In the last month the PD Howler software (aka Dogwaffle) has been accompanied by ten new YouTube videos showing the new 3D capabilities in the latest version. The latest one is on working with DAZ Studio exports.
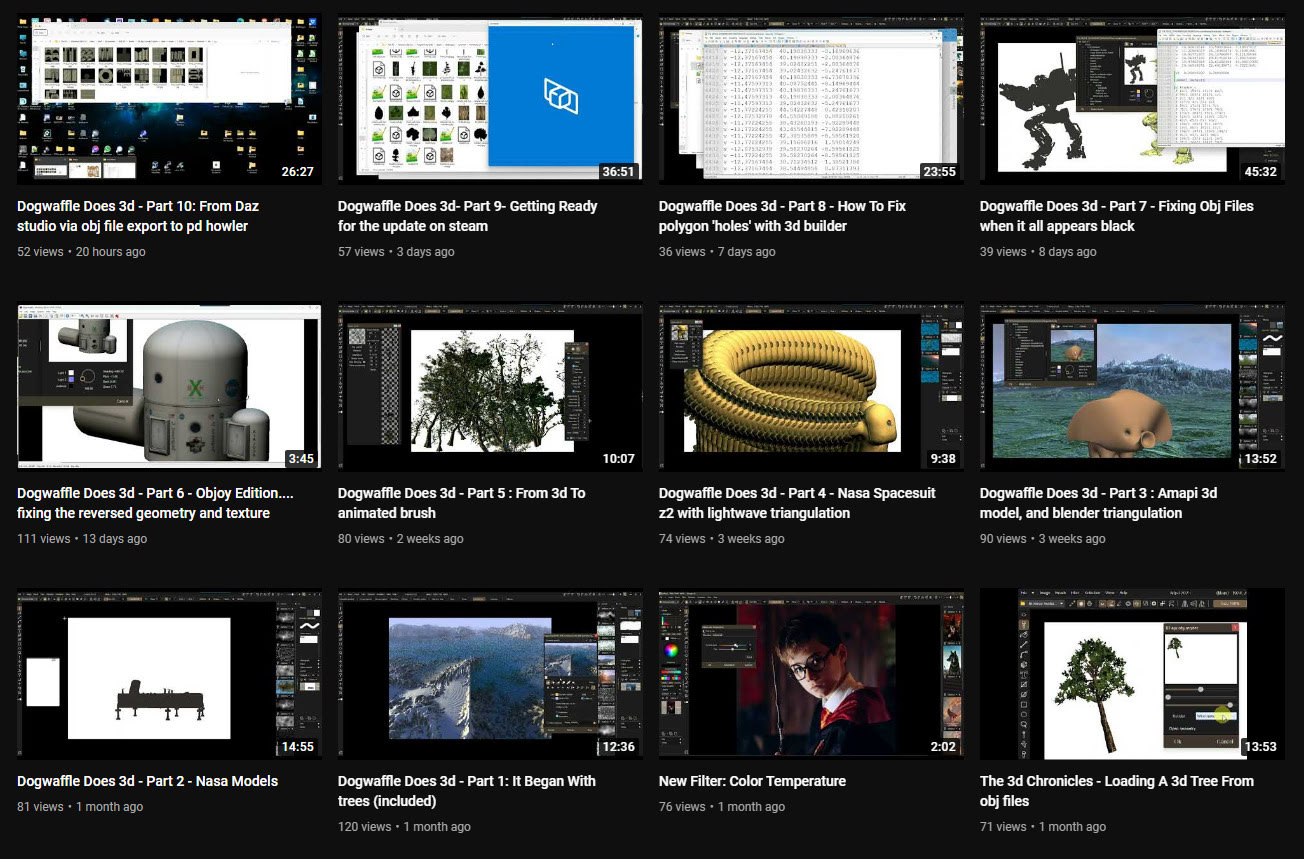

In the last month the PD Howler software (aka Dogwaffle) has been accompanied by ten new YouTube videos showing the new 3D capabilities in the latest version. The latest one is on working with DAZ Studio exports.
 Posted in Companion software, Freebies, The Animation Industry, Tutorials
Leave a comment
Posted in Companion software, Freebies, The Animation Industry, Tutorials
Leave a comment
It seems rather odd to consider old-school text-to-speech software and SAPI5 voices, at a time when Poland’s ElevenLabs is doing such great things with AI-generated voices. But I’m always one to cherish old Windows freeware, and at present all the new AI voices are online and require a monthly/yearly subscription. So I was pleased to find an alternative freeware to Balbolka for desktop PC text-to-speech using SAPI5 voices. Many such voices are also now abandonware on Archive.org, the key companies having since been sold on several times.
Made in Italy, the DSpeech TTS freeware used to be fairly basic, but it’s improved enormously since about 2016. Though this is not a fact reflected in its rather basic 1990s-style download page, which you’ll have to overlook. This freeware is now in version 1.74 (spring 2022), It’s genuine one-man freeware, made in Italy, and is feature-comparable with Balbolka though a bit rougher in UI and Help translation to English.
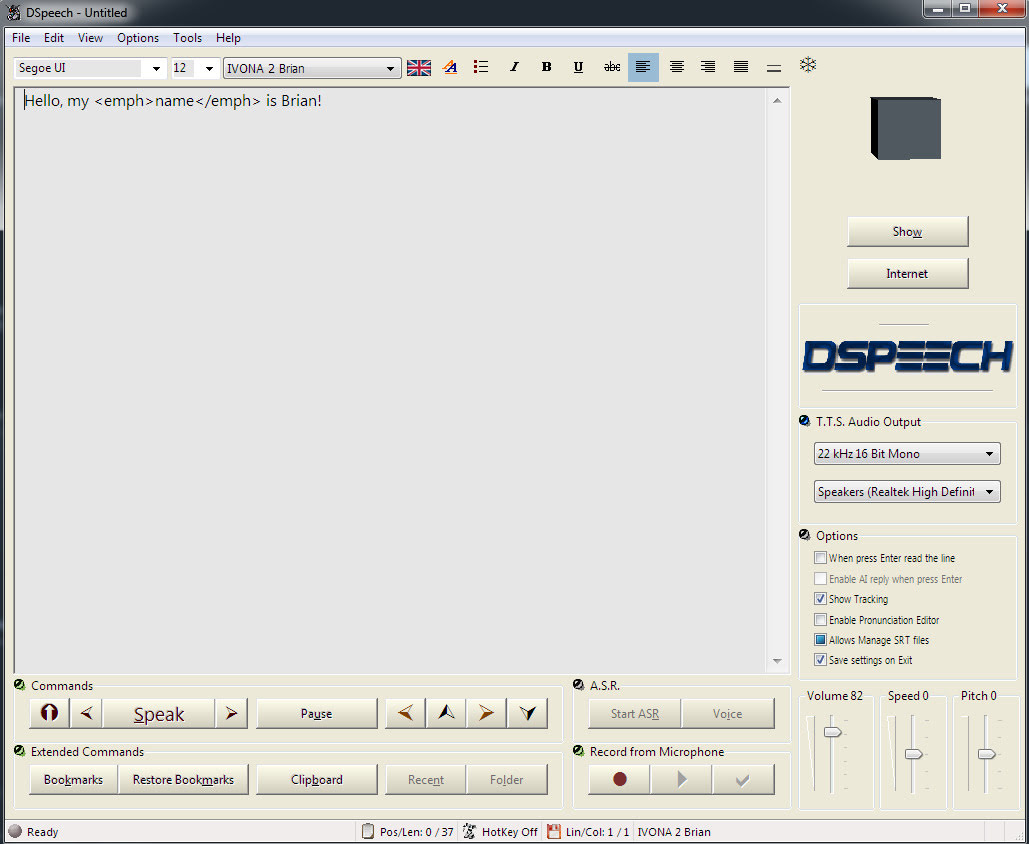
The DSpeech download link uses only a .GIF button, so if you have a .GIF blocker in your Web browser, then you instead right-click the page and ‘View Source’. You should then see a live working link to the download in the HTML…

The English manual is included in the software. There’s no Windows installer, just unzip where you want and run it.
SCRIPTING: Beyond the usual control tags, DSpeech supports basic scripting including voice-recognition and script loops. Which is unusual. Apparently it can even read out VLCplayer movie sub-titles in real-time, in a chosen SAPI5 TTS voice and speed.
TAGS: The tagging menus make switching voices easy. There’s better right-click support than in the latest Balabolka for adding tags, though that’s not saying much. When you highlight a word in DSpeech, and add a tag, the word is not wrapped with a closing and opening tag, it’s deleted. Urgh! Having right-click is great, but… the rest of the tag insertion system is not good.
LOQUENDO: DSpeech is supposed to support Loquendo ‘voice expressions’ (laugh, sigh etc) via the Italian Loquendo 6 Italian ‘Paola’ and ‘Luca’ TTS voices, combining words with special expressive tags such as \_Laugh and suchlike. Later the tag syntax was changed to \item=Laugh in Loquendo version 7 voices. But while these v6 voices work fine in any DSpeech, and v7 voices work fine in DSpeech v.1.72.29 (December 2018, not the latest 1.74.x), their expressive cues no longer vocalise in DSpeech. You just hear silence.
Spanish Loquendo 7 voices (not 6) can however ‘express’ when used in Loquendo’s own Java-based TTS Director, which came with the Loquendo SDK. See YouTube for examples and useful links.
Regrettably neither the Loquendo 6 or 7 voices can even be played in the other TTS freeware Balabolka, though they do show up on its voice menu. It thus seems that properly-working Loquendo voices are limited to…
* Loquendo 6 (any voice) on DSpeech 1.74.x or earlier. Loquendo 7 not supported on the latest DSpeech.
* Loquendo 7 (Spanish) on DSpeech 1.72.29 (or earlier?), or Loquendo 7 (Spanish) on Loquendo TTS Director with SDK and Spanish pack.
The Spanish version 7 voices do however have ‘expressives’ that work fine with Loquendo TTS Director 7, which was Windows freeware which shipped with the developer/API/SDK kit. This success at least showed me that the problem was not with my PC or a 32-bit / 64-bit Windows clash, at least for version 7 voices.
Yet it’s strange. Obviously DSpeech could, at one time, play the ‘expressives’ in the Loquendo 6 voices. But, no longer, it seems. Switching back to an older DSpeech 1.72.29 didn’t cure the problem, but it did usefully fix the playing of the Loquendo 7 voices. I suspect that Loquendo 6 voices now have a 32-bit / 64-bit problem on 64-bit Windows, despite the player and voices both being 32-bit.
Loquendo TTS Director voices have a complete list of expressives in the C:\Program Files (x86)\Loquendo\LTTS7\data\voices\Soledad\SoledadGildedParalinguistics.sde file (change name for each voice). Open it in Notepad++ to see the list in plain-text. For instance, Soledad has the following, and obviously you can also mix and match and tone-shift…
\item=Ah
\item=Ah_01
\item=Ah_02
\item=Ay
\item=Ay_01
\item=Breath
\item=Breath_01
\item=Buh
\item=Buh_01
\item=Buuu
\item=Buuu_01
\item=Cataplum
\item=Cataplum_01
\item=Click
\item=Click_01
\item=Click_02
\item=Cough
\item=Cough_01
\item=Cough_02
\item=Cry
\item=Cry_01
\item=Cry_02
\item=Cry_03
\item=Ehm
\item=Ehm_01
\item=Epa
\item=Epa_01
\item=Hey
\item=Hey_01
\item=Hiccup
\item=Hiccup_01
\item=Hiccup_02
\item=Laugh
\item=Laugh_01
\item=Laugh_02
\item=Mhmm
\item=Mhmm_01
\item=Mhmm_02
\item=Mhmm_03
\item=Oh
\item=Oh_01
\item=Ohoh
\item=Ohoh_01
\item=Ops
\item=Ops_01
\item=Prrr
\item=Prrr_01
\item=Shhh
\item=Shhh_01
\item=Sigh
\item=Sigh_01
\item=Sigh_02
\item=Singing
\item=Singing_01
\item=Smack
\item=Smack_01
\item=Smack_02
\item=Sniff
\item=Sniff_01
\item=Sniff_02
\item=Sniff_03
\item=Snore
\item=Snore_01
\item=Swallow
\item=Swallow_01
\item=Throat
\item=Throat_01
\item=Throat_02
\item=Throat_03
\item=Uff
\item=Uff_01
\item=Ups
\item=Ups_01
\item=Whistle
\item=Whistle_01
\item=Whistle_02
\item=Whistle_03
\item=Whistle_04
\item=Whistle_05
\item=Yawn
\item=Yawn_01
\item=Yawn_02
\item=Yeee
\item=Yeee_01
\item=Yuhu
\item=Yuhu_01
\item=Yuhu_02
\item=Zas
\item=Zas_01
Easier to just paste these all in and cut out what you don’t want. Rather than wrestling with menu-based insertion.
VOICEWARE: DSpeech has support for reading with a VoiceWare TTS, but not for a vital aspect of the voice. The first version of the TTS VoiceWare voices (e.g. VW Bridget, British) had different inflections on words if you added ! ?! or !? (again, see YouTube for demo and useful links). But this feature of the voice is not supported in DSpeech. It is supported in Balabolka. So this is another deal-breaker for DSpeech.
CONCLUSIONS: Despite what at first glance seems to be DSpeech’s more intuitive right-click tag adding, Balabolka is on several counts the superior tool for longer-form editing. It properly wraps highlighted words in starting/closing tags, which is vital if you’re TTS-coding something longer than a paragraph. It also supports VoiceWare’s ! ?! and !?, useful for one of the best British voices.
I thus suggest using the latest Balabolka for freeware TTS scripting and recording, and the old Loquendo TTS Director + its Spanish voices for creation of vocal FX, pitch and speed-shifted to match the voice being used in Balabolka. Then embed these vocal FX as audio clips in Balabolka. This is not as ideal as having Balabolka support Loquendo (it refuses to even read their voices), but it’s a viable workaround.
The ideal would be to have a standard SAPI5 voice that was ‘expressives only’, for use in Balabolka. A sort of audio FX bank, that could be reliably called with a simple tag (such as \_sneeze etc). But so far as I can see, that doesn’t exist, other than by chopping bits from my Dictionary of British Pronunciation for TTS.
Finally, note that TTS Director only ‘sees’ its own Loquendo voices, and is therefore no good as a general SAPI5 TTS script editor. TTS can be done in Adode Captivate (used for super-Powerpoint ‘e-learning’ creation) and in CrazyTalk / Cartoon Animator, but the editing is not at all comparable to Balaboka.
How to find and load the G8.1 FASC face controller interface in DAZ Studio 4.21.x.
1. You first install Genesis 8 Starter Essentials pack, if you have not already done so. It should be in your Library at the DAZ store. Possibly you have not installed this since before Genesis 8.1 was introduced, so you need to do it again — it now also includes the 8.1 stuff.

These are chunky downloads, and will take a while for those on slow connections. Extract the .ZIP and install as usual. Those with an install manager may do things differently, but this is the old-school way.
2. Load Genesis 8.1 from the DAZ Library (you do this from Genesis 8 Female or Male folder, not the 8.1 folder, for some reason).
3. In the Genesis 8 | Developer Kit folder…

4. … you will find the FACS (face controls interface) loader icon, the one with the powder-blue background…

5. Load this to a default Genesis 8.1 figure. You don’t need to first select the Head. In the hierarchy list you will now see that a FACS interface has been added.

6. Switch the DAZ Studio UI over to the Posing / Shaping tab, and the controls will become visible.

In practice, though, they appear to be far more trouble that they’ve worth. The huge main problem being that it’s very difficult to easily select each face controller ‘chip’, by simply clicking on it. 90% of the time, no matter what selection movement-type you have activated up-top…
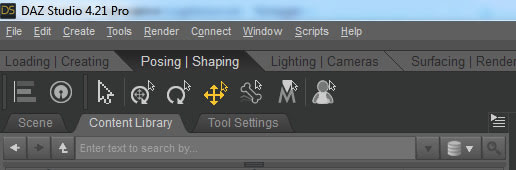
… the attempt to select a face control chip by clicking on it fails to do or activate anything. Sometimes it selects and lets you work with it, but most of the time it doesn’t. It doesn’t matter where you click — the arrow, the plus sign, or exactly on the wireframe wire — most times nothing happens.
The alternative option of using the control sliders, which are alongside and do the same thing for each control chip, works fine. Though there you have the hassle of scrolling up and down the big list, and trying to work out what each control name refers to on the face.
I dug up a free Windows GUI version of Intel’s CPU Denoiser, aka the open-source OIDN. This is standalone AI-powered desktop software made by a guy in Japan, and which no-one but some Lightwave guys seem to have ever heard about.
You feed it your partially-completed .PNG render, which has noisy ‘fireflies’ you want to clear. It works back to Windows 7, on SSE4.1 CPUs or better, and with most 64-bit OS’s.
So… no need to worry if Santa didn’t bring you an expensive $800 NVIDIA graphics card, or worry about wrangling with many dependencies on other bits of software such as ImageMagick.
It just works, and beautifully. Merry Christmas!
USE:
1. Download and unzip OIDN-gui from GitHub.
2. Run OIDN.exe and the simple graphical user-interface will appear.

Here you load the same target .PNG render into all three slots, “Beauty”, “Albedo” and “Normal”. Then “Run Denoiser”.
DAZ iRay can do the regular render (here called “Beauty”). But if you did also have additional auxiliary/buffer/canvas renders, then your “Normal” would help preserve subtle bump-mapping, while the “Albedo” would do the same for fine textures. And apparently these two work in tandem, so both would be needed.
But you may have already stripped most bumps with the DAZ Scene Optimiser, and have no complex fine-patterned clothes in the scene. If so, then you’re smiling.
There is however another way to add detail back into a denoised render. In Photoshop you drop the output over the original, as a new layer. Then you ‘paint the detail back in’, by running a soft-edged small Eraser brush over the bits where you need most details (eyes, eyelashes etc). This reveals the detail beneath… and hopefully doesn’t reveal any pesky fireflies.
In tests an old 32-thread Intel workstation took about 2 seconds on a single 1920px render, and gave great results even without having the proper “Albedo” and “Normal” auxiliary/buffer/canvas renders available. The denoised image is saved with the same file extension and type, in the same folder, but the filename will have ‘-denoised’ added.
It seems you can batch process a series of animation frames with this (untested by me). But here you should know that OIDN is not “temporally stable”. Which in plain English means that when the animation is run ‘you may see some slight waver or detail-popping’ across strongly denoised areas.
That’s it. There is a later version by the same maker, re-written for QT. But that has no regular Windows .EXE file, so far as I can see.
There’s another Windows GUI option here, but it’s drag-and-drop with no batch. The above software does batch.
Note: Not needed in Poser 12 and also the latest E-on Vue, as in both cases Intel’s OIDN is built-in. The above advice is mostly for DAZ and Poser 11 users.
The script Hampelmann 1.7 for Poser 12 has been released, free. It allows you to easily control figure-parts, with the mouse and/or keyboard. Here’s the basics of how to install and then use it for the first time in Poser 12.
1. Download the new Hampelmann 1.7 for Poser 12, extract the folder and and install by copy-paste of the folder to…
C:\Program Files\Poser Software\Poser 12\Runtime\Python\poserScripts\ScriptsMenu
Rename the new sub-folder there to something a bit more descriptive, such as P12-Hampelmann-v17-figure-controller or similar.
2. Download the old Hampelmann 1.6, extract. With this you want everything except the scripts. Copy only the config and img folders and the help files (not the scripts) to your new…
C:\Program Files\Poser Software\Poser 12\Runtime\Python\poserScripts\ScriptsMenu\P12-Hampelmann-v17-figure-controller
This .ZIP also gets you the help / instruction pages, not included with with the 1.7 .ZIP file. You might want to make a shortcut link to these pages, on your desktop.
3. Run Poser 12, place a test figure such as the standard Andy on the stage (Library: Character | Additional Figures | Mannequins | Andy).
4. Run Hampelmann 1.7 (Top Menu | Scripts | P12-Hampelmann-v17-figure-controller | Scripts | Hampelmann_17).
You should see this…
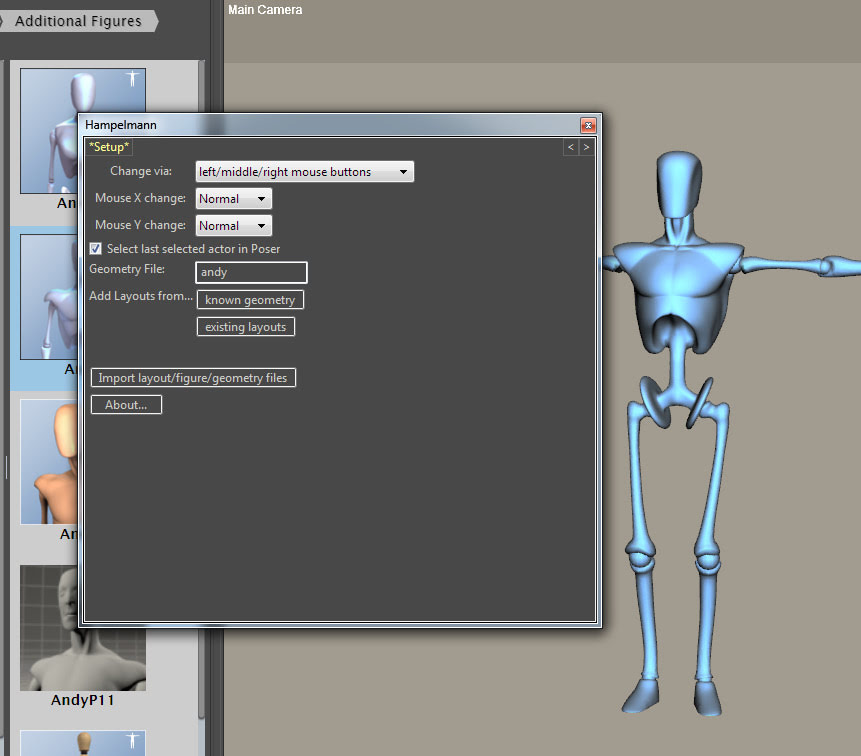
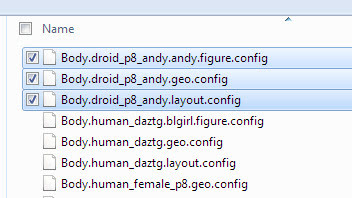
Click on “Import layout/figure/geometry files”. Then locate the folder you extracted from 1.6, the one with the layouts and config files in it called config_files. There are a confusing range of files in there. I had success with Andy by importing all three at once, and was then instantly taken to the figure posing screen. It worked, so… success.

Now click on a body part on the Hampelmann panel (not on the figure on the stage), and a click-hold of the mouse will gently move that part of the figure. Right button for back/forwards, left button for up-down. You get the idea. Sensitivity of movement can be easily adjusted with a single slider.
That’s the basics. There are detailed and rather daunting instructions in the 1.6 help files, if you need more guidance. And yes, it can work with more than one figure on the stage, and can switch between them.
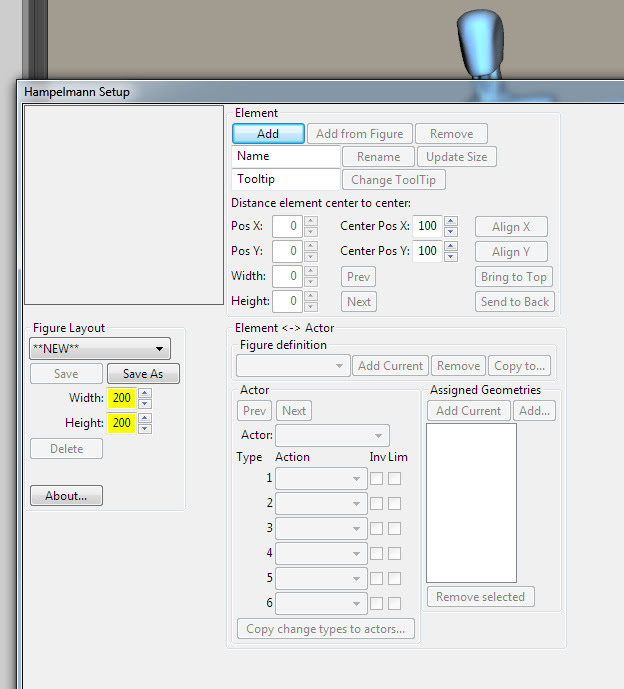
It looks like can also create your own setup files for any Poser figure, via working with the companion Hampelmann_Setup.pyc script.
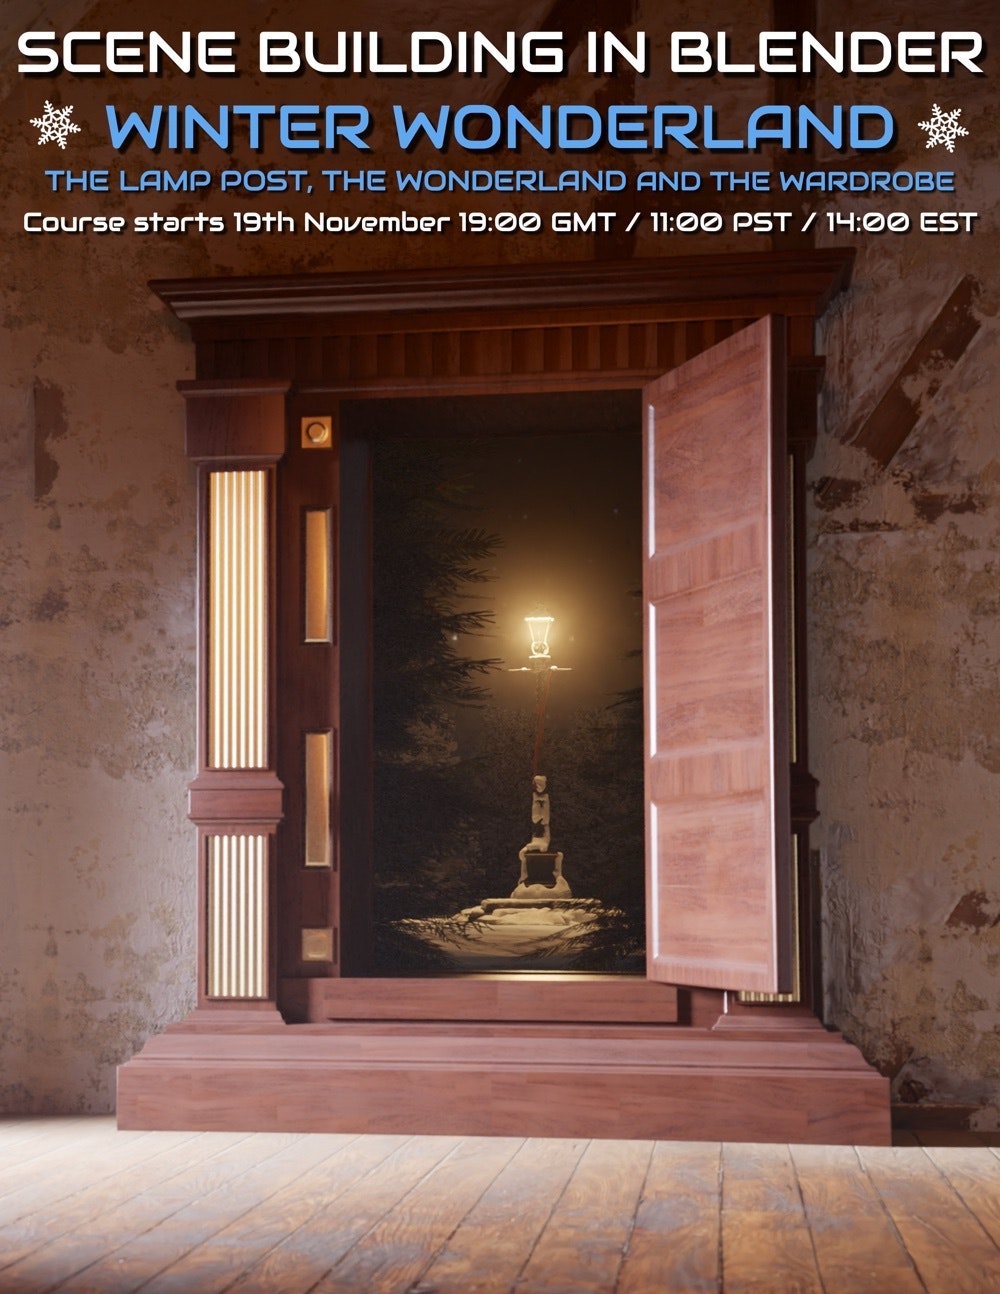
A new community course for beginners to learn Blender by creating a scene via modelling and texturing, Scene Building in Blender : Winter Wonderland. Starts Saturday 19th November 2022, and then runs Saturdays.
The scene is akin to the famous Narnia fantasy books for children: the wardrobe ‘portal’ into the snowy Narnia, with the lamppost as the first thing to be encountered there.
New and available now on Gumroad, Digital Comics Creative, Volumes 3 & 4 – Secrets of Poser 11 and Line-art Filters. Both volumes are bundled together as a bumper 100-page magazine-style PDF, great value at the introductory price of $15 (will soon be $18).

The earlier Volume 1 (Introduction) and Volume 2 (focused on DAZ Studio for comics) are also available. Volumes 5 and 6 are set for release in 2023.
Starting soon, a six-week coaching course on AI for your art, with Vladimir Chopine.

The free iRay to 3Delight script. A converter script that works. May be useful for those trying to make comics with DAZ, but who have a thingamajig that only adds lines to old-school 3Delight and not iRay.

1. Download and install script and its icon to ..\content\Scripts\iRay_to_3Delight (script is iray-to-3dl.dsa)
2. Load iRay thing into the scene, which for some reason you want to convert to 3Delight materials.
3. Add some old-school scene lights, so your 3Delight render won’t just be a black silhouette when rendered.
4. Go to the DAZ Studio “Surfaces” Tab/Room. The script can only do its thing from there. Select, open all items in the surfaces tree, then select the required surfaces on your figure or pop. Shift + click for “All”.
5. With the surfaces still selected, now run the script now found in Scripts | iRay_to_3Delight
6. Ensure you are in 3Delight as a renderer, and render.
There are also commercial scripts, that toggle your scenes between iRay and 3Delight. But if you only need 3Delight conversion for a few things, this freebie may be what you want.
Problem: In E-on’s Vue, the Camera Zoom / Pan controls and Nudge are way too sensitive for Poser scene imports to Vue. The settings there appear to be intended for vast three-mile wide scenes, where exact artistic framing of the picture is not so important.
Former solution: Pressing down Crtl while moving the camera used to work to damp down the camera, but now no longer does. The old manual had: “You can slow down the camera controls by holding down the Ctrl key as you move (this can be customized using the Operations tab of the Options panel).” This was good for Vue 11, Vue 2016, and still is if you have them. Not for the latest version(s).
New solution: The answer is “w” for the new versions of Vue. It is the new keyboard modifier for slowing or ‘damping’ the camera. Who knew? Not E-on’s Learning Center, certainly. No results for a search there for ‘Camera Controls’ and similar.

Customised as before with: Top menu | open Options panel | switch to Operations tab | scroll down the long list to find ‘Trigger Modifiers’.
There doesn’t seem much to be done about Nudge, though I guess a Python script could “move currently selected item down by X units” in a far smaller increment. I expect my nudge to be like Photoshop, one pixel at a time. Not 50 feet at a time.
Vue users could also use a Python script that runs through all possible settings that could have the damnable ‘Lens Flare’ enabled, and turns it off. Ideally permanently. It still takes forever to run at the end of a completed render, if enabled. You may think you’ve turned it off, but always seems to find a way to sneak back in. As Vue renders are now so fast, this is a big drag.
A 10-step Poser to Vue guide in 2022. Yes, it still works.
1. Install Poser 11. If possible, tell its Library about your Poser 12 runtime, if you also have Poser 12.
2. In Poser, make a scene with Poser.
3. Save the scene as a normal .PZ3 Poser scene file.
4. Install Vue (Vue 2016 R5, or latest subscription Vue R6, or both).
5. In the Vue “Options”, find the Poser button and set the path to the Poser 11 .EXE file’s folder. The Poser SDK version will be automatically set.
6. In Vue, New Scene, File, “Import Object…” (NOT “Import entire scene…”). Find and load Poser .PZ3 file.
7. On the import options pop-up: Group figures as single meshes. Render using Poser Shader Tree. Single Frame at “0”. (Research the other import options, as needed).
8. Ignore Vue’s legacy warning notice about your puny under-powered PC — it appears to say the same thing regardless of if your PC is a 1876 steam-driven abacus or a modern workstation with oodles of RAM and many cores. Just say “No” to having Vue over-ride your Poser scene import options with settings that it thinks are best.
9. Vue imports the Poser scene. Should not take too long. There’s a Progress Bar.
10. Frame the Poser scene nicely (Vue does not import Poser cameras), apply a Vue Atmosphere, Vue plants etc. Save file. Render.
There should be no materials tweaking required. Vue knows about Poser textures. The only thing you have to watch out for is spectacular on the lights and the sun in Vue.
Crtl is the camera movement damper key for Vue 11, Vue 2016, and W is the damper for the current versions. With this key pressed down on the keyboard, the camera moves in far small increments, more suitable for artistic framing of a Poser scene that’s smaller than the vast landscapes Vue is mainly used for.
I’ve tested the Vue import of a standard .PZ3 scene saved from Poser 12. Works fine, with a couple of setup caveats.
An older Vue such as mine does not know about Poser 12 and its own dedicated runtime location(s). It only knows about Poser 11 in its Options…

There Vue needs a path set to the Poser 11 .EXE and it also needs to be set to use the Poser 11 SDK. These are easily set, just a drop-down and a file-path. No plug-in is needed, as Vue already knows about Poser and visa-versa. There was a long relationship between E-on and Smith Micro, and the importer was worked on intensively for many years.
Vue presumably needs to see the Poser 11 .EXE folder for two reasons: i) Poser knows about the runtime locations to be searched to accurately rebuild the scene inside Vue, and ii) because Vue has to locate and run the Poser 11 SDK. The SDK is presumably what then does any Poser-Vue material auto-conversions and adjustments that are needed.
Thus for a scene file with Poser 12 content, I find that you must also tell the Poser 11 Library about the new runtime at C:\Users\Public\Documents\Poser 12 Content\Runtime\ (and probably also the P12 ‘Downloads’ if that also has its own Runtime). Give Poser 11 time to index this new runtime then exit.
Your Poser 12 content, if saved to a Poser scene file, will then load into Vue. This is done in the usual way in Vue: New Scene | File | Import Object, load the Poser scene file and apply a Vue atmosphere…

Poser 12 content, “Pink 2.0”, in Vue. Real 3D clouds, not a photo backdrop.
It only takes a minute. To Vue the Poser 12 scene file must seem to be just a normal .PZ3 scene file from Poser 11, 2014 etc. It’s just the file paths in it that may differ, if your scene was built using content from Poser 12’s new runtime. If you only build scenes with your regular Poser 11 runtime content, you may not even need the above steps — even though you are importing a scene file saved with Poser 12.
So far as I am aware the Poser-to-Vue SDK has not yet been updated in the new subscription Vue to handle a few of the funky new Blender Cycles 2 (aka SuperFly in Poser 12) nodes. Thus the very latest Poser 12 SuperFly materials with strange funky new Cycles nodes may not convert so well. But Vue has its own fab funky materials to use, and it looks like everything else should work as with any previous Poser-Vue import.
Note also that Vue has excellent exporters… “includes integration plugins for 3DS Max, Cinema 4D, Maya and Lightwave”, though I’m uncertain what would happen to the scene if it were no longer connected to the Poser shader tree via Vue. I guess you try it and see. However, Vue is very capable on its own and a great adjunct to Poser for large expansive scenes that could also benefit from a generous scattering of foliage and some misty atmosphere.
Yesterday’s ‘Jessi in SuperFly’ post has been updated. I went back to a saved scene file where the pupils were still white after eZSkin 3, before I fixed it. I started again and figure out how I fixed it. It actually wasn’t the Reflectivity or Specular. Here’s the corrected line, with the solution…
“Pupils should be black but they’re white after eZskin 3. Solution to fix: Material Room | Pupil | Alternate Diffuse node | follow the wire to the Scatter node | turn colour there to a very dark grey.”
Some people seem to think this is impossible, but all I can say is that tweaking the Alternate Diffuse node worked for me. Perhaps it’s only the case for very old figures?
How to add a simple overlay on top of an existing texture in Poser:

The overlay has not destroyed the original glossy effect, I just took that off manually to make for a simpler demonstration of the nodes.
1. At the top Diffuse node, right-click and disconnect the connector to your current 2D texture. This does not destroy the texture. It’s still there waiting to be re-connected.
2. Right-click the empty Diffuse slot and there plug in a new Math | Color Math node.
3. Set the Color Math node’s Argument to Multiply. Also have both of its values be pure White.
4. Connect the Color Math node’s Value 1 slot to the original texture map.
5. On the Color Math node’s Value 2 slot, right-click and then add a new standard 2D node.
6. On the new 2D node you then load your overlay as a square 2D image source, in the usual way. Pure b&w appears to work best.
Here we have a puny low-res dash-shading overlay for demo purposes. Nor is it even uniform, which it ideally should be…

For dash or hatched-shading of the object you may want to dial this source’s U and V scales down from their 1.0 settings, to something like 0.10 or 0.12, as seen here.
You can save this as a standard material setup, and then just switch the source texture and overlay texture. Obviously you’d use a seamless tiling texture, which I haven’t here.
Of course, it would be nice to have the overlay effect render on its own. There are two ways to do this, that I know of…
1. Also plug the overlay into the Alternate Diffuse, which should be set to white. You then see the change in the Preview. Then render again, in Preview even. In Photoshop, knock white out of the render with an automated Action.

2. Also plug the overlay into the Custom_output_1. There will be no change in the viewport.
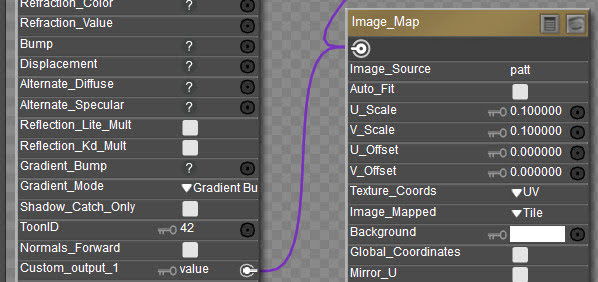
But if you render to Firefly with the following settings…

… and save as a Photoshop .PSD then you get a nice Photoshop layer of the effect on its own…

Yes, ugly seams… but this is just a quick demo. The seams could be fixed.
We still don’t have it in a form where the white is transparent, but any good Photoshop Knock Out White Action will do that.
Of course, it may be possible to just leave the whole current material setup alone, and just plug your overlay shading into the Custom_output_1. I’ve yet to investigate that. Though that would limit you to Firefly rendering only. But doing it that way should be simple and reliable enough for a script to handle automatically.
If you want to run a Python script in Poser using an assigned keyboard shortcut, you can.
1. The script must be in the software’s ScriptsMenu folder or sub-folders…
C:\Program Files\Poser Software\Poser 12\Runtime\Python\poserScripts\ScriptsMenu
2. Rename your target script filename in the following format…
my_fabulous_script###Alt+C.py
Use of Ctrl or Shift and Alt are permitted, as are capital letters. Capital letters correspond to a lowercase key-press: e.g. C = c.
3. Close and reload Poser. Try your new keyboard command to invoke the script. Tested and working on Poser 12, and once done you see the shortcut on the drop-down if you look there…

With this in place you can now also use mouse-gestures, tied to a keyboard shortcut… which in turn invokes the script.