Here’s a working script for use with Bondware Poser 12 and higher, that outputs the two reference control images that can be used in MOSS-Image. Specifically, MOSS-Image’s Controlnet-like capabilities require a depth-map and a color-map. The script makes these as Poser renders and does it fast, using the real-time Preview render mode. Tested in Poser 13, but should also work with Poser 12 and 14.
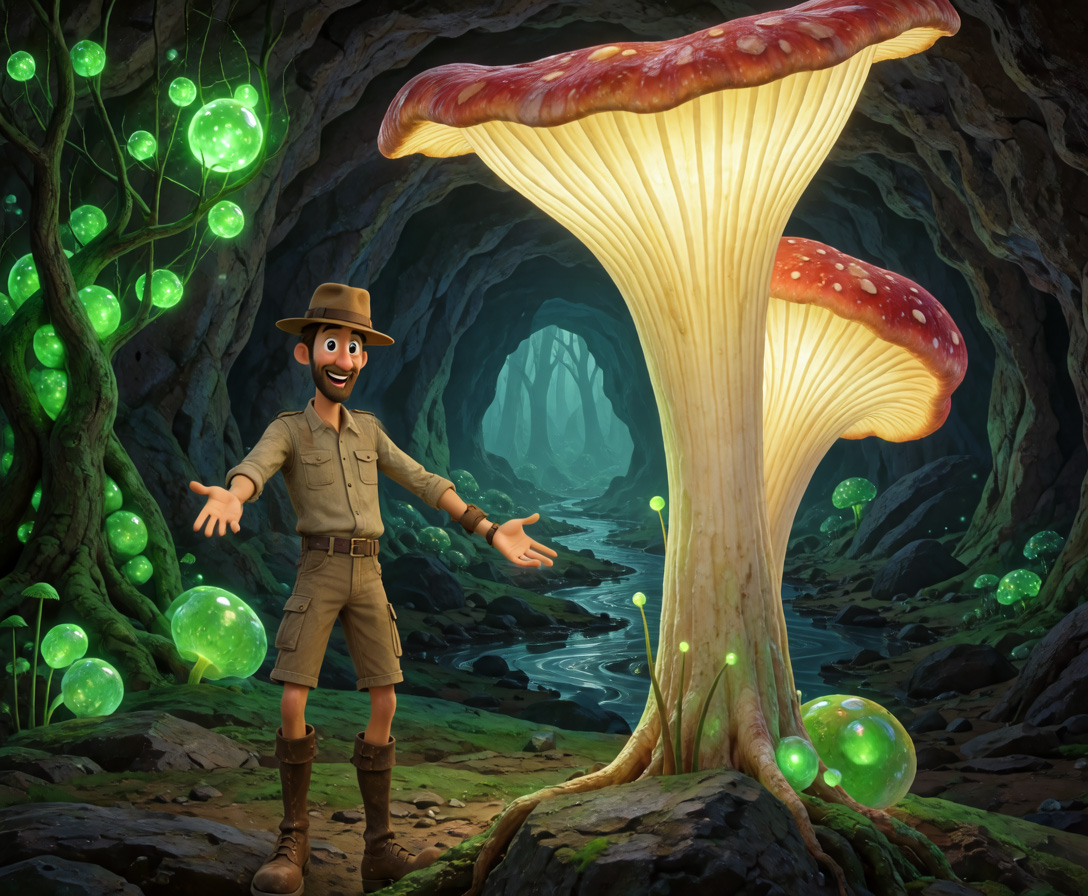
The result:
The inputs:
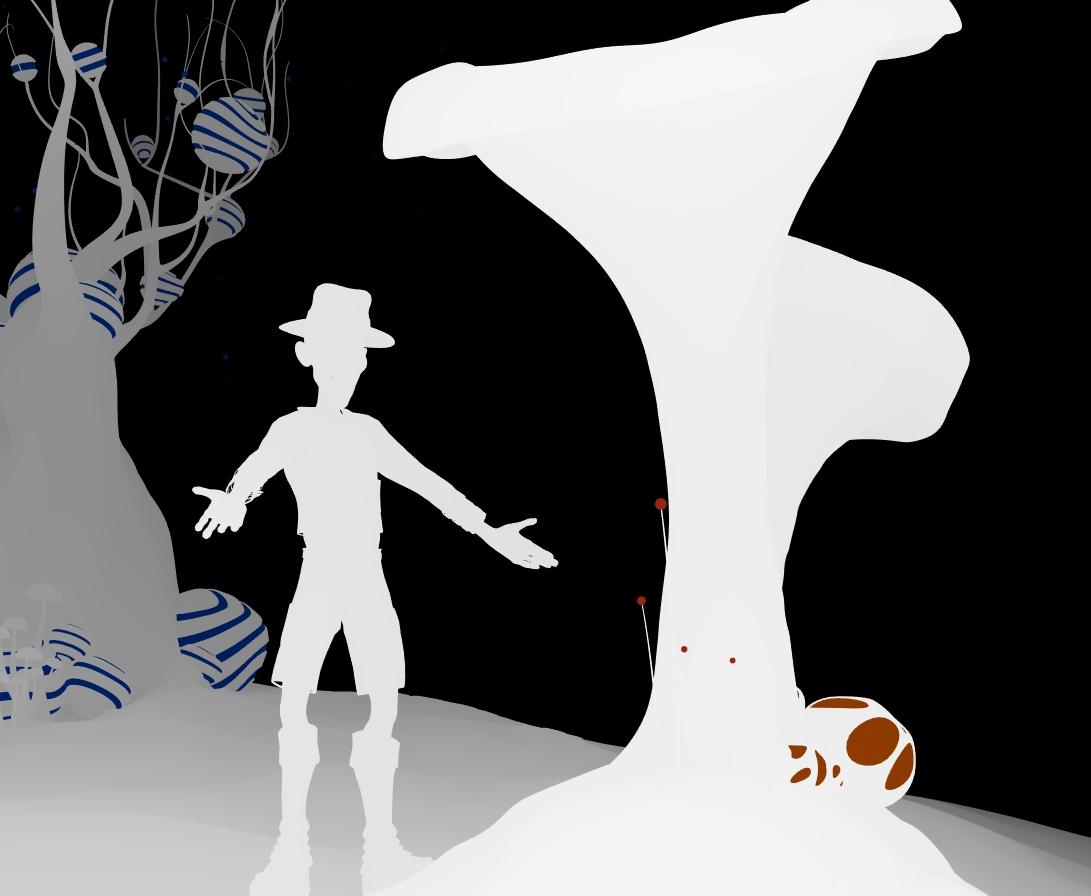
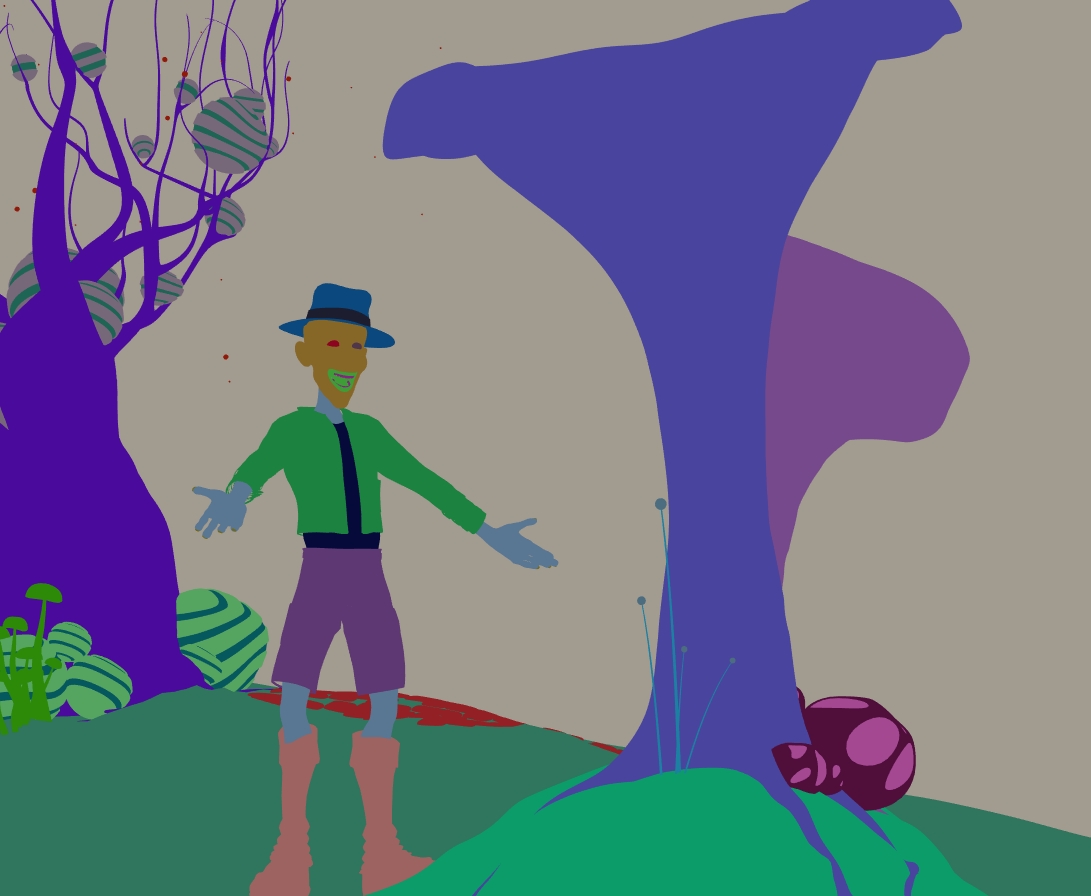
The Poser scene was Nursoda’s Dr. Pitterbill, dressed in some explorer clothes and hat, discovering 1971s’s fantasy mushroom, with 1971s’s fantasy tree behind. No style was prompted, but the cave-forest and environment was prompted for, and the prompt specified that the character was an explorer delighted to make a new discovery.
As you can see, we can’t get a character likeness of the 3D Dr. Pitterbill character from this. We’re working more with general outlines and positioning.
If a recalcitrant 3D model insists on showing a little colour in the depth-map (see above), it doesn’t matter much, as MOSS is very tolerant of such things.
Use:
The user must make a one-time customisation of the script. Change…
dirPath=”C:\\Users\\YOUR_USER_NAME\\Downloads\\”
…to your own preferred path. This is where the images are saved by the script. The double \\ are required by Windows, they are not a mistake. Output files are date-stamped, so if the script is run again they will not be overwritten.
Copy the script to…
C:\Program Files\Poser Software\Poser 13\Runtime\Python\poserScripts\ScriptsMenu\
…and run it from the Poser UI. It assumes the user has saved their scene file, and that Comic Book mode lineart is turned off. No other special Poser scene setup is required.
The ComfyUI workflow used was the official Depth-Color Edit template, tweaked to set the latent to be the same size as the input images. Poser 12 can currently be had for $20 at Graphixly. The Pitterbill figure and 1971s props can be had at Renderosity.
The script:
|
1 2 3 4 5 6 7 8 9 10 11 12 13 14 15 16 17 18 19 20 21 22 23 24 25 26 27 28 29 30 31 32 33 34 35 36 37 38 39 40 41 42 43 44 45 46 47 48 49 50 51 52 53 54 55 56 57 58 59 60 61 62 63 64 65 66 67 68 69 70 71 72 73 74 75 76 77 78 79 80 81 82 83 84 85 86 87 88 89 90 91 92 93 94 95 96 97 98 99 100 101 102 103 104 105 106 107 108 109 110 111 112 113 114 115 116 117 118 119 120 121 122 123 124 125 126 127 128 129 130 131 132 133 134 135 136 137 138 139 140 141 142 143 144 145 146 147 148 149 150 151 152 153 154 155 156 157 158 159 160 161 162 163 |
# 8th November 2026 - version 1.2. # This is a script for use with Bondware Poser 12 and higher, # to output a depth map and a colour map for use with MOSS-Image # in an Edit workflow. # Tested and working on Poser 13 and Windows 11. Should also # work in Poser 12 and 14. It doesn't work in Poser 11, even with # Python 2 adjustments - the files are not written for some unknown # reason, even when running Poser 11 in Administrator mode. # You are assumed to have tweaked the DIRPATH below, and to have # first SAVED your Poser scene before running the script. Also, # you should first TURN OFF Comic Book mode lineart - if it is on. # The likely place to copy the script is in C:\Program Files\Poser Software\Poser 13\Runtime\Python\poserScripts\ScriptsMenu\ # Then access it from the Poser user-interface menu. # Import needed Python 3.x modules import poser import random import datetime from PIL import Image, ImageOps from pathlib import Path # SETUP # Set up the saving and timestamp parameters. !!! Change the save directory to suit your needs !!! # CHANGE THIS but remember that the \\ double slashes are VITAL for Windows!! dirPath="C:\\Users\\YOUR_USER_NAME\\Downloads\\" # Setup the random function for colour randomisation. def random_color(): return random.random(), random.random(), random.random() # Setup some basic variables we'll re-use later. ext="JPG" color_map = ("color_map") depth_map = ("depth_map") date_str = datetime.datetime.now().strftime("%d_%m_%Y_%H_%M_%S") # POSER SETUP # Do we have a Poser scene to work on? scene = poser.Scene() # Ok, let's work on both the figure and actors in the scene. figs = scene.Figures() acts = scene.Actors() # Now we make sure the renders are set to use a DPI of 120, for a little more quality. scene.SetResolution(120, 0) # Load the Render Dimensions dialogue box for user checking. poser.ProcessCommand(1563) # First, we make the Ground invisible. Thus, no ground shadows or grid. # Comment out these two lines with #'s if you don't want this to happen. scene.SelectActor(scene.Actor("GROUND")) scene.Actor("GROUND").SetVisible(0) # Figure style is now set to use document style, in case it wasn't for some reason. poser.ProcessCommand(1438) # COLOUR-MAP # And we switch the render engine to real-time PREVIEW mode. # This assumes the user has already set their preferred render SIZE. scene.SetCurrentRenderEngine(poser.kRenderEngineCodePREVIEW) # Now we randomise all the base colours of the diffuse colour nodes. We don't need to also strip textures. for fig in figs: mats = fig.Materials() if mats: for mat in mats: tree = mat.ShaderTree() root = tree.Node(0) if root: nodeInput = root.InputByInternalName('Diffuse_Color') if nodeInput: nodeInput.SetColor(*random_color()) tree.UpdatePreview() for act in acts: if act.IsProp() or act.IsHairProp(): mats = act.Materials() if mats: for mat in mats: tree = mat.ShaderTree() root = tree.Node(0) if root: nodeInput = root.InputByInternalName('Diffuse_Color') if nodeInput: nodeInput.SetColor(*random_color()) tree.UpdatePreview() # We turn on Cartoon display mode poser.ProcessCommand(1501) # And set Cartoon display mode to one colour. This reveals a colour map with random colours. poser.ProcessCommand(1552) # Re-draw the scene. scene.DrawAll() # Do the colour map render, and save as a .PNG file for quality. scene.Render() scene.SaveImage(ext, dirPath + color_map) # DEPTH MAP # Now we set up the depth map. We delete all lights in the scene. Then redraw the Poser scene. lights = scene.Lights() for light in lights: light.Delete() scene.Draw() # Now turn on the 'Smooth Shaded' display mode. poser.ProcessCommand(1083) scene.Draw() # Now Toggle 'Depth Cue' display mode on. poser.ProcessCommand(1044) scene.Draw() # Set the scene's background color to white. scene.SetBackgroundColor (1.0,1.0,1.0) scene.Draw() # Now we render the scene in real-time Preview and save to a .JPG file. # It must be .JPG otherwise we get a .PNG cutout with alpha mask and fringing. scene.Render() scene.SaveImage(ext, dirPath + depth_map) # INVERT THE DEPTH-MAP # Now we have PILLOW (PIL) invert the depth map, so it's as MOSS-Image expects it. # Open the newly saved depth map image image = Image.open(dirPath + "depth_map.jpg") # Invert the colors of the image inverted_image = ImageOps.invert(image) # Save the resulting inverted image inverted_image.save(dirPath + "depth_map_MOSS.jpg") # FILE OPERATIONS # Now we datestamp the three files, so we don't overwrite in future script runs. # Should work even if Poser is not running in Administrator mode. files = ["color_map.jpg", "depth_map.jpg", "depth_map_MOSS.jpg"] for name in files: old_file = Path(dirPath) / name new_file = old_file.with_name(f"{old_file.stem}_{date_str}{old_file.suffix}") old_file.rename(new_file) # REVERT TO LAST SAVE # Done. Now we revert the entire Poser scene, to its last saved state. This means # that it doesn't matter that we changed the display modes and deleted lights etc. poser.ProcessCommand(7) |