10 Reasons You Need a Falloff Shader Plugin for Carrara. Including to do faux glows, which follows from my recent tutorials here on the subject of doing spillover glow in Carrara…


10 Reasons You Need a Falloff Shader Plugin for Carrara. Including to do faux glows, which follows from my recent tutorials here on the subject of doing spillover glow in Carrara…
Free Coursera online course, Live!: A History of Art for Artists, Animators and Gamers. 8 weeks, starts 24th February 2014.
New Renderosity video tutorial, for Poser Pro beginners, A Tour of the Poser Pro 2014 Interface, and How to Reset It (10 minutes)…

It’s part of a premium series of video tutorials intended to get users started with Poser Pro 2014. These are set to be released soon…
“Beginning in January, we’ll be releasing a new tutorial each month that will build on the knowledge you developed in each of the previous lessons.”
Following my recent tutorial on “how to make a simple sphere glow in Carrara 8”, I’ve found that there’s also a way to have a light glow, rather than have geometry glow. Doing it this way takes whole lot less render time than my earlier technique, but the effect seems less convincing unless you want a standard “car headlight” effect. So it seems useful for middle and far-distance lights, especially in instances where you have some geometry objects intersecting the light — objects that would complicate any Photoshop postwork using a gradient glow filter.
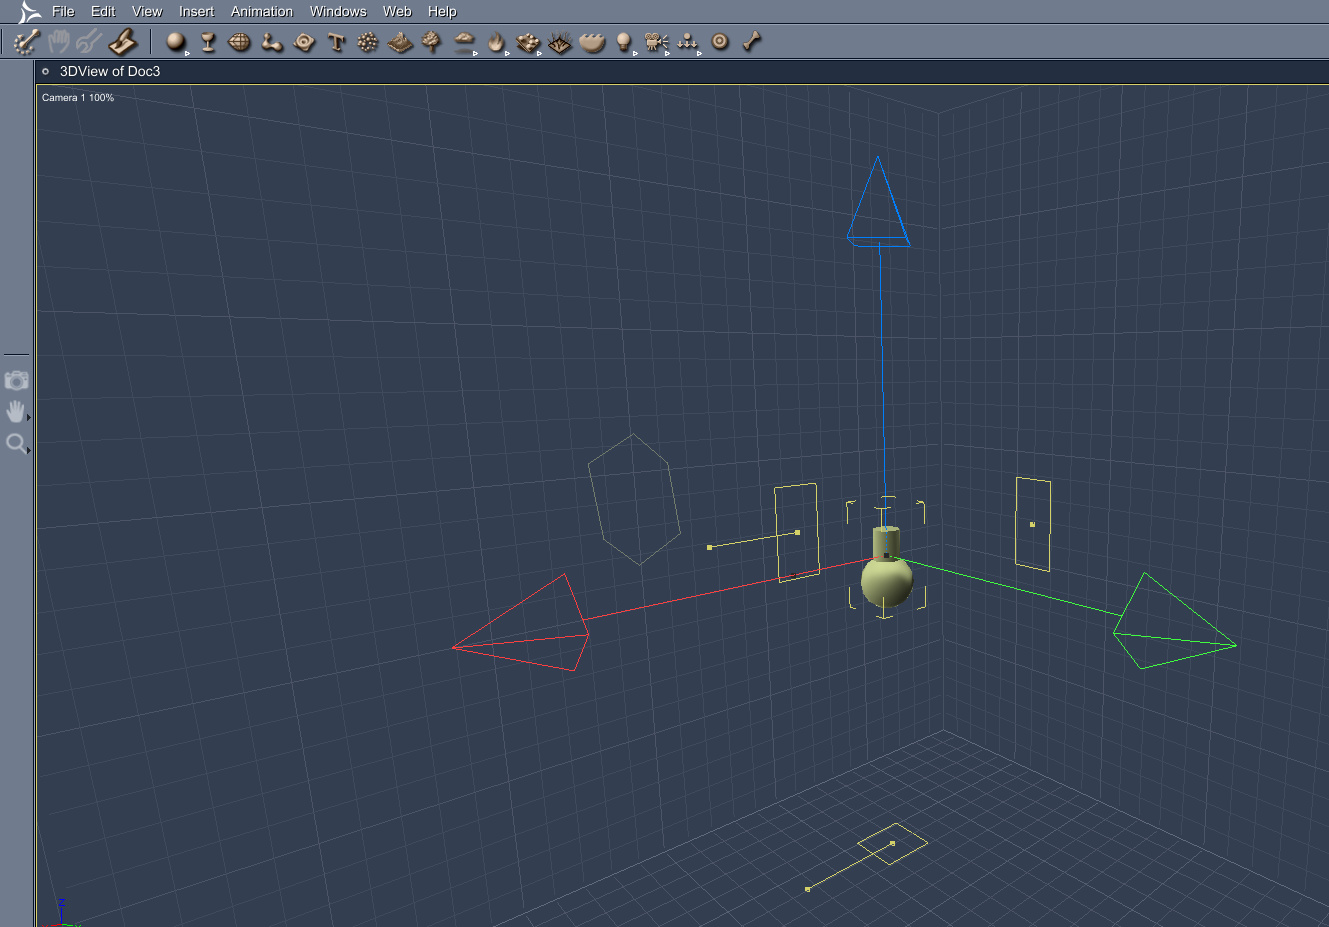
1. First, drop a bulb light onto the stage…
2. Click on the “General” tab in Carrara’s Assemble room. Boost your “Brightness” slider way up, maybe between 170% to 200%. Change the bulb’s colour to the colour you need. Run the “Range Falloff” slider up to 100%. Make sure that “Cast Shadows” is turned on.
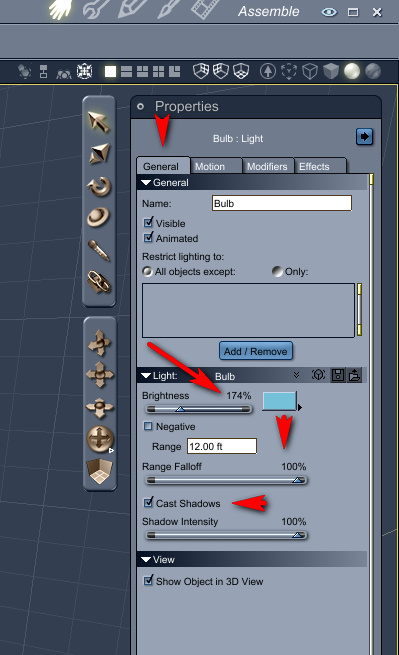
3. Now switch to the adjacent “Effects” tab. There, tick “Light Sphere”, then click the edit button next to it.

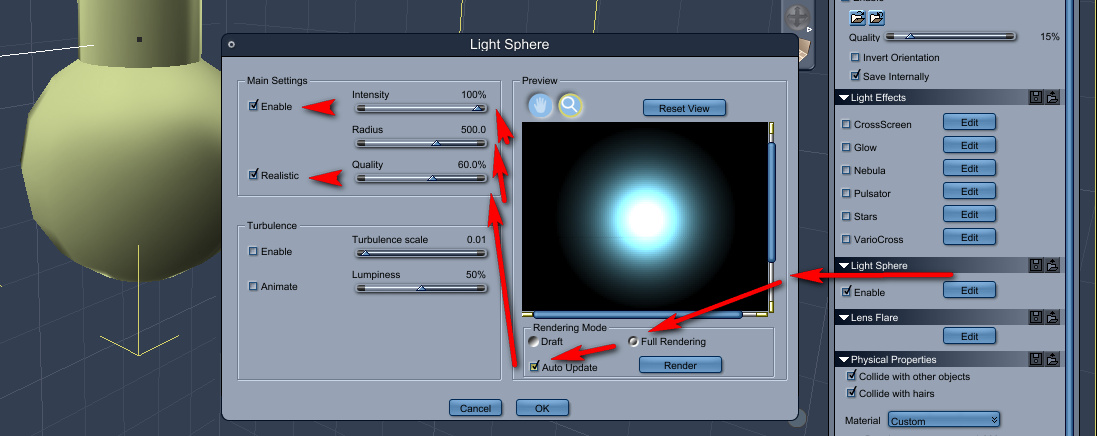
4. Clicking in the “Edit” box will pop-up a window containing all the “Light Sphere” effects. Here, turn on “Full Rendering” and “Auto Update”, so you can preview the glow effect in real-time. Then increase “Intensity” to 100%, “Radius” to about 500, and “Quality” to perhaps 60%.
5. Here’s the final PNG render of the glowing bulb light, with the above settings…
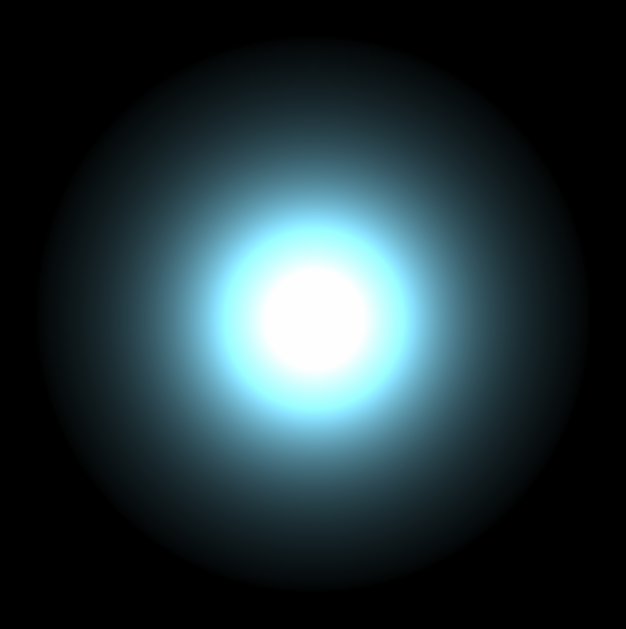
Compare this render to the the more subtle results I got from making a textured sphere glow in the last tutorial…

So, my conclusions from my Carrara glow experiments (so far) is:
* glowing bulb lights are vastly faster to render, and also more suitable for use as middle and far-distance lights in a scene.
* glowing textured geometry is likely to give far better and more subtle effects, and would be a good choice for props and characters that are close to the camera. Although choosing this way to make things glow is likely to significantly increase render time.
(As before, note that Google Chrome’s graphics rendering-engine can’t handle the subtle graduations of the light spillover, and will dither/”band” the glow effect thus making the renders look rather ugly)
How to make a simple sphere glow in DAZ Carrara 8:

1. File | New | Empty Scene
2. Drop a simple sphere primitive onto the stage. Keep it selected.

3. First we apply a basic texture to the sphere. To do this we go over to the General tab, over there on the right of the screen. There we click on “Preset”, in order to choose a texture for the sphere that will match the desired type of glow. I chose the “Blue Chrome” texture.

4. On the right hand panel, switch to the Shading tab, and click “Edit”. This will switch into Carrara’s Texture Room. Here we can see the sphere texture’s “Glow” channel, and we need to switch this channel from “Nothing” to “Texture Map”.
 (Ignore that the screenshot shows “Normal Map” instead of “Texture Map”: I messed up the screenshot).
5. Switch back to Carrara’s main Assemble Room. On the right hand panel, switch to the Effects tab, and then tick “Enable” in the “Aura” panel. Then click on the “Edit” button next to Aura. This will bring up the Aura settings window.
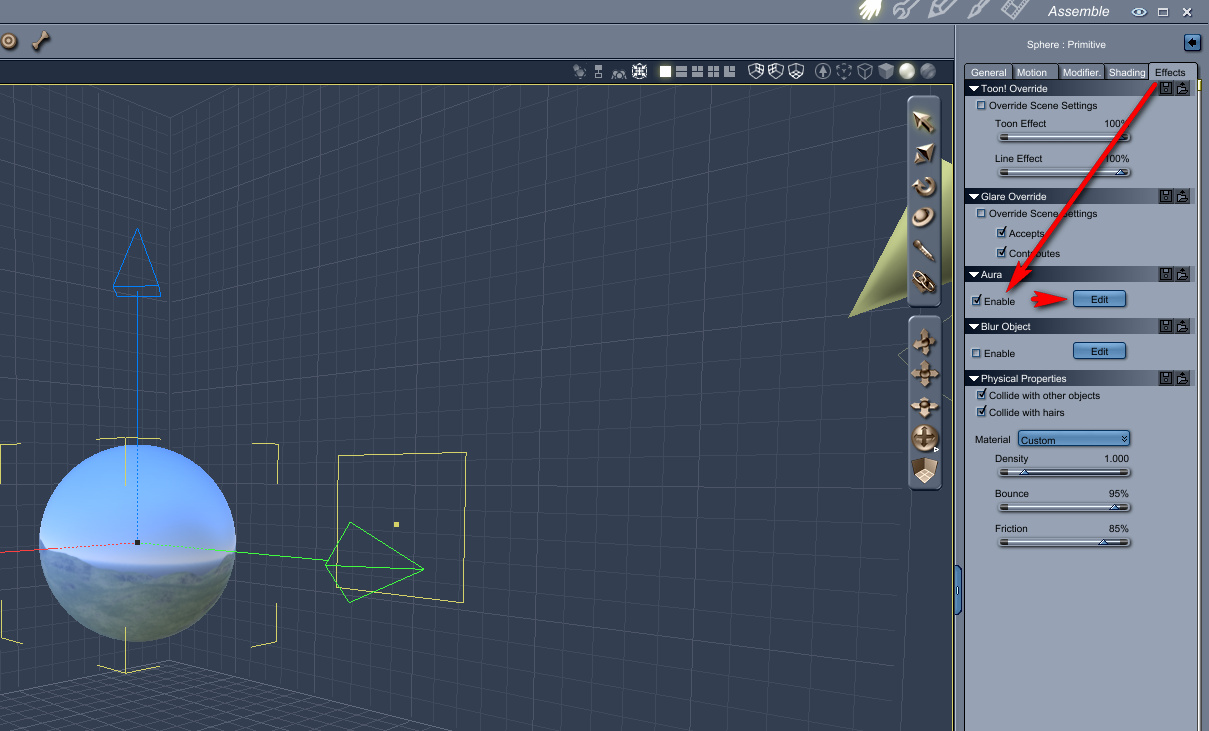
6. Your sphere should be glowing in the Aura setting window’s handy little real-time preview box (see screenshot, below). Click “Auto Update” in Rendering Mode, then slide the sliders to change the glow effect. Here I have the glow Radius at 70 (too high) and have ticked Distance Attenuation (meaning: adding the effect of light spillover, into the air around the sphere). I also have Intensity effect reduced, so that we can still see something of the original sphere texture. And I also changed the colour of the aura to match the sphere’s texture. When you have the glow looking how you want it to, then click OK.

7. Now switch to Carrara’s Render Room. Here I set an 800 x 800px render with Fast anti-aliasing. The initial render of the sphere will be almost instant. But then a little bar will appear at the top of the screen, preparing to overlay the glow effect. This may take a long time to run, even for a simple sphere. If it’s impossibly long for you, pressing Esc on your keyboard will stop almost instantly.

You can try to switch to a fast render preset…

But it hardly speeds up the slow application of the 3D Aura effect. The main render-speed killer here is having ticked that Distance Attenuation box in the Aura settings. A setting of 50 in Distance Attenuation is a good deal faster than 70, and yet still gives you something to add to with a glow layer effect later (when working on your final render in Photoshop). For a complex scene you might have to have minimal Distance Attenuation, and then add more glow later in Photoshop or (for animation) HitFilm.
Here’s my final render with an Aura | Radius | Distance Attenuation of 50…
And here is the same render with a bit of Photoshop enhancement, applying Alien Skin EyeCandy “Gradient Glow” filter to a circular selection (made just inside the rim of the sphere). The edges of the sphere are blended in a little by this Photoshop tweak, and there’s a more believable falloff of light.
(The Google Chrome browser can’t handle the subtleties of the glow banding, and will make it look rather ugly. Save the PNG and view it from your hard drive).
All in all, it’s way too complicated (iClone can make a sphere or any other object glow in about one second of work, and render it in real-time too). But it’s good to know spillover glow can at least be done in Carrara. For a more complex example see the Neon sample scene that ships with Carrara (Browser | Special FX | Luminescent Logo).
The other problem is that if the maker of the figure or model did not name things correctly, you have no way of finding the shader/material you need to glow. Sadly Carrara is not like Poser, where you can just ‘eye-dropper’ on something to find out what its material name is. Thus, though Carrara can do nice glows, the setup can be nearly impossible.
A free one-hour recorded-video webinar from Stefan Werner, Senior Software Engineer for Poser: “Getting the Most Out of Your Poser 3D Renders”…
“He demonstrates how to leverage the new and improved rendering features, including Subsurface Scattering, available in Poser 9 and Poser Pro 2012. Stefan also discusses how to optimize your render settings to master features such as depth-of-field, indirect light, and ambient occlusion. Learn why more isn’t necessarily better when it comes to rendering, and find the perfect balance between quality and performance.”
Infinite Skills have a new Carrara 8.5 Tutorial Video. 11.5 hours of training to help you get started with the latest version of Carrara, DAZ Studio’s ‘big sister’ software.

UK users may find it cheaper or as-cheap on Amazon.
Part one of the tutorial is more generally useful for those who need to export FBX files for non-standard toon characters from DAZ…
Part two shows you the steps needed in 3DXchange Pro 5 and iClone…
Did you know there’s now a free script to export OBJ 3D models from Poser and import the OBJ into the 2D animation software Anime Studio Pro? It’s been possible for some years now, but Smith Micro now offer the free Poser Python export script — along with two tutorial movies, one of which shows how to adjust the toon line weight on the object.
See also this 10 minute tutorial video, in which DutchWorkingMan shows how he uses Poser and Anime Studio Pro to get a believable cartoon cel-shaded look on an exported character.
The Smith Micro comic-book software Manga Studio can also apparently import OBJs — but in that case you simply drag the OBJ onto your Manga Studio canvas.
Update: script still available via Archive.org. Works for Poser 11 to Clip Studio.
A short Infinite Skills video guide/tutorial, on the new Comic Book render options in Poser Pro 2014…
This new nine-minute tutorial video might be useful for some. Morgan Schweers shows how to quickly convert Victoria 4-based characters (inc. morphs) to the new DAZ Studio Genesis format…
To work through this new tutorial you will need to have the DAZ Genesis Generation X (aka GenX) plugin installed, plus the V4 and M4 Shapes for Genesis pack.
Newly available from Infinite Skills, their Learning Poser 10/Poser Pro 2014 – Training DVD. 102 lessons in 7.5 hours (hint: don’t try to learn Poser all in one day!), and with a pleasant clear voice used for the presentation.

New free webinar tutorial for users of Poser 2014. This one is on the Bullet Physics in Poser, so will be of interested to animators. Thursday, 27th June 2013 at 11:00AM PDT, for one hour.
“the finer details and settings for creating both Soft Body and Rigid Body Dynamics using Bullet Physics in Poser 10 and Poser Pro 2014.”
New podcast from 3D Art Direct magazine, on how Sergio Martinez from Xurge3D creates custom outfits for Poser. Sergio also has…
“his three part live webinar masterclass on Saturday 8th and 9th June 2013.”
There’s to be a free Poser 2014 webinar with Steve Cooper, Senior Product Manager at Smith Micro Software. The one-hour live webinar will walk you though the new features in Poser 10 and Poser Pro 2014, on 23rd May 2013.