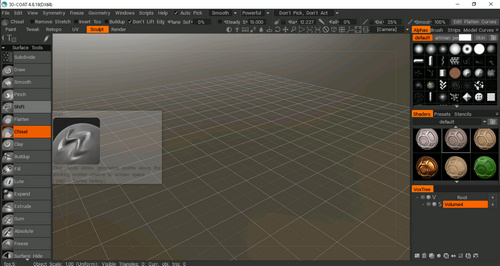
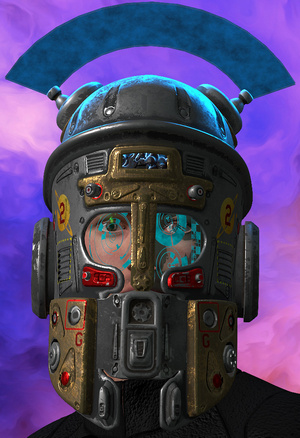
The open source figure-creation software MakeHuman 1.2.0 final has been released. It’s now Windows 64-bit only, and it appears that it still integrates closely with Blender, and indeed now has… “completely new Blender integration, MPFB, with support for socket transfers, IK and Kinect.” Lots of other improvements and changes, and a move to the new Python version.
Category Archives: Companion software
Another pre-Black Friday roundup
So we’re still a week away from Black Friday, but many stores are going a week early. Several offers have even been and gone, including a modest discount on the latest GigaPixel AI and some nice offers on key Flaming Pear plugins such as Flood 2.
What’s tasty in non-subscription software?
* 30% off Rebelle 3.2 is a good one, as I’ve never seen it at a discount before. The software is near-perfect, not least in its simplicity, if you’re an illustrator in a traditional style who want to remove white from lineart and then add very realistic watercolour layers underneath. Watercolor painting is the main strength, as well as the best-of-breed UI. It can kind of do speed-painting, but is not really the best choice for that. It also lacks the extensibility of software like Krita.
* “Top Corel Products” are now discounted, with Painter Essentials 7 at a quite reasonable £30, with is pretty good though keep in mind that Krita 4.x is free. Corel also has PaintShop Pro 2021, less desirable at £50, especially when compared to the recent Humble Bundle offer.
* The Reallusion 20th Anniversary sale until 22nd November, including the fine Cartoon Animator 2D software.
* There are big discounts in Unity plugins at the Unity Asset Store including 50% off the three major rival toon plugins RealToon, Flat Kit, and Toony Colors Pro 2. Also the “visual novels” engine Naninovel.
* “Up to 50% off the entire store” on the 3D model packs at KitBash3D, albeit coming down from a high starting price.
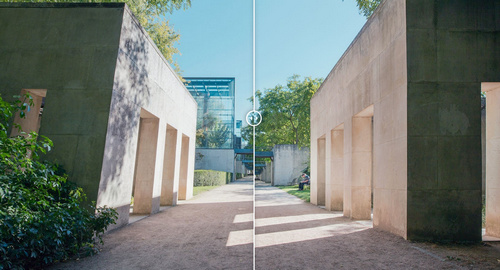
* DxO ViewPoint is discounted. Automatically fixes the weird angles on your ‘big architecture’ photography, so you have straight verticals.
Release: KeyShot 10.0
KeyShot 10.0 has been released. What’s new and important for people in the DAZ/Poser world?
* KeyShot “now respects alpha channels when importing FBX”. That’s interesting. So, does that mean trans-mapped eyelashes/hair from DAZ/Poser figures finally work properly in KeyShot without a whole lot of fiddling and prodding? Worth testing, I’d say.
* “A new Light Manager and Light Gizmos to control individual lights.” Colour, power, size, beam-angle and spread, etc. Which makes it more like Poser and DAZ, but you can still slap on the usual type of light if you’re feeling lazy.
* “Visually identical results in the real-time view and in final-quality output.” I thought they basically had that already, bar a bit of grain and gloss/texture and a few fireflies? I’ve never noticed very much difference.
* “Can now hide all of the objects in a scene, except the one you want to work with.” Again, making it more like DAZ or Poser or iClone, and opening up possibly interesting compositing possibilities re: Photoshop layers and automated filtering.
* “A revamped UI for the Move tool.” Chunkier (or at least size-adjustable) is probably better, in these days of huge monitors.
All the above are in the Standard version, still $995. No changes to the new bristles/fur, or to the NPR rendering capabilities. No native render-speed improvements, as far as I can tell. By which I mean, optimisations that are independent of what graphics card you’re using.
$100 Decimator
Wow, the official Decimator for DAZ Studio plugin is now priced at $100 on the store!
I’m glad I got it free from DAZ some years ago, which I think was when they were moving from DAZ 3 to DAZ 4.
After boggling my eyes at the current price, I looked at the re-download of my freebie. Had it updated? Yes, it’s now “DS4 Decimator 1.10.1.118” for 64-bit DAZ Studio. So if you were still running an old install of DAZ Studio alongside the latest version — just for the Decimator you’d plugged into it — then freebie owners might usefully switch to a later DAZ version to run the Decimator.
What does it do? It’s DAZ’s only native polygon-reduction tool, which usefully offers per-item reduction of polygons. e.g. in the hair, the eyelashes, the dress, the body etc. This is done very easily and quickly, by sliders. Decimator is also useful when used simply as a tool to check what item, usually hair, might be causing your scene’s memory-consumption to become critical.
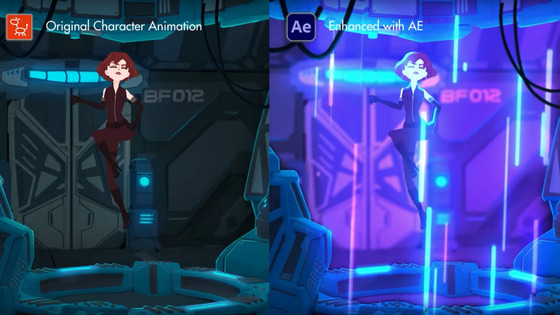
After Effects borrows a vital feature from Cartoon Animator
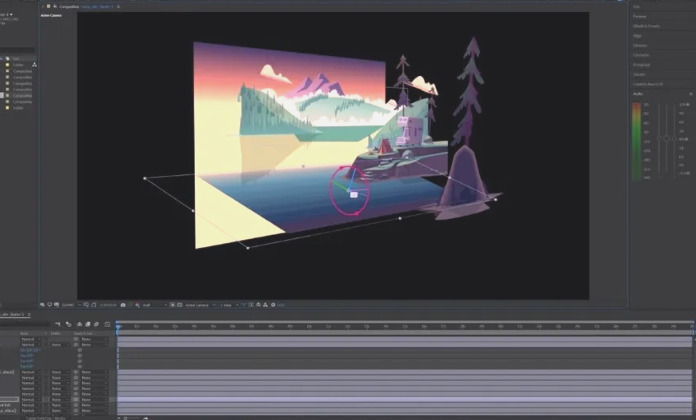
Reallusion’s Cartoon Animator 4.3 Pipeline recent enabled sending of scenes via a script to Adobe After Affects (CC 2020, CC 2019, CC 2018, CS5, CS6). Perhaps as a follow-on, the latest After Effects has introduced a new “3D Design Space in After Effects”…
This looks very like the intuitive angled-layers view in Cartoon Animator, which should make the Animator 4.3 -> AE transition easier. Amazingly, it seems that After Effects couldn’t do this before now.
MotionArtist discontinued and unlocked re: activation
Smith Micro are obviously continuing to wind down, with their products-blog the most recent casualty. The only really ‘long-term important’ bit of the blog, the Dave Gibbons interview, has been saved.
The page for their unique MotionArtist HTML5 motion-comic making software now states…
As of August 2020, MotionArtist has reached its End of Life. All MotionArtist users should download and install this final available version for MotionArtist here (active license required):
MotionArtist 1.3 for MAC (153 MB) | MotionArtist 1.3 for WINDOWS (149 MB)
The software should continue to function on the supported Operating Systems and Hardware as indicated by the System Requirements.
Right, so that’s very good of them, if they couldn’t find a buyer who wanted to develop it further. Just as well I purchased it when I did, by finding and bagging a cheap £10 DVD on eBay. I just checked inside the downloaded new .ZIP file, and the “NoAct” bit must indicate that no online activation is required for this final version…
So it looks like those with a valid 1.3 install should stash their 1.3 licence serials and this final-final .ZIP version that doesn’t phone-home after install, in case they need to reinstall on a new PC at some point. In which case the software should now last as long as Windows can support it, and as long as the Web can play what it produces. That’s very good.
Presumably a cheap eBay DVD with a serial in it will still be useful, in combination with this .ZIP?
Note also that their Moho Debut 13 and the main Moho (formerly Anime Studio) are both at a 40% discount for the next two days. I believe, though have never tried, that Anime Studio files can be imported to MotionArtist. Maybe even Manga Studio (now Clip Studio)??
“Get a Sammy on the job…”
It’s always good to hear about a new semi-automated AI assistant feature for the free Unity engine, to remove some of the drudge-work. The ArtEngine apparently automates seamlessly tiling of materials, and also…
“up-resing, de-blur, un-warping, color matching”
Drawbacks: appears to need an NVIDIA graphics card, and costs a ridiculous $1,140. Still, it’s likely to be a herald of things to come in Semi-automated Assistant AIs.
We probably need a short name for those in creative production, actually. How about SAMAI or SAMAAI, to be pronounced in conversation using the friendly non-scary name “Sammy”. A Fully Automated Routine AI would be a FARAI, pronounced “Fairy”. Or just said as “Sam-eye” and “Far-eye”.
Photoshop Elements 2021: Face Tilt
A new version of the budget Photoshop Elements 2021 is out today. The most interesting new semi-automation is “Adjust Face Tilt”. It seems this may have uses for final-adjustment of pictures inside comics frames, where the picture is still hi-res and the face-tilt or look-angle is ‘not quite right’. So far as I can tell there’s no third-party plugin that will easily do the same in the main Photoshop.
Given the demos I’ve seen, though, it probably only really works well where the subject is facing the camera, which may rarely be the case in comics.
No progress on the iffy auto-colorize feature, it seems.
Webinars: Clip Studio Paint
Official, free, booking now…
“Clip Studio Paint Demo: Drawing Digital Comics” will be hosted on 11th October 2020 from 7-8 p.m. EDT. …. will show tons of tips and tricks for translating traditional techniques into the digital environment. … including turning thumbnails and roughs into pencilled artwork, digital inking … [then] “Clip Studio Paint II” will take place on Sunday, 18th October 2020 from 7-8 p.m.”
Part of the “Month of Mice”.
Effective…
Cartoon Animator 4.3 Pipeline can now export your Project to Adobe After Effects. There’s a handy video on installing the script and sending the scene over. Nice. Now you can say to the animation snobs, “Oh yeah, it was made in After Effects!”
Freebie: Automatic OBJ Exporter
What’s that you say? You want semi-automatic speedy export of any Genesis figure from DAZ Studio, to use with Poser’s real-time Comic Book mode? What? And you also want it posed and clothed?
And you’d like to add fast and stable poly-reduction to about 200,000 polys, to make the figure wieldy inside Poser in real-time? And you want all but the unwanted specular textures loading back onto the OBJ, when you load it in Poser?
Oh, and you’d also like the poly-reduction to be done by an efficient stable super-fast third-party decimator that doesn’t crash or stall (i.e. MeshLab), or take forever to produce a crumpled mess (i.e. DAZ Decimator), or which needs three hours of wrangling and head-scratching to even start to make work (i.e. Blender)?
You’d also like this done in less than four minutes?
So… you want a miracle, right? Well, it’s here. All this is available in the new free Automatic OBJ Exporter suite of scripts, which provides a step-by-step and highly-automated way of getting posed/clothed Genesis figures to Poser for tooning. Works in Windows only, and to be so fast it requires the $52 Atangeo Balancer — which a script will launch from an icon inside the DAZ Studio Library.
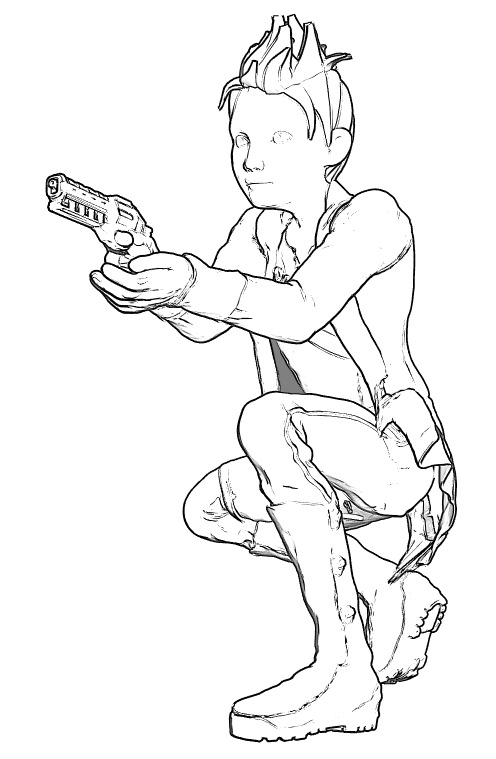
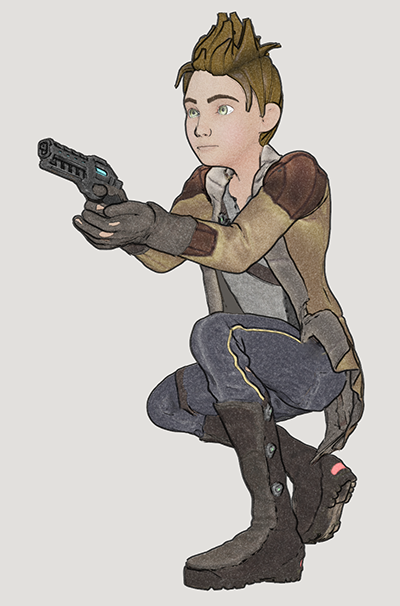
G8M, with lineart and toon in Poser 11. Yes, with extreme poses / tight clothes you may have to fix some poke-through via Photoshop’s heal/clone brushes. And yes, you’ll also likely want to blend in a shadows render too, which hasn’t been done for this demo.
There’s a clear read-me, but here are a few extra tips on use:
1) On importing to Poser, there will be a message that the Specular materials cannot be found. They’re not needed for toon and are not available because they were deleted earlier by a script. Just carry on loading and the rest of the textures will load on fine.
2) Once you’re happy with your reduced OBJ in Poser, obviously you then re-name its export sub-folder to something meaningful like Export_0001_Kid_Bounty_Hunter_01 and also delete the larger original OBJ in that folder (it’s the one that now has a -bak file-name). The next time you run Automatic OBJ Exporter, you rename the final created export sub-folder as Export_0001_Kid_Bounty_Hunter_02. And so on. Otherwise Automatic OBJ Exporter will over-write your older exports.
How to Decimate in Blender 2.9… or not
I just wanted to make a quick test of the Blender Decimate ‘decimator’ feature. A free decimate, aka poly-reduction, aka mesh reduction. What could be nicer? Especially as the free Meshlab 2020 is still flaky and very crash-prone.
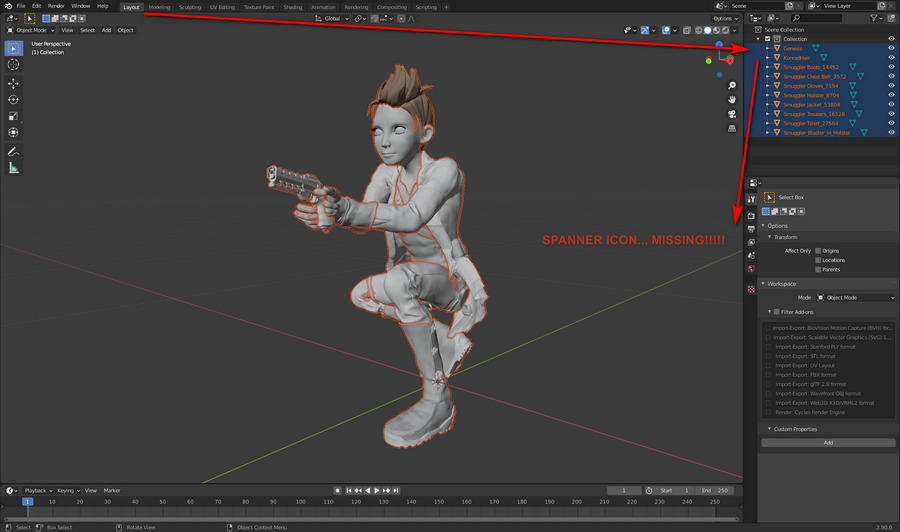
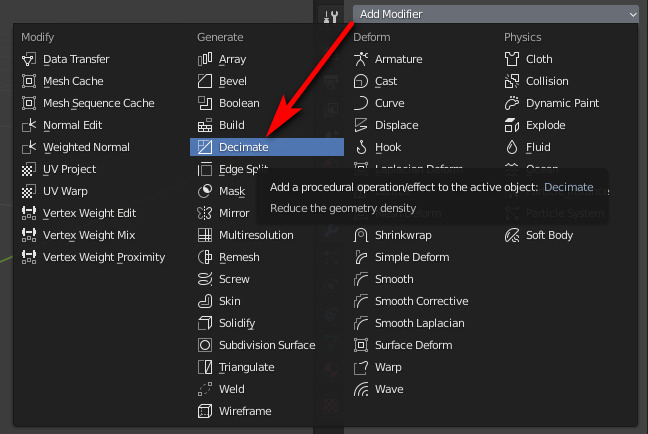
First of all, where is the Decimate panel in Blender? Everyone, including the official manual, shows you a nice picture of the Decimate panel itself. “Just click the Spanner icon…” reveal a couple of rather more helpful YouTube videos. But that was no use to me, because there was no Spanner icon…..
Bizarrely, the spanner icon then does appear and it persists, but only when the items in the scene are deselected and re-selected. No other change had been made. Go figure…
Anyway, with this “missing icon” hassle fixed, the user can finally select “Add modifier” and choose to load the Decimator panel…
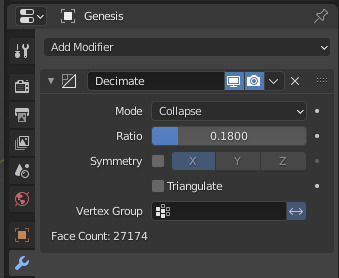
Once the Decimate panel’s UI is visible there’s some weird stuff going on in it. You expect to see a normal poly-count and a nice smooth dial to dial this down. But you get “faces” instead of polys. I know this is a 2.3m poly .OBJ, so Blender telling me that it has a 73,000 “Face count” is not at all helpful.
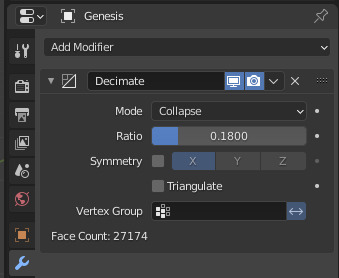
Then there’s the reduction dial… which is not labelled as such and is not a dial, as it’s just horrible to try to operate with a mouse. There’s also no indication that its “1.0” setting is actually 100%. The best way to operate this awkward cryptic pseudo-dial appears to be double-clicking on it and just manually typing in a desired setting. Turns out that “0.18” = 18% of the original.
You can see the mesh modifying in real-time, which is something.
Then, buried deep in a forum, is the advice that you have to save the .BLEND file before you export, or you won’t get the reduction. Another bit of fairly vital advice missing from other sources, including the Manual.
So then I export to a new .OBJ file, with “Apply modifiers” ticked in the OBJ export panel. This takes five minutes, during with the PC becomes deeply unresponsive. And what do I get from that? A 174Mb OBJ, 50Mb bigger than the original!
Ok, so it’s back to search and the forums. Turns out you have to not only save the file but also, in the Modifier panel…
“Apply the modifier using the apply button on the modifier.”
“Modifiers can be permanently applied by clicking ‘Apply Modifier’ while in Object mode.”
OK. Where’s that button then, because it is definitely not on the panel I see…
Apparently it should be under the “Add modifier” label.
Does it show up if I move from Object to Edit mode? Nope. if I switch away to a new tab and then back again? Nope. If I close Blender and re-open. Nope.
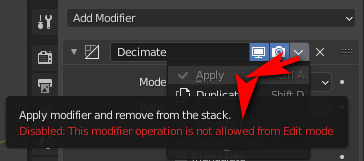
Turns out this button has been recently removed(!) to be hidden under a fiddly little drop-down arrow…
This drop-down at least usefully informs me that I had switched to the wrong mode. Switching back to Object mode caused the “Apply” to become active…
On clicking the live “Apply” the Decimate Modifier panel vanishes, the items in the scene are deselected, and in the top item there’s a new little circular icon near the name. I assume it’s applied.
OK, so I save the .BLEND file a third time. Then save out as an OBJ, “Apply modifier” once again ticked in the export panel. Things go a little more smoothly now, though the export was still about three minutes. The only problem was… the resulting OBJ was was just as large as before at 174mb!
So, three hours later, I still had no decimated circa-20Mb .OBJ out of Blender. I gave up. Blender appears to have some very nice developing NPR and real-time features… but is still an utter pain in the arse to actually try to use.
Now I know why people who want to decimate OBJs a lot pay $50 for the speed and ease of Atangeo Balancer.
RenderMan 24 Stylized Looks – the first look
In Spring 2021 Blender is to get the official new Pixar renderer, RenderMan 24. The cutting-edge RenderMan 24 will include “Stylized Looks”, on which all will be revealed in a webinar this evening. Although you can get a sneak-peek here, from which the screenshot below is taken…
That looks horrible, frankly. Though the painterly simplification brushes look a bit better…
But apparently the “Stylized Looks” will offer…
“a tool for any type of look creation, from photorealistic images to any other artistic genre, from comics to anime, from illustration to watercolor … toon shading to brush stroke effects … or anything you can imagine. … from conventional cartoon shading to hatching or brush strokes, with the hatching reacting to emulated light effects, and supports custom AOVs and display filters. … work usually done in comp to stylise an image can now be performed directly during rendering.”
And before you get too excited by that blurb… note that it will only be available to users of the commercial edition of the software. Not in the “free non-commercial edition”. Aww. Thus it’s going to be “production studios only” rather than for hobbyists, due to the fairly hefty $600 price tag for RenderMan 24.
Ah well… so there’ll still be a place for Blender’s forthcoming BEER NPR plugin. And, most likely, for Poser 12.
PzDB for $20
PzDB 1.2, now just over $20. Nice. There’s also a free trial of 1.3, if you just want to test PzDB first. For indexing a huge runtime you’ll also want to run this freebie first, which will fix any missing thumbnails before you then index with PzDB.
Only via the Store link above. Those who just splug down onto the main landing page see a higher price.
Release: Blender 2.90
Blender 2.90 has now been released, as a final not a beta.
Here’s six bits of new stuff that caught my eye in the Changelog…
1. Rendering speed improvements…
“Intel Embree is now used for ray tracing on the CPU. This significantly improves Cycles performance in scenes with motion blur. Scenes with high geometric complexity also benefit on average.”
So that potentially benefits Poser’s SuperFly, eventually, as SuperFly is a slightly tweaked Cycles under another name. I assume that Poser 12 will plug in the latest Cycles. Though this change may only offer a bit of benefit, as the benchmark improvements are not that great over the previous Blender.
2. Blender users “can use the denoiser interactively in the 3D viewport”, which you couldn’t before.
3. A new filter to auto-smooth jaggies in shadows…
4. Lots of improvements to the sculpting tools, including “four types of cloth simulation.” A plug-in called Extended Sculpt Tools v2.0 has also just been released.
5. Better and more logical/readable layout and nesting style for the zillions of sub-menus and tick-boxes. Also a new Search, for finding commands, menus and buttons in what is still a vast and labyrinthine UI…
“Ever wondered in which menu to find a certain operator? Wonder no more! The new search menu shows you that and more: See the menu and its hotkey; Add the operator to Quick Favorites …”
I think I’d rather have UI ‘skinning’ presets that radically simplify and aggregate/iconize the UI just for particular tasks, but it’s welcome all the same.
6. Grease Pencil improvements. Drag-and-drop to re-order a stack of Grease Pencil modifiers. There’s also what appears to be the ability to turn the edges of 3D geometry into Grease Pencil lineart. At the moment it’s looking very basic, and won’t be challenging Sketchup or Poser any time soon. But’s it’s now in there, and fill-layer improvements are due in 2.91. A quite recent update, 2.83.4, also changed how Freestyle lineart works, so it’s possible that will also be new to you in 2.9.
Overall, Blender is finally “getting there”. I can see myself taking a very in-depth look at Blender 3.0 when it arrives. Especially if it has really nice-looking and easy-to-use NPR by that time, either natively or via the BEER plugin.