I just wanted to make a quick test of the Blender Decimate ‘decimator’ feature. A free decimate, aka poly-reduction, aka mesh reduction. What could be nicer? Especially as the free Meshlab 2020 is still flaky and very crash-prone.
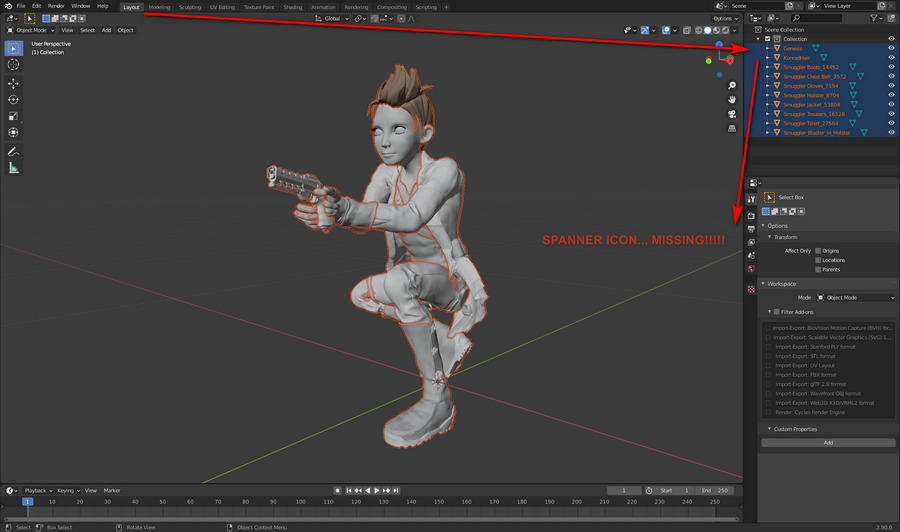
First of all, where is the Decimate panel in Blender? Everyone, including the official manual, shows you a nice picture of the Decimate panel itself. “Just click the Spanner icon…” reveal a couple of rather more helpful YouTube videos. But that was no use to me, because there was no Spanner icon…..
Bizarrely, the spanner icon then does appear and it persists, but only when the items in the scene are deselected and re-selected. No other change had been made. Go figure…
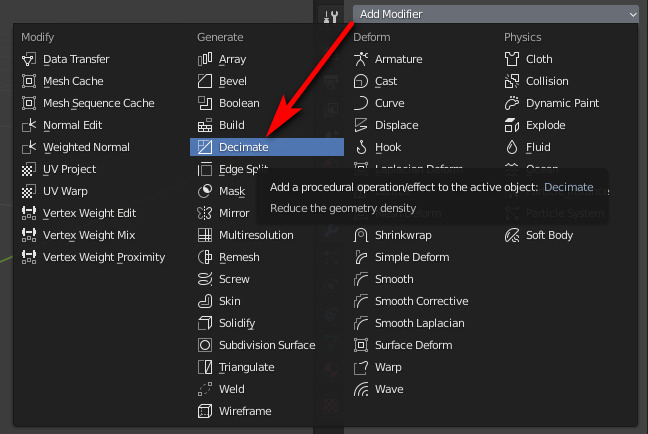
Anyway, with this “missing icon” hassle fixed, the user can finally select “Add modifier” and choose to load the Decimator panel…
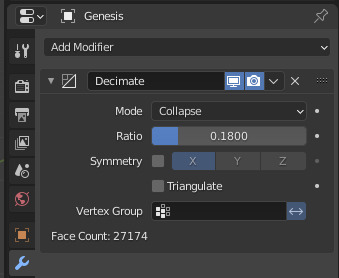
Once the Decimate panel’s UI is visible there’s some weird stuff going on in it. You expect to see a normal poly-count and a nice smooth dial to dial this down. But you get “faces” instead of polys. I know this is a 2.3m poly .OBJ, so Blender telling me that it has a 73,000 “Face count” is not at all helpful.
Then there’s the reduction dial… which is not labelled as such and is not a dial, as it’s just horrible to try to operate with a mouse. There’s also no indication that its “1.0” setting is actually 100%. The best way to operate this awkward cryptic pseudo-dial appears to be double-clicking on it and just manually typing in a desired setting. Turns out that “0.18” = 18% of the original.
You can see the mesh modifying in real-time, which is something.
Then, buried deep in a forum, is the advice that you have to save the .BLEND file before you export, or you won’t get the reduction. Another bit of fairly vital advice missing from other sources, including the Manual.
So then I export to a new .OBJ file, with “Apply modifiers” ticked in the OBJ export panel. This takes five minutes, during with the PC becomes deeply unresponsive. And what do I get from that? A 174Mb OBJ, 50Mb bigger than the original!
Ok, so it’s back to search and the forums. Turns out you have to not only save the file but also, in the Modifier panel…
“Apply the modifier using the apply button on the modifier.”
“Modifiers can be permanently applied by clicking ‘Apply Modifier’ while in Object mode.”
OK. Where’s that button then, because it is definitely not on the panel I see…
Apparently it should be under the “Add modifier” label.
Does it show up if I move from Object to Edit mode? Nope. if I switch away to a new tab and then back again? Nope. If I close Blender and re-open. Nope.
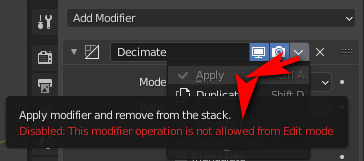
Turns out this button has been recently removed(!) to be hidden under a fiddly little drop-down arrow…
This drop-down at least usefully informs me that I had switched to the wrong mode. Switching back to Object mode caused the “Apply” to become active…
On clicking the live “Apply” the Decimate Modifier panel vanishes, the items in the scene are deselected, and in the top item there’s a new little circular icon near the name. I assume it’s applied.
OK, so I save the .BLEND file a third time. Then save out as an OBJ, “Apply modifier” once again ticked in the export panel. Things go a little more smoothly now, though the export was still about three minutes. The only problem was… the resulting OBJ was was just as large as before at 174mb!
So, three hours later, I still had no decimated circa-20Mb .OBJ out of Blender. I gave up. Blender appears to have some very nice developing NPR and real-time features… but is still an utter pain in the arse to actually try to use.
Now I know why people who want to decimate OBJs a lot pay $50 for the speed and ease of Atangeo Balancer.


