Comic Book FX. The Comic Book Sound Effect Database. 1,482, so far.

Comic Book FX. The Comic Book Sound Effect Database. 1,482, so far.
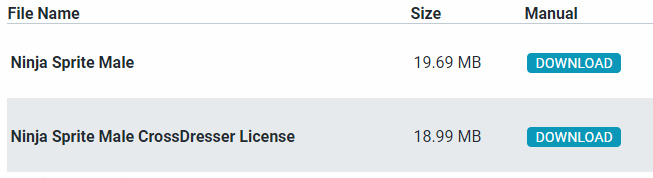
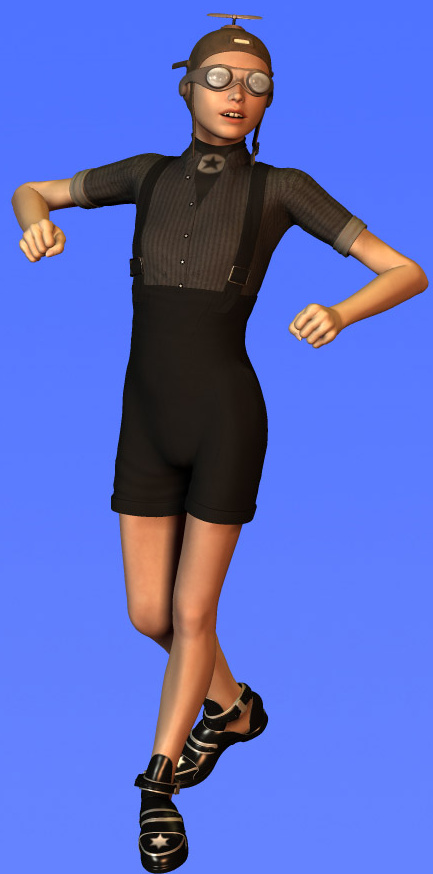
Having long had the female of the species, today I picked up the Ninja Sprite Male on a $5 sale offer — and was very pleased to see that he comes with a free Crossdresser 4 license for easy clothing conversion. The Sprites are elemental characters, so don’t really need dressing… but the license is a nice thought, and possibly very useful if you were going to runtime/kit-bash them to try to create a unique-looking sci-fi toony alien.
 Above: my early attempt at tooning the female Ninja Sprite in Poser 11 with the Comic Book render, with the top of the hair a bit of a kludge.
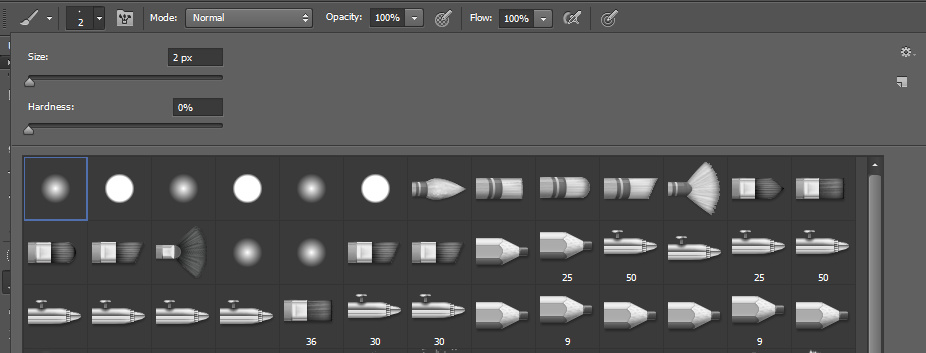
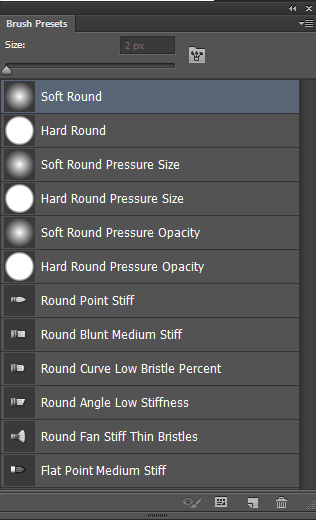
Got Photoshop brushes? Got too many Photoshop brushes? Yup. And, let’s face it, Photoshop’s brush management and preview pallettes are something out of an archeological dig — even in the newer versions.

What are the alternatives and helpers, for managing your brushes? Here are all those I could find.
Newer:
* The $19 Anastasiy’s MagicSquire 1.5 is billed as a “brush organising agent”. It’s rather expensive for what it is, which is a better ‘but not that much better’ replacement for the usual panels. Still… colour codes tabs, drag-and-drop sorting, better auto-generated brush-stoke previews and more are all improvements. If they’re worth $19 to you, then it’s the one. The great advantage it has over the Brusherator (below) is that it works in older versions of Photoshop… “CS3 CS4 CS5 CS6 and CC”.
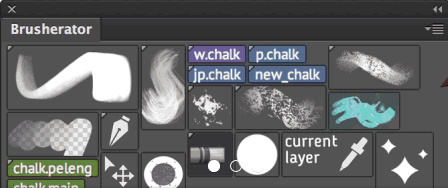
* The $13 Brusherator 1.3 is for Photoshop CC and higher. Probably the most elegant of the lot, and you can configure it how you want it. But to use it you need to be running a newer version of Photoshop, and its management methods and menus are far from intuitive to learn. It’s also nearly impossible to set up on a second pen-monitor with a pen, and so it needs to be set up on your main monitor with mouse + keyboard.
* The $13 BrushBox seems similar to MagicSquire, but looks more basic. It only runs on “CC 2015.1 and above”.
Older:
* The $2 drbjr Custom Brush Manager. The panel uses Flash (and is thus an inherent security risk), but it does support Adobe Photoshop CS6 and early versions of CC on Windows. The panel UI is rather basic, but it is obviously has quite a few features and it only costs $2.
* The $10 Preset Viewer Argus is a general standalone Photoshop Preset Viewer. It renders out a big library of thumbnail previews from all of your Photoshop brushes and presets. No more squinting at tiny little “what is that?” icons, which may be useful for those who know what they’re looking for. It works with presets and brushes from all CS6 and CC versions, and has been updated to run on all versions of Windows.
* The freeware BrushView QuickLook PlugIn is another oldie, from circa 2009, and seemingly aimed at Photoshop Elements users. It… “allows you to see the contents of Photoshop brush files. Now you no longer need to load a brush file into Photoshop to see its contents. … supports three different version of Photoshop [Elements] brush files — versions 1, 2, and 6.”
* The freeware abrMate 1.1 was a “Brush Viewer, Organizer, Converter, and Exporter for Windows”. Nice, but it was last updated in 2011 and only supports brushes made in Photoshop CS5 or lower, so is not really that relevant now. Apparently it required Microsoft .Net Framework 4.0 to be installed.
That’s it. I’m guessing that possibly I could also do something with Adobe Bridge in finding brushes, but I never use that and don’t want to start.
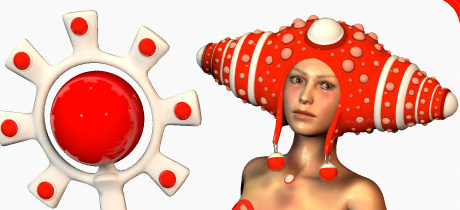
Oskarsson is currently having a big 50% sale on Renderosity, with prices generally at $6 or less. Unusual bargain items I spotted…
Paranoia, a detailed steampunk spacesuit or undersea suit for V4.

Dynamo Kid, a detailed valvepunk era outfit.
Epifani, a Moebius-like sci-fi head-dress and outfit for V4, for a mere $3.75.
Need fashion design inspiration from the past, for designing new digital outfits? Pinterest boards are great, of course, if you can find a great searcher/curator combo. But Europeana Fashion is open access and…
“brings together an incredible wealth of content including historical clothing and accessories, contemporary designs, catwalk photographs, drawings, sketches, catalogues and videos contributed by nearly 40 museums and fashion brand archives from 13 European countries.”

It appears to be the “what do you want to see in Poser 12?” season. So here are my ideas on what I might personally want for Poser 12…
1. Multi-pass rendering that can cope with multiple render types (e.g.: Firefly with multiple switches, such as Shadows Only | Sketch with custom preset selection | Preview with Comic Book to a dialed-in preset | SuperFly) and output sizes and file types. The ability to schedule all this.
2. The ability to load and save Presets for the Comic Book dials and the panel’s check-boxes. A colour-picker for varying the colour of the black ink lines.
3. A Python Panel that (at long last) remembers your custom buttons between sessions. The ability to save your own buttons as a preset for this Panel. The ability to add micro-icons to aid in quickly picking a script from the Python Panel.
4. A macro recording and playback feature, like Photoshop’s Actions, with the ability to save and share playback files.
5. The ability to save and share UI interface configurations. This would work in tandem with the macro recording (see above), providing easy sharing of quick “watch what I do” tutorials without needing to get into all the hassle of making and uploading video. These easily-made and shared ‘Tutorial-lets’ could greatly aid new users — download, load the UI preset and macro, press “Play”.
6. Ability to quickly add an “eyes controller plate” to any character, including a G2 DSON import, which would easily move both eyes at once by grabbing and moving a non-rendering cube or eye-plate in the scene.
7. Particles, duplicate and scatter objects, shatter objects (perhaps an expansion of PhilC’s $10 ‘Exploder’ script).
8. A simple way to paint a texture or colour directly onto the model surface with a brush, in 3D space. Nothing complicated, just a quick way to snip bits off a base bitmap.
For instance: my base prop has crude painted-on rivets or eyebrows which are not tooning up well, because they’re not geometry. I load a simple brush and directly erase these while in the 3D scene. Of course this can be done in other ways, but having such a brush could also lead to other possibilities.
9. Bigger fatter versions of the bits which a user regularly needs to grab onto: scroll bars, rotation tools, etc. Other than that, and perhaps a Lights controls makeover, don’t go changing the interface other than in very minor ways.
10. Something like the core of Scene Toy, but built-in as a Window. Smith Micro should also buy the rights to a number of key ‘in danger of extinction’ PoserPython scripts, polish them, and include them as standard as they already do with a number of partners.
Overall, stability is fine with Poser 11 SR6, so that doesn’t need to be fixed. Same for the Content Library (provided you turn off indexing, after your initial big indexing pass of your runtime) with SR6. I don’t much care about new base figures (we have enough generic people, by now, don’t we…?) or about new/better physics (breast jiggle, which is probably all it’ll be used for, has been able to be done by scripts for decades now) or the tools needed for making clothing and outfits for sale (though of course it’s nice to buy the results now and again).
I took a risk and purchased the old Poser Python tools with source code, currently on a $7 clearance discount from Renderosity. I was curious about what the eyetarget.py and materialtoon.py scripts do. The scripts were made by Kazuhiro Eguchi in Japan in 2010, and last updated 2012, and as such the documentation on the store is sparse. They are not a Merchant Resource. I installed them in Poser 11 Pro SR6 to C:\Program Files\Smith Micro\Poser 11\Runtime\Python\poserScripts\ScriptsMenu\ and tested with M4 and Doctor Pitterbill.
Random face.py
Randomize Face works only on V4 and M4 and Kids 4 (K4) with Morphs++. This doesn’t respond to Undo, so use with care. The expressions are quite subtle, and are not cumulative, so this seems to be for when you just want to get V4/M4/K4s’s face away from the default without the bother of finding an expression preset. Kind of useful, but not hugely.
Possibly you might get it to work with other characters, such as A3, if you were prepared to edit the script and put in the A3 face morph names?
eyetarget.py
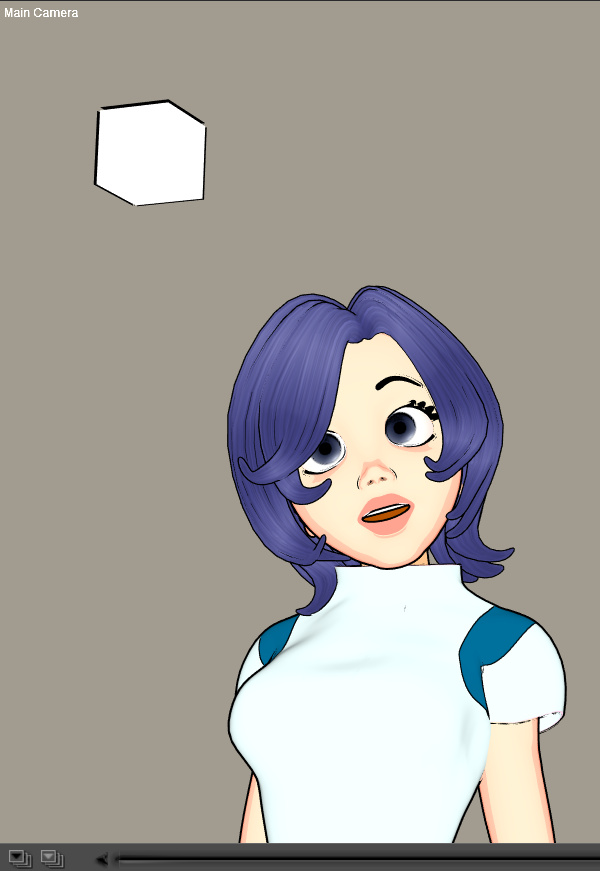
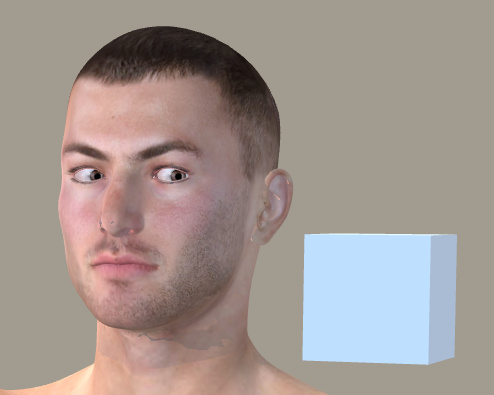
I was very pleased with eyetarget.py which works fine on M4. Select the M4 head, then the script loads a simple cube about three feet in front of the character’s eyes. Move the cube, both the eyes follow to “look” at it. Meaning, no need to fiddle about with posing the eyes. So far as I’m aware this is the only working ‘Look at…’ Python script, either commercial or free. It also worked on Aiko 3, more or less…
The cube is automatically invisible in both SuperFly and Firefly renders, without turning it off. It can be turned off for Preview (Properties panel | Visible | off), and gaze direction remains. Delete the cube and the eyes return to default. Eye positions created with the cube can’t be saved as presets to Expressions.

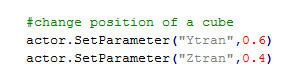
It can also be turned off with a few additional lines of Python code…
scene.SelectActor(scene.Actor("Figure EyeTarget"))

actor = scene.ActorByInternalName("box_1")

actor.SetVisible(0)
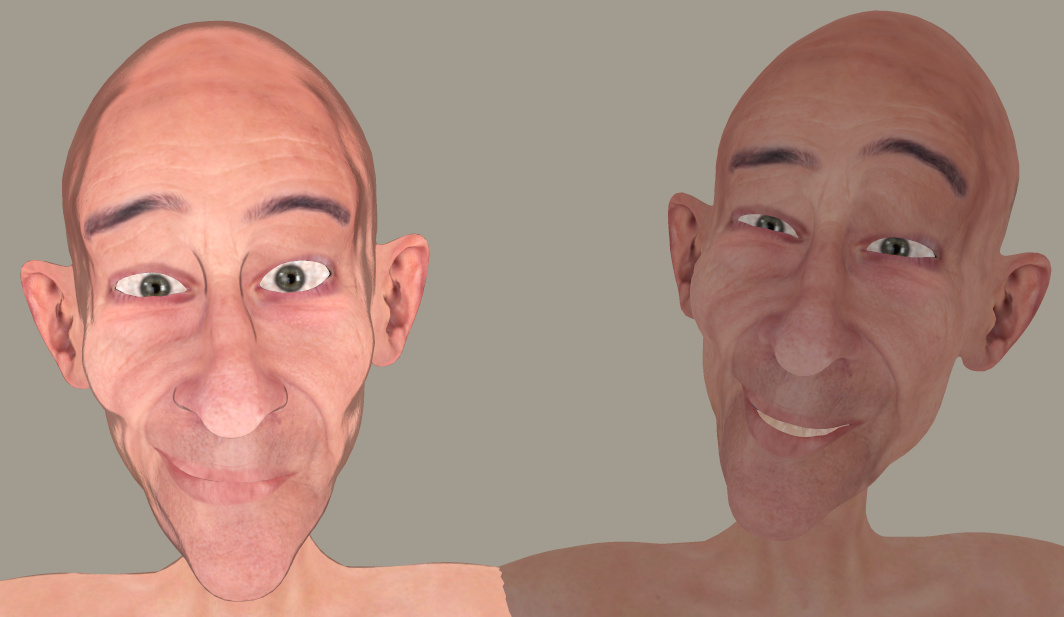
I guess it’s just a very quick way to do the fiddly manual setup of a ‘Look at…’ for the eyes. But to me this feature is worth the $6 on its own, though regrettably it doesn’t work at all with standalone characters like Doctor Pitterbill (even though the script suggests it should grab onto any head part labelled “eye”). For Pitterbill, and presumably for other Nursoda characters, you have to manually set up the “point at” for each eye, and then the cube works well. This is done by loading the script and then selecting an eye and from the top menu bar going: Object | Point at. Then you do the same for the other eye.
Any character with huge toon eyes doesn’t cope well with being pulled about by a box, though as you can see above I did have success with Aiko 3. All Poser characters should come with a script for posing the eyes that works like this, and there should be a drop-down menu to tailor the offsets for each character’s eye-size.
The well-commented script can be edited in Notepad++ and presumably the cube’s two basic movement parameters can be fiddled with to get a slightly better fit for a non V4/M4 character…
But I suspect the script would have to be hacked to load two cubes, one for each eye. That would also allow adjustments for big-eyed toon figures, though would still not be as useful as the sort of dedicated eye-plate that comes with the likes of Toonboy Sam.
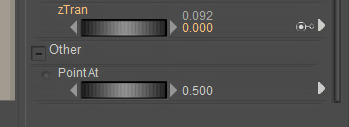
For a less abrupt eye movement, after apply the script you can also click on each eye, and scroll down to the bottom of its Parameter dials list. There you will see a new “Point at” dial. By default, this is at 1.0. Set it to 0.5 for subtler movement.
Random Pose.py
This is much more dramatic and wild than the random face. If you want someone falling wildly from a window, this is going to give you a quick pose. You can also run Symmetry.py which mirrors the pose from one side of the body to the other and thus gives the random pose a bit more balance. Could also be used in combination with a reset pose to default script and a partial selection of body parts, to tone it down.
invisible cube.py
This loads the invisible cube again, but this time it’s not connected with the eyes. You can parent it the character’s head, and then pick them up and move them around the scene more easily than otherwise. Again, the cube doesn’t render. Useful, if you get frustrated at grabbing a character to move them and find you’ve only grabbed the hair. Again, you could do this manually, but if you have a big battle scene with lots of background characters it’s the sort of thing that will save time.

material copy.py
Fairly self explanatory, and although basic it usually appears to work fine (though can also be a bit temperamental in some circumstances). Place a material onto some small part of the prop or body, copy it to multiple other surfaces.
material amb red.py
If you have a grey cast to your character’s skin, perhaps because of the light they’re in, this boosts the warmth of the skin tone by reddening it.
material toon.py
Again, it worked as described in Poser 11. It changes the selected materials to use a toon shader with edge shadow effects. It appears to load for each character or prop in a scene, so if you find your Poser scene unresponsive after application, it’s probably because there’s another instance of the material toon.py panel waiting for your input down in your taskbar.
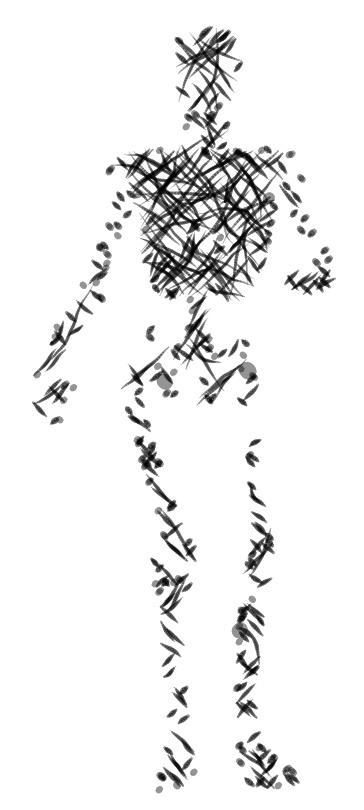
Here’s Pitterbill with a simple toon shader applied to all surfaces, ultra-flat lighting (left-hand render). It’s just a basic blended / ramped toon effect, but a quick way to get it over the existing materials.
Adding the basic Comic Book mode with flat lighting shows how far the toon shader is helping, even though the 3d photo textures are still making it look far from hand-drawn/painted. He’s picking up useful nose ridge lines and nostril lines from the toon shader only. And the Comic Book mode is then inking them.

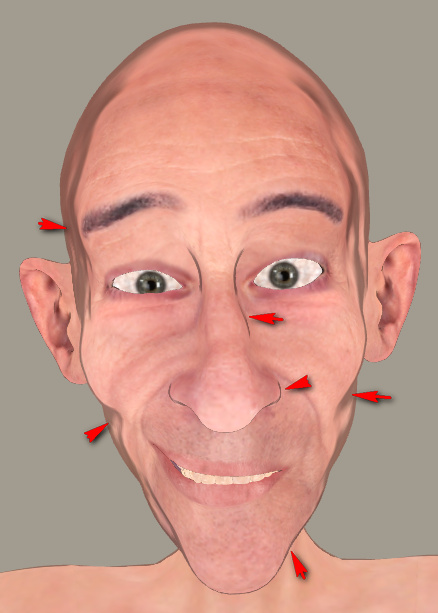
If the Toon shader is temporarily disconnected, and the Comic Book mode is applied, it shows it was the toon shader producing the nice nose-ridge and nostril lines.

Those were the pack’s scripts that interested me, but there are more. Worth $7 for the quick setup of the two types of invisible boxes, and the material toon.py looks interesting for quick tooning in combination with the Comic Book preview mode.
I accidentally gave out a wrong bit of information here the other day, my apologies. I had found and installed the old Poser LLanime script. Then, when I wanted to blog that it worked, I needed to give you the install location. To get this easily, in Windows Explorer I typed “ScriptsMenu” — since that’s where I had installed it to. Windows Explorer then showed me the wrong ScriptsMenu. Even when my Windows Explorer is explicitly told to find everything…
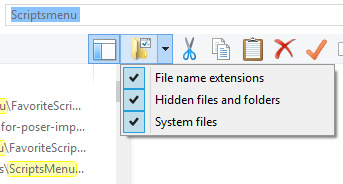
… it still skips the C:\Program Files folders. Which, of course, is the real place Poser 11 keeps its Python Scripts.
Poser maintains a number of locations where Poser’s Python scripts can plausibly be installed. But only one of them works for seeing them show up inside Poser 11…
1. Your main runtime, where you install your characters, props and other content. This will very likely have a ..\content\Runtime\Python\poserScripts folder.
Nope.
2. C:\Users\Public\Documents\Poser 11 Content\Runtime\Python\poserScripts\ScriptsMenu
Nope.
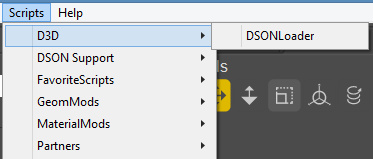
3. C:\Program Files\Smith Micro\Poser 11\Runtime\Python\poserScripts\ScriptsMenu
Yup.
The third path is where you put new scripts, if you want them to show up in Poser 11’s Scripts menu…
Here I have a handy FavoriteScripts folder, since the Python Panel in Poser is annoyingly incapable of remembering assigned scripts between sessions (at least, without some vigorous manual code-hacking of various *Buttons.py scripts).
So I’d obviously done a correct install on LLanime, but then my casual reliance on Windows Explorer caused my mistake in the blog post. It was my fault, as I had long ago told Windows not to index C:\Program Files (in order to speed up the sluggish Windows indexing process). In such a circumstance, to have Poser’s script content folders and files show up in the Windows Explorer search, go:
Star Menu | type Index | Select ‘Indexing Options’ | Click on the C: drive | Modify | Now you can choose which folders you want to Index or not | Choose ‘Smith Micro’ and OK.
Have you ever found yourself looking at a tangled mess of Materials panels in Poser’s Materials Room, some of which are closed, while having the suspicion that there are still others to be found if you scroll sideways? align_Nodes.py runs from: File | Run Python Script and gets them straightened up. Works fine in Poser 11.
I’m pleased to say that Rust-Icator for Poser and Grime-Inizer for Poser (the latter no longer sold) work in Poser 11. They seem a simpler script/texture-based alternative to the new materials layer-blending possibilities in Poser 11 and SuperFly. For instance, they offer a very simple way to apply a blended cross-hatching texture, without fading the underlying material or changing its appearance.
They’re billed as…
“… one-click age and decay effects you can use on everything in your scene … can be applied to ANY surface – human skin, clothes, props, hair – like any other shader. Existing texture maps will not be replaced. The shaders incorporate math nodes so the original texture is still visible beneath them.”
These scripts (aka Rusticator etc) were updated at the DAZ Store fairly recently. I can confirm that the latest Rust-Icator for Poser runs fine in the latest Poser 11 Pro version (SR6) under Windows…

There is however a forum report suggesting that modern Mac users have the ‘wrong type of Python’ for this to run. Could be that it’s now effectively Windows-only, but that’s just my guess.
They also seem a bit temperamental about launching from the Poser Library. Firstly they are found under “Pose” and not “Materials”. Figures they like, Props they don’t. If there’s no response from clicking on a Library icon, then use the alternative route of File | Run Python Script… which seems to always work fine even on props. ..\Runtime\Python\poserScripts\DraagonStorm\Grunge\RustShader\MHGSrustcracked.py is your target.
There are three duplicate sets of the scripts, one for Poser 8, Poser 9, and other named MHGS. The MHGSrustcracked.py and other MHGS versions ran fine in Poser 11, from File | Run Python Script… Do not delete the older P8 / P9 versions, thinking you won’t need them. Because it seems that the working MHGS versions require or call them in some way.
The scripts call up 4,000px textures from the runtime, which can be swopped out easily in the Materials Room…

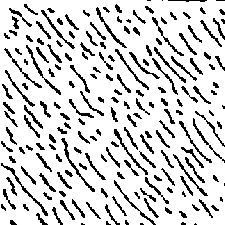
For less memory-muching, a smaller file can be loaded and scaling then dialed down from 1.0 to 0.1. Here I’ve switched to a piffling little 130px cross-hatching tile, which isn’t even optimised for seamless tiling…
Works in Preview, Firefly, SuperFly and Sketch.
When I first loaded up Poser 11 Pro I fairly quickly discovered that the old Sketch Designer is happy to noodle its sketch-render magic along the new Comic Book mode’s toon lines, and thus create a simple soft-charcoal line, for later Photoshop blending into the hard-ink Comic Book toon lines.
I more or less stopped there, happy to have a sort of ‘grease pencil’ line. But after some more experiments today I’ve discovered it’s possible to use Poser’s Sketch Designer to create a different type of ‘rough sketch’ Comic Book line, and at the same time to render Sketch Designer’s lines into the base materials too.
Here’s the stock Andy 3D character in a flat light, with a simple slightly-shaded plain texture and with the normal Comic Book mode inking lines applied. Next to him is the Andy with some of my home-brew Sketch presets applied into the Comic Book lines, plus another preset where I was trying to get big chunky ink lines.

I’ve also discovered (or perhaps re-discovered, after many years?) that you can preview and design a new Sketch render preset in 4000px. First turn off all the Sketch Designer’s also-sketch-lines-into-the-background panel sliders (which speeds it up enormously) and do any old Sketch render to that size, then leave the finished render ‘live’ while going back to: Render | Render Settings | Sketch Designer. This time the Sketch Designer will take some seconds longer to load. That’s because it’s now picking up the settings from the finished render and offering you a live preview at a huge 4000px. As such you’ll have to pan wildly across the preview, to get your object back into view again. But you can then design Sketch presets which work for a 4000px render…

Sadly it seems to be no way that convincing traditional cross-hatch ink shading can be done this way, except perhaps as a very lucky accident for one-off character portraits. By ‘convincing’ I mean I need it to work like a human inker would — follow and hug into the shadows, follow curved surfaces with a suitable angle-of-attack, and not start whorling and swirling about. Update: it can be done, but needs tight control of other variables.
Still, while the Sketch Designer has its limitations in terms of realistic cross-hatching , it’s also fairly easy to take it far away from its usual ‘teeny-weeny hairlines’ default presets…

For reference, if you want to share any Sketch Designer presets you’ve made, your personal ones get stored as .pzs files in one of Poser 11’s many obscure hidey-holes, at:
C:\Users\USERNAME\AppData\Roaming\Poser Pro\11\SketchPresets
The excellent 2D animation software CrazyTalk Animator is now shipping the promised .PSD Photoshop templates with the $299 CrazyTalk Animator Pipeline version 3.1 (not to be confused with 3.01). This is from Reallusion, and so the new templates are very clearly documented.
This relatively-simple software also looks increasingly useful for re-posing 2D characters of the sort used in webcomics production, to save a whole lot of hand-drawing. So it might be considered by artists, even if you don’t want to plunge into all the pain and fiddly slogging that comes with making a full-blown animation with its backgrounds / video-editing / voice-acting / music / titles etc.
Also, I see Reallusion has iClone 7 on a pre-order with special discounts, for delivery in “June 2017”. Upgrading from iClone 5 Pro would cost $199, and that would include the vital companion software 3DXchange 6 Pro (required for working with the current incarnation of 3D Warehouse, older 3DXchange versions being no use now in that regard, because 3D Warehouse have junked all their old file versions).
I’ve looked at the new features but am not really tempted to get back into iClone, unless perhaps… if iClone 7 reveals a Comic Book inking mode that can do better than Poser 11 can. iClone 7 development looks to be pitched heavily toward meeting a slate of industry pre-vis feature requests, and competing with videogame engines such as Unreal and Unity (both free, but for now they’re stuck with nightmare interfaces intended for game developers).
There appears to be a need for a Poser script to quickly apply a colour-adaptive toon material to all surfaces.
There are of course several automated material-replacer Poser scripts, which can work en-masse. For instance, you pick one material .mt5 and then apply it to all your selected materials on a character or prop. Simple script panels such as Transfer Material will do single textures, and XS Shader Manager (looks old, but it still works fine in Poser 11.2) will do much more. MATWriter Panel lets you save a MAT file preset once you have everything applied.
But with Poser 11’s new Comic Book mode, what we now need is a script which does such a replacement, but… which first reads the base colour in the material to be replaced, and then automatically adjusts the colour of the newly applied material accordingly.
For instance: I want to replace all materials on a prop with a neutral two-tone toon material. Where the new material replaces a red material, its colour will be automatically switched to more-or-less the same red colour as it replaces.

I’m not sure if this is possible. The script would presumably need to…
1. Look at the material’s base bitmap, and any colour shading that was being applied on top of that.
2. Then output a ‘best guess’ at a suitable replacement output colour.
3. Then adjust the duo-tone toon material’s colour ramp accordingly.
Having such a script would speed up the process of toon material replacement across a large scene, for use with the Comic Book mode in Poser 11.
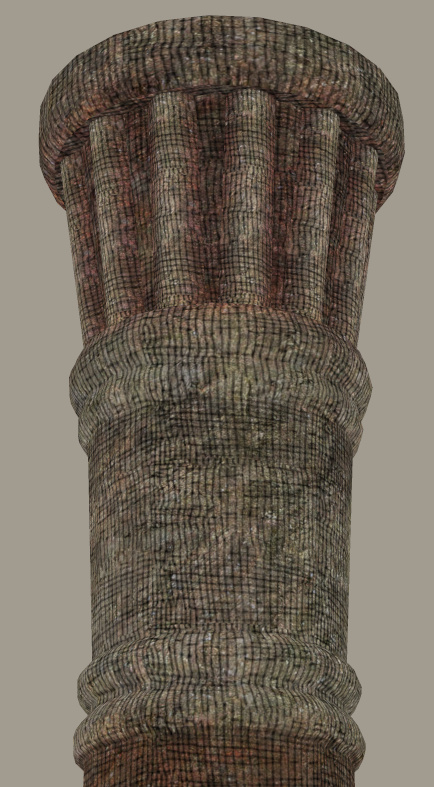
One can of course ‘burn off’ much of the prop’s 3D material colour, when using the Comic Book mode (see below). But even when at optimal burn-off, it’s still sometimes not ideal…

Which is why such a script would be useful. It would be like the old llanimeall.py script, but intended to quickly optimise all materials to work with Poser 11’s Comic Book preview mode.
Update: in the animation industry such things are apparently called Matcap (MAT capture) shaders.
Incidentally, I found that the old llanimeall.py Anime script is still available via the WayBack Machine. It’s been overtaken by the Poser 11 Comic Book mode, but some users may still want it for something. For Poser 11 the script goes into C:\Program Files\Smith Micro\Poser 11\Runtime\Python\poserScripts\ScriptsMenu where I have a FavoriteScripts\Toon Shaders folder.
I sort-of got the script working again, at least on some test shoes, by pasting the whole /runtime/ folder (found in the .zip) underneath that…

But it gives multiple error-messages, and is obviously unable to do the vital mat-cap bit. The script only ever worked on Poser 10 (not 2014, which was the Pro version of 10), and I’ve never heard of anyone but the maker Digitani who was able to actually make his script work.
But even if you don’t want the script, the LLToon.mt5 and LLAnime.mt5 materials may be useful to study, and can presumably be applied en-masse using one of the scripts linked at the top of this blog post.
A quick-start on the absolute basics of how to add a new blended materials layer, using Poser 11.
Layers work somewhat like they do in Photoshop, in terms of the basic ability to blend them into one another.
1. Go to the Materials Room. Click on a scene material you want to overlay. Click on the Plus icon…

2. You’ve now made a new Materials Surface. The old one is still there underneath, it’s just that you now have two layers and the new one is on top.
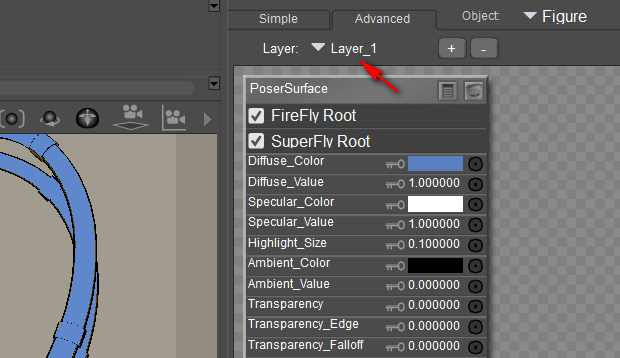
3. Make the new layer semi-transparent, by dialing its Transparency down to 0.6, so we can see the old layer coming through the new. Then, for fun, load a ‘Spots’ preset into the Alternate Diffuse.

4. There’s now a ‘spotted cow-hide’ like effect, because the new spots material layer is blending in top of the original layer. There are lots of presets like Spots. They’re explained in the PDF Manual in Chapter 15, 16 and 17.

2D textures can also be loaded into the blending layer. There’s obviously a lot more to this layer blending feature, which I haven’t yet investigated, but that’s a basic four-step starter to get someone started.
Update: multi-layers appear to be for SuperFly rendering only.
There’s a new predictive industry report on 3D software, from Indian analysts Technavioforecast. They suggest that the “global animation design software market” to grow by 16%, to be at $4.288 billion by 2021. Keep in mind that this market report is focused on animation production and thus includes and will be skewed by the huge videogames industry. As such it presumably doesn’t consider the uses in comics and artwork production, event and theatre pre-production, and industrial uses such as architectural and store design rendering.
The report suggests some main drivers:
* increased use of animation design in movies and video games.
* use of animation design software for TV commercials [and presumably also for Web].
* a rise in demand from the Asia-Pacific region inc. Russia. With… “China, India, and Japan leading this growth”.
Fairly obvious stuff. Off the top of my head, I’d suggest that a few other factors will be:
* increasing automation and optimised workflows within the software.
* a large and growing number of able older people, retired and still adept with their hands and their PCs, with the time and money to learn the software as a hobby.
* faster rendering via the move to 8-core PCs and faster video cards. Also on the horizon are “render farms in a box” (44 cores in a cool quiet desktop BOXX, currently £3,800 but that sort of thing will fall in price in five years if the market sees competition).
* excellent tutorials, webinars and support, making the ‘on-ramp’ for the software vastly easier than the way things were 10 to 15 years ago.
* this ‘on-ramp’ is aided by the increasing use-ability of mature software (think Poser 11, Vue 2016 R2, CrazyTalk Animator 3 etc). The same can be said for the wider 2D ecosystem of support software (Photoshop, Clip Studio, SketchBook Pro etc) and their digitising methods. Judging by 3D World magazine, the same thing is happening over in the university-students-and-professionals market (3DS Max, Maya, Zbrush etc).
* there are new commercial content niches for paid content made with this type of software, in markets often uncontrolled by establishment media gatekeepers. Production and sales distribution are both aided by the ease of getting affordable no-hassle assistance from the likes of Fivver.