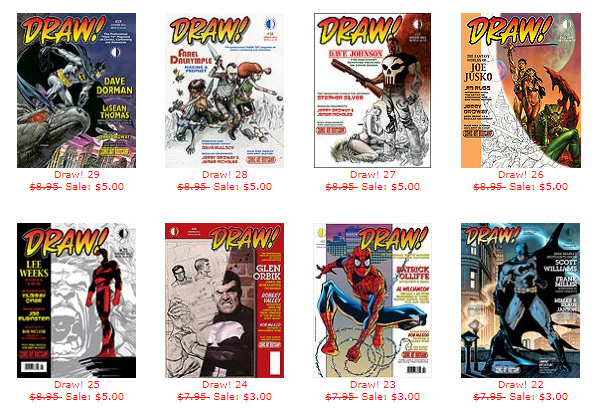
Just released, FontForge 2019. FontForge is the free and open source font editor and creator. Not 3D, but kind of handy if you want to make and tweak a font of your own hand-lettering, for a comic. FontForge 2019 is the first new version since 2017.
poserworld.com returns
The old Poser World website is back up and there’s a message there that the former ‘lifetime members’ can again access their legacy downloads. I tried the login, but obviously what I purchased back in 2012 was not a lifetime pass and must have been a three-month pass or something.
The old catalogue is also online, though not functional, so at least it provides a catalogue of what used to be available…
I see that some bits of the old Poser World content are also now starting to show up on Renderosity, as well as at VanishingPoint (which appears to have purchased the old Poser World content as a job-lot). It seems a good time to re-appear, as there appears to be something of a small revival of interest in the best of the old A3/M3 V4/M4 content for use in Poser. I guess it’s partly down to a new generation of Poser users who never got the chance to collect a huge runtime over fifteen years or more.
I wonder if the plan is to start making new Poser content again, while pointing the old catalogue pages to links at Renderosity/VanishingPoint?
$100m of Epic MegaGrants
Unreal Engine | Epic MegaGrants. $100-million, apparently. Applicants don’t have to have a game… “Anything in UE4 or relating to UE4 is eligible.” Or even something made in Unreal… “If your project is built in another engine or toolset and you want to move it to UE4, you are eligible to apply for an Epic MegaGrant”. It’s not restricted to the U.S…. “If we can legally make payment to you, you are eligible.”
Random City Maps
The UK’s Marcus Johnson has a new 2D RPG Random City Map Generator for just $1 on ArtStation, and the licence allows… “up to one commercial project (up to 2,000 sales or 20,000 views).” It hooks into the free Substance Player, and needs it to work. Not sure what the output resolution and anti-aliasing is like, but presumably one could wrangle these into an isometric view and then pop 3D rendered PNGs on top.
The old Poser World content
What appears to be some of the old Poser World stuff is appearing for sale on the Vanishing Point store.
I picked up all of their unusual and worthwhile content when they had a generous “all you can download” offer, in 2012 which was late in the life of their site.
But they had a lot of nice V4/M4 uniforms and M3 historical outfits that some people have missed since they departed.
So it’s good to see that some of these are starting to become available again. They’re still useful for overpainters and comic-book makers, or people who need lots of extra costumed characters in a historic scene.
Some of these are also on ShareCG, where there’s a rider… “Original model by, and acquired, from Poserworld, and now owned by VanishingPoint.” So it looks like the old Poser World content has been sold as a job lot.
MediBang! Contest 2019
Tokyo’s MediBang! and Manga CPO have joined forces for a new contest with two sections, Manga and Illustration. They want a max. 32-page manga style comic, and / or an unpublished comic-style illustration on the theme of “Journey”. Free entry, and it appears to be open worldwide though they obviously expect to see a Japanese style in the entries. Deadline: 7th May 2019.
MediBang appears to be a sort of store platform for indie manga creators to sell their comics and illustrations in the Japanese market. They also offer the free MediBang Paint software, now fairly mature at version 23.x, and Jump Paint which is more of a guided experience with embedded tutorials for new manga creators. The contest doesn’t appear to restrict you to just this software.
ClipStudio – innovative new features demo
The paid ClipStudio (aka Manga Studio) has a new short video demo of its new ‘autocolour line art’ and ‘pose extraction’ tools. The autocolour gives ClipStudio parity with the free Krita 4.x, and the semi-automated pose extractor is only in quite experimental stage at present. Notice how there’s an abrupt jump-cut in the video as we jump from the basic and rather clunky pose extraction…
… to something that’s obviously had a quite a bit of hand-tweaking…
Still, that it can be done at all is very promising for the future. And it’ll surely be coming to other software, as the research for it is in the public domain.
On the flat
Here’s a fine visual demo of the general concept of having ‘colour flats’ first and then laying ink lines and panels/balloons over the top, when making a comic book page. It’s from Lovecraftian illustrator and Spanish comic artist Juan Aguilera Galan.
Obviously he’s not using Poser and 3D, but it does suggest another possible workflow for digital artists making a comics page. Something like…
1) Make real-time Preview renders for separate colour flats and inked line-art, as usual, from Poser 11.
2) But… then arrange the colour flats into an entire page in Photoshop, as per the rough storyboards. Include aligned ink line-art as per-frame layers, but keep them all turned off.
3) Once laid out as colour flats, then merge and copy out the entire page of arranged colour flats (rather than filtering one element/scene at a time) to a new document and filter them.
4) Paste the filtered results into the page, then hide the unfiltered colour flats, and then turn on the inks lines. Then add a shadows layer, boost contrast etc.
Depending on the Photoshop filter used, doing it that way would potentially mean that the colour flats on the page would appear more unified in appearance than if each frame element had been filtered individually. Since you would be filtering them all at once. Obviously this assumes that you don’t have rapid scene changes from dark to light spaces, within a page.
Doing it this way may be especially useful in maintaining consistent skin-tones and other repeating colours across a page.
Vue has Python scripts
Vue has Python scripts. Who knew? I didn’t, or had never investigated them and forgotten. But Ironsoul did, and mentioned it on the forums. So thanks to him. He pointed out that ImpWorks has a large slate of them for free as direct .ZIP downloads. Also a Vue Python scripting tutorial. Vue 2016 is not listed in the scripts compatibility list, but there’s no reason to think the ImpWorks scripts won’t work in the final version.
One such is…
* “Python scripts for loading and saving camera data to and from .CSV files. These scripts are useful for moving camera animations between scenes.”
Could this or something similar work with the “Poser – Export Poser Cameras and Lights” script which saves Poser camera co-ordinates out to .XML? To then pass Poser camera co-ordinates over into Vue, and have Vue locate the camera within an imported Poser scene? Or are the camera co-ordinate systems mutually untranslatable?
Other useful sounding scripts at ImpWorks, though possibly superseded in Vue 2016 by newly native features, are…
* “This Python script coats the outside of an object with an EcoSystem.” it works in Vue 2016. Keep the instances low, and the scales relatively small. Test first with 100. 5,000 is going to take ten minutes to cover a sphere. Could you make a ‘little planet’ with this? You could if you had about two days to tinker. It takes absolutely forever to design one good ‘little planet’ result, and then longer to render the damn thing. Not worth it.
* “Make the sky a solid block of one colour.”
Others:
Vue Infinite Python Scripts Page.
Blender to Vue.
Vue to Unity Terrain.
Working with the Vue interface with Python (GIS code snippet).
On my PC, Vue Python scripts live at…
C:\Program Files\e-on software\Vue xStream 2016\Python\Scripts
D-NOISE for Poser and DAZ renders
There’s a free D-Noise add-on from Remington Graphics, for the free Blender. While I’m loath to recommend Blender to anyone, this is a top-class state-of-the art GPU de-noiser judging by the tests.
And the Web page blurb for this plugin also states that…
“D-NOISE can run on any image loaded into the [Blender] Image Editor including texture bakes and even photos!”
Thus it seems that, once you work out where the the Image Editor is in the infernal Blender interface, you could then use Blender to denoise iRay and Superfly renders made with Poser and DAZ. It may be worth a try if you’re not satisfied with what you’re getting by removing the fireflies and speckles via other methods. It’s all free, bar your time. I figure that it might cost someone new to Blender about three hours of work to get it all installed, set up and the focussed de-noising workflow pinned down for use with iRay and Superfly renders. If you have a go, please comment on this post and let me know how it went for you. I don’t have the required NVIDIA GPU, so I can’t run it.
If experience with A.I. GigaPixel has made you think that anything “A.I.” takes days to run, fear not. It runs quick, like ‘five seconds quick’ according to Remington, but only with an NVIDIA GPU. It thus requires a… “NVIDIA GTX 600 Series or newer”, which means a card from 2012 or later.
It’s also interesting because it’s geared to 3D render noise, whereas most de-noiser software appears to be more focussed on the mass-market camera market and camera sensor-noise.
There’s a handy new 20 minute tutorial on how to use it.
The new NPR render presets in ZBrush 2019: Part Two
This is Part Two of my test of the new NPR ‘art filter’ capabilities in ZBrush 2019.
In Part One I wrestled ZBrush into a state where a decent anti-aliased print output could be had at a large size. Doing that is a vital pre-requisite for any NPR render intended for comics, illustrated books, magazines, t-shirts etc. NPR is not much use if it’s full of jaggy edges and 800 pixels.
Continuing into Part Two of the test, I immediately encountered a huge roadblock when I tried to import a 3D test model from Poser.
IMPORT OPTIONS:
* Import from Poser: While it is possible to easily and swiftly send a posed character over from Poser 11 using Go-Z, the character only imports into ZBrush as a bare mesh with a red clay texture. To totally jettison the Poser textures seems a big loss, in terms of creative possibilities. Apparently ZBrush can only handle one single texture map?
* Import from .FBX file: What about an .FBX then, with embedded textures? No. To my slight amazement, ZBrush cannot import .FBX files. Or, if it can, it’s not in my version or I just can’t how to do it. Update: FBX import is now possible for ZBrush, but seemingly not with textures.
* Import from .OBJ: What about a fallback to .OBJ, then? The problem is that again ZBrush imports a mesh without textures. It seems that ZBrush cannot import and apply textures onto an .OBJ one-by-one by referencing the .MTL file, like any other 3D software does. Instead ZBrush needs the object’s materials saved out into a unified single Texture Atlas (like videogames use). And even then, getting that back on the model inside ZBrush appears to be an incredibly fiddly process and the UV mapping can be horribly awry. (I also had “Unable to read specified file” errors when trying to import a .JPG texture to use with the mesh. Seriously? ZBrush can’t read a standard .JPG that every other software on my PC can read? Who designed this mad software??)
Import of a Poser mesh, for some light re-sculpting, obviously works fine via Go-Z. I believe DAZ users have the same import option. But equally obviously the import of a mesh with original materials is simply not feasible — if all one wants to do is NPR rendering for comics (rather than for sculpting).
NPR APPLIED TO BARE MESH:
Still, I figured that the NPR might be applied to the raw mesh and yet look good. Perhaps the resulting NPR render might be coloured or otherwise filtered later. It seems a pity to throw away all the materials on a Poser model, but that’s obviously just the way it is with ZBrush. Thus I continued on with the test of the NPR filters, using the Poser robot I had previously used for my Krita filter tests.
The GOOD:
‘Sketch Line on Paper’. Very nice, though obviously the naff paper effect needs to be removed.
‘Notebook Doodle’. Again, a nice effect, but the notebook paper effect needs removing.
‘B&W Thin Outline’.
‘B&W Anime 01’.
‘Line art’.
‘Blueprint 03’. Nice clean lines, though the gridded paper needs to be deleted.
‘Blueprint’. A very slight chalky effect added.
THE MEDIOCRE:
‘Zehlong Ink’. You’d do better with Krita and G-MIC.
‘Orange Print’. This one is going to launch a thousand garish student-bedroom wall-posters, probably with dreadful typography added. It is quite nicely done though has bizarre touches.
‘Underpainting’. You’d do better with DAP or Poser’s Sketch Designer.
‘Thin Paint’.
‘Oil Paint’
‘Pencil Sketch Detail’.
‘Line Art 2’.
‘Comic Style Lines’.
‘Messy Sketch’.
‘Illustration Flat Colours’.
‘Watercolour’
‘Flat Watercolour’.
‘Dark Ink’.
‘Coloured Pencil’.
‘Charcoal on White’.
‘B&W Sketch’
THE UGLY:
‘Pencil Ink Sketch’. Computer say no.
‘Ink Gouache Colour’. Sprinkled with… something.
‘Heavy Stokes’. With an axe, in a forest.
‘Sketch 01’. Oh no, the spray-paint can exploded!
‘Pencil sketch’. From the dreams of H.P. Lovecraft.
‘B&W Anime’. It hates red.
THE UNMENTIONABLES:
I tried all the BPR/NPR presets, but about a dozen were too mundane, horrible or pointless to even show. To be charitable, I guess some of these require certain lighting and specially textured models to work as designed.
In Part Three I’ll have a go at finding out what styles makes the good NPR filters tick, how to take the lined-paper effect off them, set up flatter lighting, and if it’s possible to get variable tapered ink lines and believable ‘hand-drawn’ hatching into shadows. Also how to stack and save presets.
The new NPR render presets in ZBrush 2019: Part One
This is a tutorial for complete and utter beginners with ZBrush, who just want to test the exciting new NPR features in ZBrush 2019.
This tutorial uses the only method I found that worked in ZBrush 2019 that gives proper anti-aliasing on a large canvas — without which NPR filters are useless. Thus much of this first tutorial shows how to wrestle ZBrush into a setup suited to NPR destined for the pages of a comic or magazine. I’m not an expert, just a fellow total newbie who carefully worked out what the workflow is supposed to be.
1. Firstly, don’t even try to understand ZBrush’s baffling and non-standard user interface, unless you’re willing to spend at least a day just watching tutorials on it.
Instead, just load ZBrush. You will then be asked to pick a preset project from the Library. Pick a good choice for a NPR test, such as the obvious default “Demo Head”. Double-click on the head’s preview icon, to load it. We see a flickering old floppy-disk icon appear. Then after a few moments a little text message will appear in the upper left, saying that the project is loading. Wait for this to finish loading before continuing.
2. Now we need to force ZBrush to use full maximum-strength anti-aliasing on a big canvas. NPR filter effects, such as hatching and line-art, are no use if there’s no powerful anti-aliasing going on, and also if the final render size we get is puny. Thus there is a vital need to first set up a large Canvas. To do this go to: Top Menu | Document | Double.
3. Press the “Double” button twice. The second time will trigger a Windows alert. Click “Yes”.
You can go up to 8k on the Canvas, but if you do ZBrush becomes very sluggish and unresponsive. It seems that 2 x Double is the ideal.
(Incidentally if you were wondering what the orange “Pro” button here is, it doesn’t mean you’re on “Professional” settings. It means the “Pro-portions” of the Canvas are locked together).
The head will now look terribly jaggy, as we can see here…
But don’t worry, as we’re going to delete this horrid head. We’ll replace it with a fresh identical one. The new head will match the new big Canvas size we just set in the Document menu, and it will be much smoother.
4. But first we must now go: Top Menu | Layer | and then with Layer 1 selected we press “Clear”. This deletes the first head. OK, we now have a large cleared Canvas at a size that’s theoretically feasible for production use for comics.
5. Now we load the same head model onto the Canvas again. To do this, first glance over on the upper-right hand side of the UI — where the “Tool” panel should be visible. This glance is just to ensure the brush is set to “DemoHead” as it should be.
Then we left-click with the mouse near the upper left edge of the Canvas, and drag-hold to “draw out” (i.e.: place and then enlarge) the DemoHead onto the Canvas.
(At this point there’s also an alternative route, of bringing in your own .OBJ model. ZBrush can’t handle .FBX files, or if it can it’s not in my version. Import is also done over on the Tools panel on the upper-right, via the “Import” button. But let’s assume we’re continuing with the default head, for our NPR test Update: FBX import is now possible for ZBrush).
6. Then once the object is roughly placed on the Canvas we immediately press “T” on the keyboard to escape from the the “DragRect” placing tool. We have to press this button now, or we’ll never be able to escape the “DragRect” mode and will be trapped in it. ** It’s absolutely vital not to skip past this step and omit it! **
7. Then we go on to adjust the head with the side-toolbar buttons (“Move”, “Zoom 3D”, “Rotate”) so that it has the angle and position we want. Then over on the right hand toolbar we click “AAHalf” and then “Frame” (not the other way around!). This sets up a basic anti-aliasing trick and frames the head on the Canvas. Only when the zoom factor is exactly 50% are the contents anti-aliased by ZBrush, or so I’m told.
8. Then the head’s mesh needs to be smoothed a bit, to make it a better test subject for NPR. Press Ctrl + D twice on the keyboard, to smooth the head’s mesh by subdividing it. It appears that ZBrush will only let the user subdivide a mesh three times. OK, so after doing that we have a nice smoothed head, centred on a large Canvas, and with a basic anti-aliasing trick applied.
The basic setup is now done. Sadly we can’t now save this changed project file and have it carry the large canvas settings within it. Save it and load it again, and it just loads into the puny default canvas size. So far as I can see there’s no way to force ZBrush to always use a higher default Canvas size. It always loads to a useless 1479 width, which then needs to be manually doubled and doubled again.
All this fiddly setup rigmarole should really be made far easier by ZBrush, like ONE BUTTON with ONE CLICK, and the button labelled “Automated Setup for Print”. But for now, at least, we have the basics all set up.
9. OK, now we can finally open the NPR Presets Library, by going: Top Menu | Render | BPR Filter | Lightbox > Filter.
Confusingly, in ZBrush “BPR” = “Best Preview Render”, and the acronym has nothing to do with “NPR” (Non-Photoreal Rendering). Yet the “BPR Filter” menu item is how we drill down to preview and load the NPR presets.
Don’t they look lovely? But, as seen here, some are hidden from the user. Why the Library display can’t just show everything in one single view, I don’t know. These hidden presets can be revealed by left-clicking anywhere on the preset library display, but only if the user knows to hold-and-drag the left mouse button over toward the right. Doing this will slide the Library presets view over to the right, thus revealing the hidden presets. So far as I can tell there’s no way to see them all together, all at once, in ZBrush.
But here I’ve Photoshopped them together…
10. Choose and load an NPR preset, by double-clicking on its visual preview. We should see a text message briefly appear, up in the top left of the user interface. This will say something like: “Opening a ZBrush Filters file…”. It might take about ten to fifteen seconds.
It’s quite possible that nothing will then happen to the sculpted head on your Canvas. The user may be puzzled by this — didn’t the slick demo videos for ZBrush 2019 show the NPR filters being instantly applied in real-time? Yes. But that only seems to happen for some of these NPR filters. For the rest, it seems we need to then manually press the “BPR button” that’s located at the top of the right-hand bar…
“BPR” = “Best Preview Render”, which seems to translate as… “OK, ZBrush… make a Preview render at the best quality you can”. On a large canvas this may take a while. First the basic render is done, then ZBrush will appear to pause while it also adds the NPR effect we just selected. Then it will lay the NPR effect on top…
See how nice and smooth it is. No jaggies. That’s because of the tedious ‘big Canvas’ setup we did at the start.
Note that this NPR effect only seems to work on the BPR Preview render mode, not on “Best” render mode.
11. Now we want to save this final render to a file. Go: Top Menu | Document | Export, set a file name and folder destination.
The newbie user might think that’s it, and go off looking for the render they think they just saved. But that’s not it. What ZBrush is now showing on the screen only looks like the Canvas. It isn’t the Canvas, it’s actually an Export window that only looks like the Canvas…
Only once the final vital “OK” button has been clicked, do we at last get the render saved.
It may be disappointing to find that the model is stuck in the middle of the big Canvas, and is barely 1k once cropped out. But it seems that that’s the way ZBrush rolls, in order to get anti-aliasing. It’s only 72dpi (ZBrush can go no higher) but is just about an adequate size for a comic-book panel on a six-panel page. Though it is going to cause severe frowns from a magazine editor who wants a cleanly anti-aliased full-page cartoon illustration or front-cover at 6000 pixels and 600 dpi. The same is going to be true of publishers of children’s books, posters, t-shirts etc. A 1200px 72dpi render is just rubbish, to them.
(Apparently one can zoom to see the whole Canvas, then “Zoom 3D” to resize the model to fill the Canvas, then render and get a really big render with the object filling the render. That might get you a 4000px object, but the problem there is that it’s not anti-aliased. So far as I can tell, full useful AA is only applied when you click the “AAHalf” button, and doing that unavoidably shrinks the object back down into the centre of the Canvas.)
In some ways it might actually be quicker to just take a screenshot of the final render-export window, and forget the save from ZBrush. Both the screenshot and the export will be 72dpi. Then you could just paste the clipboard straight into the likes of a Comic Life frame. It won’t be masked, but then (unlike Poser 11) neither is the PNG exported from ZBrush.
You can however also very easily and quickly save additional render types from ZBrush, such as a simple mask as a .TIF render…
Over in the “Zplugin” folder, there should be a “ZBrush to Photoshop CC” plugin, which can apparently also export and bundle all the rendered BPR layers into an aligned Photoshop .PSD file.
OK, that’s it for Part One. Now that we’ve wrestled ZBrush into an approximately NPR production-ready form, in Part Two I’ll look at the NPR effects themselves and if they’re worth having.
Added to the sidebar: G3 and G8 to Poser
Added to the ‘Plugins: Poser’ section, over on this blog’s sidebar…
Genesis 3 Poser Updater for Poser 11.
“Product Notes: NOW UPDATED FOR GENESIS 8.”
It’s a freebie. Seems to have been updated for G8F in summer 2018. It processes G3 and G8 so they can be imported into Poser 11.
How to turn .WEBP images to .JPG
How to turn .WEBP images to .JPG, easily and for free.
What is it?: the .WEBP format is an image file that still experimental and without defined standards, but is occasionally found being used commercially in early 2019.
Where does the problem lie?: Most modern Web browsers are fine at displaying them, but once they’re downloaded locally to Windows they become a pest. Windows 8 can’t preview them as visual thumbnails in the file explorer. (I’m guessing that Windows 10 may also have problems with them, as they appear to be a ‘Google thing’?)
What’s the fix?: I was unable to find anything that ‘fixed’ Windows 8.1.1x to show previews of downloaded .WEBP files, in either Windows Explorer or Explorer++. However, for now, the best workaround seems to be simple quick conversion…
1. Get the free IrfanView and its plugin installer pack. The plugins enable .WEBP support.
2. When Windows can’t preview a downloaded .WEBP file, right-click and open it with IrfanView and save it as a .JPG at 100%, to the same folder and with the same filename.
3. Delete the .WEBP files.
IrfanView has batch convert capabilities, if you’re saddled with a whole folder full of these pests.
ZBrush 2019 – ‘NPR for comics’ heads the new features list
The ZBrush 2019 new features are out…
The big one is NPR, which offers… “a hand drawn 2D style and even take your sculpted creations into the pages of a comic book.” Very interesting, though from the look of the samples I doubt it beats Poser 11 for either i) hand-drawn-ness of the ink lines, ii) ease-of-use, or iii) speed of real-time rendering.
While the pencil effect looks adequate, and the hatching on the second example (below) seems to follow the contours of a very boxy 3D model, I can also see the shading zip-tones slicing through geometry as if it wasn’t there…
The question is then… can that ‘follow the angles’ hatching (on the second example) also work on more rounded organic shapes, such as characters? The texture-bunching weirdness seen happening on the gun’s round scope suggests not.
ZBrush 2019 does have MATCap — meaning that (apparently) the toon outlines can pick up their colour from the 3D material applied below them. Which is cool if it works well and automatically.
Still, the ‘demo comic’ graphic makes it look like the new ZBrush is at least worth a test once it’s available, to see how easily all this can actually be done. There’s a lot being added in post here — look at the (hand drawn?) floor, added texturing on the pillar, and (painted?) sky background…
Poser 11 would give you the colour flats as well as the ink lines, possibly saving work in colouring.
But I guess this is ZBrush’s move to an approximate parity with the free Blender and its increasingly powerful (if incredibly fiddly) toon capabilities, rather than Poser 11/12. If that’s the case, then I guess we’d expect to see the $180 ZBrush Core 2019 have all the NPR features of the main ZBrush. Yet Core currently lacks “2D and 2.5D painting and drawing tools” and a whole lot of other features that a sculptor/toon-illustrator might want.
Ok, well… these are just my first few minutes of reactions. I’ll obviously have to give this feature an in-depth review when the time comes. A lot will depend on if the toon lines are just standard uniform toon-outlines (as they seem to be), or are variously weighted inking lines which can look like they were made by a human inker. But if they had ‘tapering/variable line weights’ and ‘hatching that follows curved contours’, then surely they’d be showing it in the demo pictures?
There’s also lots of other new stuff in the announcement. Though that seems only of interest only to ZBrushers, such as the expected Folders, Retopology stuff, a better camera system.


