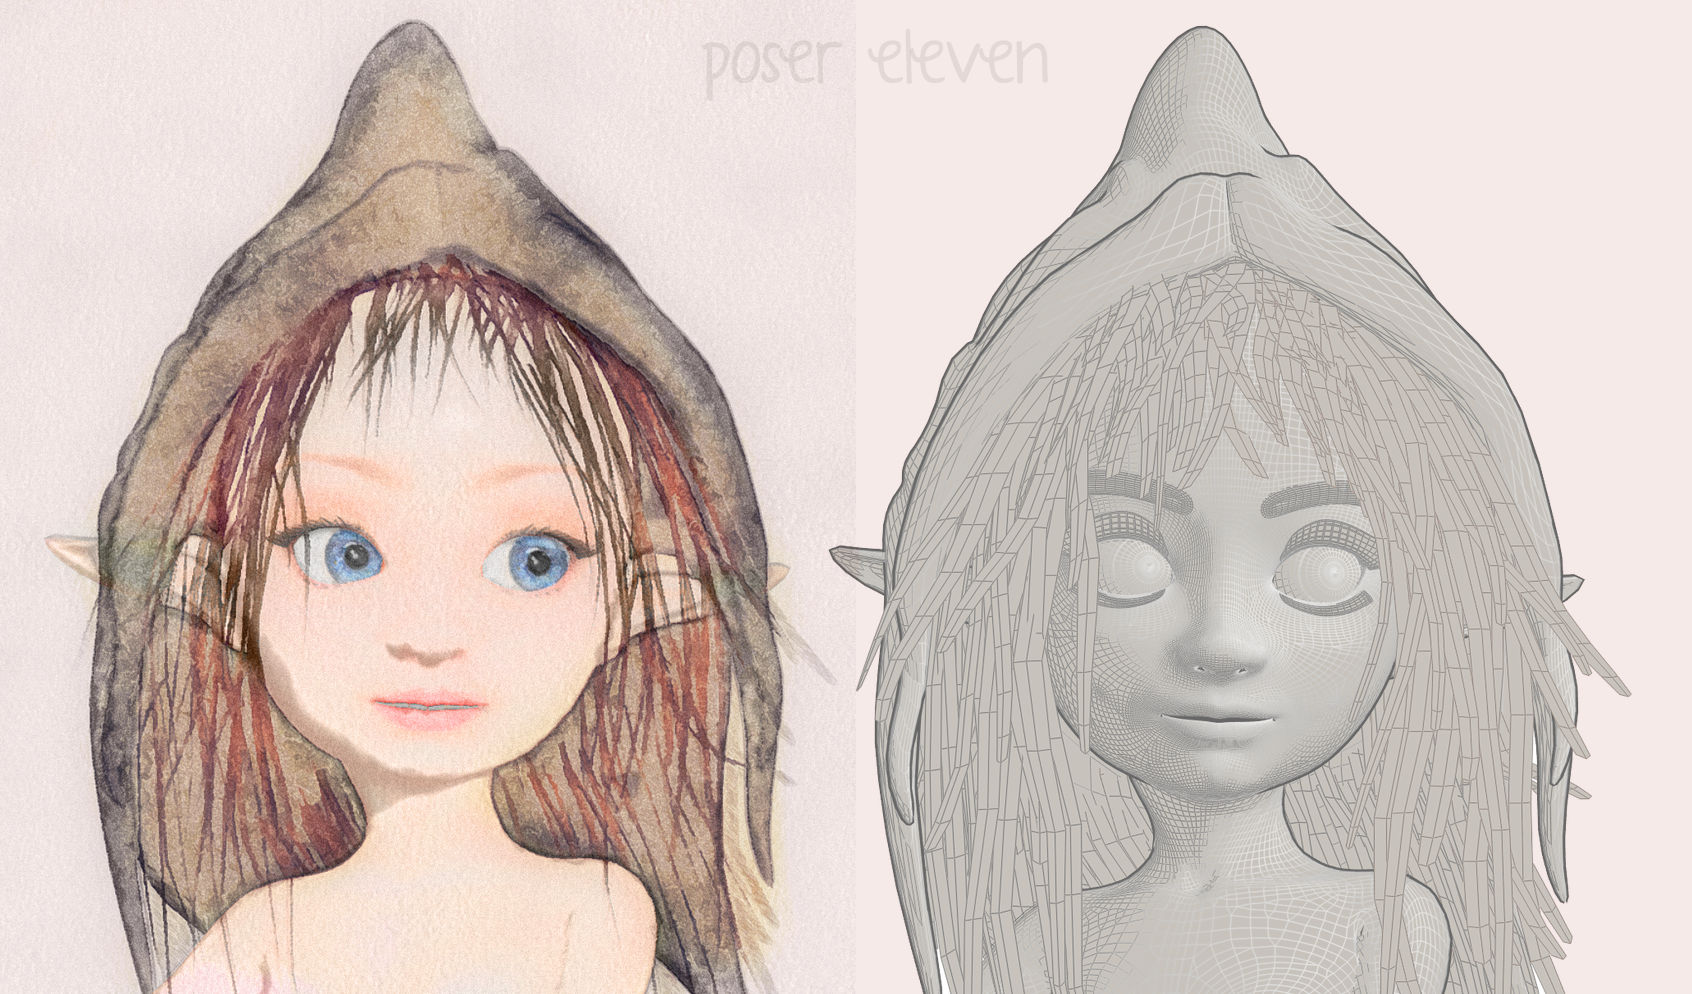
There’s a new 70-minute series on YouTube from Tony Vilters, Poser2Blender. It appears to be of use to figure-based content-makers, rather than those wanting to get a scene to Blender for NPR rendering. But there are also some interesting observations on how Poser exports .OBJs files for figures.
Category Archives: Tutorials
DAZ to Freestyle
I was pleased to find a new YouTube video from the 3D Comic Creator, “DAZ Studio To Blender To Freestyle For Inking Your Comic”. He shares an in-depth 90-minute workflow for taking a DAZ Studio character into Blender and wrangling Freestyle lineart onto it. It’s clearly explained and he’s a good presenter.
I’m not sure I’d want to go through all that pain and intense fiddly-ness, though. Just to get what Poser 11’s Comic Book mode / Sketch Designer can output ‘at the drop of a hat’ in real-time. But it’s interesting to see how the most advanced DAZ users are trying to make artwork for comics. And as Freestyle is currently something of a “moving target”, along with the rest of Blender, there’s always the possibility that Freestyle and other NPR aspects of Blender will start to become easier and more automatic to use, in future. But for now the problem with Freestyle is that it’s old, and thus can only use one CPU thread. It’s not multi-threaded. Nor can it work with alpha-channels.
It’s very early days, but a better option might be a project called BEER/Malt that intends to try making NPR easier to get from Blender. Another hopes to add an easy SketchUp-like ‘sketched outlines’ capability to the default install of Blender (something you can only do with a paid plugin at present). Although both have very primitive demos at present.
Some ideas on quick-sketch ‘explainer videos’ with Poser
You remember those “whiteboard animation” videos, in which a hand super-quickly drew a sketch, words get laid down, while there’s a voiceover? They were the ‘hot new thing’ circa 2014, and generally now go by the name of “explainer videos”.
Production of them is now a Cloud or tightly Cloud-locked subscription thing, and there appears to be no desktop-only software worth having for making them quickly and easily. The leading $40+ a month names are Sparkol VideoScribe Pro and Easy Sketch Pro, among others. There’s obviously a lot of money in such services, and the Web is very intensively astro-turfed with page after page of spam and misleading marketing on such things. It’s almost impossible to find reliable information. Anyway, they exist, and the market leader VideoScribe has impressive capabilities, yet is fairly simple to use.
Their lustre has faded, as a media form. ‘Explainer videos’ were very hot in 2015-16 as we came out of the Great Recession, but they became over-used for mundane purposes — often purchased off the shelf for $20 from quickie providers in the back-streets of India, via Fivver. Such indifferent use has turned them into the humdrum Powerpoint slides of 2020. Meaning a superficially fancy presentation of fuzzy or half-baked ideas, done in a manner that’s then difficult to question or challenge. Thus making the format one that people now wince at, when they see it hove into view in a business meeting, teachers’ meeting or in a marketing context.
But that doesn’t have to be the case, and with a good story to tell and some creative flair they still have a place in education, especially for children and in lower-level work training. That set me wondering about how one would get a Poser line-art render to animate as if it was being drawn line-by-line by a human hand. Being able to output such a thing might be an attractive feature for Poser 12.
The basic method is fairly simple. Lineart as a vector .SVG is just a bunch of vector paths, usually laid down by hand in a certain order. A good .SVG keeps note of the order in which the ink lines were laid down, and apparently it then embeds this information in the file. Javascript can then be run on each vector line to “dash” it. Make these dashes long enough, then cycle through them with a bit of maths so that the dashes appear to “slide along the line”, and that’s the basic way you can give the illusion of lines being revealed. That, apparently, is how the trick is done.
As first I wondered if Smith Micro’s MotionArtist could do this sort of “reveal a drawing effect”. Nope, seems not. Reallusion’s Cartoon Animator? Nope. You’d think that such a sales-worthy feature would be a natural one to add, but it’s not.
What about the vector tools? Surely there’s an Inkscape plugin? Nope. Clip Studio? Nope, seems not. Paint.NET? Nope.
Then I thought about Poser’s ability to output a Corel Painter script, for playback in Painter. But my in-depth look at that nearly forgotten Poser feature shows… that it does not actually lay down “strokes and lines”, whatever the end result may appear to be. Like I said above, a lot of this stuff is in the realm of “smoke and mirrors”, in terms of how it’s actually done vs. what it actually looks like.
But could a Python script in Poser go through a figure and selectively turn off the Geometric Edge line, stepping through the body parts according to a set “feet to head” list, and saving to each step to a movie-frame as it went along? That would give a certain effect, but it might look a little weird in terms of not looking “hand drawn” when played back. For instance, the long leg lines would be drawn in “all at once”. One would have to also have the script generate shaped white geometry at certain co-ordinates (placed in front of the leg) to prevent the complete line from being seen all at once. It’s a very complicated possibility, for someone with a few weeks to spare and ninja Python coding skillz, but it doesn’t seem likely to happen.
Perhaps then what’s needed is for Poser 12 to whip up some maths that saves Comic Book Preview edge-inking lineart to SVG, and have that SVG embed pseudo “pen stroke” information based on mesh names. For instance, tell the SVG that: this set of ink line come from the head mesh | therefore when drawing = reveal main head outline first | then eyes, nose, mouth | then neck | then reveal hair and hat lines. Or: this leg line is a long line from the leg mesh | therefore drawn it bit by bit | first to that on one side of the leg and then the other. It would probably still not look convincing.
The other way might be an AI that “knows” about the order of head, hands feet, eyes, etc. It would look at any vectorised Poser lineart and identify the body parts and it then “knows” the order in which a human would draw them, and how. It then saves a new SVG with that drawing information embedded it it. Clip Studio already has AI pose recognition, which transfers the pose from a photo to a 3d figure, so it’s not going to be impossible in future. It’s probably the future of this sort of thing, but it’s still some way off.
Alternatively, if you like the Poser Comic Book inking/rendering style and want to keep it, the best option can be simply to import your lineart to VideoScribe. It will actually automatically vectorize and you then choose the reveal style…
The bottom-left one is the best. It might appear that VideoScribe is preparing to draw ugly blodgy lines over your lovely lineart, but that is not the case. What it’s showing is where your lines will be revealed, not drawn.
What appeared to work best for this import was a 600px PNG with a plain background. On playback the hand and pen darts about all over, since there is no “order of laid-down lines” to follow, but if you set the draw time to sub 5-seconds then the flickeriness is not going to be too wearing on the audience (though a few may be on the floor having a flicker-induced epileptic fit). It’s also possible to remove the ‘drawing hand’ or just use a pen-nib instead. For reveal times, the best VideoScribe scene/video settings are said to be…
Another possibility is that you vectorise in Inkscape, set a new top layer, then quickly paint over it with a brush in an approximation of hand sketching. You then make these drawn lines fat enough to cover the lower drawing, and set the top layer to have an opacity of zero. When brought into VideoScribe, you can apparently tell the reveal “hand” to follow only the lines on the top layer, thus cunningly revealing the already-done layer beneath. That would given you a more realistic “drawing by hand” effect, on playback. Like I said, it’s all “smoke and mirrors” in this corner of graphics-world.
Skin and eyes-only render from Poser
Following on from my recent “How to extract skin and eyes for colour blending” post, I think I’ve now successfully cracked the ‘skin and eyes-only render’ problem for Poser 11. The extreme use-case is: how is your graphics software going to select just the skin on this render, by colour, without complex fiddling around in Poser with setting Toon_IDs for each material, setting up a Firefly render and masking?
Instead of trying to render just the skin from Poser, which does not seem possible in a form partly masked by clothes and hair, there’s another option. I instead have Poser render everything except the skin as black or dark grey.
To do this my Python script scampers through the Poser scene in a few seconds and looks for hair, props, conforming clothing. For anything that isn’t the figure itself. For what it finds, the script sets the diffuse colour nodes to black. A preview render is then made. As this is obviously a destructive script, after running the script the user is prompted to revert the scene to the last saved state.
The resulting real-time Preview render then has skin that can be easily selected and masked in a graphics programme, even if in the original scene the figure had red hair and was wearing a red outfit. Which would have confused the heck out of the software’s skintone selection process.
In PhotoLine (which I now prefer to Photoshop) an Action can automate the ‘Channel to Selection’ process and in a microsecond it has whisked out the skintones and eyewhites to their own layer…
Her eyes have also been selected, but that was because they were a soft skin-like hazel colour to match the outfit. This layer can then be used to restore colour to the skin after a render has been run through several filters and plugins to make it look hand-painted.
Photo.Net can also extract the skintones, using the Color to Alpha v2.2 plugin. Which is probably better if you need fine control over the eye-white selection. It’s very likely Photoshop also has such selection capabilities in its newer subscription version, though readers will have to discover those elsewhere.
Your (only) choice for a third-party Photoshop plugin appears to be Imagenomic Portraiture 3, which has automask of skintones, but which doesn’t return a selection mask (it all happens inside the plugin). It also fails on dramatically-lit pictures such as this…
The advantage of a scripted Poser render is that even if you have a dramatically lit ‘sunset forest’ scene like this, you’re still going to get a relatively easy mask. Because you’d just tweak the colour in the script from black to bright green, and render against a bright green plain background (hide all other elements). The masking out of the bright green should then be very easy, leaving only the skin and eyes.
How to extract skin and eyes for colour blending
Ideally Poser 12 would have the ability to render only those parts of the skin and eye materials that are visible to the camera, and nothing else in the scene. And to do so in a real-time Preview render.
However I don’t think this is possible, due to the limitations of the current Preview and Firefly engines. I can’t find any script “to render just materials X and Y, as visible to the camera”.
Why would one need to do this?
In post-work a render may be filtered through a Photoshop plugin to get an artistic effect (see below), and the colours will thus shift or wash out. The general colour and contrast shift may be pleasing, but the skin and eyes may then look “off”. Skin can look yellow and jaundiced, and eye-whites less than white. By laying in a render-pass layer containing only skin and eyes, the correct colours can be restored — the layer is blended using a Colour or Saturation blend-mode.
There are several possible workaround solutions to get something like such a useful ‘skin and eyes only’ render.
1. Create a Python script to temporarily hide hair and clothes and props from the Poser figure, auto-remove any Comic Book inking lines, auto-render to Preview, then have the screen restore all visibility. It can be done, and I now have such a script working. The results are not ideal when you’re pasting over a picture which has hair and collars, and where the eyes have become better than what you’re pasting in. But a few dabs with an eraser can just about blend in the new layer. It’s not ideal, but it’s the best in-Poser option and is quick and mostly automatic.
All we want from this is the colour, blended as a layer in Colour blending-mode
2. Extract skin with the free paint.NET graphics software and its rather nice Color to Alpha v2.2 plugin. Imperfect, and may need a wide Gaussian Blur to fill holes and soften raggedy edges. Might be good if you don’t need precision or eyes. Update: it’s capable of far neater work. More useful if your graphics software can ’round trip’ to Paint.NET and back, such as you can do in PhotoLine.
Set the skin tone, and the skin is extracted while the rest is sent to transparency. Adjustable via sliders. This example was run on a Poser Sketch render, and its’s not the extraction that’s caused the artistic effect.
3. Render each and every figure / hair / hat / prop in the Poser scene separately and then assemble them in the graphics software as aligned masking layers. Again, I now have a Python script to do this in Poser. But in practice it’s not viable, since hats, helmets and hair etc don’t mask. Meaning that you see the back of them, when there’s no head in them. If you only have scenes full of bald and hat-less monsters and robots, you’re fine. Otherwise, not so much. That said, it’s quite possible that some makers of comics and storybooks will want to manually draw on the hair afterwards, along with brows and mouth-lines.
4. In the Materials room set a bright green colour (it’s found under ‘Math’, perversely) as the Firefly auxiliary render ‘option one’, repeat for all the fiddly bits of skin and eyes you want masked. Render in Firefly with the ‘option one’ Auxiliary switch thrown, save to .PSD. Select colour, extract, use as a mask. Fiddly, slow, and clunky as hell. Best avoided.
Poser: how to toggle all scene lights when making Preview renders
Selecting GROUND in a Poser scene is a handy trick that does not, in every single instance, make the guide-wires of Lights invisible in a scene. I’ve seen instances where spotlights don’t toggle off when GROUND is selected.
Why would we want to toggle the lights? Well, when working with lights the last-selected light leaves ‘guide wires’ showing in PREVIEW, and these will mess up a comic-book render. This picture of a live scene in OpenGL shows the problem…
If one were to render this in real-time, the picture would have the light’s ‘guide wires’ arrows and circle on it. Easy to miss, easy to forget until it’s too late and you’re dropping it into a panel on a comics page.
Willyb53’s free Light Toggle script can be hacked to do this for us. Willy’s script was set up to turn all the scene lights off and on, but a few simple tweaks keeps them shining while only their guide-wires are turned off in the scene. To do this we simply open his script with Notepad++ and change it to read…
… then save, rename Toggle_Visibility_All_Lights.py and place the new script wherever you keep your Python scripts. Mine are in…
C:\Program Files\Smith Micro\Poser 11\Runtime\Python\poserScripts\ScriptsMenu\FavoriteScripts
You can then iconise the new script using Dimension3D’s $10 eXtended Access. This runs fine so long as you have the AVFix for it, and I load it at every Poser startup. Attached to a meaningful icon (here a red closed eye), the new script then becomes one-click and it can be handily positioned near the Poser lights control panel.
If you have the neat and attractive Scene Toy addon for Poser, and if all you mostly use the Hierarchy Editor for is to click on GROUND to get rid of the guide-wires, then this script lets you hide that window and reclaim a little more screen space in the Poser UI. “Begone, ‘o great space-wasting panel of grey ugliness”…
Finally, the other thing to keep in mind, re: lights and Preview renders, is that OpenGL is limited to eight lights in a scene. This is an OpenGL limitation, not a Poser limitation. In practice, that “eight lights limit” may be even less, because your PCs’ hardware may not be able to support that many interacting lights and their shadows. For working in Comic Book Preview mode it’s probably best to try to stay at three or four lights in a scene. Sketch only supports three, in terms of having the strokes follow the light directions.
How to clean the old Cornucopia ~~. files from your Vue content folders
Vue users will know how annoying it is to encounter apparent content that has the file name ~~. These were not real content, just thumbnails with links that led to the now brutally-closed Cornucopia online store.
How to mass delete these now-defunct spam link in your Vue content folders? Thankfully they all have the extension ~~. For instance:
Realms_Art_Rope_Bridge_25_~~.vob
So we need to delete everything with a ~~ in the name. What the Vue user can’t do here is have Windows Explorer just search for ~~. or *~~. and then delete the lot. Explorer doesn’t play nicely with symbols, for some unknown reason. All it will do, with a search like that, is to find everything.
Of course, it’s possible to do this with arcane command lines or wrestle with PowerShell, but that’s total overkill and requires skills unknown to ordinary mortals.
The solution is a handy little Windows freeware utility, of course. Alternate Directory is a finder-deleter for Windows that can do the job. It’s a little mis-named, and should probably have been called ‘Search and Delete Files by Mask’ or something like that.
1. Download and install.
2. Make sure you’re going to ‘Recycle’ rather than ‘Clean’. Then go: View | Options | Edit.
3. Paste in *~~.* at the top of the list. Then select and delete all the other file name-types on the list, and save. Congratulations, you’ve just configured Alternate Directory to only find files with ~~. in the filename. (The * here, for those who don’t know, is a wildcard — it tells the software to find ‘anything’ in the search string).
All the other file-types were just the sort of cruft that system administrators encounter on their servers and need to bulk delete.
4. Now use Alternate Directory to navigate to C:\ProgramData\e-onsoftware\Vue xStream 2016 (or whatever top folder your Vue version indicates for its content files)
5. Making absolutely sure you have ‘Recycle’ selected run “Diagnosis” on the folder. All sub-folders are also looked into.
6. Look at all that crap it found, nearly 5,000 bits of defunct system junk. Pressing “Clean” deletes it all to the Recycle Bin.
Alternate Directory will then take a while to delete that many found files, in this case about five minutes. Once it’s finished you empty the Recycle Bin, and enjoy an extra chunk of disk space.
Now re-index your Vue folder in any 3D content indexing software you have, such as PzDB.
Alternate Directory is a useful bit of freeware that does the job simply and effectively. You may also find it handy in future for similar bulk deletion jobs, where there’s a filetype you want removed or where there’s a repeating filename for it to hook onto. It could, conceivably, also be carefully used for cleaning massive Poser runtimes of certain unwanted old filetypes.
It can also be useful for cleaning junk that comes across when you copy parts of a hard-drive. Such as _Zone.Identifier files. In which case the mask *Zone.Identifier does the trick.
You can also have Windows Explorer become a partial Content Library with pictures for Vue:
1. Open Windows Explorer and go to your content folders at C:\ProgramData\e-onsoftware|Vue xStream 2016 or wherever you have your content stored. Set it to something sensible like View: Large Icons.
2. Over on the left panel, select the topmost folder for your content library, right-click it, Properties, Customize.
3. Choose “Optimize this folder for Pictures”, and tick “Apply to all subfolders”. OK.
You now get thumbnails and previews in folders, and can easily search by keyword.
deviantART-Filter for Eclipse – alpha 1
For those who are staying at DeviantArt and suffering, you’ll be needing a blocking-filter that’s better than the clunky native one. In which case you should know that the deviantART-Filter browser add-on has a new v6 ‘Alpha 1’ (14th April 2020) for testers. The add-on elegantly blocks users from your search results, and provides a discreet and hassle-free ‘block’ button. It can run alongside the UserScript dA_ignore which it seems doesn’t do blocking in search results, but blocks in other ways.
Why is this deviantART-Filter release important? Because version 6.0 ‘alpha 1’ works with the horrible new Eclipse UI, which regrettably we’re all being forced to use from 20th May 2020. The old version doesn’t work with Eclipse, and the new one is anyway a lot faster when scrolling through search-results.
Here’s the best way to go about getting the new deviantART-Filter…
1. First, don’t uninstall your old deviantART-Filter addon. First, export your old blocklist from it, as a .JSON file…
Then de-activate it, but don’t un-install your old copy just yet.
2. Now download, unzip and install the new version from GitHub. I manually installed the Opera version from the unzipped folders. That means I just went to: Extensions | Load Unpacked | and pointed Opera to the folder. I assume it’ll be much the same on other browsers.
3. Go to the new add-on’s dashboard, accessed via its red address-bar icon. Find the import panel and drag-and-drop your old .JSON blocklist into the import panel…
A ‘hive of scum and villainy’, installed and blocked. As you can see, I’ve been ban-happy over the years…
Now you can uninstall the old version, after backing up that .JSON file somewhere safe.
4. Now check it’s working. On searching you should see correctly-sized placeholders for blocked pictures…
Each remaining picture has a blocking ‘X’ icon placed in the top-left corner, which appears when you mouseover the picture with your cursor…
Click it, and the user is perma-blocked.
Update: 6.1 has a new way to filter a user – right click on a search result, “Create Filters…”.
A big advantage of the new v6.0 alpha in Eclipse is that it’s no longer ‘sticky’ to scroll down multiple pages of results, even with 1,600 permablocks at work in the background. If you only have a few hundred you may not even notice the occasional slowdown.
Incidentally, if you want to convert your exported .JSON file to a one-name-per-line list suited to dA_ignore, then Notepad++ and this Regex is your friend…
The place to then paste your list is your own personal Settings page at DeviantArt, into which dA_ignore will have plugged a new link and a listing page.
More automation, less clicks!
If you want to run a Python script each time when Poser starts, you can do so by editing Poser’s poserStartup.py file.
1) First locate your poserStartup.py file, which is what loads your chosen Python scripts whenever Poser starts. For me, in Poser 11.2, this startup file is located in…
C:\Program Files\Smith Micro\Poser 11\Runtime\Python\poserScripts
The location may be different for some, but poserStartup.py is very likely to be in Program Files folder. As such it may be protected by Windows. If so then you you need to copy it out in order to edit it.
2) Make a safe backup of the poserStartup.py file. Then copy it out to somewhere on your PC that allows file editing (e.g. the Windows Desktop), and open this copy with the free Notepad++. A .PY script file just a text file.
As shown below, as an example, we then add lines that start SnarlyGribbly’s AVfix script, and with this fix loaded we can then run the very useful XA – Toolbar plugin in Poser 11.2…
poser.ExecFile(“C:\\Program Files\\Smith Micro\\Poser 11\\Runtime\\Python\\poserScripts\\ScriptsMenu\\Snarlygribbly – fix Poser 112 errors\\avfix.pyc”)
poser.ExecFile(“C:\\Program Files\\Smith Micro\\Poser 11\\Runtime\\Python\\poserScripts\\ScriptsMenu\\FavoriteScripts\\XS – Toolbar and macros\\XA.pyc”)
It looks complicated, but it’s just a poser.ExecFile instruction followed by the path to the script we want to automatically start. Don’t forget to manually add all the double \\’s! PoserPython needs them on the file-path. Also, note that if you’re copy-pasting my example, PoserPython might not like WordPress’s fancy curly ” marks, and these may need to be re-typed as plain ordinary ” marks.
The above instruction lines are added one on each new line, and placed at the foot of the poserStartup.py file.
This also works for SnarlyGribbly’s poserStartup.py that is meant for Reality. Although that is meant to start AVfix on its own, both of the above lines still need to be added to the end of his poserStartup.py. This seems counterintuitive, after all: “if AVfix is started by SnarlyGribbly’s special poserStartup.py then why call it again?” Because that’s how Poser 11 likes it, and it won’t start XA.pyc without first seeing an explicit full-path call to avfix.pyc.
3) The file is then saved. You then copy the fixed poserStartup.py and over-write the original in C:\Program Files\..
4) Start Poser, and your chosen scripts should now start up automatically. In this example, Dimension3D’s XA – Toolbar starts automatically. This useful toolbar can be configured to do all sorts of things with a single click. For instance, you can drag-and-drop the new free Sketch Presets Manager for Poser script on it, and it automatically makes a button that starts this script with one click. More automation, less clicks!
If you get a “non ascii” error message, it is likely you copied the script path from a blog like this rather than from the Windows Explorer path. e.g ..\\ScriptsMenu\\FavoriteScripts\\XS – Toolbar and macros\\ is not the same on the this blog as \\ScriptsMenu\\FavoriteScripts\\XS – Toolbar and macros\\ copied from Windows Explorer and the extra \’s added. This is because the – bit of the path is encoded as non-ascii by the blog, and PoserPython can’t handle that.
Tutorial: How to create, find and position a billboard prop in Vue
How to create, find and position a billboard prop in Vue 2016:
1. First, render your prop and save it to the target .PNG file you intended for your Vue scene. If not using Vue itself then this means using software that enables the saving of a clean .PNG with an alpha, with no fringing at the edges. It may also mean approximately matching the lighting in your Vue scene. Or, if you have no idea of what lighting you’ll eventually end up using, then at least have fairly neutral lighting. The output size doesn’t need to be huge, maybe 1800px. I’ve no idea if DPI affects such things, but 300dpi may be a good standard to work with.
2. Launch Vue and go to the top menu. There go: Object | Create | Alpha. Shift + H will do the same on the keyboard, and can also be tied to a mouse-move gesture.
3. The Import window will appear. Those who learned their 3D with the old Bryce interface will be familiar with the cryptic mini-buttons look. Note that one of the tiny buttons also lets you change the gamma of the import image at this point. (I’m using Vue 2016 R4. Apparently R5, R6 and the new subscription Vue have changed the UI, and this may be one of the changes).
For some reason, this import operation will not always seem to work:
A. Works, and the result appears in front of the current camera: In some cases, the import window has behind it the ‘blank billboard’ plane. The new prop will then appear right in front of the current camera.
B. Appears not to have worked, but in fact has: Far more often this ‘blank billboard’ does not appear. It is in the scene, but it is either up above the camera viewframe or way off to the side. If this seems to be happening, just carry on as usual.
4. If the new billboard is indeed nowhere to be seen, and cannot be framed, then switch to the Top camera view and zoom way out. Most likely the billboard loaded miles away from the camera. This is the case, for instance, even with the default Vue ‘starter’ desert scene.
In the Top view, re-position the billboard in front of the camera. Then switch to the Side view, and do the same again.
To save such fiddling it would be nice to have a “place the selected prop directly in front of the current camera” Python script. But I’ve yet to find such a useful thing for Vue.
Update: I made a Magic Object Mover for Vue script, to help with this problem.
5. You’ll then probably also want to adjust the tilt and orientation of the billboard. It’s supposed to be automatically camera-facing and upright, and it sort of is, but will still often appear awkwardly tilted in the camera view and will need manual adjusting.
Note that…
* You can scale up the billboard like any other prop.
* It can cast shadows that look like its shape, not like the rectangular plane the shape is inside.
* You can also point a spotlight at it to adjust its brightness. Go: Lights icon on toolbar | Right-click and hold | Spotlight | Edit | Influence | ‘Only objects selected’…
* A very low-res placeholder may appear in the viewport, depending on the power of your PC. On doing the final render, the high-res image will be loaded.
* You can save the billboard to the library as a .VOB prop, by right-clicking on it and saving it.
Tutorial: seeing the light in DAZ Studio
Those new to DAZ Studio may be especially puzzled by one aspects of the lights. For instance, it is possible to light a scene with some light preset or other, found and loaded from a Lights folder…
“Hmmm.., nice, but too dark. Let’s find its controls and tweak them up…” you might think.
Yet… no light will then be found listed in the Scene item-list. Nor will one find any light when one switches into the Lighting/Cameras tab. And yet there is obviously a light in the scene.
Where is this mysterious light, and how can it be controlled?
This type of light’s controls are actually hidden away at the bottom of the Render settings, under “Environment”, a place whose name might lead a newbie to expect anti-aliasing settings for the edges of the leaves of trees and the bumps on rocks. Nope, it’s the controls for the missing light.
As you can see, there are all sorts of tweakable sliders here, including time-of-day and intensity. There are even more when you scroll down the panel.
Dynamic Outline Inking with Blender
A new video from Lightning Boy Studio, Dynamic Outline Inking with Blender. Definitely not as simple to set up or control as Poser 11’s real-time inking, but the video’s result on the test ‘dinosaur mask’ looks production-ready to me.
Unsplash
Are you irritated by the Photoshop splash screen that you see 20 times a day? Those with ‘l33t hacker skillz’ can apparently replace the image, but normal mortals are not allowed to. You can, however, simply prevent the Photoshop splash screen from showing. This is done by adding the command…
-NoSplash
… to your start Photoshop launch-icon’s Properties.
How to load your saved render presets in DAZ Studio
One of the big problems I’ve always had with DAZ Studio is the inability to load my saved Render presets. It’s easy enough to save them: File | Save as… | Render Settings. They are placed in the ..\content\Presets\Render folder as .DUF files.
But then they never ever show up in the Presets tab. This problem has always been there, across multiple different versions of DAZ Studio and even across different PCs. To try to solve the problem, one can copy the render preset files into every possible runtime and content folder that DAZ has access to, but still… nothing will ever show up in the panel. I assume it’s a bug.
The workaround solution is to manually find your presets in Windows Explorer and then drag-and-drop the required .DUF preset file directly onto/into the scene in DAZ Studio. With the Editor open in the Render Panel, you can see the settings change ‘live’ as you drop the .DUF onto the scene. But it would be so much easier just to have them show up in a list where they’re supposed to be.
Poser 11 Webinar Series: Meeting 1
Poser 11 Webinar Series: Meeting 1 January 2020 is a welcome new webinar from Poser expert Nerd3D. Here’s the handy contents-list from the front of the video recording which is archived on YouTube…
I’ve added three red dots on those items likely to interest those who are not store content-developers.
Perhaps, in future, the show might get an even bigger audience if the producers were to front-end it with such general items, and then follow those with the more content-developer-ish items?


