The excellent free 3D mesh conversion and poly-reduction tool MeshLab has had a long-awaited update to MeshLab 2016 (Win 64-bit and Mac).
Category Archives: Companion software
HandBrake 1.0 released
HandBrake 1.0 has been released to the public, after years in beta. It can do things like: take the huge raw video files from your camera, and turn them into something that’s much easier and smoother for your video editing software to use. The new v.1.0. is free and…
“brings tons of new presets and support for more devices and file types”
HitFilm Pro 2017 released
HitFilm Pro 2017 (version 5) has been released. It’s an affordable video editor and VFX/greenscreen compositor combo, packed with presets for easily applying raygun blasts and suchlike. It’s less costly and somewhat easier to learn-and-use than After Effects + (shudder) Adobe Premiere, and generally seems to be aimed at makers of fan-films, indie films and creatives in small production studios.
Among the new features I spotted in v.5:
* “Go Pro and 360° video support”. So I’m guessing you can seamlessly add their large library of VFX to your 360° VR, and not have them look distorted when seen in the headset viewer?
* “Autodesk FBX format support”.
* “Queue up a number of high quality tasks to export”. So there’s now some form of a Render Queue, so users can do things like render out their footage overnight.
£308 in the UK and (turns on VPN proxy and pretends to be in the USA…) $349 in the USA. Which at current exchange-rates should be £281 in the UK. So presumably they’re adding VAT sales tax, to get the UK price up to that £308 figure. As with most forms of video editing, you’re also going to need a powerful PC and masses of empty hard-disk space.
Bedroom Producers Blog has an excellent short review of what’s new in HitFilm 2017, and concludes with useful tips on how to to use HandBrake to convert your humongous source camera-footage to something that HitFilm’s timeline will work more smoothly with.
Project Felix
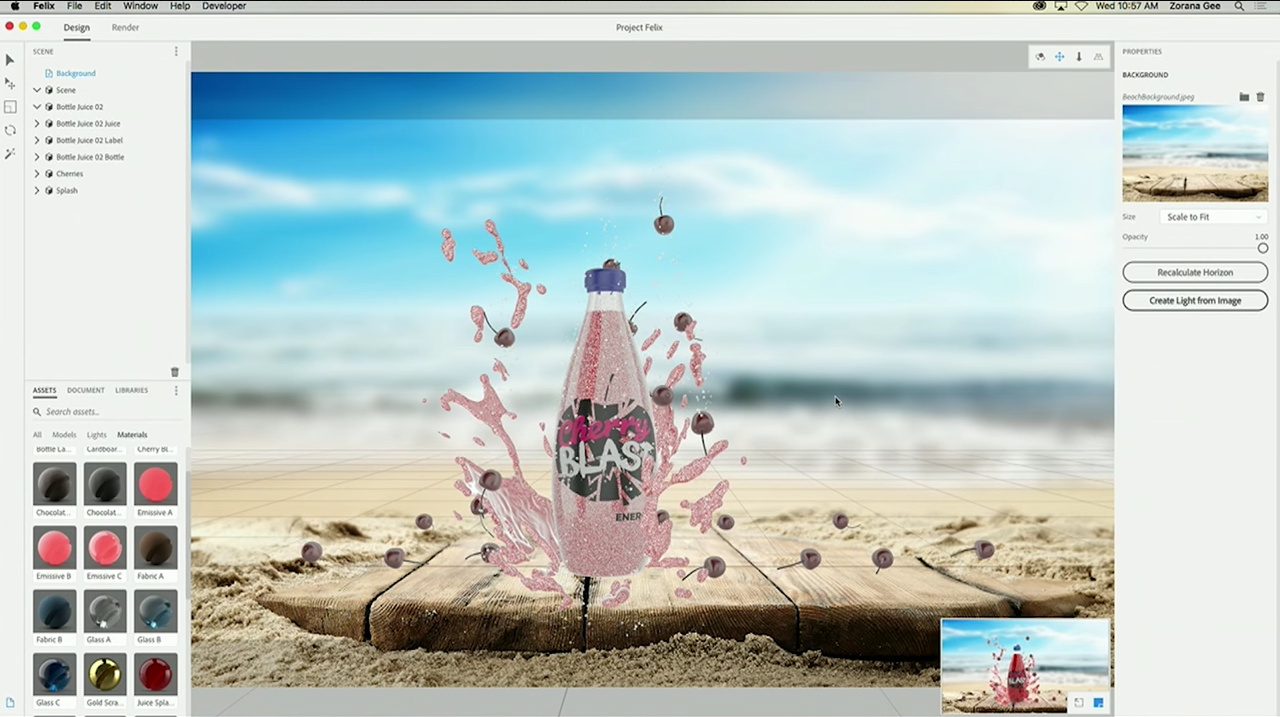
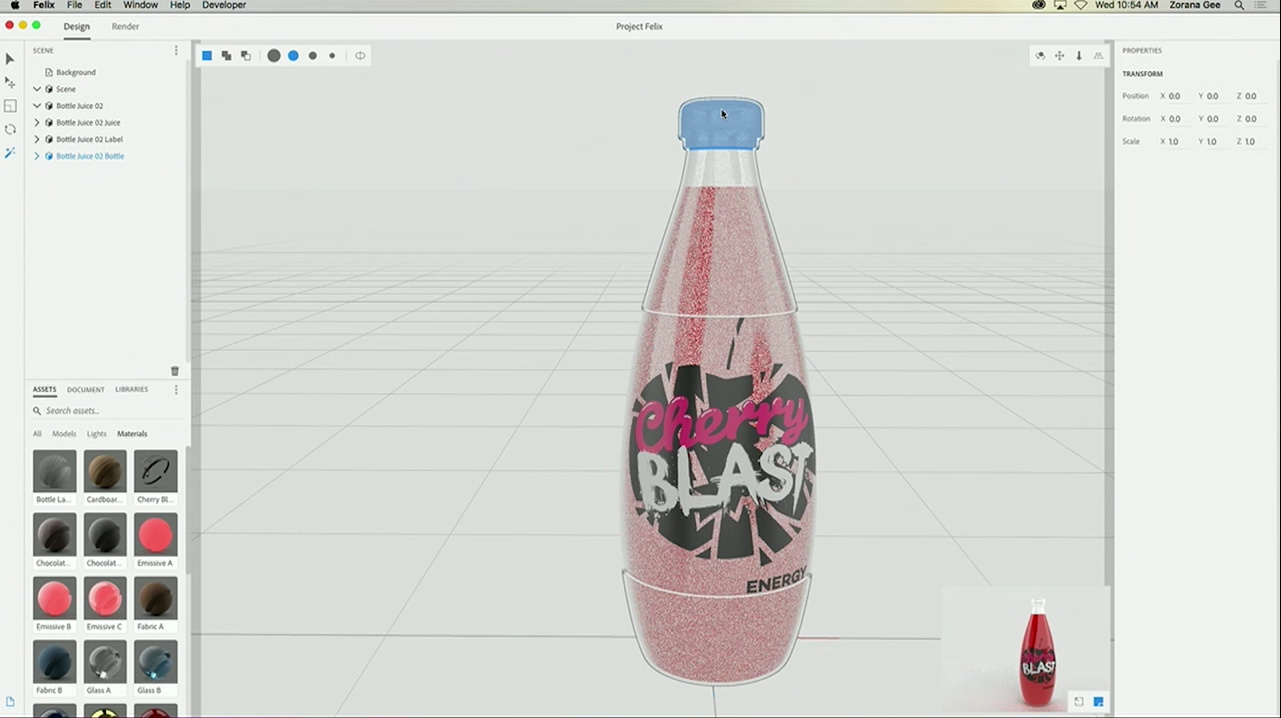
There’s an interesting new thing from Adobe, aimed at beefing up Photoshop’s presently mediocre 3D capabilities. Adobe is doing a simple for-dummies version of Keyshot, called ‘Project Felix’. It aims to make 3D more accessible for 2D artists to use in 2D pictures. Without having to learn the equivalent of the control interface of a nuclear submarine, as is the case with software such as Blender and many others.
Project Felix is still in “coming soon” mode, with a public beta set for “later in 2016” before eventually shipping with Adobe Creative Cloud sometime in 2017. It looks like it’s aimed at people who are so limited that they couldn’t even handle a half-day basic training session on Keyshot, which is just about the simplest 3D software to use.
Basically it seems to be Keyshot, plus the ability to seamlessly take the render into Photoshop as a layer. The V-ray render doesn’t look very impressive in the video, but it does look fast — so either it’s on an ultra-fast setting, or Adobe have added some special sauce to V-ray, or they’re expecting users to have a couple of ninja graphics cards available.
I wonder if the Keyshot guys will react to this move by Adobe, re: their pricing, ability to interface seamlessly with Photoshop, and maybe even a V-ray hookup? Their $1,000+ pricing, at least, will likely come down.
The other interesting thing will be to see if Adobe will support the transparency alphas in .FBX and .OBJ models exported from DAZ Studio and Poser? Will such exports have blocky square leaves and white ‘slab’ eyelashes, because Felix can’t juggle the transparency mapping correctly?
Comic Life 3.5, 50% off
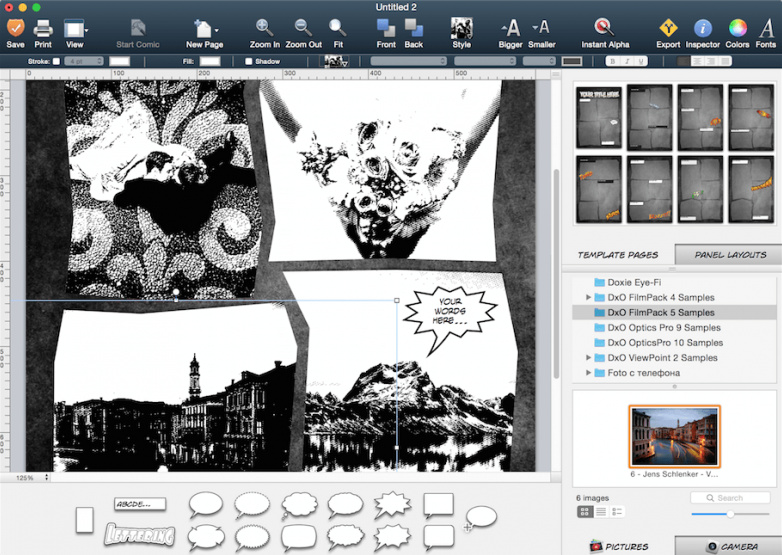
Another Black Friday/Cyber Monday discount spotted. The $30 Comic Life 3.5 is a Windows and Mac software tool to quickly make pages of comic-book frames, into which you then drop your pictures, and then add speech balloons and dialogue boxes on top. The graphics wizards can do this with Photoshop, of course, but it’s somewhat easier with Comic Life where everything is streamlined. It does have some very cheesy templates, to appeal to teachers and kiddies who want to make fun chuckle-comics about their pets. But look past that and it’s a useful bit of software for speeding up comics production. Version 3.5 introduces a way to quickly link the comic’s typed script and the speech balloons on the page, and adds other fixes and upgrades from earlier versions.
Use the checkout code: CYBER50 to get it for $15. Sadly they use a checkout system that adds country sales tax, so you do pay VAT in the UK on the final amount. That makes it £10.50 in the UK. It’s a one-time payment, not a subscription, and PayPal is accepted.
Black Friday Sales 2016 – the survey
It’s 9pm Thursday evening UK time, and here are the Black Friday -to- Cyber Monday deals I’ve spotted so far:
The DAZ and Poser stores:
* The DAZ Store has a 30% off page. Some of the content creators also have heavy discounts. Nothing in my WishList is discounted though.
* Renderosity. No sign of any Black Friday content sale yet, though the Poser 11 software is discounted (see below).
* Content Paradise. No sign of any Black Friday sale yet.
* Hivewire 3D. No sign of any Black Friday sale yet.
* Cornucopia 3D (for Vue users). A nice range of What’s On Sale? items, but no specific Black Friday discounts yet.
* Runtime DNA has 60% off all content remaining in the store. Hmmm… login. Wishlist is still working? Oh yes, though it’s rather depleted these days. I see that a number of Crossdresser licenses are still available and discounted, including Cookie. Advanced Shaders Launcher script for Poser, get the complete set for $7. So I loaded up on various items at RuntimeDNA.
Then I unloaded — because for some really annoying reason, the RuntimeDNA site no longer accepts PayPal payments wholly in dollars. If you’re in the UK you now have to pay partly in dollars and partly in pounds, which makes the purchase a lot more expensive for someone who holds and wants to pay in U.S. dollars only. I took several items out of my cart, so as to reduce my exposure to the rip-off rates.
For those who have the semi-toon character SuzyQ 2 in their Runtime I spotted the above outfit at Runtime DNA, for just $3.80 (and with Crossdresser 4 it should convert for the original Star).
Software:
The Poser content manager database PzDB 1.3 is down from $52 to $36. Still one of the best ways to wrangle a vast runtime.
Reality 4 for Poser and Daz, at just $5.99.
Poser 11 Pro – 65% off.
Poser Pro 11 Upgrade – 25% off.
Poser Pro 11 Upgrade (from older versions, back to V.6) – 25% off.
Corel has a big discount on Painter 2017, priced at $299 down from $429.
Vue? Autodesk Sketchbook? No sign of any movement from them yet.
Manga Studio Pro for $25? Yup. Although these days they call it Clip Studio Pro…
Hardware:
Microsoft’s Surface Pro 4 128GB + keyboard and pen, is available in the UK for £599.99 from the Microsoft Store UK, a hefty £259 discount. They’re clearing them out before the Surface 5 arrives in the New Year.
Lots of graphics cards and other deals in the UK, at Overclockers.
CrazyTalk Animator 3
CrazyTalk Animator 3 has been recently released. It’s a relatively easy and accessible 2D package for animators and also a drawing aid to cartoonists, and is one of Reallusion’s most appealing bits of software. There’s a range of short tutorials on version 3 in the Reallusion YouTube channel. But it’s really difficult to track down a “new features” overview in a ten minute video, and I don’t think there is an official one yet. There are videos for each new feature, though.
In terms of new content enabled by version 3 the cats and dogs are new packs. Breeds are extra purchases, but even the outlines look especially useful for budding animal cartoonists…
Reallusion does have a full online manual which has been updated for V.3 — just type “New for v3” into the search box to see the technical details on what’s new. One of the big changes is that a user can “put bones in anything”, and create “free bone” non-human characters. Animate a book, for instance.
I see that a coming patch for the $299 Pipeline version will allow the creation of 2D rigged characters from Photoshop layered .PSD files. Automated, I’m guessing, from a correctly named template .PSD? That would be interesting, especially as Sketchbook Pro can output .PSD files.
And apparently their real-time animation software iClone 7 is set to ship in December. If it has a Comic Book Mode as good as the one in Poser 11, I’ll be interested.
SketchUp 2017 released
Software releases are coming thick and fast as we hurtle toward December. Today comes SketchUp 2017. There are some useful-looking advances for the CAD and architectural users, but for artists there are only three main improvements…
* Faster rendering.
* Semi-transparency “renders faster and at higher quality too”.
* Cleaner “snap to” functions when model making.
Ugee + Xbox controller + JoytoKey
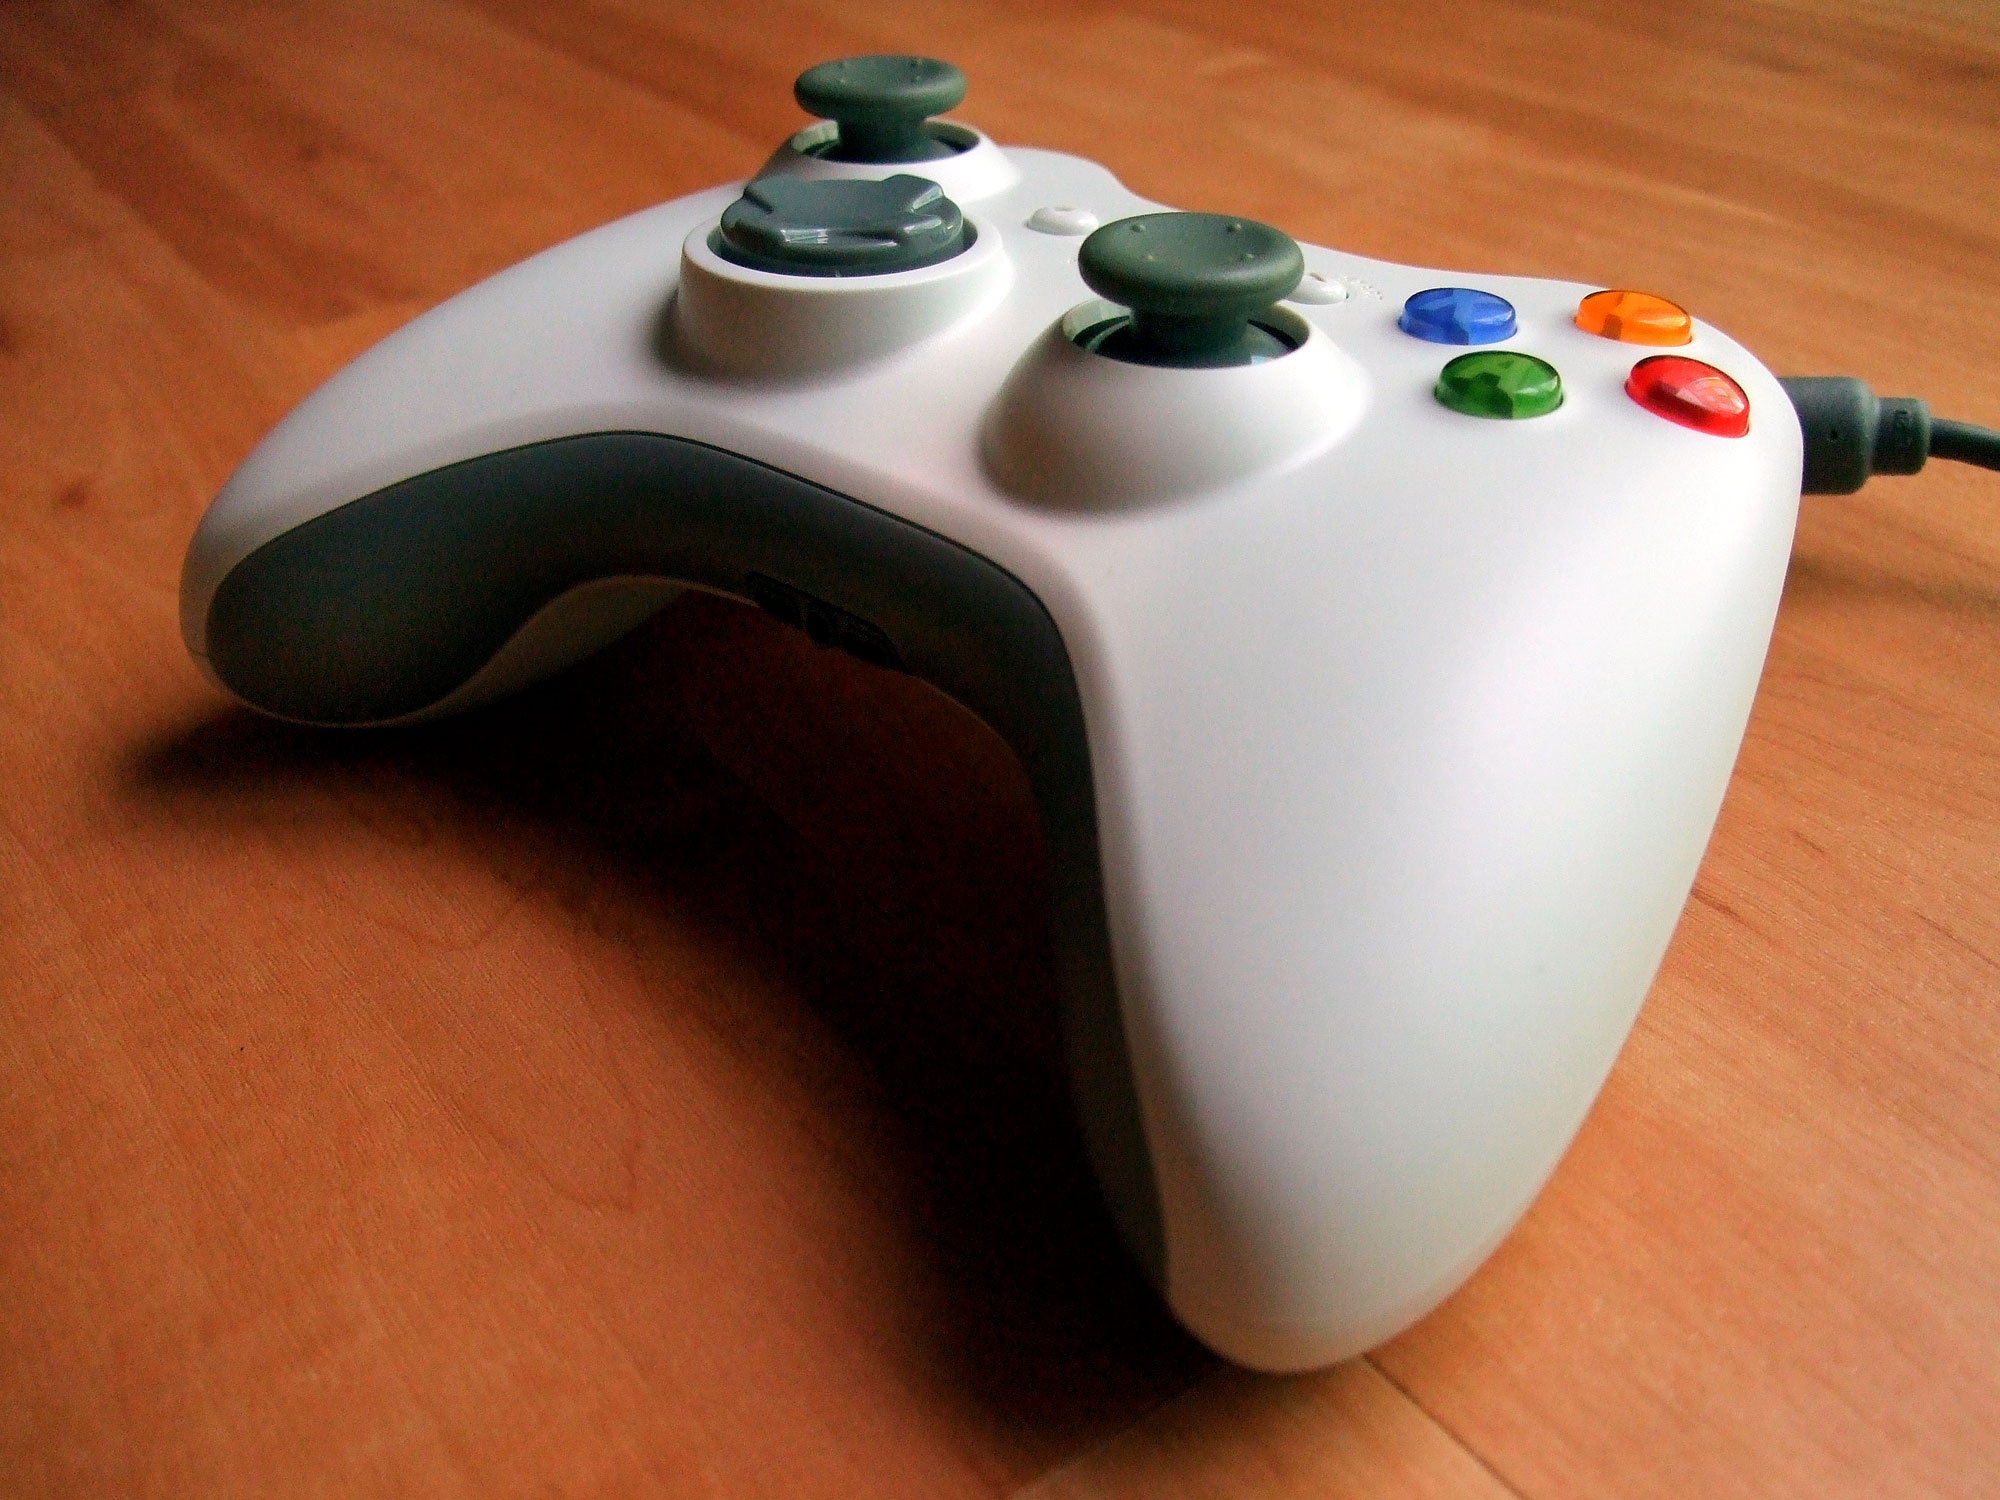
Got an Ugee drawing tablet, and rather envying the shiny row of buttons that your friend’s Cintiq tablet has on the side? Envy no more! If you have an old USB-wired console game controller, such as a nice ergonomic Microsoft XBox controller for the PC, then just get the free Windows shareware JoytoKey.
JoytoKey lets you map the buttons and joy-stick of the game controller to software things like Save, Undo, switch brush to Eraser, etc. This video from Trevor Daley explains it fairly well, for a simple photo ‘pick & tag’ software… just be aware that the download link URL he uses is now flagged as a hijacked ‘attack site’ (eeek!). The safe and official JoytoKey software is now over at the official site JoyToKey.net.
So far as I can tell JoytoKey is fully functional, despite being shareware. There’s an optional $7 PayPal payment if you want a licence, but I’m not sure what it might unlock. Maybe there’s a timeout or you eventually get a useage nag, but I haven’t encountered it yet.
JoytoKey doesn’t need to be installed. Just unzip and set it to start in Windows XP compatibility mode, or if you’re confident then give it Administrator rights. Then load JoytoKey (works fine for me in Windows 8.1), click the controller button you want to configure, then Edit the button assignment. Once you’re set up you can save a labelled configuration file for each software package you want to use it with, such as Photoshop, Sketchbook Pro, Clipstudio (aka Manga Studio) etc.
So, for a low cost you effectively get the nice buttons of a $2,000 Cintiq, but in a quite literally ‘more handy’ form — in your hand as a controller, and one made with all the ergonomic expertise of Microsoft! You can totally remove the need for a keyboard while you’re drawing on an Ugee tablet, and there’s much less need to be moving your arm around the screen to select menu items and the Undo.
I have yet to test if I can map one of the joysticks to smoothly grow or shrink the size of a brush as the stick is thumbed, but that may also be possible.
There is no “curvature pass” in Keyshot
So what is a “curvature pass” in Keyshot? Non-existent, that’s what it is. There is no such render type, as I found after I wasted half an hour trying to discover it. So I’m just dropping this blog post here to save others a similar waste-of-time. This is now the second time in recent weeks that a spurious mention in 3D Artist magazine has led me on a ‘wild goose chase’…
There is no such render pass in Keyshot…
I think that what is meant is rather a manual setup of a specialist render…
1. Save a version of your final render-ready Keyshot file that you can afford to destroy.
2. On the model, find all the textures that you want to distress in Photoshop. Double-click on them and turn them to Texture map: Texture: ‘Curvature’. Make sure you have a suitable bump map in place for each texture.
3. Set up bright colours on the Negative | Zero | Positive colour-pick boxes for ‘Curvature’.
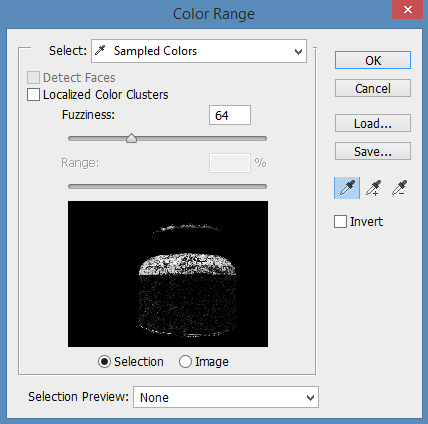
Now render, and you get a custom render pass that is of some use in Photoshop, using Color Range selection…
Here’s a quick test, without using any extra ‘rust render’:
From left to right: 1. A test inkpot with a sort-of rough-texture gold surface. 2. Test inkpot with a distressed texture applied, then switched to ‘Curvature’ with strongly alternating colours and rendered. Colour selected with the eye-dropper in Photoshop, and used to select only a section of the scratched art-texture. 4. Selection “paste in place” and blended with the main render, for a very nice distressed patina look. It also serves to mute the shinyness of the main render.
Neither the gold texture or the super-crackle surface would have been suitable on their own, but this method allows one to get a more subtle blend, with local rim-distress such as around the rim and base of the inkwell.
I could be wrong, but that seems to be what is meant by the mythical “curvature pass”.
Vue 2016 available
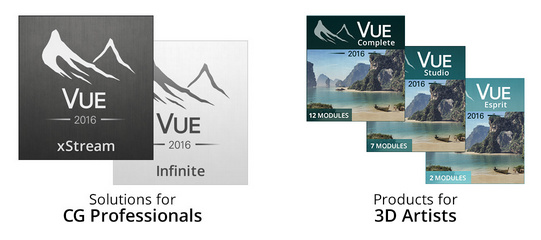
e-on VUE 2016 is now available. Now supports Poser 11 Pro.
New “Rendering Presets”: OpenGL, Preview, final, broadcast, superior, ultra, Path Tracer, user settings. I’m not sure if that speeds up the workflow re: Vue’s sluggish native rendering, but it might. If it doesn’t, then there’s another option…
“Render VUE content using any renderer (such as Arnold, Vray RT, Octane, Renderman…) thanks to the xStream Convert tool: In 3dsMax, Maya and Cinema4D.”
Also… “Maximum supported Poser version: Poser Pro 11 (SR1) and Poser Pro GameDev in standalone mode.”
Highlights of the many new features are:
Scenes and assets thumbnail previews in Windows Explorer. (Update: Requires the proper Windows Explorer, won’t work with Explorer++ etc.).
Hybrid GPU/CPU interactive Real-Time Path Traced preview in the main view. Default OpenGL engine set to Shader 4.
Export EcoSystem populations as FBX, including texture maps. Export textured objects as FBX. Export full scenes as FBX (including EcoSystem populations and sky maps).
Other videos about what’s new for Vue 2016…
VUE 2016 – HeightField Terrains
VUE 2016 – Interactive GPU PathTracer
Also videos of the Plantfactory 2016 improvements…
PlantFactory 2016 – Plant Variations and Growth Node and Level of Detail.
Lazy Nezumi Pro – brush line-smoothing for Photoshop
Ever wondered why Photoshop doesn’t have real-time line-smoothing for its brushes? It’s probably a market-driven thing, rather than about the technology. My guess is it’s something to do with not wanting to cross into Adobe Illustrator territory.
Anyway, there is a way to get excellent line-smoothing in Photoshop. You just install the Lazy Nezumi Pro plugin. The software’s landing page makes it look rather complicated, but that’s mostly just the settings options. It’s actually quite simple, and you’ll get good results with default presets. It’s very light on your PC system resources, too. It’s only for Windows.
Also works with Corel Painter, Sketchbook Pro, Manga Studio and others, though they all have line-smoothing in one form or another.
Ashampoo Slideshow Studio HD 4
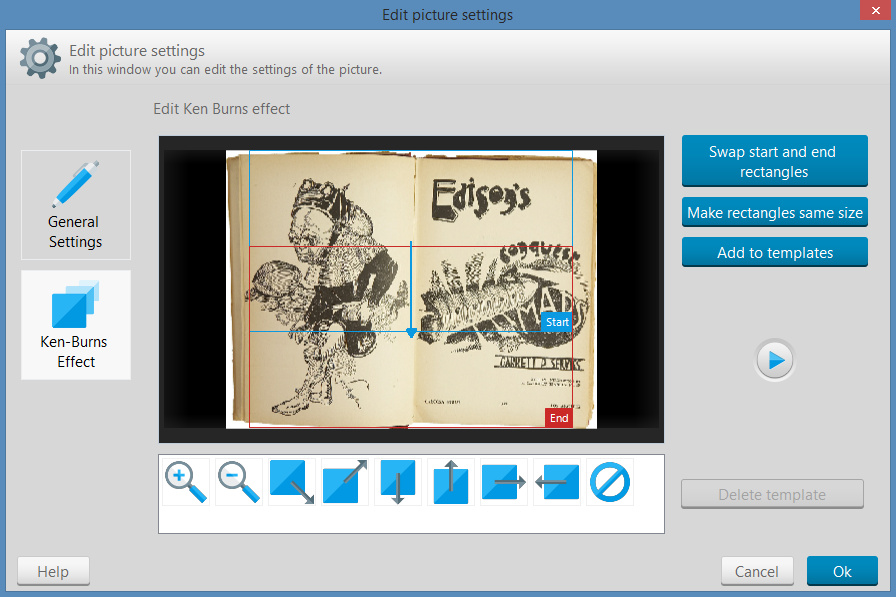
I had cause to go looking for a good simple “Ken Burns-style” slideshow software, to make a really simple ‘voiceover documentary with zooming and sliding pictures’. It had to…
* be Windows standalone software, running on Windows back to Win 7.
* be simple, cheap, but up-to-date.
* have ‘Ken Burns style’ transitions, and those should be fully adjustable.
* have fast clear YouTube output, with a small file size for upload over slow broadband.
Surprisingly there’s no such open source software out there, other than some old stuff for Linux. And only a few modern Windows applications that offer Ken Burns style transitions, or at least advertise the fact that they do and use that name.
After my searching and comparing, the German Ashampoo Slideshow Studio HD 4 came top of the small heap in 2016 for standalone Windows software. It’s $40, comes with a whole lot of cheesy transitions and some even cheesier online marketing. But I’ve tried it and it’s very capable and beautifully easy-to-use bit of software, with excellent simple/fast rendering output. It also has the needed Ken Burns style documentary transitions…
So it’s affordable and very useful for rapid production. Slap in your hi-res photos, record a basic voiceover, tweak the transitions, add titles and credits, then output the video. You’re done.
However, you can’t add any sort of video clips and neither can you adjust the audio balance between a music .mp3 and your recorded voiceover. A music .mp3 would thus easily overpower your recorded voiceover and FX, in the final video output. Nor can you boost the amplitude of your voiceover recording, if you have a soft voice. However, one can work around the audio problem, and without having to resort to some huge lumbering video editor.
The complete workflow for making a Ken Burns style slideshow documentary video in Slideshow Studio, without any ‘talking head’ video inserts, would thus be:—
1) Do the research, get the facts straight, and ideally work from the original sources (or as close as you can get). While doing the reading and research, create a list of your likely image-search keywords and phrases.
2) Rough out the voiceover, but only very loosely, just in terms of getting the subject’s basic sub-topics or talking-points in the right order.
3) Then do the intensive picture research, to find the best and most usable hi-res pictures for each of the points you want to address. (On the basis that it’s no use writing a full script and recording the voiceover first, only to find you then can’t get the public-domain or Creative Commons pictures or maps needed for certain sections).
4) Use Slideshow Studio to assemble a simple timed-sequence of your pictures. I’d do this without using the Slideshow Studio wizard, as a wizard-made sequence of slides doesn’t seem to re-flow nicely when you try to add cross-fades between pictures (while also keeping the Ken Burns effects on them).
5) Add titles and credits, and get the picture sequencing absolutely right, so you have the full length of the final video 98% done. (Don’t forget to credit the makers of your Creative Commons pictures, or pictures from museums that offer public domain works. The same goes for texts from the likes of Archive.org and Hathi, and especially short ‘fair use’ quotes found via Google Books).
6) Now preview the sequence in Slideshow Studio while adding a rough and mumbly ‘rehearsal voiceover’, and keep at it until you get the timings right and work out which of your asides and digressions will need to be left out. You’ll see that some pictures will need to be on screen for longer, other for a shorter time.
7) Then, while your finalised sequence of Slideshow Studio slides plays back in preview mode, in another software (such as Audacity) you’ll simultaneously record your final “give it all you’ve got” voiceover. You may want to do this from a script, but a more conversational and impromptu style may flow better and have more bounce. Because you’re recording into an audio editor, rather than Slideshow Studio, there will be less pressure to get the voiceover exactly right and to ‘hit all your marks’ as each slide comes up.
8) In the free Audacity audio editor you’ll then trim away any slight stumbles in your delivery, and boost the depth of your voice (a high squeaky voice, and a recording which opens with a lot of stumbles, may cause your YouTube audience to flee instantly). Then increase the amplitude of the recording, because a ’12 inches from the microphone, with a wind-sock on’ recording will inevitably be too quiet and soft. And a ‘cheap gaming headset, microphone on my top lip’ recording may be too loud and raspy.
You may also want to place a public domain, or SonicFire, music track underneath the trimmed voiceover. Then have it fade in and out, so that your voice can be heard clearly over the music.
The subtle addition of quality sound effects can also work wonders at bringing old photos alive, for instance the faint crackle of a campfire or the sound of a horse, so you may even want a third FX track alongside the voiceover and music.
You can add all these in Slideshow Studio, but the problem is that you can’t mix them or boost their amplitude. Nor can you do that in Ashampoo’s related Movie Studio Pro 2 software. And once you’re into video editors, well… you’re in the ‘video editor hell’ that many creatives will know so well.
9) Once the audio is finished then you can save your voiceover/music mix from Audacity, then output in the form of a single high-quality .mp3 file. Import that into Slideshow Studio as a music file. Now you can finesse the slide timings so everything matches up perfectly.
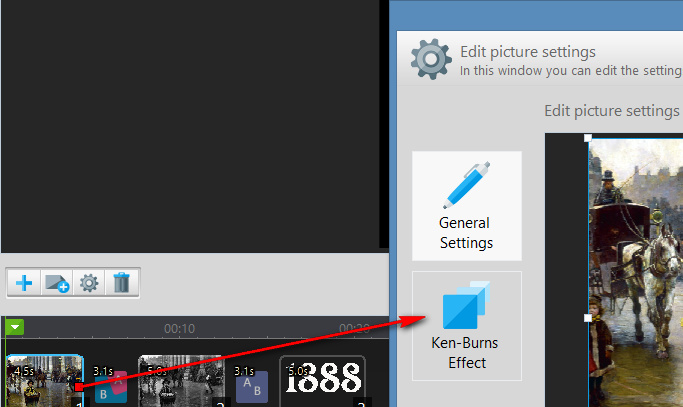
10) Now — and only now — you can sprinkle your final Ken Burns pan & zoom magic on the pictures. You have the voiceover done, so now you know exactly what the point-of-interest needs to be for each pan & zoom, and when in time that point needs to become dominant on the screen. Slideshow Studio has excellent and easy adjustment tools for the Ken Burns effect.
Output the final video. You now have something of quality to show to potential contributors of talking head video interviews, and if you get enough of those you can take their clips and the Slideshow Studio video to a full video editor, in order to make a longer documentary film.
Photoshop’s new Face-Aware Liquify – a tool for DAZ/Poser users
Still using trusty old Photoshop CS6? Not been wow-ed by the new features in the various Photoshop CC versions? I haven’t been, I’ll admit. Even though a realtime healing brush preview and a font bookmarking system might have been somewhat nice to have.
But the latest Photoshop CC 2015.5 brings a couple of very nice new features, which may tempt users to make the move. One of the new features is very major and seems especially useful for DAZ/Poser artists.
* Face-Aware Liquify. If you’re rendering faces and characters in big renders, this may well help you to nudge the face out of the ‘uncanny valley’ and make it more appealingly human. You don’t have to laboriously place dots and virtual push-pins on the face, as everything is automatically pinpointed for you by Photoshop. Here’s the very impressive video demo…
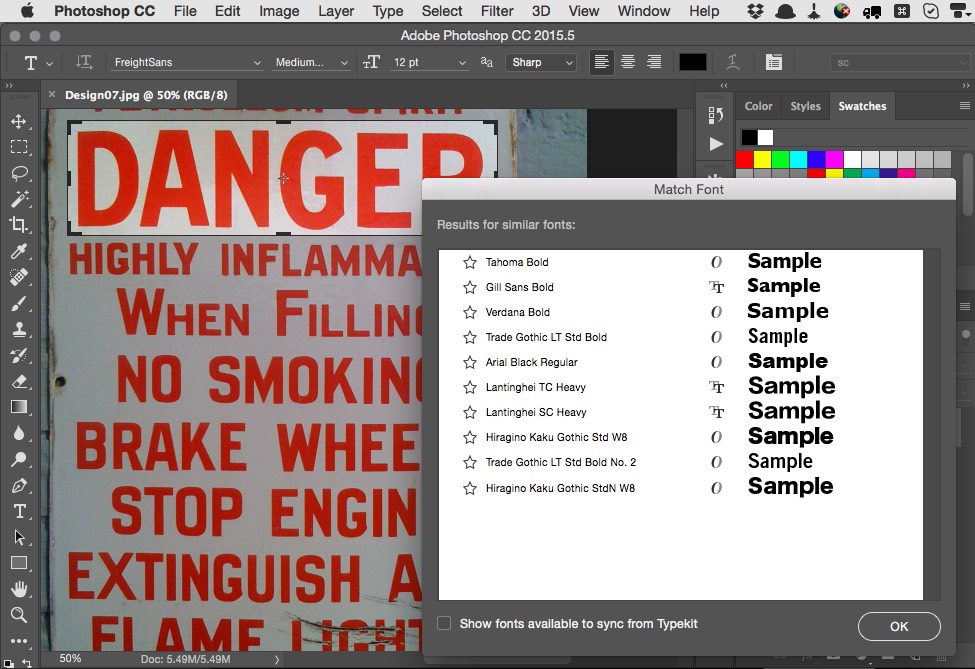
* Match Font. Need to replace some lettering in a bit-mapped image? Draw a box around it, and similar fonts from your system are shown. Nice, but not vital. Third-party services such as WhatTheFont! do the same thing, while searching across a far wider set of fonts than the few hundred installed on your PC. I guess maybe some of these services are even available as Photoshop plugins?
Two new free ‘open source’ video editors
I see that there are two new open-source Windows video editors, since I last went looking for a possible replacement for the lumbering heap of annoyances that is Adobe Premiere Elements 12.
Each is relatively simple, compared to the various behemoths that are meant for editing Hollywood movies. They may thus may be useful to you, if the old Windows Movie Maker is too limited or if Adobe Premiere Elements is just too awful an experience to keep on using. I installed both, and as a test I tried slapping together an 28Mb audio .MP3 and a 1Mb still .JPG, and outputing to a video small enough to upload to YouTube (less than 100mb).
* OpenShot 2.0 (beta) has a Windows version and a simple modern interface. Though it’s not 64-bit, which may be why it crashed for me again and again on final rendering, tried with three different export settings. Uninstalled.
* Shotcut. Windows 64-bit, but I never got it to the rendering stage. Because the simple task of fitting a static .JPG onto an .MP3 audio file is made into vastly more work than it should be, and in an interface that only a software developer could really love. Uninstalled.
So, no luck for me with these two. Why are free video-editors so flaky? But you may have a different experience. OpenShot 2.0 in particular is worth a try, to see if you get crash-free exports.