Cool new alien 3d figure for DAZ Studio / Poser, from Sixus1: Void Prime: Dakari.


Cool new alien 3d figure for DAZ Studio / Poser, from Sixus1: Void Prime: Dakari.
DAZ Carrara 8.5 Pro users will shortly get an Octane renderer plugin in “Windows 7 & 8 … 64-bit”. Apparently it’s now only “a few weeks away”.

Renderosity has a big 50% Off architecture and scene sale for Daz and Poser users, 3rd – 9th February 2014.
Above: 1971s, Mechanic House.
Free Coursera online course, Live!: A History of Art for Artists, Animators and Gamers. 8 weeks, starts 24th February 2014.
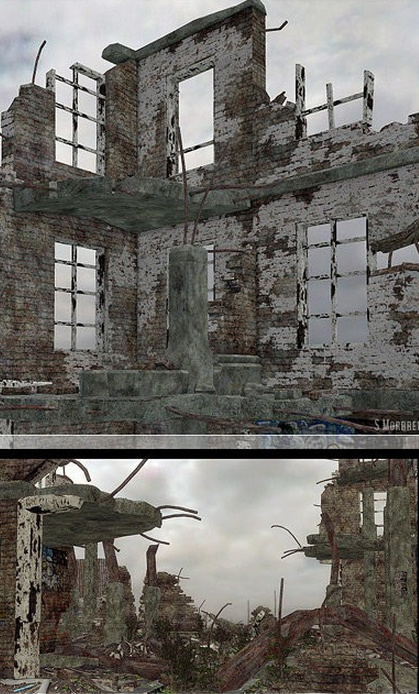
Two major new sets from the excellent Stonemason, to add to his urban ruins series.
Abandoned City 1 and Abandoned City 2.
A big scene made with these packs might need a lot more young birch trees and ground shrub cover, erupting through the roadways, if there had been abandonment of twenty years or more. The new Nature – Trees Pack 1 may be useful in that regard, as they’re low and medium poly models and look fairly convincing.
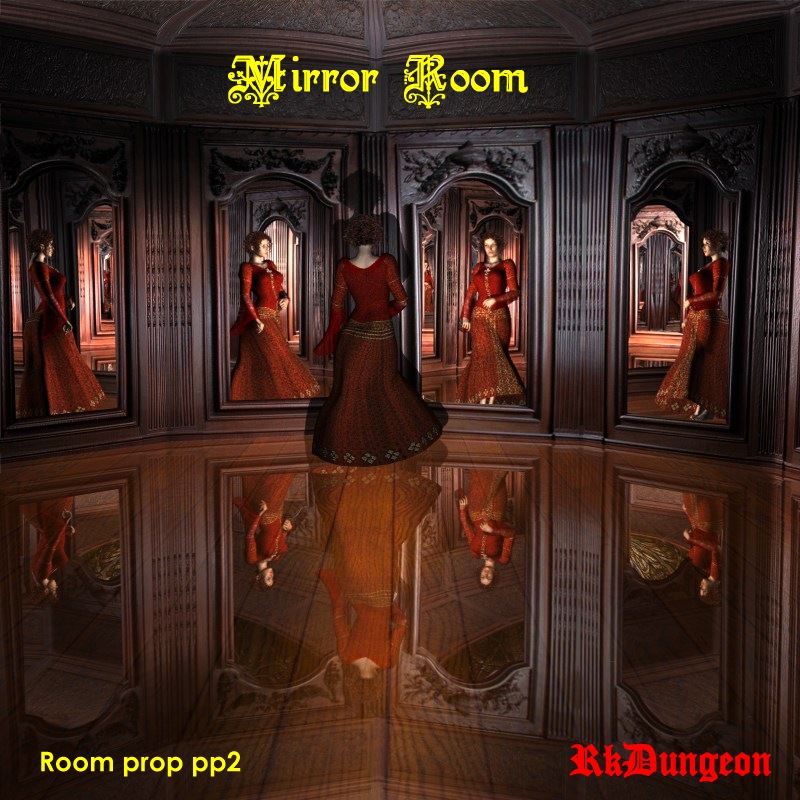
Unusual 3D scene, a mirror room for Poser, apparently with “working” mirrors.
Those interested in 2D animation should go grab my re-release of 500 free props and backgrounds intended for users of the new CrazyTalk Animator 2.
Update: now on Archive.org in perpetuity.
Now even the Daz/Poser dinosaurs are going “semi-toon”! This cute dino is new from dinosaur expert Dinoraul…

New Renderosity video tutorial, for Poser Pro beginners, A Tour of the Poser Pro 2014 Interface, and How to Reset It (10 minutes)…

It’s part of a premium series of video tutorials intended to get users started with Poser Pro 2014. These are set to be released soon…
“Beginning in January, we’ll be releasing a new tutorial each month that will build on the knowledge you developed in each of the previous lessons.”
So what cool free stuff has been released for DAZ Studio and/or Poser, over the Christmas break?
Simple Wood Sign is a nice example of the species. Could be combined with the werewolf above, maybe pointing the way to granny’s house?

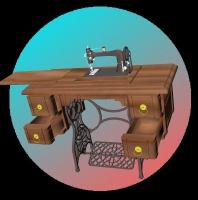
Granny’s Old Sewing Machine, ready to animate. Are you sensing the Little Red Riding Hood theme, yet…? 🙂
Nubian Complex looks impressive and has lots of nice comments, although I haven’t loaded it yet and the maker rather ominously states… “textures do not load appropiately, the textures are located in the texture files.”

Unusual Melted Snowman at Poser Direct, along with other new toons. Including the Tremblin’ Terrors for Halloween which I must have missed back in October/November…


I also seem to have missed Poser Direct’s huge Toon Train set.

I’m pleased to see continuing development on the PzDB DAZ/Poser content library management software. (My review of PzDB). Version 1.3 is currently in public beta testing…
“We’ve expanded to PzDB to work with more of your favorite CGI programs, so many in fact, we have introduced a new File Types window to enable you control which files PzDB indexes for you. You can now index more kinds of bitmaps and CGI Content files from Anime Studio, Corel Creative Suite, Google Sketchup, iClone, Maya, Quindam, Softimage, Wings3D, and even movies and audio files.”
Yep, iClone content indexing, as well as DAZ/Poser! Nice. Plus better indexing of those annoying new-fangled DAZ 4.x file types. It has a new and more polished look, too…

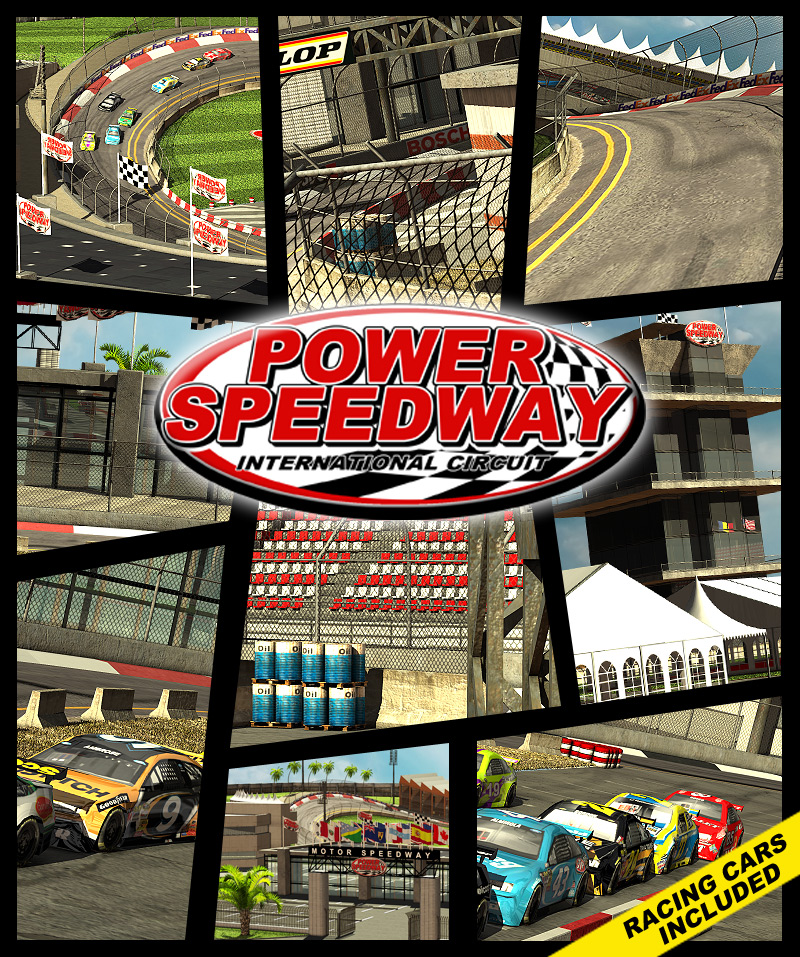
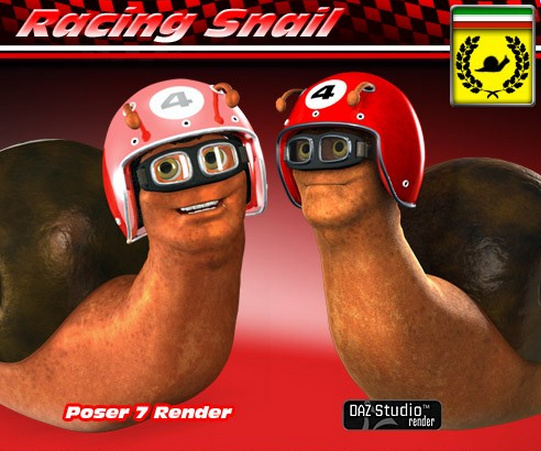
Got your racing snails in good shape? Powerage has released a complete and massive new Power Speedway set for Poser (not tested in DAZ Studio).
You can get Racing Snails here for Poser and Daz, although they’re not as cool as those in the excellent new movie Turbo. But you could probably have a lot of fun customising them with jet packs and suchlike, scavenged from other content.
And I’d suggest Ollie the toon octopus as the perfect TV race commentator for your racetrack.

Ok, ‘Black Friday’ is here. Time to take a look at what’s on offer at the DAZ Studio or Poser content stores.
* Nothing on my wish list at Content Paradise has any discount on it, at the moment.
* Not much on my DAZ Store wish list is discounted yet, although there are a few discounts scattered here and there from 33% to 71%. I note that a lot of the Daz Originals environments and monsters are on heavy discount. The Steam Dragon character is a nice bargain at just $5.

On my DAZ wish list the Aslan Court interior architecture and its extensions and addons has chunky discounts. Carrara 8.5 Pro is also on a nice 50% discount at the DAZ Store.
* Renderosity has a couple of fairly light discounts at the cheaper end of my wish list. Nothing major though, and generally I’m really having to hunt to spot any “on sale” signs inside my huge Renderosity wishlist.
* Runtime DNA is a much better. They were the best and widest discounter last year, and this year about half my Runtime DNA wish list is on discount. Some of the discounts are quite heavy. The Sassafras semi-toon cat character is less than $10, which I’ll pick up along with discounted poses. Yep, it looks like Runtime DNA will be getting the big bite of my PayPal balance this year.

* Teknology3D has got the right idea, with a no-nonsense “50% off everything” one day sale. Including their merchant-resource clothing template kits for Sammy and Sadie…

* FoRender has a Black Friday vote on which item should get a 65% discount.
9pm on Thursday night (UK time) and I’m waiting for the big Black Friday sales to start on the Daz Studio and Poser content stores. I just went round my store wishlists, nothing yet…
A virtual Tilda Swinton character for Poser and DAZ Studio (3 and 4.5)…
