New freebies site link added, Littledragon’s freebies…


Poser 11 is only just out recently, but here’s a list of the known packs of SuperFly shaders presets / materials presets, at January 2016:
* Node-god Seachnasaigh’s “misc Sfly MATs” pack. Including a very useful and fine glass preset in both plain and volumetrics versions. Make sure you get all his .zip files. Update: This appears to be one of the items which vanished with the demise of the RuntimeDNA store.
* 8 Speciality materials. Including glowing alien gloop! (free)
* Superfly Metals Basics (free)
* Glass pack. Just made for fun, not super-realistic. (free)
* D3D SuperFly Materials. Cloth, glass, metals, textures such as cork, settled snow. This is also labeled as a Merchant Resource. ($12)
* Zoe’s SuperFly Satin Shaders (free)
We’ll no doubt see more in 2016, since it’s fairly easy to port over the zillions of free Blender Cycles shaders into Poser 11.
Anyone reading this will probably also want the free EZSkin 3, which enables older SSS or more-complex DAZ SSS skin shaders to work in Poser 11 SuperFly, in just a few clicks.
How to get the best from the Comic Book preview mode in Poser 11: a basic workflow using two masked PNG renders of a character.
AIM: to show how the Comic Book preview mode works within a workflow. To get the ink lines onto their own Photoshop layer, with the flat colours underneath the lines on another layer.
USERS: This is for those intending to spend serious time creating a narrative comic-book or graphic novel, and who need the artwork to stand up under the scrutiny of seasoned buyers of comics and comics reviewers. If you’re just making a webcomic gag-strip, shown at a small size on a phone or tablet and seen by readers for 0.3 microseconds, then you don’t need this tutorial — instead just accept the ink lines that the Comic Book Preview mode gives you, rendering them to a big masked .PNG with anti-aliasing enabled.
REQUIREMENTS: Poser 11 Standard or Pro, Photoshop. Please note: this tutorial requires you to be familiar with using Photoshop, and that you can remove a flat colour from across a picture and replace it with 100% transparency.
1. Set up a new Poser 11 scene with a flat single-light IBL light at perhaps 30% intensity, so as to get a toon flatness across your character. Turn off the Ground (i.e.: make any backdrop plate and the floor invisible, even as a mesh), since we want to output a masked PNG later on. ‘Flat’ here means it’s pointed fairly directly at the camera is is not causing many shadows… the lighting that results is ‘flat’.
Note that as well as having a dial setting for Intensity, your single IBL light also has Red | Green | Blue dials. Dialing back the Green a little can add a subtle extra warmth to a character’s skin when using IBL flat ‘toon’ lighting.
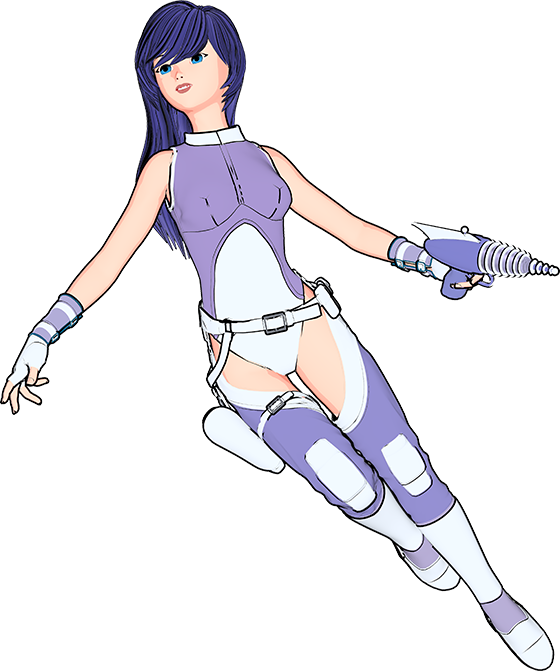
2. Then load a suitable character such as Aiko 3, seen here, who is still excellent for comic book tooning. Here she is with toon materials, but in Poser’s default lighting. As you can see it’s a bit ugly — this is what is about to get cleaned up by the special single-IBL light which will give us relatively flat toon lighting. Without an anime/manga ‘flat’ light (we’re adding that in step 3) you can’t tell if the toon materials do actually toon or not.
One of the nice things about Poser 11’s Comic Book mode is that older vintage characters such as Aiko 3, who are misleadingly deemed to lack something in the age of photoreal rendering, suddenly become useful again for comics and cartoons.
Once you’ve loaded your character then you’ll need to locate a dedicated toon skin material in your runtime, and apply it to the character. You don’t want one that gives you an ink line, though, since we’ve already got that. Ideally the toon skin material will just incorporate a very subtle paint wash effect, as seen in the example below. This helps to suggest rounded limbs, noses, and chins, but without the need for ugly dark shadows…
This example also illustrates why this tutorial’s method is needed. Close-ups will show errors in the ink lines, such as are seen here on the clothes at the shoulders. Having the ink lines on their own Photoshop layer makes these errors so much easier to correct or erase.
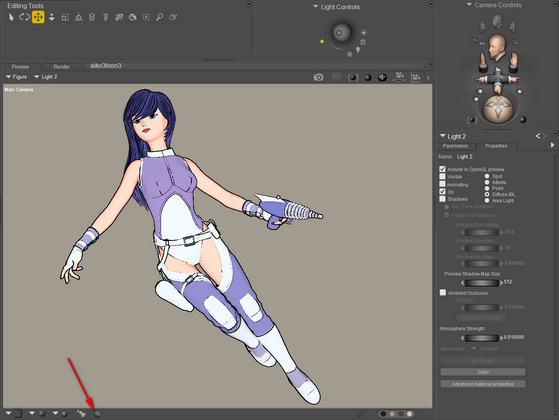
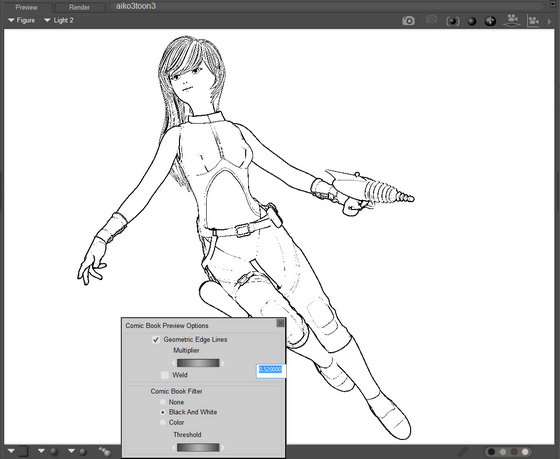
3. Activate Poser 11’s Comic Book preview mode panel (centre of the screen, at the bottom), and tweak this effect to your liking. Note the new flat head-on light.
Now drop the flat or almost-flat colour materials, that you’ll already have scoured your runtime for, onto the clothes and skin. Ideally — in this special lighting and mode — the chosen materials will have just a tiny bit of shadow set to appear at the edges (as seen above on the clothes). Once you have found a suitable material, you can save it out and just use it again and again, simply tweaking its exact colour to your liking via a quick trip to the Materials room.
Find suitable hair, then apply a toon hair material that looks good with the new Comic Book mode (easier said than done, because such materials appear to be rare).
Ensure that any legacy materials are “burned off” by turning up the Threshold dial in Black and White mode, so you just have line-art when in Black and White.
4. Once you’re happy with your Comic Book look in both colour and black-and-white modes, ensure that “Enable Hardware Anti-aliasing” is enabled in the Preview rendering settings, and that the Style Options panel there has “Antialias rendered image” ticked. These should both be on by default, but it’s worth checking. Those without a graphics card should note that Poser 11 no longer requires a GPU for anti-aliasing.

Then set the render size to BIG. For this tutorial I worked with 5000px by 3750px. Render size just doesn’t matter here in terms of speed, since we’re working with real-time OpenGL rendering.
5. Ensure that you are in B&W Comic Book Preview, then Render your Preview + export a PNG. Even at 5000px the Preview render this should not take more than five seconds.
(NOT: OpenGL preview + anti-alias + export, since that won’t give you a masked PNG).
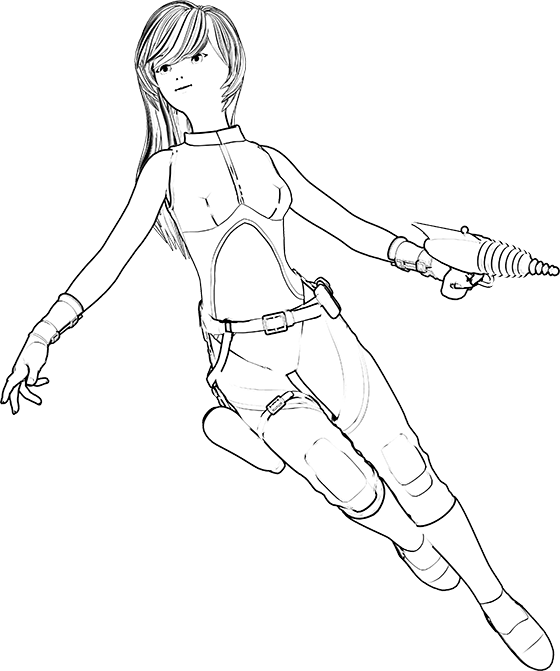
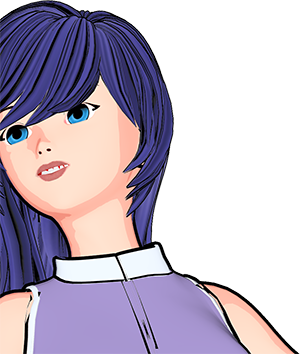
Note here that the line inking is not perfect. The mouth is a fairly ugly line. Bits of the gunbelt are missing lines. A bit of boot is missing a line. Her clothing top’s ink line goes haywire as it approaches her shoulder. There are also some thin mis-placed lines on the top of the thighs, and a line across the eyes (though the latter can’t be seen in this reduced-size picture). Anyone who wants to make a comic that deals in close-ups and a medium-shots is going to have to deal with problems like these.
6. Now turn off all the Comic Book preview inking effects. Yes, that’s counter-intuitive. But, now that we have the ink lines as a render, we only want the Colour Flats or as close to flats as you can get. Without moving the camera or character pose, render the flats out to a 5000px .PNG.

Quite pretty on its own, admittedly. But if it’s going to be part of a narrative comic panel then Aiko needs the quick ‘visual readability’ that strong ink lines will give her, and which will help her to stand out from the background.
The hair still has lines, since they’re coming directly from the toon hair material I added.
7. OK, we’re done with Poser (you might also add a shadows-only render, but that’s not covered here). Close it and start Photoshop. Open the colour flats .PNG in Photoshop. Copy | Edit | Place Special | Paste in Place. Doing it like that helps to avoid the clunky mis-registration of the two layers that might otherwise happen.
Now use Photoshop to knock out all the white in the B&W ink lines layer, so that you just have the black lines on top of the colour flats. Set the line art’s Layer Blending mode to Darken, 100%.
(Ideally, a future update of Poser 11 would enable a dual-layered .PSD from the Preview renderer, for this sort of work).
8. So, why do all this? It’s because you now have the ink lines on their own layer, which allows you to clean up the line-work in a quick way that would otherwise be impossible. Simply chop out any ink lines you don’t like, with the Lasso tool. Or more carefully erase or soften ink lines with the Eraser.
Here you can see that I’ve removed the odd-looking stray lines that had crept up over the thighs, have totally removed the ugly ink line which had been placed across the mouth, and removed two tiny lines that were going right across her eyes. This sort of work may be especially important for larger comics panels containing close-up artwork of your characters.
Because of the large 5000px size it’s also now easy to ink in any lines that may be missing. Or if you have a shaky hand you can just steal nice lines from elsewhere in the ink lines layer, copy+paste them, then rotate and re-size. For instance I did this on the end of the belt-pull.
One can also use Photoshop’s Liquify tools to nudge, smooth and reduce certain lines, and because you’re working at a large size the resulting blurring won’t be too apparent. Make sure the nudged line still aligns with the colour flats render, though.
You may also want to do some very light Dodge and Burn work at this point, just to bring back a little shape and weight to selected aspects of the character. The gun holster and gun body, for instance, might benefit from a subtle visual cue as to their roundness. Or if you’re skilled with art rendering, paint a whole greyscale values layer, blend it and then add highlights.
Perhaps you might even paste in a Shadows Pass or AO pass from Firefly (Shadows-only render) as an additional layer. Though maintaining consistent self-shadows across all panels of the comic will likely generate vast amounts of extra work, and the result probably won’t be satisfactory as either 2D or 3D.
If you need your final .PNG cutout characters to cast a ground shadow, there’s Lyne’s Cast Shadows Action for Photoshop.
There may be a slight overall mis-registration of the layers, but that can add to the comic-cook art effect by making the art just a bit less than perfectly done.
9. Once you’re happy, save the picture as an un-flattened .PSD for future tweaks, emergencies and re-use. Then select the character, Edit | Copy Merged and paste into a new document. Reduce that to the size you need for the target comics panel and save it as a .PNG (so that it retains its transparent background).
10. Your output .PNG is now suitable for dropping into a comic-book page’s frame, and because it’s a .PNG output it will be seamless with any pre-existing background layer you already have in the frame. (You can also Stroke the edge of your output .PNG in Photoshop, if it needs to stand out more from the background, and note that Stroke can be run in Inside and Centred mode as well as along the Outside edge. Alternatively, a black Outer Glow can also give you an edge Stroke, but softer than a Stroke).
Seasoned comic-book readers are now far less likely to sneer at your artwork because of oddly placed ink lines on noses, mouths, or other important areas, or because of some curiously missing lines.
A few additional things I learned in the process of this tutorial…
* In the Black and White mode, turning on Depth Cueing can very subtly change some toon outlines.
* In Black and White mode, adding a 50%-power Spotlight and swinging it around can cause interesting extra ink lines to appear, at the cost of some loss of lines elsewhere.
* Conforming accessories such as belts and goggles etc seem to take toon ink lines especially poorly. I suspect it may just be poor edgework due to the conform.
* And as I’ve written elsewhere, the Sketch Render can be applied to just the ink lines of a B&W preview, for a nice pencil effect. Try the Charcoal preset, with the stroke lightened up a bit and with no background sketching.
* If you really feel you also need 3D-style shadows on the character, you can do an extra render with just a shadows pass, and then blend and partially erase this in Photoshop. Keep in mind that that character shadows may be difficult to control consistently across a 24-page comic-book, especially across multiple characters and settings, and thus may be more trouble than they’re worth.

Update 2020: I’ve learned a lot more in the four years since this tutorial. See my other posts tagged “comics”.
Next weekend I may not have the time to do my usual survey of the month’s new content for DAZ Studio and Poser. So, here’s the latest roundup of the quality and unusual items that have caught my eye since December 31st.
Wear Them All – Autofitting Clones and Clothing Smoothers for Genesis 3 Female and for Genesis 3 Male. Looks incredibly useful for DAZ Studio and G3 users….
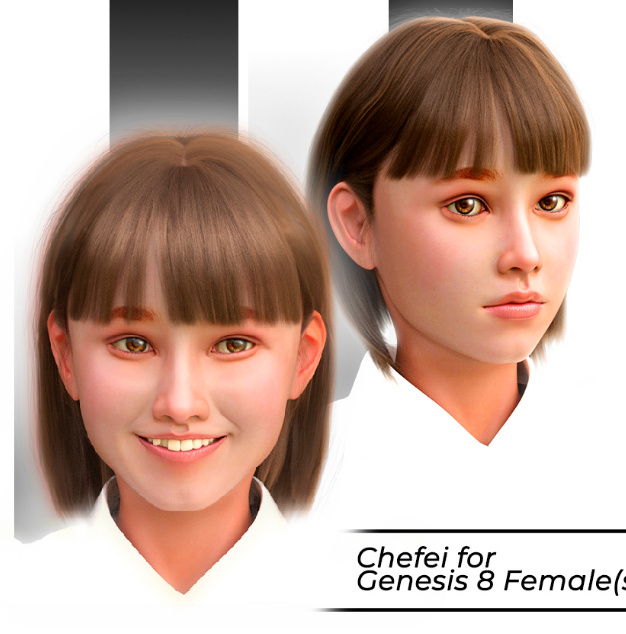
“Wear Them All autofitting clones are created to smoothly fit any Genesis 2 Male, Genesis, Victoria 4 and Michael 4 conforming clothes to Genesis 3 Female(s) using the Autofit feature in DAZ Studio.”

There’s also a big Male + Female ‘Growing Up’ bundle to easily get different age-shapes onto Genesis 3.
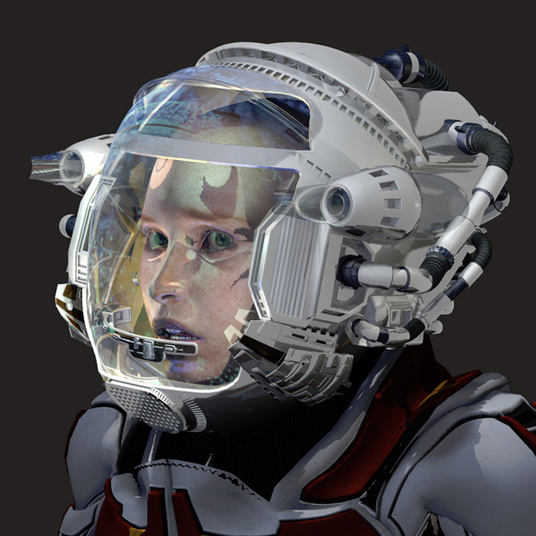
There are of course plenty of generic/chain-store G3 outfits this month, plus a useful base set of Office Wear for Genesis 3 Female. But a few more unusual items stand out for me. The AntFarm has an impressive Flight Gear head-piece for G3 and G2, which someone will no doubt produce a steampunk materials makeover for soon.

Demian’s Misterio Outfit for Genesis 3 Female is an interesting blend of ancient Greek, steampunk and sci-fi, with a smidgen of pirate. Those with large runtimes could probably mix-and-match items from different outfits to get something similar, but this is nicely done…

Oskarsson has a classic Alice in Wonderland outfit for Genesis 3 Female, which is sure to be popular and to attract a large number of texture makeovers…


Grand Siecle Hair for G3 female, big French-style hair from the 18th century…

For Genesis 2 there’s High Top Canvas Sneakers, which look usefully generic and which come with a wide range of textures and scuffs/stains…

Also for G2 is a freebie Chef outfit, worth having simply for the unusual hat — even if you don’t need a chef…
Poser 11’s new Pauline flagship figure has a goth makeover Jana for Pauline (Poser 11) and an Asian makeover Asami for Pauline (Poser 11)…


In science fiction Predatron’s Star Wars-inspired 14MU Space Dock might be hard to get good camera views inside of, but it certainly looks superb from above. It could equally well be a futuristic gladiatorial arena for battle-bots?

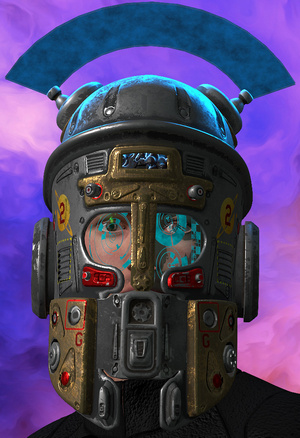
Atlantida Weapons are attractive Fifth Element-style hybrids between sci-fi and Ancient Atlantis, including a very desirable helmet…
Also in sci-fi head-wear, Poisen has a fabulous set of Helmet-Z2 helmets this month…


Is your default grey-blue Poser startup figure, Andy, looking a little humdrum? The freebie Andy2.0 Ancients gives him a colourful sci-fi makeover…
Pin-Up Gynoid Phase3 for G3F Base is unusual…

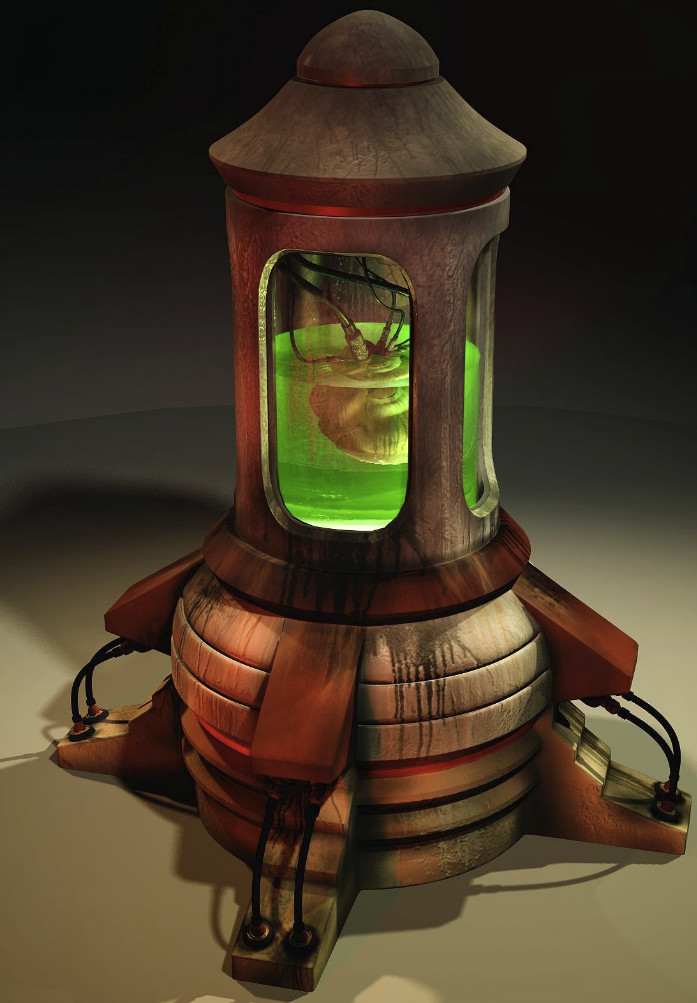
There’s an even more unusual storage chamber for the Gynoids, Valentine’s Hive…
There are a couple of classic history scenes this month, including i13’s new Greek Arena and Greek Chariot…
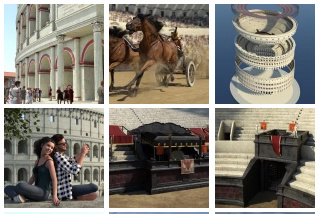
Borgia’s Opulent Hall looks like an excellent place for a renaissance swordfight, a Venetian ball scene, or perhaps even a steampunk battle-planning conclave…

Pre-Raphealite paintings in DAZ Studio or Poser? No problem. Mada Hair Genesis 3 Female, G2 and V4, complete with the daisy hair wreath — and (over at Renderosity) NaturalHC colors for hair and wreath…
I covered the recent wave of Ancient Egyptian content in my survey of such, a few days ago…

There’s a crop of urban gangster/police scenes this month. The AntFarm has The Back Room…

And Coflek-Gnorg has an I Spy stakeout scene…

Coflek-gnorg also has MO Ghetto Props 3D Models, which could also be part of the stakeout…

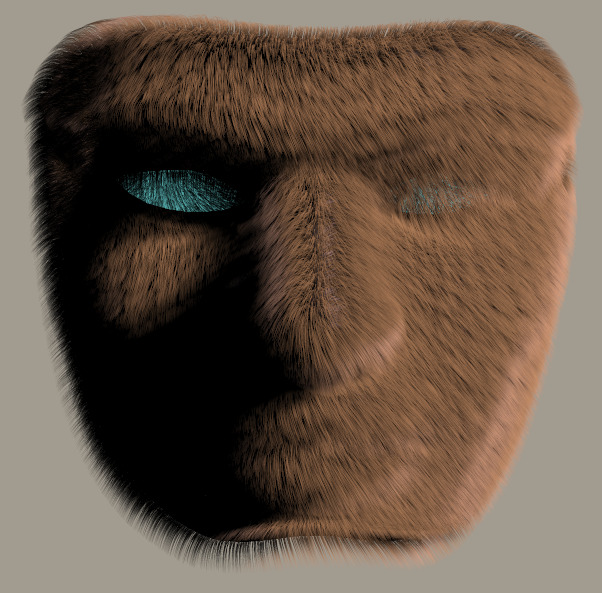
The guy who lives in the box probably sports the epic new fuzzy-face beard from Mortem Vetus, Facial A-Hairness…

Fitting into this crime genre, perhaps a little more than into sci-fi, is Cybertenko’s Military Exoskeleton. It might be a possibility for outfitting and super-charging your gangster-busting hero…
Not much in semi-toon this month, but what there is is quality. The humanimal Reindeer Dusk & Dawn looks great fun…

Also surfing the humanimal trend is Baby Rhino for Baby Luna. Though sadly Baby Rhino appears to have been pulled from the store. Hopefully that’s not due to complaints…

A Witch’s Gingerbread House has a nice baked glaze on the gingerbread…

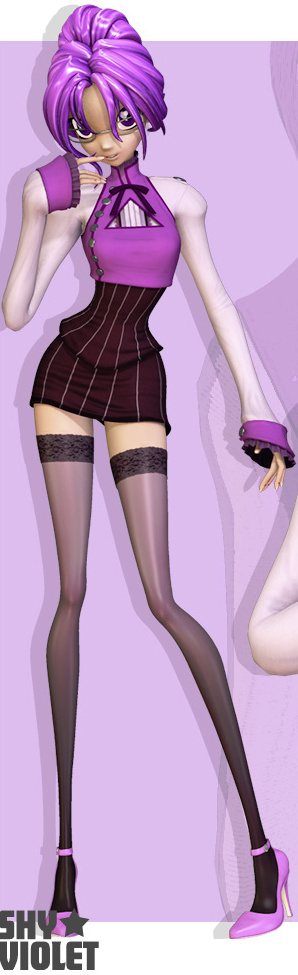
At Runtime DNA there’s new winter clothing for the popular Star! figure, Vintage Looks for Star…
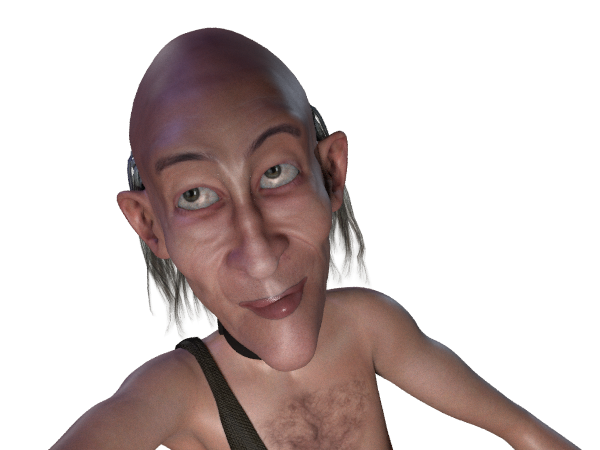
Skinny in a very different way from Star! is the modern-folklore character Skinnyman. He’s a new standalone character for Poser 6 or later, with a suit that has an excellent silhouette on the shoulders…


Animals continue to attract top Poser/DAZ designers. AM has his Wolf 2.0 for Poser out now, complete with fur.

AM also has a new Thylacine (Tasmanian Tiger), a sort of curious marsupial blend between a dog and fox, with zebra stripes…

Too late for Christmas, but you can now turn your Hivewire Horses into Rocking Horses…

The maker of the top-quality Songbird Remix series continues his new Moths series with Moths of the World Vol. 1 and Vol. 2…

Mortem Vetus’s Facial A-Hairness for Micheal 4 can also give a man-beast an epic amount of animal hairyness…
All that in just 24 days since Xmas. Thanks to the designers who make all this cool content happen!
That’s it for now, more next month.
Now online, the recent 76-minute webinar for users of the new Poser 11: “How to Get the Best Results from Poser’s SuperFly render engine”…
Update, video was at /l0yjSRMsAjY but is now dead.
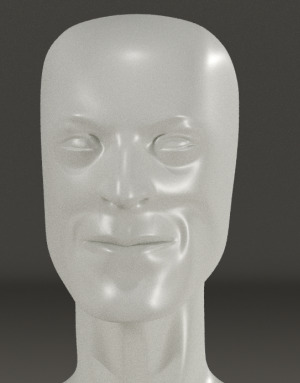
A rather unfortunate frame (above) for YouTube to decide to dwell on. Don’t worry, you really don’t have to learn math and draw complex diagrams to use Poser! However, the graphic does indicate the nature of the video.
BE WARNED: this video is a highly technical look at the innards of SuperFly, and is not ‘pretty pictures of space babes and a half-dozen hot rendering tips’. Basically, if you don’t know what “bucket size” is and what “shader nodes” are, your head will explode about half-way through the video 🙂
Poser newbies who do try to watch it should be aware that all this complexity is hidden behind simple presets for render-quality and materials.
I did learn something interesting right at the end of the video though. “Bucket size” can affect the speed of a CPU render, but it depends on the type of scene. Doesn’t seem to work for my simple CPU though, on a test scene…
Bucket size (default Fast Preview preset is 64) | seconds:
16 | 31 seconds
32 | 30 seconds
64 | 30 seconds
128 | 43 seconds
256 | 59 seconds
Update: Those with multi-thread workstations (e.g. 12 fast cores, 24 threads) can go higher up this list and get faster not slower.
Got some troublesome, flaky old SSS skin in Poser 11? Simply rub on a handy squirt of SnarlyGribbly’s EZSkin 3, and all your itchy skin problems are solved!
In a few clicks EZSkin 3 cooks up a neat little SuperFly and Firefly materials combo, using the original textures, and has your character’s skin looking right for rendering in Poser’s new SuperFly. SnarlyGribbly has kindly released it free as a robust beta, via Snarly’s Space: EZSkin. There’s also a ‘latest build’, if you want to trawl the thread on the official forums and scroll through to pinpoint the latest .zip for that.
Very simple to use, once you install:
1. You load EZSkin 3 and its set of Figure Definitions. These are found in the un-zipped folders…


For Poser 12 there are now two zips, and you need both for the presets and definitions.
In the definitions “DAZ Gen 4” = V4 / M4 / K4. These and many others are in the Figure definitions / Legacy figure defintions.defs file that ships with the script or can be found in the second download .zip file.
Poser’s flagship La Femme female figure is regrettably unsupported, but there is a third-party EZ Skin 3 Definitions for La Femme. Note also that the new La Femme figure has a different eye set-up.
2. Tell EZSkin 3 what the figure/character type is, if it can’t auto-detect that.
3. Select either Firefly or SuperFly rendering (the target renderer).
4. Click ‘Apply’.
5. Render.
That’s it. Took about two seconds and four clicks for Dr. Pitterbill. Most popular figures are automatically supported for this, including the various DAZ Genesis variants.
Not working? It should not need AVfix, but that’s worth a try first. You may have an old EZSkin that requires it. You may also need to fiddle with EZskin a bit, for instance if it’s a V4 with a ‘Unsupported’ character and MAT already applied. Even then you may not have success. Ideally the vendor of the character will supply SuperFly materials.
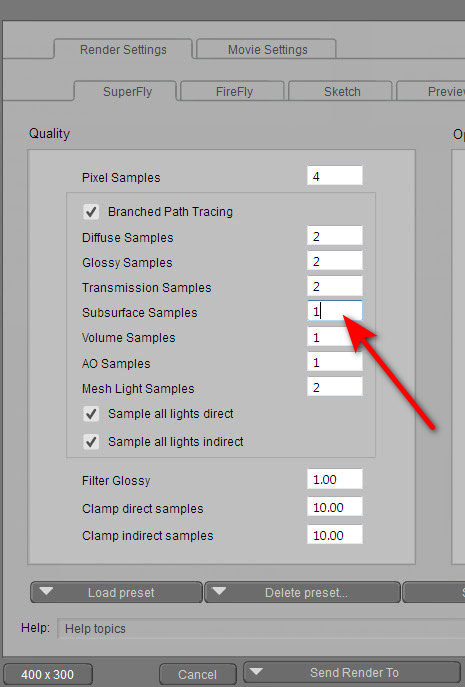
If you have the ‘black skin’ problem in renders, it may not be the Vendor. First check your SuperFly render preset. If Subsurface Samples is zero (often used for a very quick test render), then the skin will render black in SuperFly. Increase this setting to at least 1.
White eye pupils are fixed by going: Material Room | Pupil | Alternate Diffuse node | follow the wire to the Scatter node | turn colour there to a very dark grey. This does not apply to La Femme, which has a different eye setup.
Poser 11 Service Release 2 (SR2) is now available to load through the Download Manager. There’s also a 260Mb updater for the free Content Pack.
Many fixes, the full list of which is on the official forums. My small selection from the list…
* Content Library drag & drop, plus an info bar for the drop target.
* Native drag & drop to enable drop on 3rd party applications.
* Reintroduced “Locate” context menu functionality for [Content Library] search results.
* Improved Raytrace Preview robustness.
* The flagship male character, Paul, now has Talk Designer visemes (i.e: lip shapes for speaking).
* Paul and Pauline, and their free clothing, are officially made a ‘merchant resource’ now that they’re finished. There’s now a business suit.
* Various fixes to the Python scripting.
It’s been a little over a year since I checked all the ‘The Poser/DAZ Directory’ sidebar Web links on this blog. Last night I checked them all by hand, and have either updated or deleted the broken ones.
Want to make something a bit more ambitious than a comic-strip, with Poser 11’s new Comic Book Preview mode? Squiffy 5.0 is a free Windows-based choice-based interactive fiction authoring system, from the UK.
“Squiffy is a tool for creating interactive fiction – that is, multiple-choice games that focus on text and story. Players navigate through the game or story by clicking links. Sometimes these kinds of games or stories are known as gamebooks. Squiffy is free and open source. It creates HTML and JavaScript, so you can upload it to your own website, or you can upload your games for free to textadventures.co.uk. You can also turn your game into an app using PhoneGap. A player’s state [their savegame] is automatically saved to their browser’s local storage, so they can always pick up from where they left off, just by going back to the same Web page.”
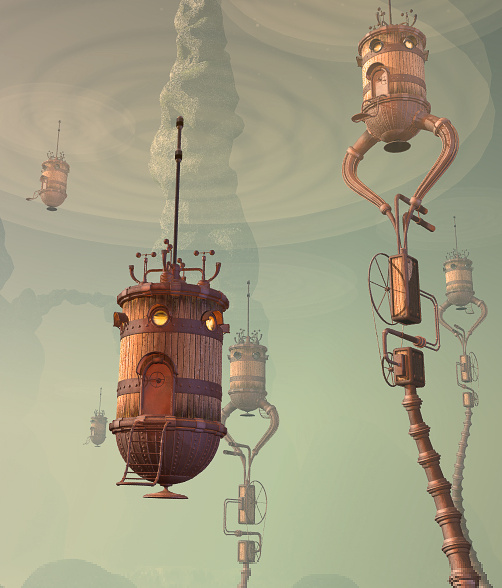
It uses a text-editor interface to make an old-school ‘choose your own adventure’ book. But, of course, these days they are often called ‘gamebooks’, and can come with phone-screen sized graphics, nice screen transitions and small bits of animation. Note that gamebooks are different from, and much simpler to code, than the older text parser-based ‘interactive fiction’ such as the famous Zork series.

The best example in English is the steampunk 80 Days (above), which the UK’s leading Daily Telegraph newspaper review called “the best novel of 2014”. 80 Days has a race-against-the-clock time-keeping feature, and a very simple item-trading and wallet feature.

As you can see, Squiffy is for creators familiar with using an HTML editor and tweaking Javascript.
It seems that Squiffy can’t get the finished book out to a plain ol’ Kindle ereader. Not in a way that the gatekeepers of the Amazon store can handle, since they and the Kindle ereader only support a fairly restricted set of HTML tags, and add some of their own tags for good measure. And Amazon’s Kindle store is where a great many dedicated novel-buying readers are likely to be found. I actually coded a complete working gamebook HTML template for the Kindle a few years ago, but never released it — so I know what the ereader version of the Kindle demands.
But if you want to get your gamebook onto an app store for phones and tablets, then Squiffy 5 is currently said to be the best authoring option with the most features. But I see that it has no flowchart feature — for doing the initial designing of how each section of your main story will branch off into short vignettes and then how those will loop back again toward the main plot. That’s something that’s still probably best done with paper index cards and a large wall, so you can see it all at a glance.
The makers of 80 Days have their own free Inklewriter (Web only), which can export to Kindle. In the summer of 2015 Inklewriter was also ported to the free Unity game production software. The 80 Days creators have this week announced their their next gamebook will be made in Unity, presumably with their own super-duper Unity implementation of Inklewriter.
Newly available for free on the Hathi Trust archive: Practical hints for art students (1910), a delightfully clear and abundantly-illustrated primer, from an era when the human figure and its posing and lighting were at the heart of art-school practice.

Do you have older items in your Poser / DAZ runtimes, which have no thumbnail previews? The free RSR to PNG Converter will scamper through your runtime and make a .PNG thumbnail for every non-thumbnailed Poser .RSR file that it finds. Still works fine in Windows 8.1, and is a nice addon for PzDB.
Load | then point at your ../runtime (not your ../content); select ‘recursive’ | let it run (there’s no indication it’s running) for about 30 minutes on a first pass of a huge runtime.
When it stops producing its occasional “RSR could not be converted… Sorry!” messages, and lets you slide the scroll bar, then it has finished its run.

With Poser 11’s new Comic Book Preview mode, a lot of older content with fuzzy/muddy textures can become useful once again — for a cleaner cel-shaded/comic-book style. The underlying model geometries are still fine, so you’d just swop out the older textures for a flat toon style material.
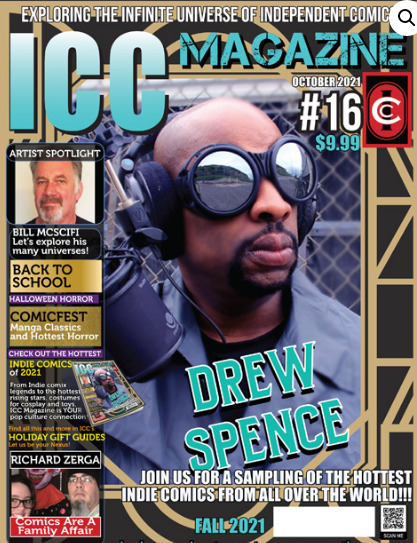
Available now, the free Digital Art Live, issue 4. 96 pages of in-depth interviews on the new advanced render-engines (Poser’s new SuperFly, plus the Octane and Reality plugins). Plus an in-depth 7,000-word review of Poser 11 Pro, and a concise survey of the best space sci-fi of 2015. Here’s a preview…


Ancient Egypt seems to be hot in 3D these days, so I thought a survey of the best-looking items might be in order. It can work for everything from heroic fantasy adventure through to Bible stories, from Age of Empires cityscapes to Fifth Element -style ‘ancient astronauts’ sci-fi.
Characters, hair, costumes:
Egyptian Outfit and bundle for Genesis 3…
Bast: Goddess of Cats for V4, including clothing and the Bast Hair for which there are Colours for Bast Hair and Queen Nile Bast materials. Bast also has Egypt poses for V4. Bast is also available as a bundle for Genesis 3 Female…


MDD Sakkara for V4.2 from quality character designer MDD…

If you need lower-resolution extras, perhaps to to play a small part in a vast resource-intensive scene, they might be provided by Rulers of Egypt for the now-ancient V2/M2, and note that they also have a Egyptian Couture-Lapis textures makeover…

Military:
There are a variety of authentic military figures and chariots for M4, and Egyptian Chariot. There are also a variety of foot soldier uniforms floating around the stores.

Armour expert Xurge also has a fantasy-ish Pharaoh Outfit for M3…

Props:
RDNA Egyptine Peacock Feather Fans…


Temples and Statues:
Ruins Of Egypt by Stonemason…
Hypostyle Hall imagines how an Egyptian hall might have looked in its freshly-painted heyday…
Ra’s Palace for DAZ Studio by Dreamlight, plus a Dreamlight light set…

Egyptian Pyramid with entrance, and there’s also a free Sphinx in OBJ…

Also have a look at Temple of the Nile and Egyptian Fantasy.

Egyptian Statues for Poser…

Treasures of Egypt pack and Treasures of Egypt 2 and Ancient Egyptian musical instruments, all perfect for filling the Ancient Tomb and its lower Forgotten Tombs.


Joe Kurz has a a variety of free Poser temples and columns in the Ancient Egyptian style.
River transportation:

Papyrus Boats for the Nile.
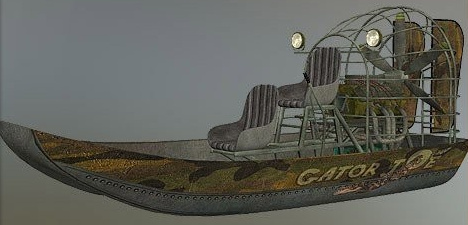
There’s also the Ancient Egyptian Canal Boat.
Meshbox have a Ancient Egyptian River Dock and Boatmaker which might provide a mooring place for boats, around which one might plant Predatron’s Reeds and Rushes…

Predatron also has Palm Trees.
Semi-toon:
I wasn’t going to venture into the semi-toon area on this theme, but Furries’ Furs – Bast and Anubis are too nice to ignore. They have a ridiculous amount of dependencies, though. They seem to require that you have Furries for Melody / Furries for Micah, which in turn require Melody for A3 which requires Aiko 3, and Micah for Hiro 3 which requires Hiro 3. Phew! Thankfully, apart from the base characters, they’re all low-cost.

There’s also a Toon Egypt semi-toon 3D scene to pose them in.
Fantasy:
If you were to go a bit Conan / The Mummy Returns / Fifth Element with the Egyptian theme, then Queen Cobra HD and Nefertina HD might be useful…


For fantasy males, perhaps Shades of Atlantis: Anunnaki for M4 and Genesis 2 Male Anubis Armor for Anubis…


We seem to be currently missing a Ra-Horus figure — the sun-god, head of a bird — from the Poser/DAZ line-up…


Animals:
You may be needing high quality Scorpions and Large Snakes.
And a Nile Crocodile or three, of course. There’s a freebie Crocodile Pit Extension for The King’s Pass building…


A Scarab Beetle comes free with Poser, so many people will have one in their runtimes.
And finally, no Egyptian scene is complete without some suitable kitties for your characters to worship. Bast Cat for the Millennium Cat seems the most elegant kitty to fit the role…

That’s it!
How to use the free desktop version of ComicRack to shrink .CBR digital comic book files in size, for reading on an older under-powered Android tablet:
1. Install the free ComicRack for Windows. It’s mature software, and the desktop version is genuinely free.
2. Load ComicRack. Get yourself all the way out of whatever ‘minimal interface’ / ‘full-screen’ view you’re in. In the corner, click on ‘Folders’, and navigate to the folder containing the .CBR comics that you want to reduce in size.

3. Shift-click to select all the folder’s comics. Click on “Export Books”.

4. Now set up your Export preset. Tell ComicRack where the save the new files, the size reduction, compression, and more.
Erm… now, what size to shrink them to? You’re not told what the page width is (although you can use CbxConverter if you really want to know) but let’s assume that a HD .CBR page is 1988px, with double-page spreads at 3975px.
Let’s imagine that you have a Archos 70 Android tablet from four or five years ago, which had the benefit of an excellent and crisp screen at 800 x 480px. A preset that gives each page 1000px, in .JPG at 60% compression, should be very lightweight. Here I’ve also set it up for that, and to split double-page spreads into two pages…

5. Save your configuration as a preset, and test your preset. If don’t get it right the first time, delete it and start over. If 60% JPG compression is too strong, try 85%. If you have a slightly more powerful tablet than otherwise, you might try a 1400px width.
6. Once you’re happy that you have the right mix on your preset, from now on you can use this custom master preset for “Export Books”. Simply click on “Export Books”, select your preset from the dropdown, and the conversion starts. There’s no progress bar, but if you look in your chosen export folder you’ll see the new files being created one by one.
7. That’s it. As a .CBR and .CBZ reader I use the excellent free Comitton (aka ComittoNxN — scroll down the Google Play page a little, to see the link to the free version) (Also on Kindle Fire). Its only disadvantage is that on layered PDF files it only displays the artwork, not the lettering laid on top of the art.
In past years many have suggested the free CbxConverter as a .CBR size shrinker. It’s effective, but it can only save using the .webp graphics format. Which means you can’t use ComittoNxN as a reader because it doesn’t yet support .webp, which means that on an older tablet you have to use Perfect Viewer instead — and Perfect Viewer has an awfully clunky magnifier compared to ComittoN, even when you pay the donation.
Tutorial: How to combine the Comic Book Preview outlines and the Sketch Designer in Poser 11.
1. Load a new Poser scene. Turn off the GROUND visibility, since we just want the effect applied to the character.
2. Load any suitable toon character. Here’s Rufus, who ships free with Poser 11. His default grey plush material is certainly not suitable, but Poser 11’s new Comic Book Preview mode can now get the toon effect onto even a grungy character.

3. Now think ahead. Those thin white whiskers are highly likely to be a problem later. They need to be turned black. Go into the Material Room, find the character part Whiskers, and turn the Diffuse and Translucence to black instead of white. Or simply apply a generic black material to the whiskers. The eyes and nose are rather a dense black, but leave them be for now, to see how they turn out in test renders.
4. Set up a single flat toon light for the scene — set the light to be IBL, about 52% intensity, set to “Include in OpenGL”, no shadows. Have it point somewhat directly at Rufus. Make sure the light is NOT ticked as “Visible” in the Preview window.
5. It’s not looking promising for tooning… until one loads up the magic of Poser 11’s real-time Comic Book Preview mode.

Rufus has become ink outlines, as a real-time preview. There are two ways to tell Poser’s Sketch Designer to ONLY sketch into these ink outlines. One way is in the Comic Book Mode, where you switch on ‘Black and White’ and turn its Threshold dial up very high, until you see all the character textures ‘burn off’ to white. That’s what you see above. The ink lines are nice and clean, but a little dense.
6. How to make those ink lines look more like a pencil sketch? Go to Render Settings | Sketch Tab | load the Soft Charcoal preset. Run the Sketch render.

7. The Sketch Render has affected only the Comic Book Preview ink lines that have been dialed in.
Not all Sketch presets work well with such toon outlines, but the Sketch Designer can let you design ones that do, while previewing them in real-time. Make sure that you turn the Background tab’s Opacity off when designing such presets, since that will then allow you to experiment with turning Color on in the Comic Book Filter in Comic Book Preview mode…

8. The effect is still not ideal. For a softer and nicer-looking sketch, turn down the line opacity on the Soft Charcoal preset, to maybe 30%, in the Sketch Designer render. Then render out at 2000px and reduce it in size with Photoshop. As you can see, the lines then become much more like natural greasy-pencil outline sketch lines…

9. The outline’s OK, especially on the head. But as a hand-drawn sketch emulation it’s not ideal, partly because of Rufus’s general lack of edges. So you may want to experiment with combining Poser 11’s Comic Book Preview mode with a toon-edge shader (not Poser’s older method of adding toon lines, which is still in Poser 11 but which produces edge lines that are too clean and uniform). For more of a ‘greasy pencil and tracing paper’ look I combined the Comic Book Preview mode with a new and subtly toon-edged skin shader on Rufus. Running the Sketch effect (as per Step 8) then has the effect of subtly bringing out a little of the 3D shape, by elongating and thickening certain lines such as the belly, at the price of loosing subtlety on the head and ears…

10. Then I used Photoshop to finish this up, as a little coloured sketch. I could have made it better by combining the head from the first render with the body from the second…

Not that convincing as hand-made art, but it’s just a little ten minute proof-of-concept on combining two features of Poser 11. Someone willing to put in a day of experimentation with this, and with a toony character with more complex edges (SA Kitty, for instance) could probably take it a lot further. One could add to the final mix a shadows pass from a standard Firefly render, for instance.
In Photoshop you can clean up the white fringe you can see above, where the two layers mis-register. Simply Stroke | Outside | 6px with a similar pink colour, to have Photoshop add a pinkish blending fringe to the layer.
Note that a sketch render can’t be output as a masked PNG of a character, even if you fiddle with background and opacity in Sketch Designer. To get a basic character mask, output a straight Comic Book Preview render of exactly the same scene in PNG — and then use that to make the mask in Photoshop.