Smith Micro’s official one-hour webinar is now on YouTube, going into detail on The Making and Using of La Femme.

Smith Micro’s official one-hour webinar is now on YouTube, going into detail on The Making and Using of La Femme.
I read on the official Poser Forum that rendering in Poser 11 was was both faster and more convenient when using the Render Queue Manager. I thought it would be useful to write a quickstart on this feature, as it exists in the latest fully patched and updated Poser 11 Pro. Since the only YouTube video on it is now out-of-date.
Things to know, straight off, as a new Poser user:
* “Render Queue” is a Poser Pro-only feature.
* “Render Queue” was only for Firefly renders in Poser 11. But apply patch SR3 or higher, and Superfly can also use it.
* “Render Queue Manager” is not the same thing as Poser’s internal “Render in Background”. “Render Queue” is for stacking renders, so they automatically render one after the other. As such it can save quite a bit of time on a multi-render project.
* Rendering is done by a separate programme in the background. On many new 64-bit multi-core Windows systems this should make rendering faster, and Poser far more responsive while rendering. Again, this will save you time in your workflow.
* There is also something called “network rendering”, where the rendering task can be shared across many PCs on a network. This was introduced for Firefly in Poser version 11.0.3.
Short version:
1. Load and tweak your Poser scene. Save. Do a small test render, then set your full render size and quality in Render Settings | Firefly or Superfly.
2. Go: Top Menu | Render | Render Queue. The Render Queue Manager launches as a new standalone window, asks for the filename and folder it should save to, then goes off and starts rendering.
3. You then carry on with other work in Poser or Photoshop etc, while the rendering is done by a separate programme in the background.
Long and tedious version:
1. OK. First, where is it? Well, if you downloaded Poser 11 and its extras a while ago, look to see if you have a ‘Queue Manager’ sitting in your Start folder alongside Poser 11…
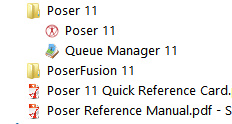
If you don’t see it there, check you have it at: “C:\Program Files\Smith Micro\Poser 11\QueueManager.exe”. If it’s not there, check in your Smith Micro Download Manager to see if you actually downloaded all the various bits needed for Poser 11 Pro.
Let’s assume you find it’s installed. Now go find your set of serial numbers that came with Poser 11 Pro. Copy-paste the serial for the Queue Manager, as you may be needing it in a moment.
2. Launch Poser 11 and load and set up a test scene. Save. On the latest version of Poser the “Render Queue” is then found on the Top Menu | Render | Render Queue…
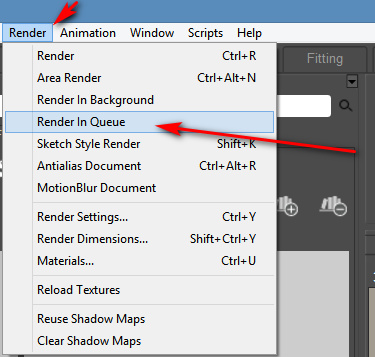
On revisiting the “Render Queue” I found that this menu item remained curiously ‘greyed out’ and inactive for me, even when I switched to the relevant tab in Render Settings. I found that what I actually had to do first was make a small test render using a Firefly / Superfly render engine. Doing this caused the “Render Queue” menu item to become active and selectable.
3. Now, clicking on the active “Render Queue” item should launch the Render Queue Manager .EXE window. If this is the first time you’ve ever launched it, it will need the serial number to be input. Then you will first be asked to set a filename and destination folder for your render, then asked to give the QueueManager.exe Firewall permissions (which only needs to be done once, at launch).
QueueManager will stay open and waiting after the first render completes, hoping to be sent more renders.
In the Windows Control Panel | All Control Panel Items | Windows Firewall | Advanced, you may then want to make the Firewall settings permanent. Once done, this should mean that you won’t be asked each time it launches…

OK, it’s up and working. “Process jobs locally” if you’re on a single desktop PC…

From now on you just skip merrily through the simple version of my tutorial, as given above.
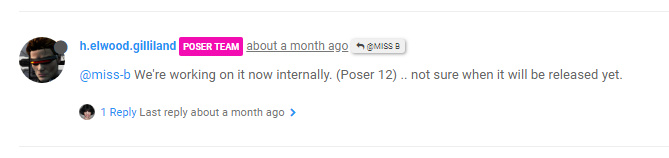
MOVIES? Rendering multiple movie frames is apparently currently more problematic, for those with the latest patch applied. It can be temporarily accomplished through a MovieRenderToQueue.py Python script. Apparently a vital button on the Movie panel in Render Settings was removed with the latest patch, along with the advanced Auxiliary Render Type switches. There’s a simple workaround for the Auxiliary Switches and the Poser devs reports that the Movie queue button should be back in Poser very soon…

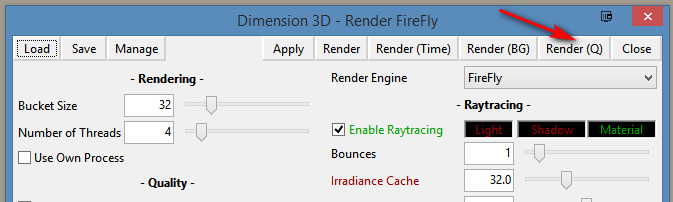
ALTERNATIVE ACCESS: One can also access the “Render to Queue Manager” command via the official partner script for Firefly. This is found under Top Menu | Scripts | Partners | Dimension 3D | Render Firefly. Or it can simply be invoked by pressing Shift + F on the keyboard.
NETWORK RENDERING: You’ll of course get the full benefit of using the Render Queue Manager if you’re using it to render across several PCs. As we’ve seen, the Render Queue Manager is a separate .EXE file and on Windows you’ll be running it on Windows 7 or higher. Render Queue can ‘network render’ across several such machines, only if: i) the Render Queue Manager version on your slave PCs is the same as on your main PC; ii) each .EXE has been activated with the serial (not the same as your main Poser 11 or PoserFusion serials); and iii) you have all the remote and desktop Firewalls set up correctly. Each .EXE will need to be given both inbound and outbound permissions through the Firewall. All this is needed to that the main PC can talk to the network PCs, and the network PCs can talk back.
If you do lots of large renders or animation with Poser then you’ll want to look at advice on building a dedicated render network or base unit. Some advice is to be found here. Looking for the apparently-required 2 x CPU “2x X5650” to “2x X5690” refurbished Xeon workstation on eBay suggests that about £400 should get you something quite powerful (24 render threads) under your studio desk. That’s comparable with the cost of a high-end graphics card, but gets rendering off your PC entirely so you can get on with other work. It also means you don’t have to faff around with upgrading the PC’s PSU, fitting a huge slot-in card, fan-noise, summer overheating etc.
AUTOMATE PREVIEW AND SKETCH RENDERS? For renders other than Firefly, you might want to look at setting up Windows automation software like JitBit Macro Recorder, which records and automates software clicks, and then set wait-times (such as 60 seconds per Preview render, allowing a 3600px Preview render ample time to complete). You could also try to have JitBit use keyboard shortcuts only, to make your automated macro/action independent of User Interface changes and screen size. Obviously this doesn’t take the renders off to another programme or PC, but there is some ‘background’ automation involved.
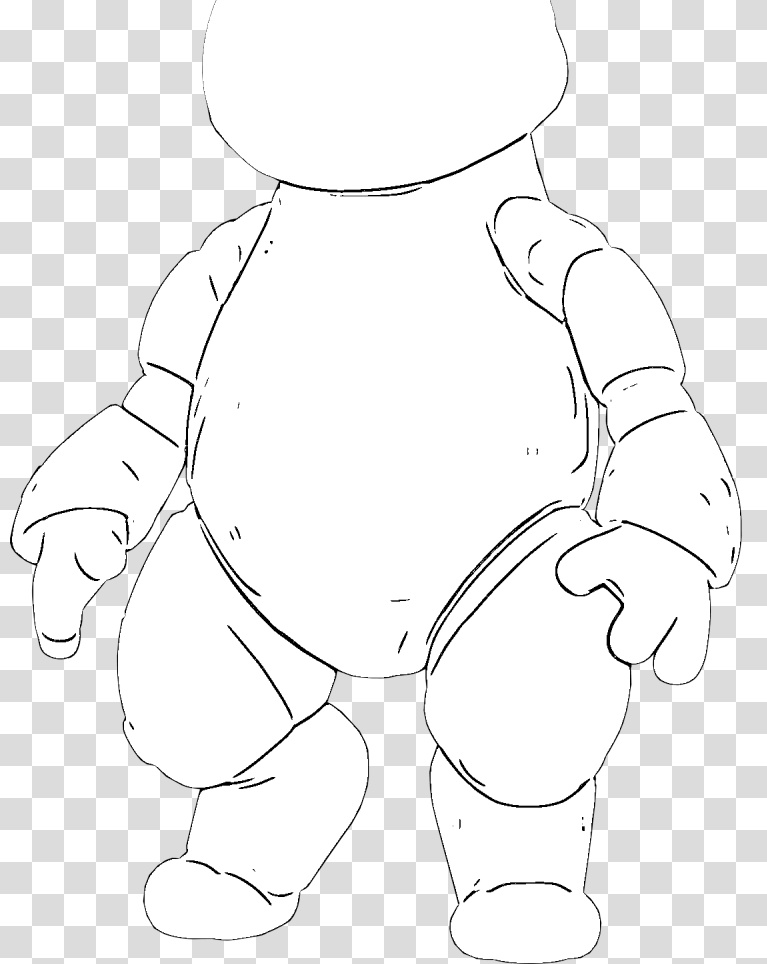
Now free as of yesterday, GroBot for Poser by Sci-Kwon-Do (Michael Seiber). A super-flexible super-morphable Poser toon robot character. Commercial use is kindly retained on making the character a freebie. In the large mix of shapes, there’s a nice toon cat-bot.

When the maker was selling this character on Renderosity, he stated it “doesn’t work properly” in Poser 11. I installed anyway, a simple copy/paste/merge of the runtime folder in the .ZIP. I then loaded Poser 11 and found the character’s parts under ‘GroBot’. As far as I can tell it’s just the preset poses that sort-of don’t work, and there’s an easy workaround for them.
The base figure loads fine from GroBot in Poser 11. All her Poses, Characters and MATs are found under various ‘GroBot’ folders. ‘Kitty Stand’ and ‘Kitty Squat’ characters work fine in terms of auto-application of the Kitty morph, but then adding any other new pose reverts her morphs to the standard GroBot robot shape. I guess this is the problem with Poser 11. However, there’s an easy workaround for this slight problem.
GroBot is quite a dramatic demo of how a character might make extreme morph changes and take extreme poses and yet remain smooth in Poser. One finds the morph dials by selecting the body and finding the ‘FBM’ Morph dials. “Kit-10” is the Kitty cat morph and it’s easy to control. Simply re-apply this morph to a set body pose, to get the Kitty feature back on the body again after applying a preset pose. You can also flatten the chest by slightly tweaking the ‘Gro-illa’ dial.
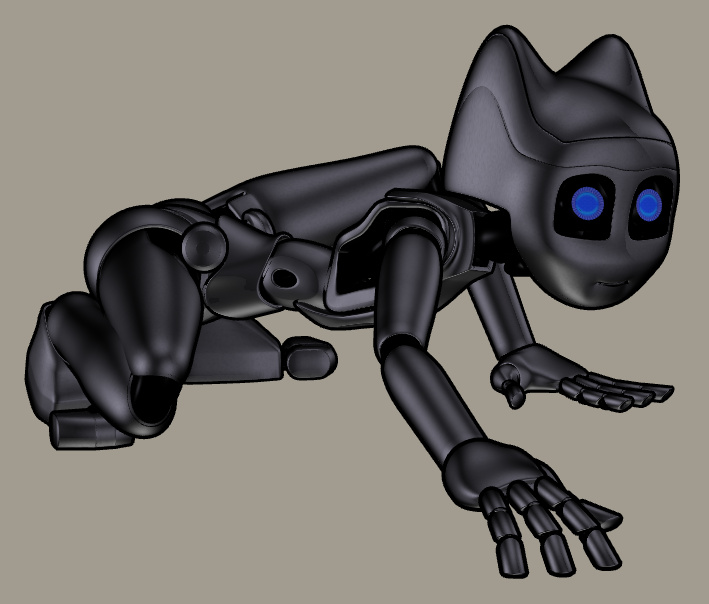
As you might expect, with her black MAT on she doesn’t respond well to Poser 11’s Comic Book Preview mode in b&w inks. But put the pink MAT on and she looks superb in that mode…

All the above pictures are in real-time Preview mode.
So, she works great in Poser 11, you just need to apply a little workaround when working with the preset poses. She doesn’t appear to accept any preset poses except her own, though some from other characters will move her arms, others her legs. The maker states “have limits turned ON, and IK turned off”, so that may help with third-party poses.
As a Kitty she could probably use a tail, but I recall noticing that she has a flexible ‘whip’ prop and that could probably serve.
Update: There’s a patch, Grobot For Poser 11, making her work better in Poser 11. Though you’ll want to read the readme.txt first. I did and I decided I’d stick with the original and my workarounds for now.
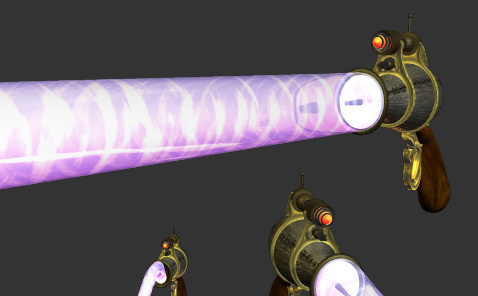
I’m always pleased to see a new Photoshop plugin from Richard Rosenman. He’s just released Electra, for all your sparking needs. From a tiny spark in a cyborg’s eye to a massive superhero-tastic ‘Amazing Arc from Above’ that gives the hero his superpowers.

Sadly it’s not one of his many excellent freebies, and your headphones may throw off more than a few sparks when you read the price… “$49.99”. Ouch. But it’s for Photoshop CS5 and above, and it will even run in Corel Painter 12 and above.
The plugin is one to try as an overlay for the new free Poser prop, Updated Morphing Beam prop for Demoleculizer, perhaps…
Your alternative plugins here would be: ‘Electrify’ in Alien Skin Eye Candy; ‘Electrify’ in Xenofex 2. I suspect that when Xenofex was retired, that was when ‘Electrify’ was added to Alien Skin Eye Candy, so they’re probably the same thing. I’m fairly sure that Corel ParticleShop also does something in that line (though perhaps a bit more ‘faery fireflies’), although that’s a hefty price.
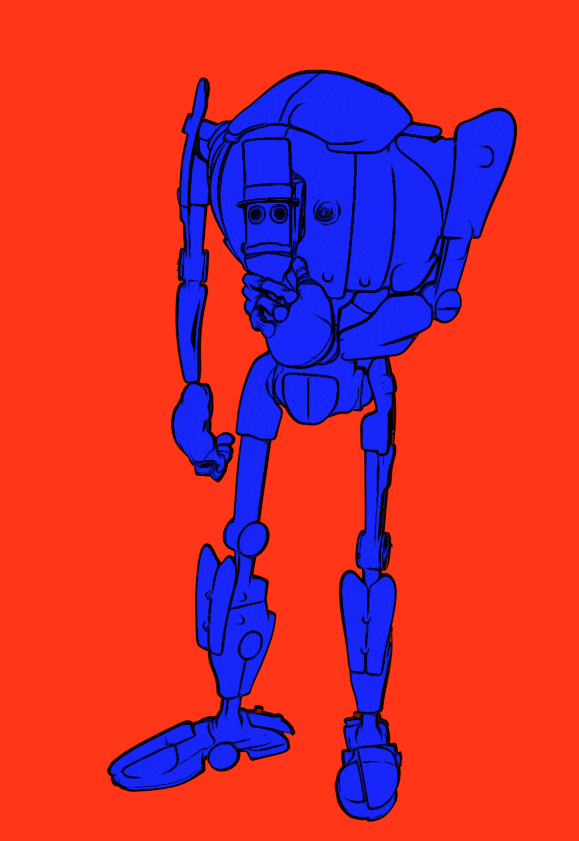
This is my demo of the slight mis-registration that a Poser comics artist may in some circumstances encounter, after running Poser’s Comic Book Preview inks through DAP’s ‘GrNovel’ filter to make them a touch more artistic. Here the ‘GrNovel’ inks layer has been experimentally blended in Photoshop with Soft Light at 50%, rather than simply having its white knocked out. This gives a lovely look to the scene, but means that we can see that its inks are not quite aligning with the underlying colour flats layer. As a result of the blending mode, you can see ghosting that reveals that the mushrooms in the scene lack a firm ‘fit’ with the inks layer above them. This mis-alignment would also be even more visible on some of the tree branches, if the glow effect were not masking it. The choice of a pale background makes this worse.

So there’s sometimes a reason to prefer the original Poser inks, because the funkier you make the filtering of your inks, the less the inks will align with your colour flats layer beneath. Especially if the colour flats have themselves been filtered, and carry their own toon edge. The lesson here is: try to keep your colour flats as flats, and don’t also add ink or pencil-like lines to them, if you’re then going to add another layer of inking on top (as is the case in the experimental picture seen above, in which I foolishly laid another ink layer over an already processed finished picture).
A dark background will however usually cover up and ‘absorb’ such problems. The lack of visual acuity in the non-artist audience will also mask much, as 85% of them probably won’t even notice that anything is wrong, even with the pale background. Also keep in mind that when reading a comic, the eye becomes quite forgiving of such defects as it skips from panel to panel.
That said, if you set your story at night or in a dark forest, then not only will you have to worry less about backgrounds, but you may also get away with fudging around such layer registration problems.
Incidentally, the glow effect here is just a third of the original Poser inks, with their white knocked out and a chalk Layer Style effect applied. Yes… when applied to inked line-art, Photoshop Layer Styles can be used for more than making cheesy extruded-3D lettering — who knew?
I’ve been experimenting to see what Krita’s G’MIC-QT filters can do to plain inked line-art output by Poser’s Comic Book Preview. This follows on from my previous test of G’MIC-QT filters on a straightforward 3D Preview render from Poser.
Here’s my test-kitty, a 3D character which ships for free in the content bundle of Poser 11 (in the Content Library under ‘Toys’). In Poser, only thin Comic Book ink lines were output, in B&W. This was to test ‘fattening’ filters such as DAP’s ‘GrNovel’. But I thought it would also make a good test render here, for this test of Krita.
* The first preset I made I called ‘Send to Moebius’, which works for a character filling 1000px on a 1200px height PNG output from Poser. The filter gives the lines a continental comics ‘clear-line style’, akin to the great Moebius — though of course without his distinctive dash-hatch contour shading. It takes 30 seconds to run, at the cost of some jaggies on shallow curves.

Still, for a clear-line style with slight Moebius-style ‘dotting’ of the lines, it’s not bad for 30 seconds on a straightforward Poser comic render. The dotting occurs where there are ultra-thin lines, which may be a method of controlling in Poser how often the dotting will occur when filtered. The same effect can’t be had on a 3600px render.
* ‘Felt Pen’ could also be made to produce dotting, more extensively and more quickly, but it wasn’t a pleasing effect.
* ‘Kuwahara’ on a radius of 1 could also do a nice felt-pen like effect, with less uniformity of the line density. But the problem here was an ugly skritchyness at the edges. ‘Pen Drawing’ was smoother but had more line density uniformity. Neither were really that all pleasing.

* ‘Charcoal’ could make the lines much darker, fatten them a bit and give them a nice grainy look. But again, at 1200px the jaggies are a problem. Better to Sketch into the ink lines in Poser, using the Sketch Room.
* It was possible to have G’MIC-QT’s ‘Engrave’ filter keep only certain fatter lines, erasing others, which was an interesting effect. It ran in about 20 seconds at 1200px. However, it doesn’t seem to have uniformly selected only the fattest lines, making it rather pointless.
So while I’m pleased to get the ‘Send to Moebius’ preset, it was the only nice one I was able to get.
Right then… it’s time for a survey of the recent new Poser and DAZ content. If you want to see my last one, a huge six-month catch up for May 2018 – Jan 2019, it’s here.
But the new post below only surveys and picks out interesting / unusual / useful new content released in the last month, from the 23rd January 2019 onwards.
Science fiction:
Hoverbike Poses for Genesis 8 for the Yamaki Hover Bike.

If you need police hover-vehicles for the persuit, see the new Speeder.

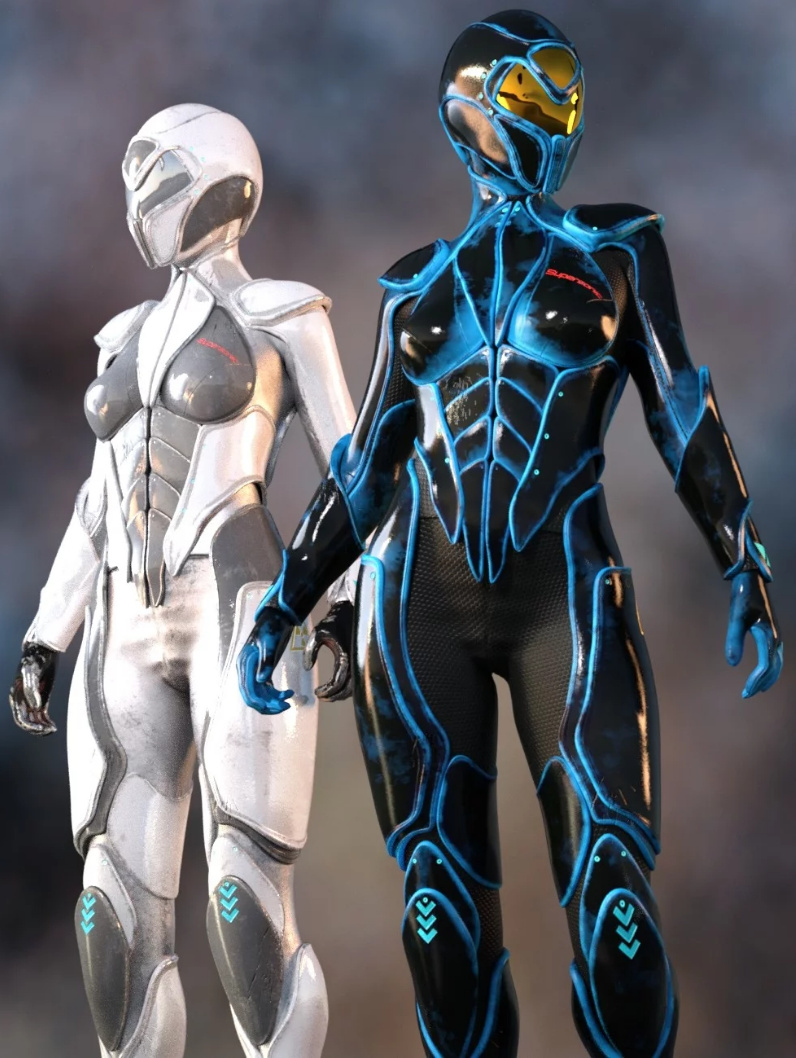
Most readers will already have sci-fi armour suits, but I do like the new Supersonic Sci-Fi Suit for G8F. It’s not too over-the-top or gaudy, and appears to have some nice slight wear on the edges.
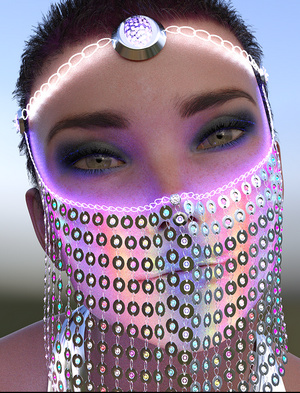
Jewel Of The Nile for G3F and G8F. Rather impractical to ride a camel with, I imagine, but it also has uses in a futuristic sci-fi setting. It’s “a HQ realistic coin veil”, though it doesn’t appear to have dForce.
Bubble Hair for Genesis 8 Female. Unusual, and again I can image a sci-fi / superhero story in which the movement of the hair can be thought-controlled, like Medusa in Marvel’s Inhumans.

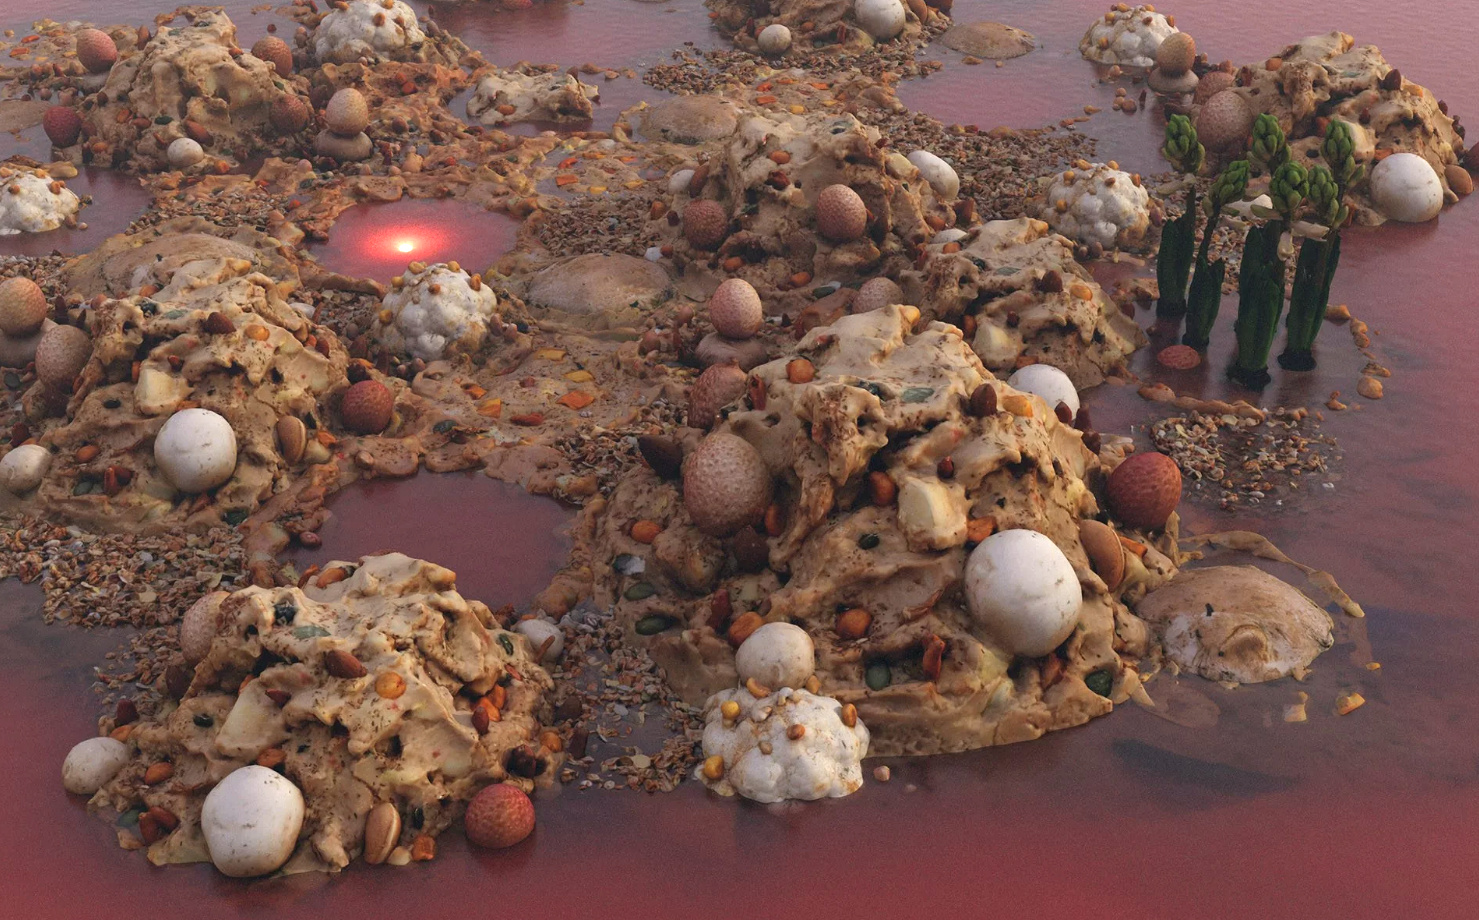
Elsewhere for DAZ Studio. This is not well-served by its Store preview, but turns out to be ‘alien planet’ rock-pools (aka tide-pools), done to Oskarsson’s high standards. With strange Yuggothian fungi, alien plants, and glowing lurkers beneath the water. It’s not for everyone, but I like the look of it.
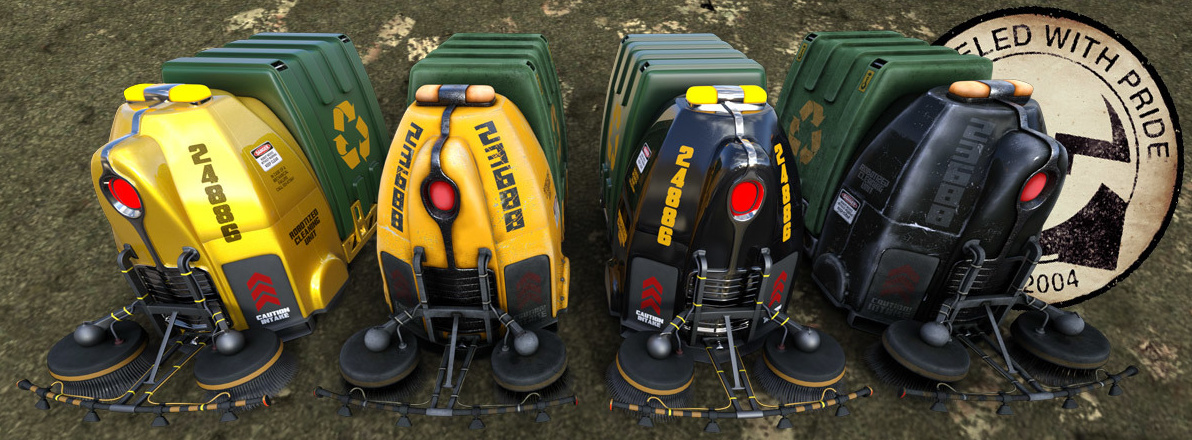
Robo Cleaner by Coflek-gnorg, for Poser and DAZ Studio. Highly detailed robot street-cleaners, for everything from your Blade Runner street scenes to your 2000AD-style Robo-busters tribute comic.
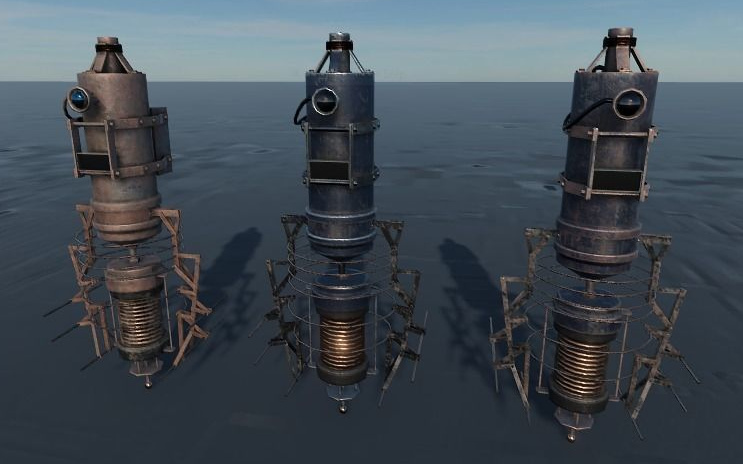
The persnickety supervisors of the lowly Robo Cleaners might be the new Osy21 low-poly floaters on CGTrader, at just $2 in FBX format.
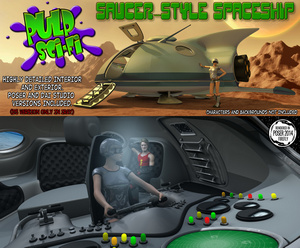
Also from Coflek-gnorg is a fab Pulp-era Sci-fi Flying Saucer complete with detailed interior. Definitely one to look at if you’re planning to make an ongoing retro sci-fi toon comic and are in need of a ‘star’ spacecraft.
Monsters:
Lycan HD werewolf for Landon 8 for G8M. DAZ Studio.

Fantasy:
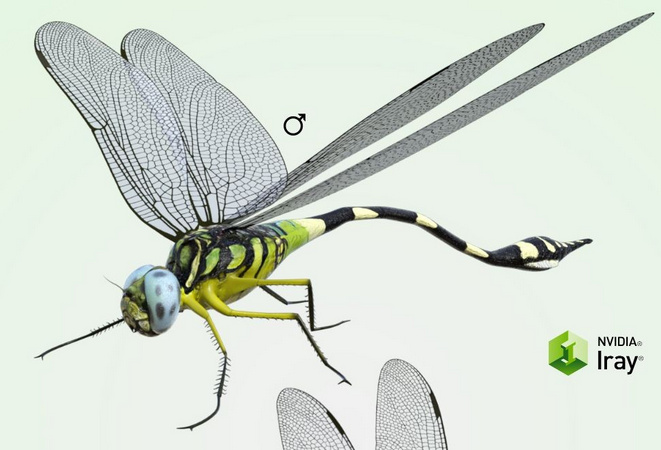
The flood of dForce-enabled clothing continues, though very little of it has been fantasy and sci-fi in the last month. A huge exception is the dForce Wing Ranger for Genesis 8 Female. Fabulous Hollywood-level work, here. She comes with a good bow and arrow too. Fits the new Meshworkz Dragonfly, which serves as her winged steed.

Jars with eyeballs in. You can never have enough of them, and the new It’s Magic for DAZ Studio has them, along with much else.

FG Place of Power for DAZ Studio, combining a magician’s lair, library and steampunk elements. I was about to pass this over as ‘just another medieval alchemist lab’, aided by the too-dark preview renders. But on closer investigation it seems to offer something a little different, and is nicely priced at $19. Worth a look, if this is your thing.

Retro and historical:
It’s unusual to see a new release for Bryce, but Battis Khamba Chattri is an Indian temple scene. Also available for Vue.

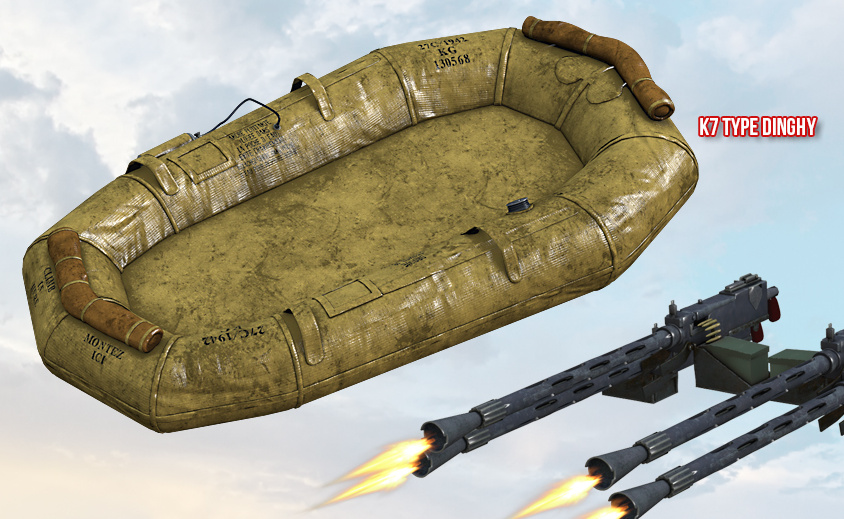
Task Force for Short Sunderland for Poser, by Cybertenko. Paint makeovers of the famous Second World War Sutherland flying-boat, and a new dinghy. For some, it may be worth the $6 just to get such a detailed wartime dinghy. It seems you don’t get the poses shown, but I’m guessing these may be included with Cybertenko’s Sutherland packages?
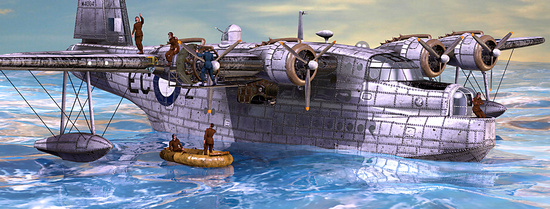
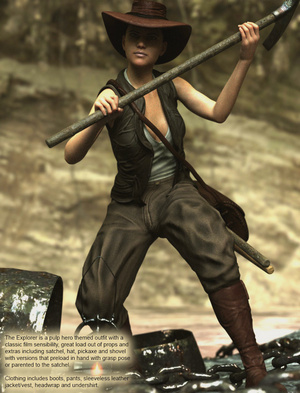
The Explorer For G8F from Sixus 1. A set of jungle explorer clothing, iRay-ready textures and grip poses. As you can see, it could fit well with the dinghy seen above, for a jungle river trip.
Minnie 1920’s Dancer Headdress for G8F. It’s not headwear that you’re going to use everyday, certainly, but it reflects the over-the-top hat-culture of the 1920s and it’s definitely unusual.
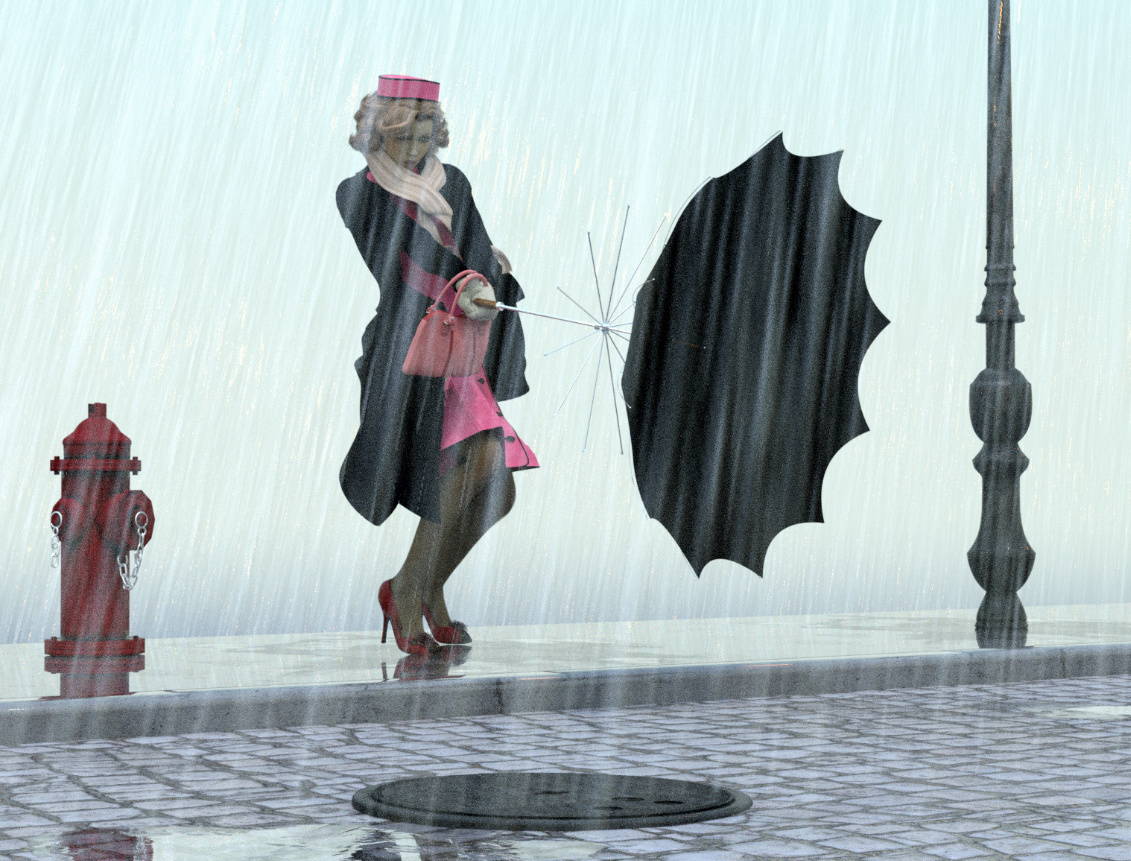
Singing in the Rain for G8 in Daz Studio. A complete set with scene, props, G8 poses and rain.
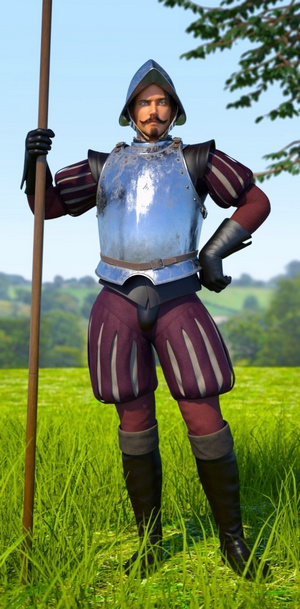
Conquistador Outfit and Armor for Genesis 3 Male. A full Spanish soldier outfit, which is something you don’t see every day. May also have runtime-bashing potential for those making other outfits for the period.
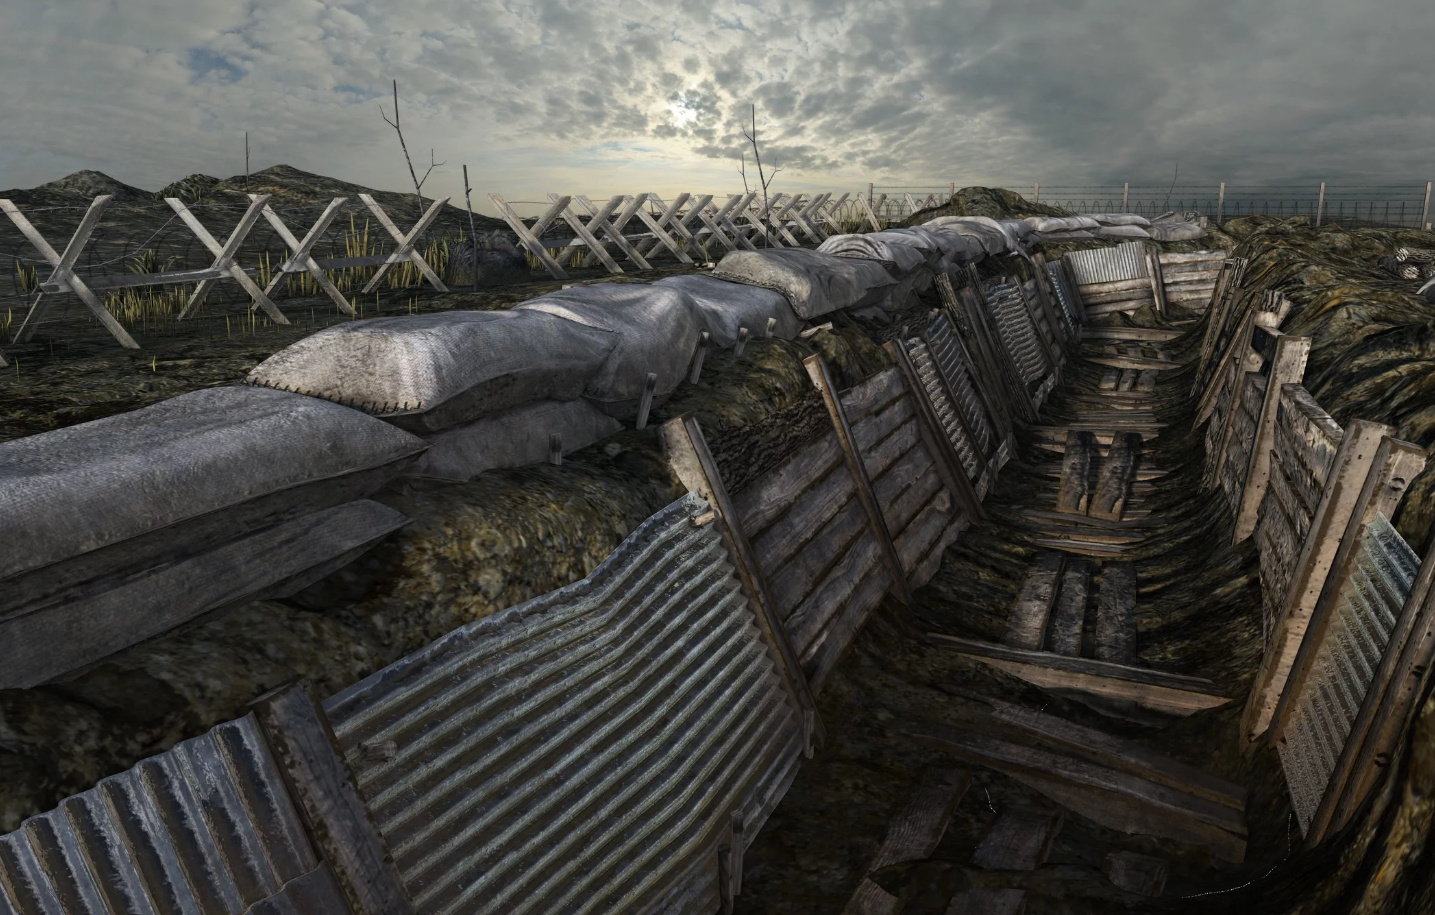
WW1 Trench, No Man’s Land. A battle-scarred First World War trench with accessories and a no-man’s land border.
Army Camp Barracks. Modern accessories, but I imagine only an hour’s tweaking would be needed to make this suit the 1970s/80s.
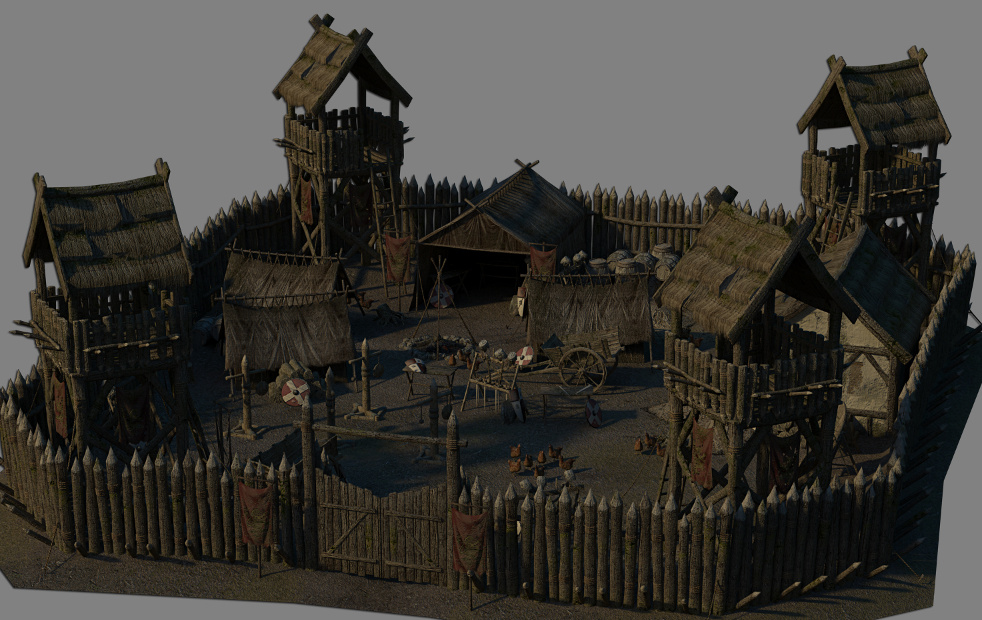
For the Army Camp also see the new Leopold HD for Genesis 8 Male.

Unusual props and magnets:
dForce Magnet for DAZ Studio. Pin a magnet to your dForce clothing, and have your character appear to be pulling or lifting their clothing. The built-in dForce takes care of all the physics of the cloth draping.
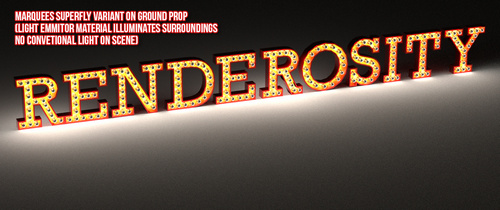
Marquee Light Letters by Cybertenko. Classic fairground, movie theater and dressing-room lights for Poser, with the bulbs throwing off emissive light in SuperFly renders.
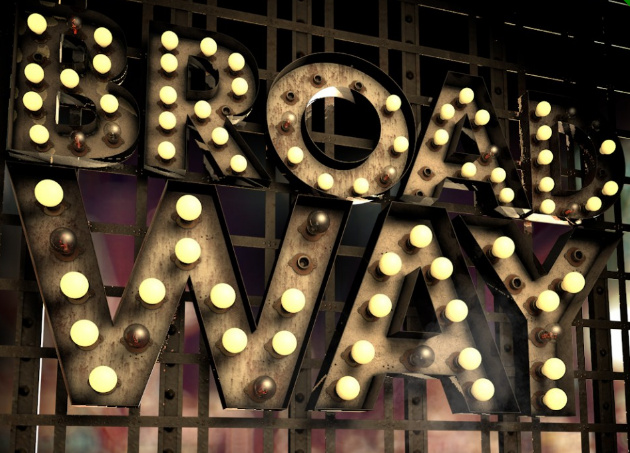
For DAZ Studio there’s also the new Broadway Light Bulb Letterings and Real Neon Letters.
Such ‘bulb letters’ might be combined, as ‘bulbs only’, with the new Synergy ABC – Poses for G3F-G8F…

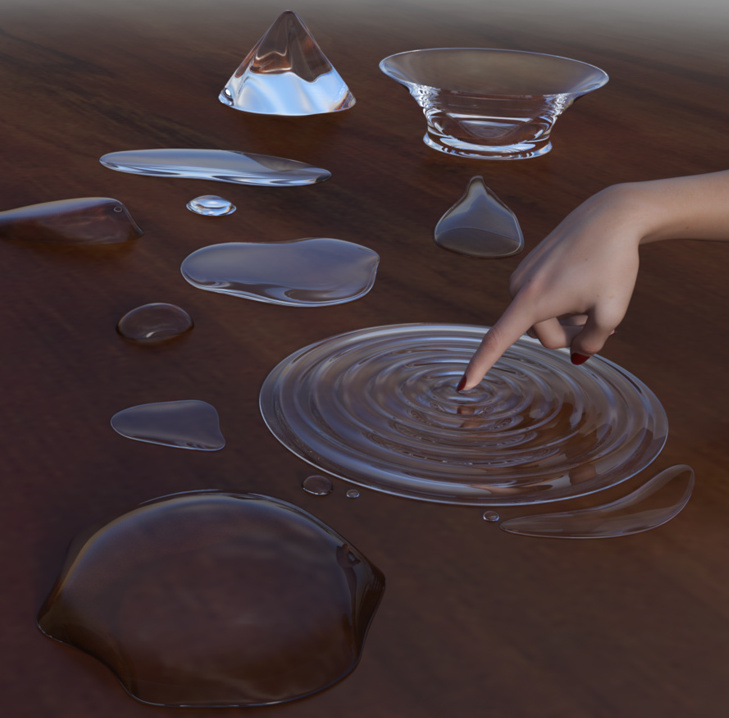
Morphing Splat for DAZ Studio, with 50 morphs. Splatting and pooling liquid.
Also look at the latest Messy FX Set 2: Food Mess for Poser, free on Renderosity.

La Femme:
The new La Femme Base Figure for Poser 11. She now has a small flood of everyday and club-style dresses and hairs on Renderosity. Almost no freebies that are worth having though, and nothing that appeals yet in terms of sci-fi, fantasy, armour etc.
La Femme injection for Prefittter-CR2. Works with The Prefitter to get V4 clothing ready to go to Poser’s Fitting Room (Pro only). This seems to be the best ‘V4 to La Femme’ solution at present, in the absence of a Crossdresser 4 file for La Femme.
Landscapes:
Flinks Snow Grounds 1 and Snow Grounds 2 as OBJs. A collection of detailed snow terrain tiles. The materials suit either Poser or DAZ.

The Snow Grounds could be paired with the new HD Upturned Winter Boats for Poser, from ShaaraMuse3D.
Dried Out River for Poser, by ShaaraMuse3D. Shaara’s usual HD scene with 4k textures and a full preload preset. One could of course add just a bit of water, to make shallow trickling pools. Good for those with dragonflies and small lizards in their runtime. Likely to also interest Vue users.

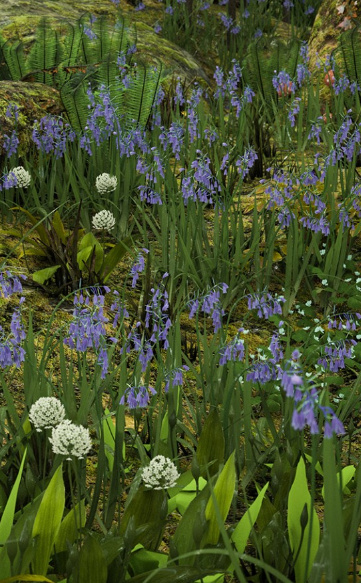
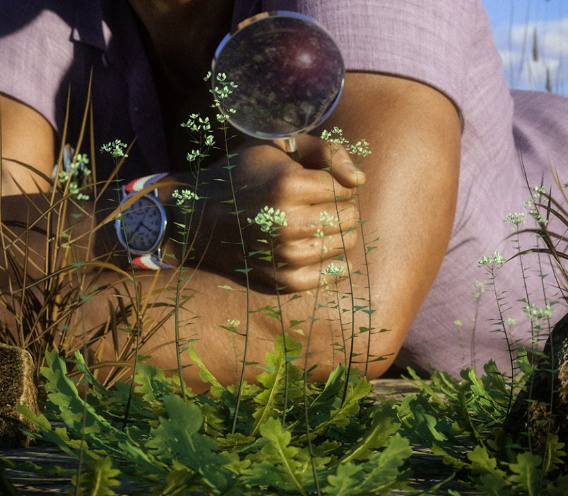
Wild Flowers Vol 5 – Woodland Plants and matching new grass. Said to be “Perfect for macro renders”. Also look at the recent Teeny Tiny Plants, also from Martin J. Frost.
Animals:
This month it’s only the dragonfly seen above, and Nature’s Wonders Lizards of the World Vol. 4 which is another fine release for Poser from nature expert Ken Gilliland. And has DAZ presets.

Toons:
A poor month for toons, but I see that Darkseal’s toon Squidy for Poser is now on CGBytes, having been on the now-vanished Content Paradise.
Storybook:
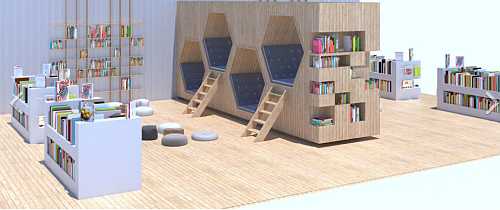
New on CGTrader a modern children’s public library / reading-room for a reasonable $30 in OBJ. Royalty-free renders.
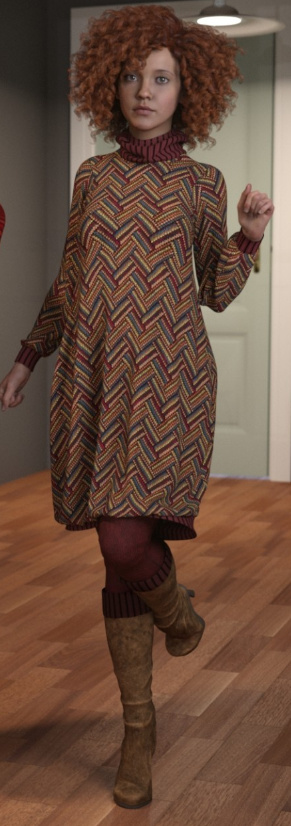
Need a modern librarian for your library? The new dForce Eloise Outfit for Genesis 8 Female and dForce Eloise Outfit Textures gives you one nice pattern texture for it…
Dayana & Karina Bloom HD for Genesis 8 Female. With the sort of face-shape that would suit a modern comic-book aimed at 9-12 year olds. Comes with a matching older sister who is more of a regular human.

Deco Vignette II for DAZ Studio. I guess you’d have to make this a central Howl’s Moving Castle-style ‘magic door’ for your story, to get your money’s worth.
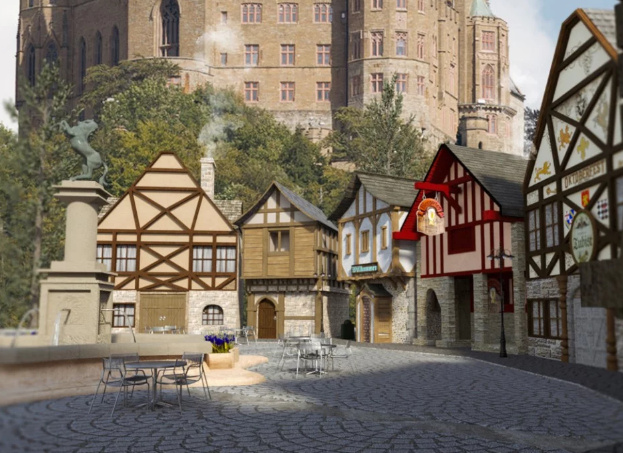
Town Circle, a traditional German/Austrian-style village centre.
Nursoda has also kindly released several freebies at Renderosity recently, for his characters, but note that they’re flagged as ‘non-commercial use only’.
Utilities:
RSSY Clothing Converter from Michael 4 to Genesis 8 Male. Convert clothing from M4 to G8M, in DAZ Studio. Seems to be relatively simple and well-documented.

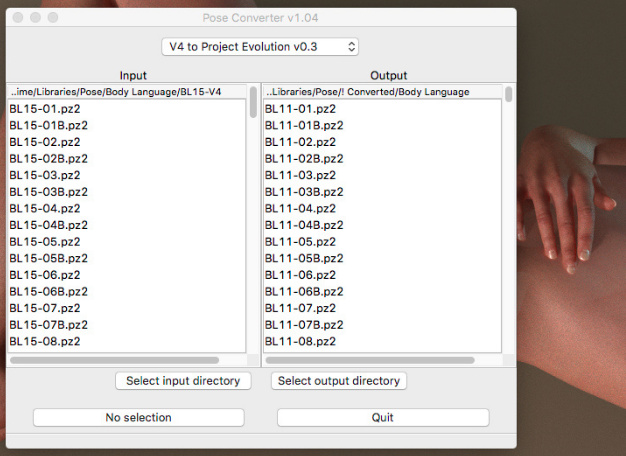
PoseConverter for Poser – Updated. A free Python script with user interface, that works inside Poser. Convert pose presets from one Poser character type to another. Only has two converter modules at present.
That’s it, more picks next month!
I’ve spent some time working through Krita 4.x’s G’MIC-QT filters. They’re the equivalent of Photoshop’s native filters + some nice plugins, all rolled into one plugin. Krita is the leading ‘open source’ graphics software, and both Krita and G’MIC-QT are free. G’MIC-QT ships integrated into Krita.
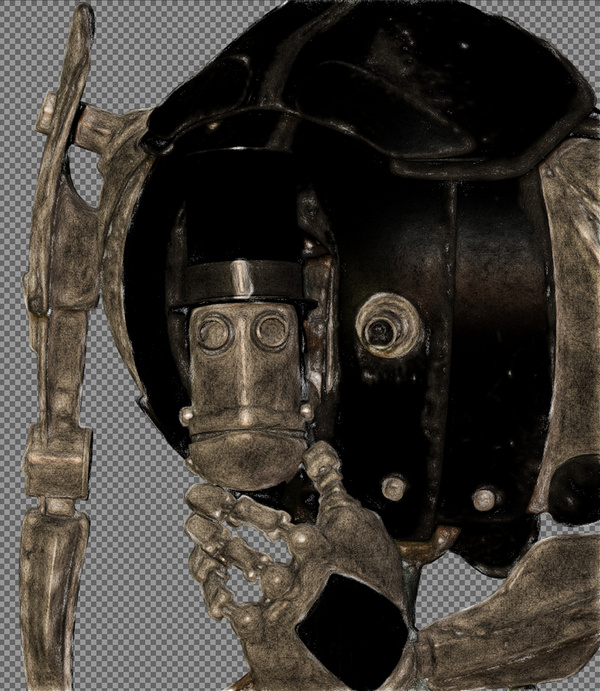
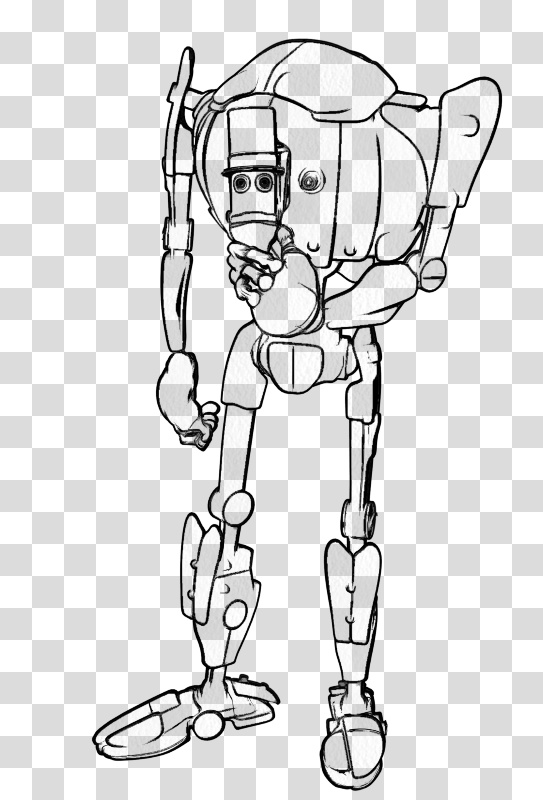
Below you see my trusty test-bot for the G’MIC-QT filters. Quite a dark raw Poser Preview render, and not at all optimized for tooning. That top-hat is going to be a particular challenge.
I was looking for things that can’t be done more easily in Photoshop.
Here are the G’MIC-QT filters I noticed and worked with, for good or bad:
1. Artistic. Brushify. A nice but mundane paint effect with the default settings. The drawbacks, even on default, are that: i) it takes a ridiculous amount of time to process; and ii) it paints into a background that should remain transparent. Still, the ‘real thick paint’ effect is nice, and it takes far less time that it would take you manually overpaint a render.
2. Artistic. Cartoon. This just gave the usual “Ugh, 3D run through a Photoshop filter!” look, of the type that only pleases those who have never actually seen the inside of a decent comic-book. Horrid. Rip it out and burn it, now!
3. Artistic. Cutout. This had something to recommend it at a setting of 6 0 6. You might want to take a quick look at this before your pay good cash for one of the TOPAZ Clean / Simplify Photoshop plugins. That said, even on a workstation this filter takes a very long time to run, like 90-120 seconds! Also you get some posterization artefacts that you would not get with Topaz Clean.
4. Artistic. Felt Pen. I was able to work it up to a custom effect I saved as ‘Felt Pen Burnoff’, which burned off most of the 3D grunge. It ran very fast, but the applied effect was not great when seen at 100%. It worked much better when seen reduced, at 33%. Still, to get this from such an unpromising 3D render is quite impressive.

As you can see, it doesn’t add a holding line around the edge. Though that may be because I was using a .PNG cutout with transparency.
5. Artistic. Pen Drawing. It doesn’t quite give the effect you might expect from the name. It’s more like a basic toon filter, and is too close to a recognisable ‘standard Photoshop filter’ look for my tastes. Can be sort-of acceptable, though only if ramped up to maximum settings. There are only two sliders, so I assume there’s not much more that can be done with it.

6. Artist. Sketch. Capable of some awful crap, as most such filters are. But I also crafted the unusual custom preset seen in action below, which is like an oil glaze on thick smeared pencil. The setting took three minutes to process a 3600px picture, but the results were rather nice when viewed at 100%. Zooming out just makes the figure look like they’ve been dipped in motor-oil and dried off a bit, which is not so pleasing. I could imagine that 100% crops from this, placed into panels, could form the basis of a graphic novel style for a macabre story.
7. Black and White. Charcoal. Quite tricky to control, and frankly not very impressive as charcoal. But… also capable of a reasonable basic stipple effect, which I saved as my ‘Stipple’ preset. Though, as you can see, it doesn’t like to run across black or near-black.

8. Black and White. Engrave. Despite the name, this is of interest for comics makers. I was able to work it up to several pleasing effects and save these as presets.
One I named ‘Skritchy Pen’, which took two minutes to run…

Another preset I called ‘Berni Wrightson’, which took about 90 seconds to run. I love how the engraving lines follow the contours fairly neatly, which is never the case with such filters. How it does that I don’t know, but it does. It doesn’t even have the 3D mesh to ‘follow’.
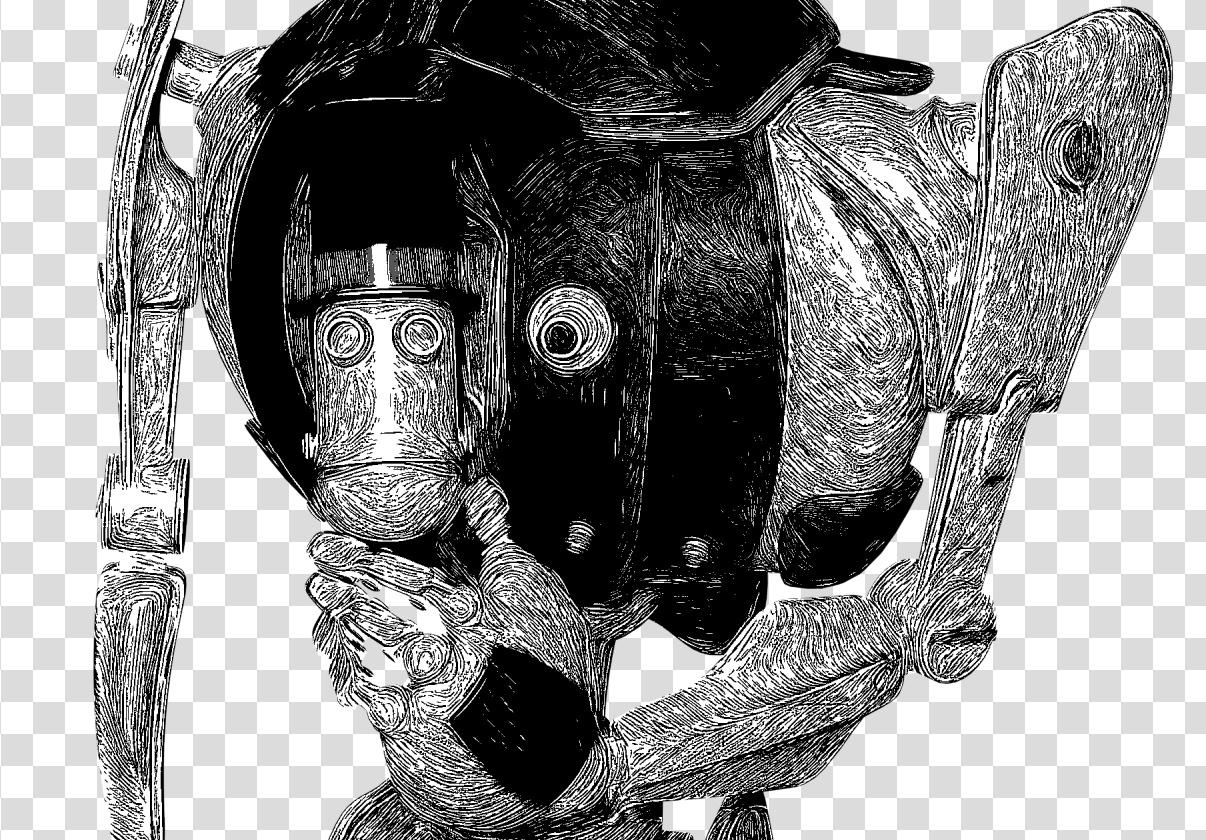
Another custom preset I made I called ‘Comic with Inks’, which was fairly fast with no anti-aliasing, but it took two minutes once its anti-aliasing was on. Very impressive, given the less-than-ideal source material. I’m not particularly keen on such dense blacks, but one might find ways of toning them down without too much work. Retexturing the Poser model would probably do it, at the risk of simply turning the blacks white.

These thin lines look like they might fat-ify quite nicely if run through DAP.
9. Black and White. Pencil. Nothing like a pencil, it’s more like maybe Posterize in Photoshop. Meh…
10. Colors. Detect Skin. Unusual. This may interest someone who does a lot of skin renders in Poser and DAZ Studio.
Thus I got about eight good useful custom presets with it, which I’m pleased with.
It’s possible to save user presets in G’MIC-QT, though with typical Krita awkwardness in naming they are called something very different. Your “Faves” are thus not just bookmarked favorite filters. They also capture the settings of the filter at the moment the ‘Fave’ is saved.
I don’t see any way to extract and share individual ‘Faves’, though you can back them up as they’re in the C:\Users\YOUR_PC_NAME\AppData\Roaming\gmic\gmic_qt_faves.json file. This is just a text file and can be opened with the Notepad++ freeware. Looking at the structure of the file it looks like someone used to code could, with great care, copy-paste a preset from someone else’s ‘Fave’ .json file and thus import it.

And, lastly, I don’t see anything in G’MIC that can do what DAP’s ‘GrNovel’ filter can do. Though G’MIC looks powerful enough to replicate it, if someone cares to try.
Possibly resembling a world-famous author (it’s the jaw) and his Waterman writing pen…

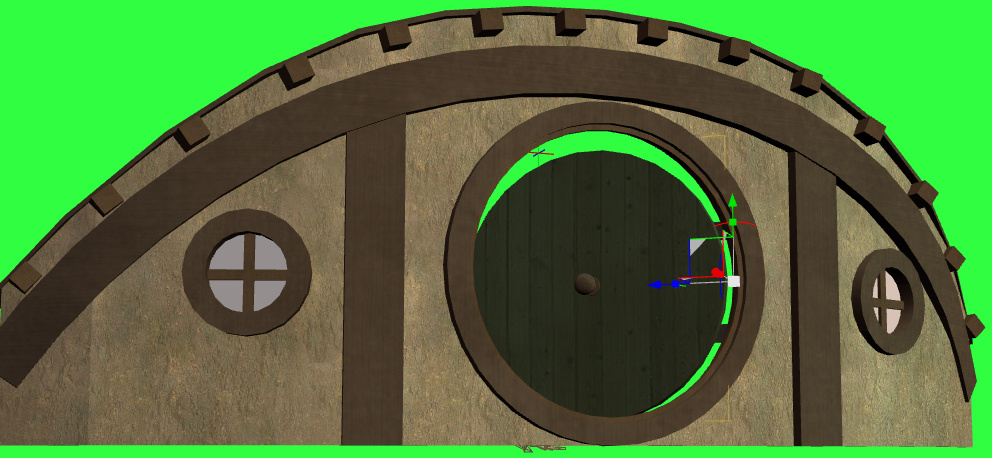
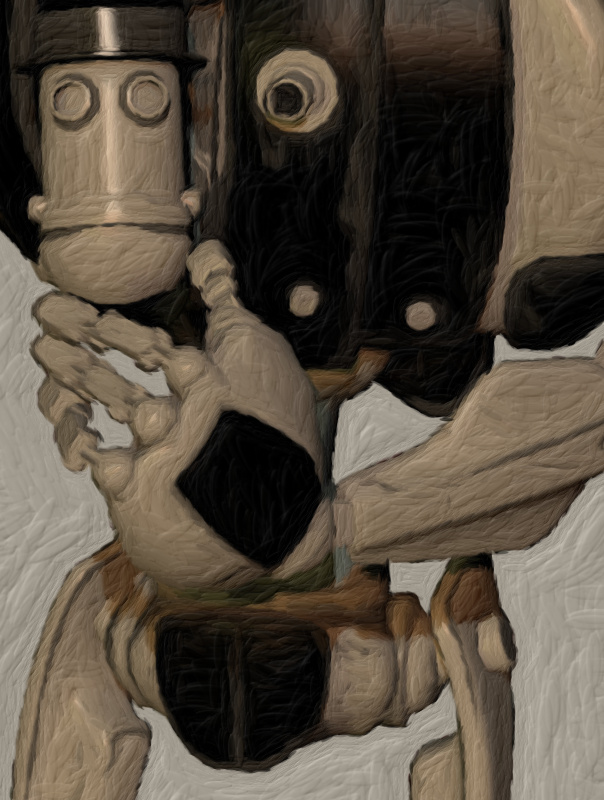
Poser 11 ambient occlusion shadows render in Preview, for subtle shadows, ’rounding’.
ON TOP OF… Poser 11 Comic Book B&W inks render in Preview.
ON TOP OF… Poser 11 standard materials render in Preview.
ON TOP OF… vintage paper texture from Archive.org.
Ink line-art render was run through DAP to make the lines look just a little more hand-drawn. The standard Preview materials render had its grungy heavy darkness lifted quite strongly in Photoshop (the 3D character had not been ‘re-textured for toon’), and was then run through a Photoshop filter. The red eyes, green mini-lazer, and border were added in Photoshop.
Raw Comic Book inks, ‘live’ in Poser…

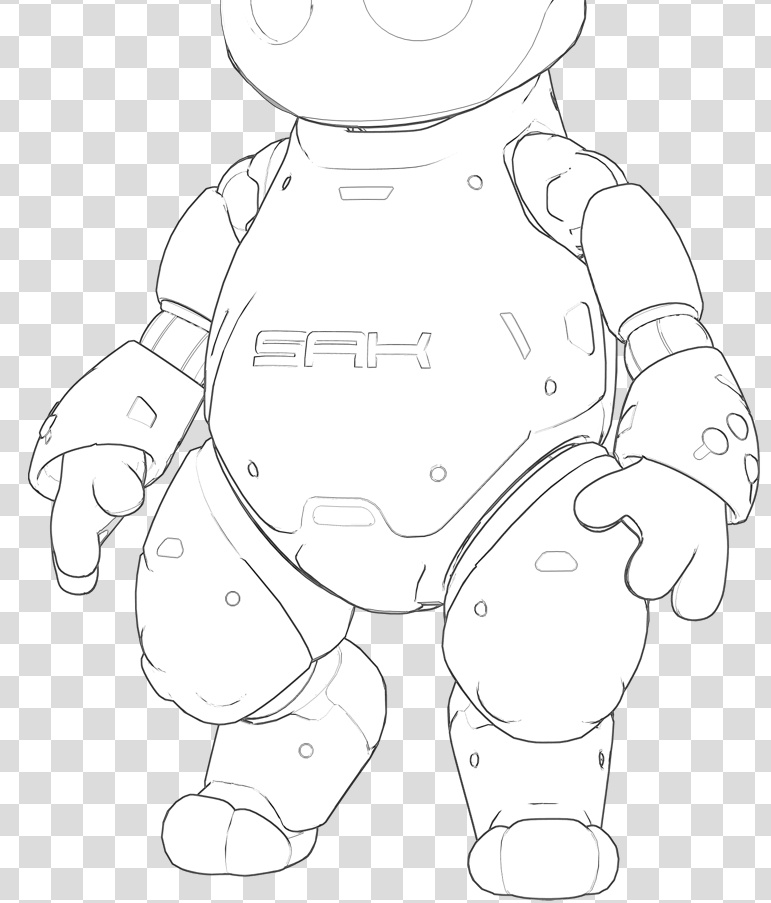
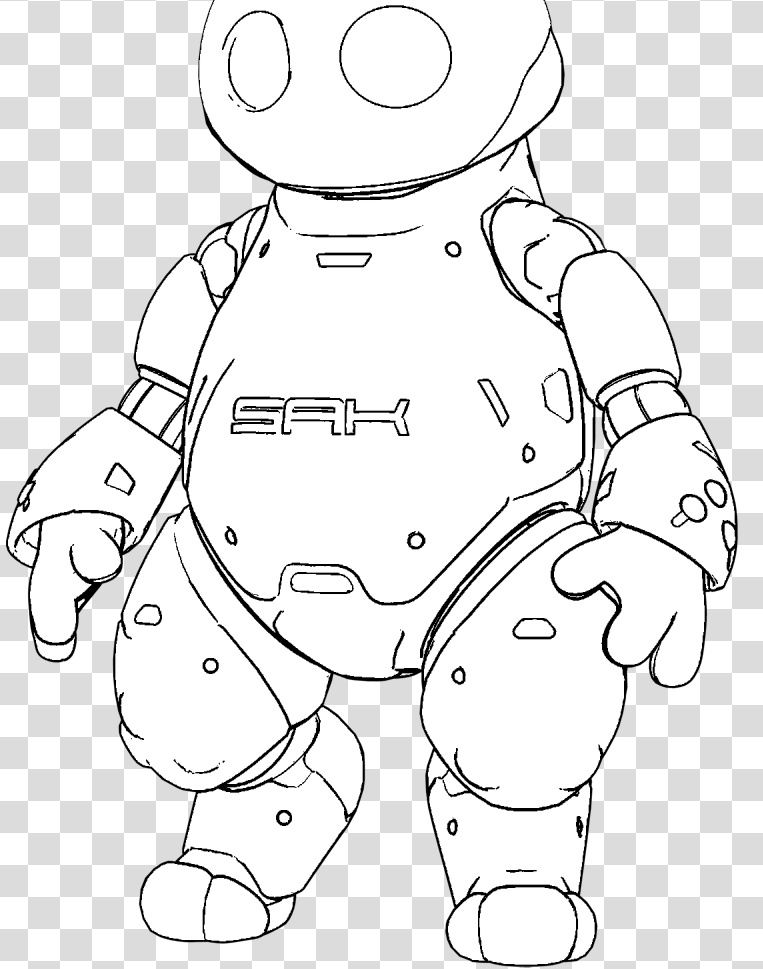
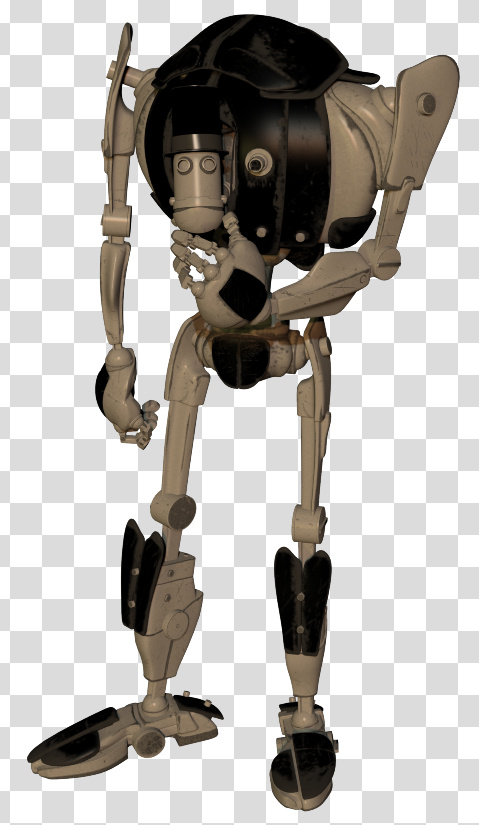
The Character is AB3K for Poser and DAZ, by AntFarm.
OOooh…
This tutorial shows you how to get a ‘pseudo Toon ID’ render from Poser, using a quick Preview render. As such this method works in both Standard and Pro versions of Poser, and gives you what is effectively a ToonID render layer (usually a Pro feature). Rather usefully, it also uses the real-time Preview render mode, rather than a slow Firefly render.

1. Set up your scene as usual and get to your final artistic framing and lighting. Save to MyScene-final.pz3. Render your final renders as usual. Without making any changes, then make a working duplicate of your final scene, MyScene-toonID.pz3. You need to work on a duplicate from now on, as you’re going to mess with the scene a bit.
2. Go up to the top menu: Display | Cartoon Settings | One Tone.

3. Go down to the Document Display Style icon palette, and set Cartoon Display mode. Everything goes flat. Each flat colour you see is being driven by the Diffuse colour in the relevant scene material.

4. Now, you may be happy with what you see. Lots of clearly defined flat colours, just begging to be precisely and easily selected with the Magic Wand or Colour Select in Photoshop. In which case make a Preview render and save your ‘pseudo Toon ID’ image. Take it into Photoshop and ‘Paste in place’ to align it precisely on top of the other layer(s). You’re done. Bring on the Magic Wand and Paintbucket!
5. Are things not looking right? Lights should not make a difference, given the combination of Display modes your scene is in. But try scrapping your scene’s existing light rig and replacing it with one single ‘flat’ IBL light. ‘Flat’ meaning it is pointed straight at the scene and is causing as little shadowing as possible.
6. It could also be that some or all of the colours in your scene are too similar. You may have dark greys on top of dark greys for instance, as was the case with these sludgy dinosaurs before they were jazzed up a bit.
You could jazz up your too-similar colours by going into the Material Room, select each and every Material and change the Diffuse colours manually. But you may have too many materials in a big scene for that to be viable. What to do?
i) If you have MATWriter Panel 2014 installed in Poser 11, you’re in luck. These make it really easy to change Diffuse colours in bulk across each character and prop, and XS even uses the Windows Colour-picker for the colour selection.
ii) The free EZMat has a Randomise script that does the same per character/prop with auto randomisation of the Diffuse colour.
Be warned that you need to work on backup copies of your scene with these!
Once you’re done, don’t forget to go back up to the top menu: Display | Cartoon Settings | and set Poser back to ‘Three Tones’ or whatever you usually have set there.
For comparison, here is a default ToonID render layer from Poser Pro. Without any colour adjustment done in Poser, in Photoshop the default ToonID layer usually requires a quick Auto Contrast and then a Brightness/Contrast tweak to make it visible and its parts selectable. That’s been done here. Note that the opacity mapping has been handled by Poser much more nicely than the above Preview method, albeit at the cost of render time. On the downside, we don’t have a selection area for the eyes, which we do have on the ‘pseudo ToonID’ render, but those could be manually input in the Material Room (change the toonID number to something very high, i.e. six figures).

There is a free script that will quickly and vividly block-colour the ToonID channel for each character and prop in your scene.
Update: Poser 11.2 has restored these render switches.
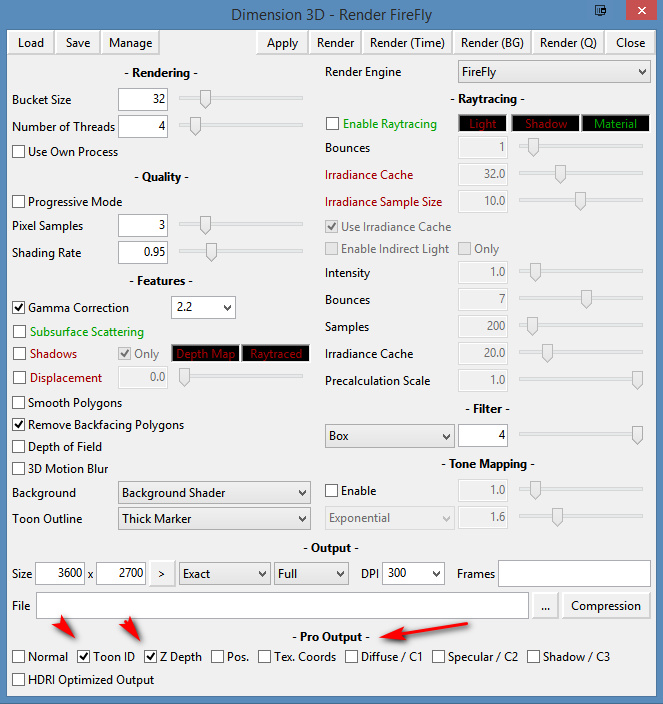
Possibly as a result of the latest Poser Pro update, I seem to have lost the Firefly “auxiliary render” switches. These add additional render types, and their drop-down switches are usually always found on the Firefly Settings panel. These extra renders are then bundled into a saved Photoshop .PSD file as layers.

But there’s a workaround fix for this problem, for me and possibly for others. Because Firefly renders can also be controlled by an official partner script, which ships with Poser. This script still works, and is robust. Go up to the top menu and find: Scripts | Partners | Dimension 3D — and from there launch the ‘Render Firefly’ scripted panel. This can also be invoked instantly with Shift + F on the keyboard. Update: Shift + F seems to have changed now.
Note that this panel may require you to toggle the render type – see the drop-down in the top-right corner. It appears to default to the last-used render type.
At the foot of this alternative Firefly rendering panel, you’ll see the expected Auxiliary render type switches (the ones which seem to have vanished from the standard Firefly settings panel).
Regrettably this can’t use your regular render presets, but you can recreate them and then save them as presets for the new panel.
Doing a Firefly render this way works fine, as the features are still there even if the switches are not. You then save a Photoshop file and it has the expected extra layers. In this instance, Z Depth and Toon ID.

For future reference, here’s what these Auxiliary renders give the Poser Pro user, even if these days you may not care much for the main Firefly render itself:
* Normal. This produces a psychedelic colour-shaded render. I’ve never had cause to use it, but apparently such renders can be used for adding enhanced bumps and scratches, and were most useful back in the days of low-poly gaming? See the page ‘Normal mapping’ on Wikipedia.
* Toon ID. Also called ‘ToonID’ in the Poser Material Room, and simply ‘ID’ when its render is in a Photoshop layer. Each material on your character gets its own material colour, and this is rendered out to a plain flat RGB colour. This enables easy part-selection in Photoshop. For instance, instantly select all of a helmet, and just the helmet. ToonID is automatically assigned and its number (and thus colour) can be changed per-material in the Material Room.
* Z Depth. A greyscale depth mask for your scene. Not useful for scenes with transparency-mapped elements such as leaves and petals, which become ugly square blocks.
* Position. Aka a Position Pass. Looks similar to the Normal render. I’ve no idea what it does, but the Cinema 4D manual says vaguely… “The Position Pass can be used in 3D-compatible compositing applications that can in turn be used to create all sorts of effects with it.” Sounds like it’s of use to high-end compositing and video editing software, such as After Effects.
* Texture Coordinates. Looks similar to the Position render, and a sort of combination of Position and Toon ID. Again, possibly useful in video compositing, at a guess?
* Custom 1. Renders Diffuse only, unless it has a Material plugged into its node in the Materials Room. In which case this channel will only render that material.
* Custom 2. Renders Specular only, unless it has a Material plugged into its node in the Materials Room. In which case this channel will only render that material.
* Custom 3. Renders a Shadows only layer, with dense shadows hard-merged onto a white background (i.e.: not over transparency). As with Custom 1 & 2, Shadows only render if no materials are plugged into its node. Note that this is not the same as: Render Settings | Options | Shadows only, which appears to produce shadows lighter in tone than Custom 3 (even from exactly the same scene).
One can also fairly easily get an Ambient Occlusion (AO) shadows pass from Poser, though not via the Auxiliary render switches.
Poser 11 makes excellent line-art from 3D content, using its Comic Book Preview mode. This effect can easily be switched into plain black-and-white, giving you just the ink outlines for a character, scene or prop. (See my video demo of this).
The free open source Krita 4.x can add to your options here, by providing you with another layer of colour for your art. It does this by cleverly auto-colorising the inked line-art it gets from Poser.
Here is the workflow for how to do this in Krita 4.x, with screenshots. Note that this is very different from how it was done in Krita 3.x.
Obviously what follows is a very simple two-colour example done for this tutorial, and I could have got more funky with auto-painting colours into the line-art.
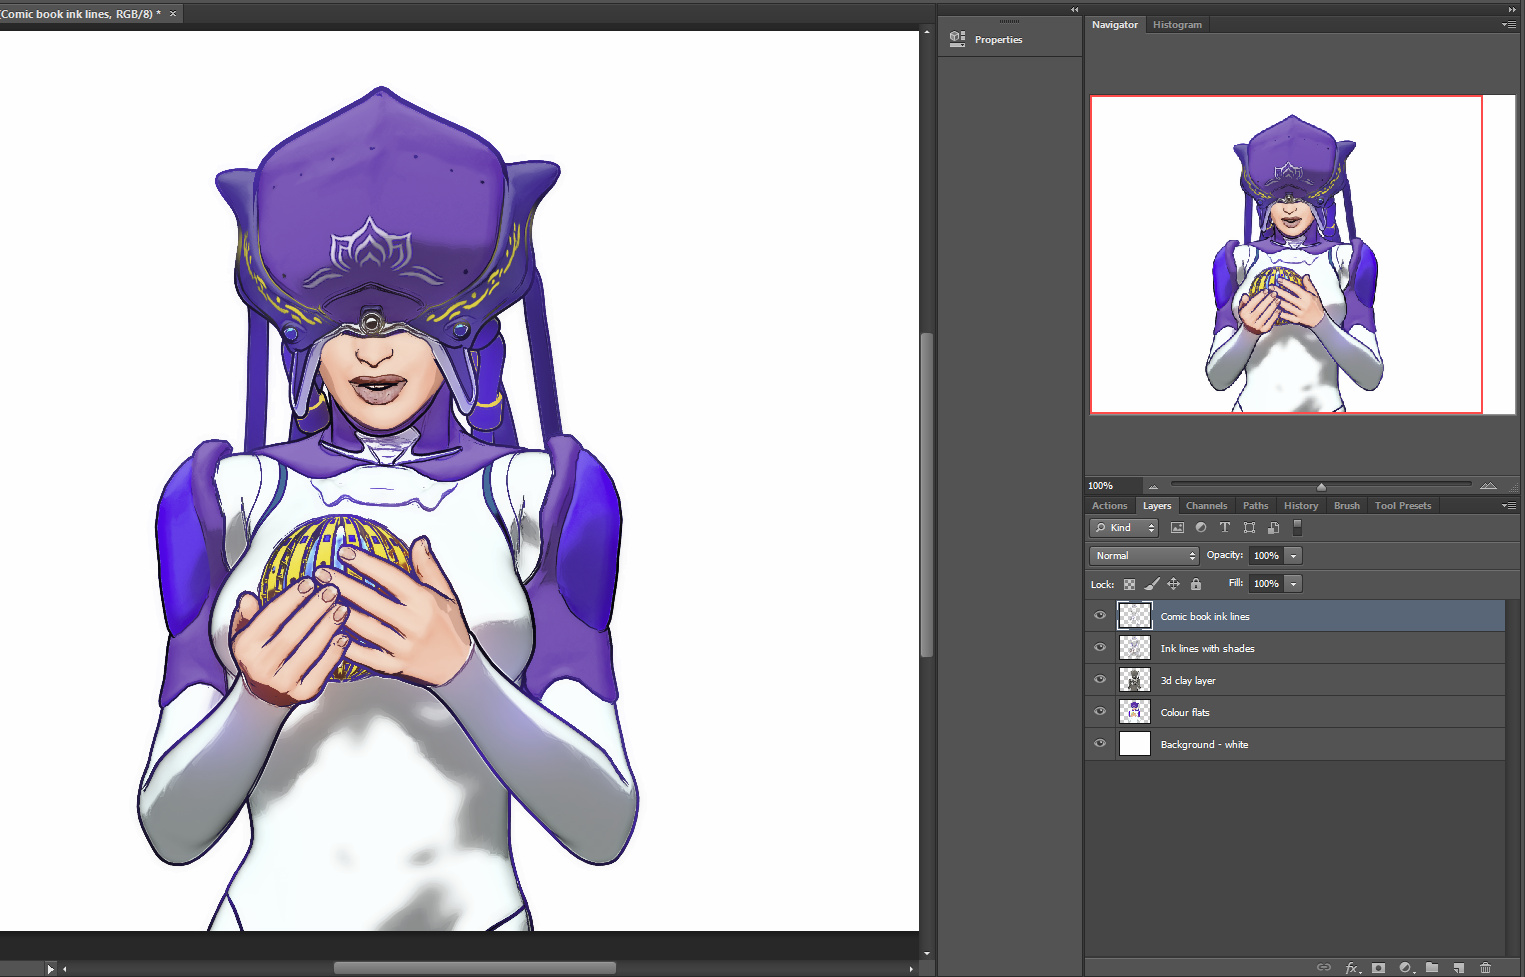
1. First set up your exported Poser render layers in Photoshop. The layers will usually be…
Shadows.
Inks.
Colour Flats.
Background.
You then run the usual Photoshop Action to remove all the white on the Inks layer, to get this result…
Then you save to an unflattened .PSD Photoshop file.
2. Now start Krita 4 and open your new layered .PSD file. In Krita’s Layers palette, right-click on your chosen Inks layer. A menu will pop up, and you then select: Add | Colourize Mask…
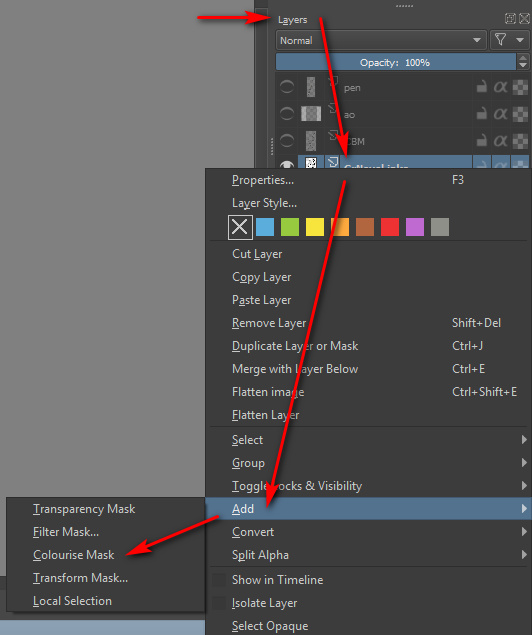
Krita will then add and auto-name a new sub-layer, which sits directly below the Inks layer…
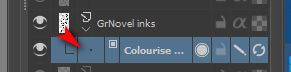
3. Now you make an absolutely vital initial selection in the Krita user interface, which isn’t mentioned in the Manual. You go over to the Toolbar and select the “Colourise Mask Editing Tool” icon. The Tool you need to select is the paintbrush icon with a sort of ‘glowing tip’, which should be near the Eyedropper…

This Tool stays selected in the Toolbar even as you then select a suitable brush or pen from the Brush Library. DO NOT EVER select the normal Brush icon on the Toolbar, as this will mess things up over in the Tool Options.

You then roughly paint and dab colours where you want them to be auto-painted by Krita. It’s important to also indicate a background colour, even if you don’t want a background colour, as the auto-colour process can only fill the entire canvas. I’ll show you how to get rid of the painted background in step 6 of this tutorial.
Dabbing and squiggling the colours can be done with the mouse, but will be easier and more pleasant to do with a pen-monitor such as a Wacom or Ugee. Ideally with a good level of zoom-in. Here it’s very crude and just two colours…

4. Ok, you’ve completed your basic indication of where Krita is to lay in its auto-colours. Now go back to the Colour Mask layer and click its end-icon, the one that vaguely resembles a recycling icon…
![]()
Clicking this icon triggers Krita’s ‘autopaint’ process, and Krita works out how the colour dabs should spread out to meet each other and the ink lines. Doing the calculations for this may take a while on a large canvas with complex colouring. You should see a tiny ‘progress bar’ while this process happens. The default settings in Krita should be able to intelligently cope with gaps in the line-art.
5. With the auto-painting run completed, you then switch back to normal mode simply by clicking on the pencil icon on the layer…
![]()
Clicking this pencil icon reveals your fully auto-coloured line art…
If the colouring is not quite correct, you can fix it. To do that you click what has now become a cross icon instead of a pencil…
![]()
… and this returns you back to ‘colour dab’ mode, and there you can edit, erase and add to your dabs and strokes. You can also tweak some settings over in the Tool Options. When you’ve made your corrections, click the ‘recycling’ icon again to run the auto-paint again. It should only take a couple of tries to get it right.
6. Now you tell Krita that you want a transparent background colour. For instance, in this example we can make the outer red be transparent when Krita ‘paints’ into the line art.
Regrettably Krita’s manual can be utterly baffling in its instructions on how to do this, if you naturally used a regular paint brush to dab your colours on the line-art. It merely says: “We want to have the [red colour] transparent. In the tool options of the colorize editing tool you will see a small palette.” But if you selected a normal paint brush then: i) you will have no clue that the “Colourise Mask Editing Tool” lives over on the Toolbar; and ii) because you never selected this “Colourise Mask Editing Tool”, there will be no mini-palette. The Tool Options docker will not reflect your active use of the ‘Colourise Mask’ layer, and it will be stuck in ‘normal brush mode’.
However, you followed my instructions above in Step 3 — to find and pick the “Colourise Mask Editing Tool” for painting colours, before selecting a brush from the Library. This means that your Tool Options docker is correctly showing this by default…
![]()
In this Tool Options docker we can now scroll down to find a line of colour chips at the bottom. Each of the colours found here represents a paint colour you used on your line-art a moment ago. We then select the red colour chip and click the ‘Transparent’ button. We then update the layer’s paint effect, and the red is gone…
We now just have the colour-filled line art and the original background layer underneath it. The red colour has simply vanished, cleanly and without leaving any ugly fringing.
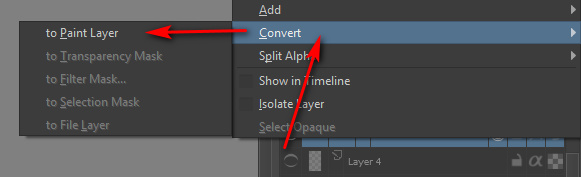
7. Once you you are happy with Krita’s auto-paint, select the Colourise Mask layer and right-click on it, then choose…
Convert > to Paint Layer.
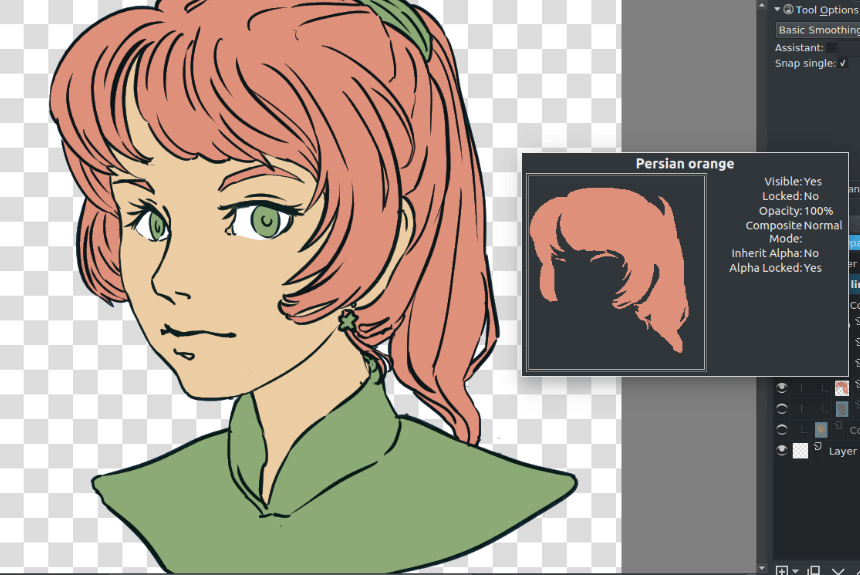
This is what the raw converted paint layer looks like on its own. If we had made more paint dabs on the line-art, obviously we could have got a far more complex colouring in of the line-art…

Here’s a very slightly more complex example of what can be done, and how it’s possible to save each paint layer as its own ‘island’ of colour…
Ok, then you’re done in Krita. Save the .PSD and load it up again in Photoshop. You can then use this new Krita layer to interact with the Colour Flats layer you had from Poser. It could also interact with a shadows layer to colourise the shadows.
The above workflow sounds complex, to accurately describe it and to warn about the pitfalls. But once you learn it, it is fairly quick.
For some types of Poser scene it can also be mimicked and bypassed inside Poser by a render using:
Single ‘flat’ IBL light, ‘flat’ meaning it is pointed straight at the scene.
Top menu, Display | Cartoon Settings | One Tone.
Set Cartoon Display mode in Document Display Style icon palette.
Then make a Preview render.
This gives you a pseudo ToonID Preview render, onto which you can paintbucket new colour, depending on how many colour segments you have. If you only have eight segments you’re fine, but if you have 200 segments per frame then you’d be at it all day.
Lastly, automation. Sadly Krita isn’t Photoshop, which means we can’t encapsulate this somewhat fiddly workflow in a semi-automated Action. But I don’t know of anything that can do what Krita can do here, inside Photoshop.
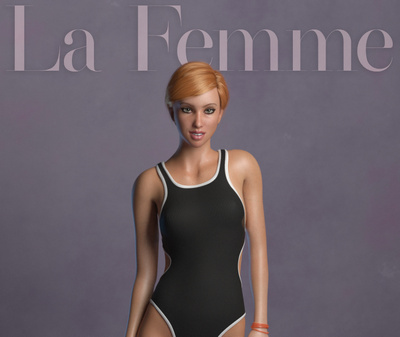
La Femme is the name of the new flagship female character for Poser, arising from the new Smith Micro / Renderosity partnership. She looks great and is free… but not really free, only becoming available free if you first spend more than $3.50 on other content at the Renderosity store.
Why is she more important than other recent Poser figures, such as the flagship Pauline figure which shipped for free (really for free) with Poser 11? To put it very simply, I’m told it’s because she brings Poser up to parity with DAZ Studio’s latest G8F figure. In terms of things like natural joint-bending, muscle flexing and having related figure and skin advances baked in. I haven’t yet seen the Smith Micro webinar on her, but I take it on trust that she’s an advanced state-of-the-art figure. Though I have very little knowledge of such jointy/bendy technical matters, and have also hardly even tried the G8s in DAZ Studio yet, I spent a few hours with a G8 and I like what I see. So it’s good to know that Poser is keeping parity with DAZ Studio there.
Personally though, I’ve always been more inclined to fix such joint and muscle-flexing matters in Photoshop, with a few flicks of the Liquify tool and a bit of light paintwork. But I can see how it would be important for animators and the 8k hyper-real render people, especially in settings where there’s minimal clothing involved.
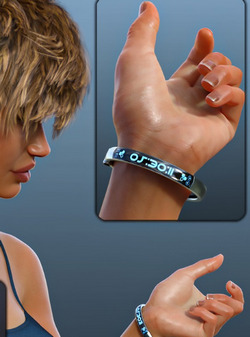
Install: Here’s the complete roster for what my third-party PzDB content library indexed for her after install. The chest cover-ups are my own, as today’s Internet services appear to be hyper-prudish about showing even the simplest and tamest nudity.
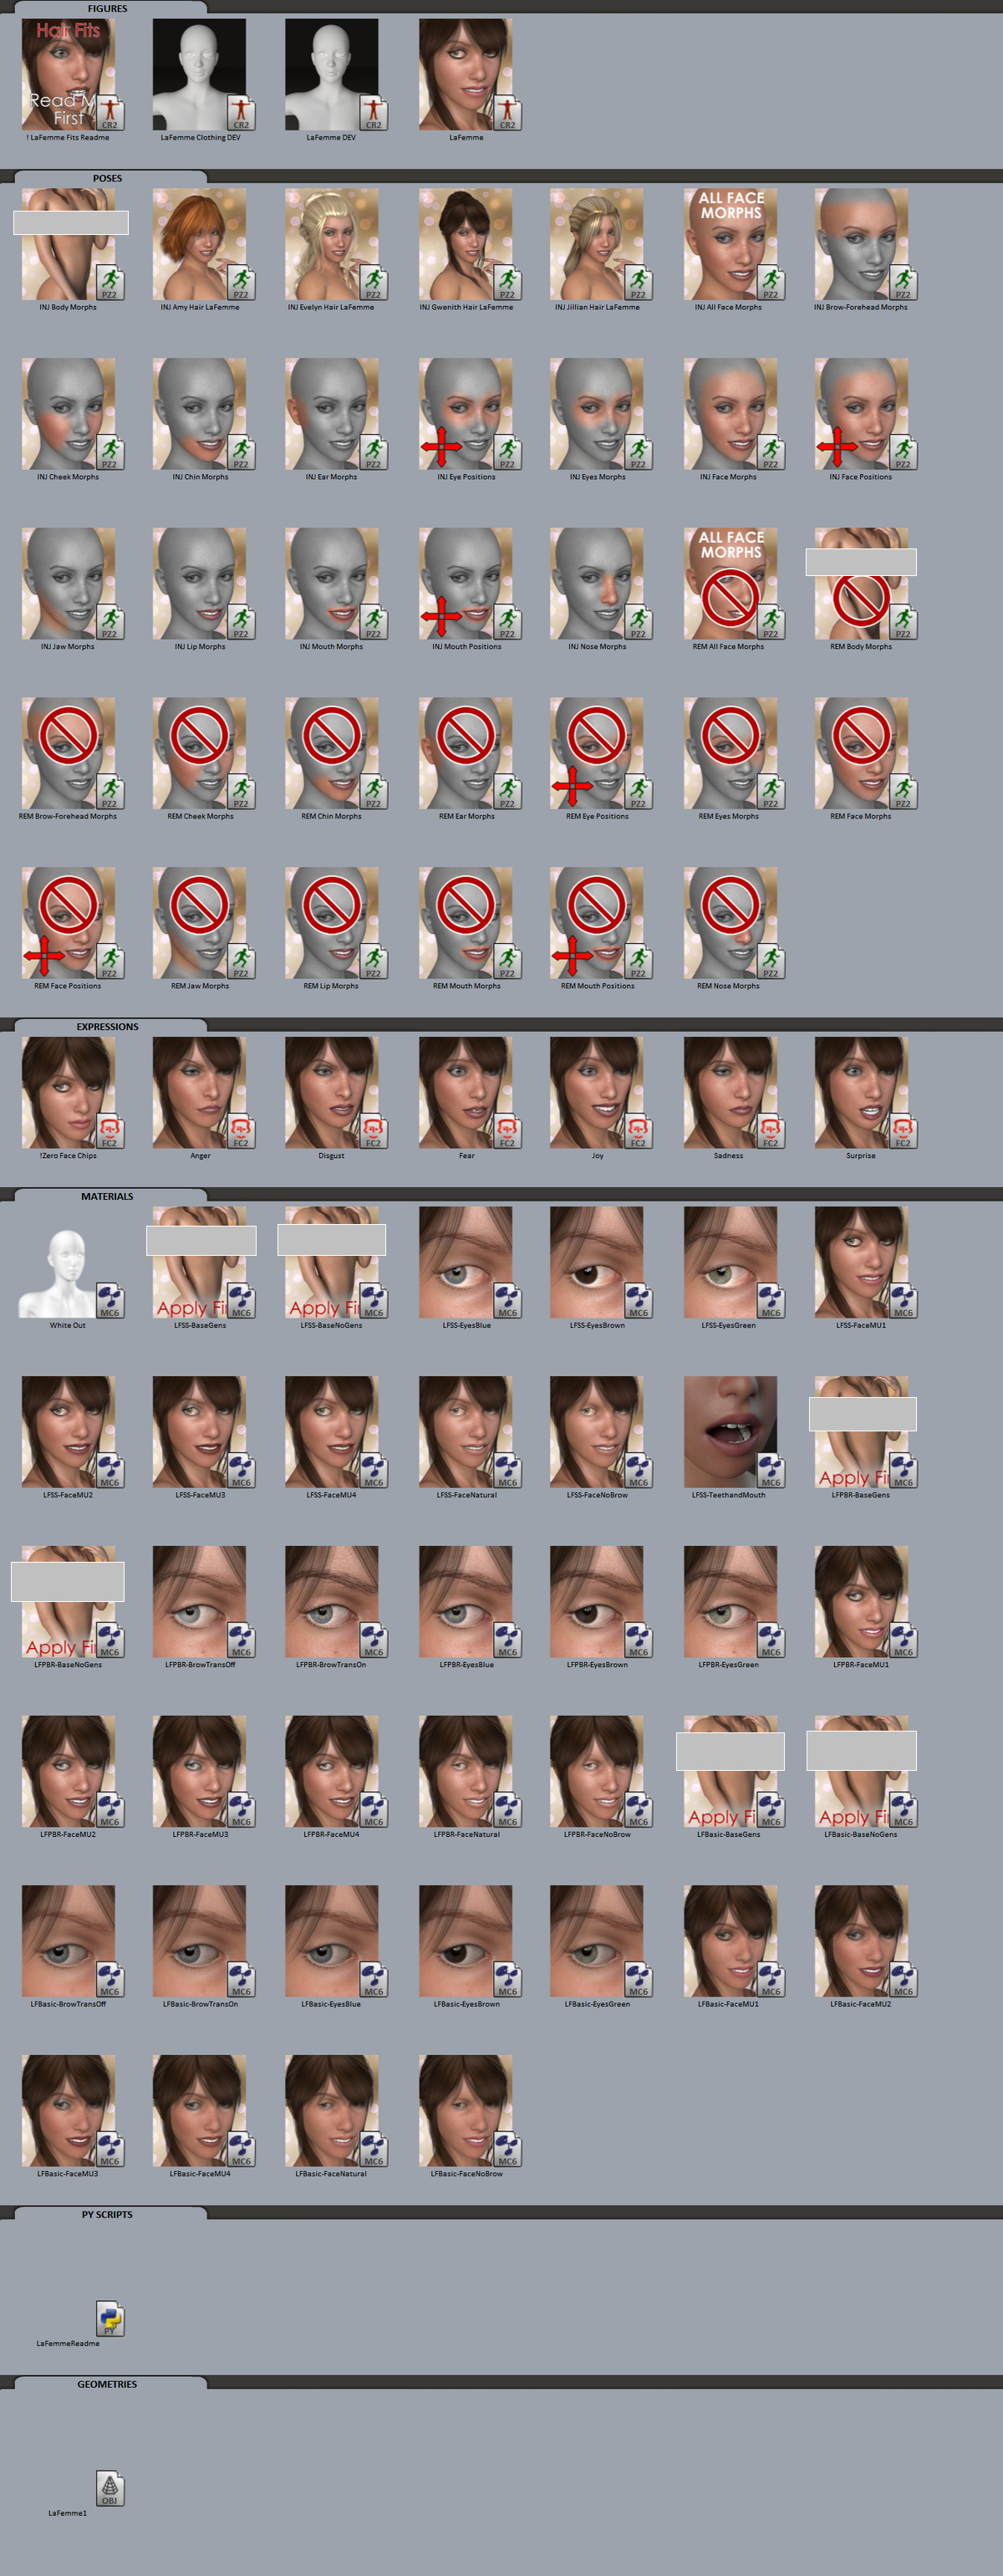
Of course you can also load all her elements with a keyword ‘lafemme’ in Poser’s native Content Library, once the yellow re-indexing icon eventually stops pulsing.
As you can see, very curiously there is no restore MAT for the skin textures. You need to make and save your own. Such a thing is needed in cases where you try a third-party MAT and you need to restore to the default MAT.
Morphs: She comes with a quite basic set of ‘starter’ Body Morphs, and a more extensive set of Head Morphs. At Renderosity there are also two $20-each packs which will add lots of further Body Morphs and HD Morphs, if that’s what you need for your renders or new characters. So you’re looking at $43.50 if you want the whole La Femme caboodle, which most days is probably comparable with V4 and Morphs++ and HD skins from the DAZ Store.
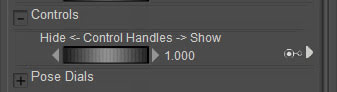
Face-control and Expressions: Her face has the new face-control chips, though apparently these are only to fine-tune her underlying expressions. Not having used Poser 11’s Paul and Pauline, I’m not at all familiar with such things. But such features look handy, and more importantly there are dials for moving both eyes at once up-and-down and side-to-side quite easily. There are also six rather basic expression presets in the freebie package, if you just want to pop on a quick expression and tweak it. The Face Chips and the body chips can be turned off in Preview, useful for comics production. In Body, there is the following dial to turn them off…
I could get no legacy A3 or V4 expressions to work on her. No other legacy expressions worked in the slightest, not even Poser 11 Pauline expressions. Injecting all her Face Morphs made no difference. Nothing at all would move her set-in-stone default expression. This was rather disappointing.
Of course, having face-chips and other advanced face-flexing elements is great, but who has the time or patience to spend an hour hand-crafting a new custom expression with them? I just want 50 good presets in themed subfolders, and separate eyes-only look presets to apply on top of the expression presets, like DAZ Studio has (e.g. the ever-useful i13 SciFi Splendor set and similar). I hope such dedicated expression preset sets for La Femme will come soon, though it’s slightly worrying that there are currently no expression sets either in the Renderosity store or as freebies. Given the apparent flexibility of her face, this seems like a big missed opportunity.
Poses: I tried her with an old Aiko 3 pose, as these often work on many newer characters. The A3 ‘Floating’ and other poses worked perfectly! Next up was a test of some V4 and M4 poses. V4 playing a musical instrument, the Cello, was taken perfectly by La Femme including the hand and finger poses. M4 driving a truck was also successful, including finger positions on the steering wheel. Wonderful. After the total failure among the Poser expressions, such success with poses was very pleasing. But V4 riding a Penny Farthing bicycle proved too much, and the lower legs and feet were totally screwed up. Though possibly this pose first required the feet to be parented to the pedals. It does suggest that while many V4 and M4 poses will work, a few won’t or will first need parenting of feet and hands to props.
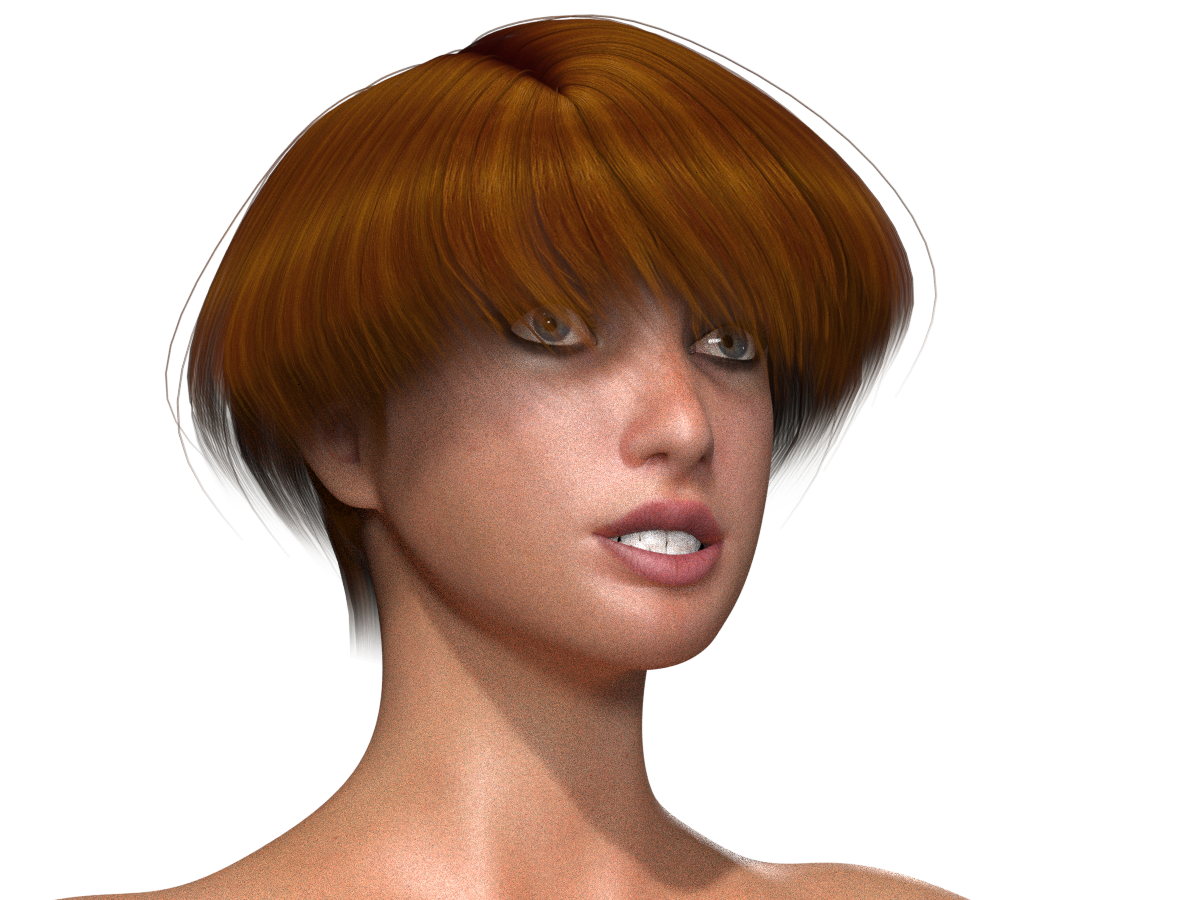
Hair: There’s no hair in the free download, but the four presets do work with the Pauline hair that shipped with Poser as extra downloads. I seem to have skipped that download bundle in the Poser Download Manager, though. Thus I discovered that V4 Supersleek hair (seen below) was fine for making a few test renders, needing only the slightest nudge upward on the Y axis for a La Femme fit. Poser auto-parented this hair and it moved with the head. Super, and this was another win for La Femme.
Clothing: This was the big problem, and lack of clothing was the total deal-breaker (for now). There’s not so much as a basic leotard in the free package, and currently there are no appealing clothes on the Renderosity store. No sci-fi, and only one rather basic maybe-steampunk set of dungarees. Certainly nothing to match V4’s 500+ awesome outfits. I had almost no success with any legacy Poser clothing, except for the V4 Morphing Cloak and the V4 Victorian Outfit, which both looked OK at the front. Otherwise it was all a mis-fit. There is a $7.50 stop-gap route for V4 clothing conversion, though that only gets you as far as the pre-prep of the clothing for the Fitting Room. But I’ve never ever used Poser’s Fitting Room, and don’t even have the first clue how to use it or how well it works for a new figure like La Femme. If clothing doesn’t fit, my immediate reaction is to try another item, rather than faff and fiddle around with it for hours. The Fitting Room is also a Poser Pro only feature, so Poser Standard users don’t have it.
But we already have a free V4 skull-shape morph, for V4 hair-fits on La Femme. So… will we also get a similar V4 full body-clone morph, making her into a V4 shape — but with a load of G8F-like advanced features, joint flexibility, and highly tweak-able expressions? I don’t know enough about the arcana of Poser figure-making to know if that’s possible, but I presume it is? I see it in DAZ Studio, where we even have sliders that can micro-adjust how much legacy character shape your Genesis figure has input in them. If a V4 body shape could be done, would V4 clothing then load onto La Femme perfectly? Or am I just dreaming re: that possibility? Perhaps V4 clothing requires certain named bones to ‘grab onto’, which are not present in La Femme?
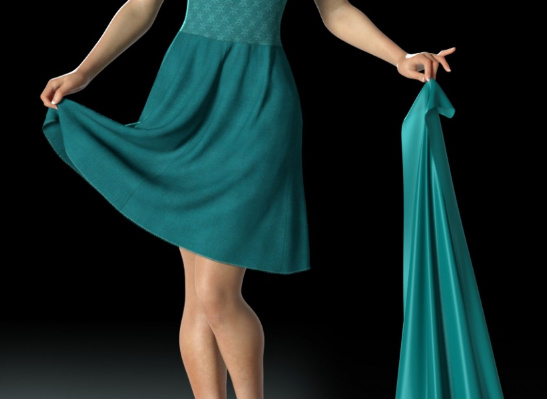
The idea of a retro ‘V4 shaped La Femme’ may cause sniffs from some, but it would be fine by me. Just the body and top of the skull, not the face. I’d then consider using her instead of a V4. Because she does look very good in SuperFly renders even ‘out of the box’ and under the default Poser 11 ‘Bright Lights’ preset…
Update: Two years later. The main problems: Difficulty in getting the face away from the default ‘horsey’ face. Limb bending/creasing is not as good as a DAZ G8 in dynamic poses. Lack of morphs and (less so) clothes. Just not as easy to work with and dress as a G8 in DAZ Studio.
There’s a free Poser webinar for the new La Femme figure for Poser, the one that gives Poser parity with the features of DAZ Studio’s G8F figure. The webinar starts in three hours time! It’s now 8pm Wednesday in the UK, and 2pm CST in the USA. The webinar starts at 5pm CST in the USA. There are 100 seats so I assume there may be a few tickets left.

I assume it’ll also be edited and posted on YouTube in due course, as the free Poser webinars usually are.