Airen 4D for Windows, a new $200 ‘AI renderer’ plugin for Cinema 4D. It’s Stable Diffusion and you’ll still need to text-prompt. So there’s no pre-rendering AI that’s classifying the image type and content, and then writing the SD prompt for you. Also, ‘jiggling boobies’ animators can relax… it’s just for stills.
Category Archives: 3D Renders
U-Render
Interesting news of a “really real-time” renderer for Cinema 4D, thus potentially interfacing with imported scene files from Poser. U-Render works on Cinema 4D R16 and upwards, is OpenGL 4.5-based and is GPU agnostic (Nvidia or AMD). Poser 11 Pro’s PoserFusion plugin supported Cinema 4D to R19. Thus it should be theoretically possible to import a Poser scene to C4D and have it render in real-time.
U-Render is somewhat affordable at $329 (currently with a 33% discount offer). In its latest 2019.11 version it newly supports volumetrics.
The only major drawback seems to be that U-Render is developed for the toxic tangle that is Windows 10. But there’s a 30-day free trial to test it — please comment here if you find you can actually get it running under Windows 8.1.x.
One wonders if this could be plugged more directly into a future Poser 12, too, perhaps as a $199 plugin.
Incidentally, if you’re inclined to ask “what version of OpenGL am I running”, then be very wary of installing the commonly-suggested GL View utility to find out. It will bring your PC to a grinding halt for two hours while it does its intense tests, and it cannot be halted no matter how many times you press Crtl + Alt + Del. The only way to kill it is to remove the power-cable and kill Windows. This makes it highly dangerous for most users. It’s not intended to be malware, but its aggressive system-hogging, and lack of asking user permissions or offer of slower probing, effectively make it so.
The far easier way is the portable freeware GPU Caps Viewer. This is very light on your PC and indeed takes just half a second to give you the answer. I’m on OpenGL 4.2.
Update: installing new GPU display drivers upgraded me to OpenGL 4.5.
New iRay render farm service
Jack Tomalin has a new iRay Render Server remote ‘farm’ service.
Pay as you go – $0.40 a minute
or
$50 a month for an ‘unlimited’ plan.
Uploads can be done from within DAZ Studio. It’s a new service and the page says that trial accounts are being accepted.
DAZ Studio 4.12 beta supports RTX
This week everybody seems to be announcing their software will support real-time ray-tracing for those with “Nvidia’s new RTX GPUs”, which at the consumer level means the GeForce RTX gaming graphics cards. Including DAZ Studio 4.12 (already enabled), Blender, and KeyShot (in the forthcoming version 9 in Autumn/Fall 2019).
In DAZ Studio 4.12, with “RTX On” according to DAZ you get…
RTX-accelerated ray tracing for both the interactive viewport and final renders … [with a claimed] 140 percent more performance in final frame rendering compared to previous generation GPUs, and an incredible 10.5x faster than CPU-only rendering.
Looks nice, but Amazon tells me that even a low-end budget gaming “GeForce RTX” is likely to cost me around £350, and that’s without a Power Supply Unit (PSU) upgrade to run it. An RTX version that’s going to last a few years starts at £700. Still, for a small commercial studio, that sort of amount could be written off against tax. Although I think I’d really need a new PC to go down that route. And that’s still some years away.
How to find and use the Render Queue Manager in the latest Poser 11
I read on the official Poser Forum that rendering in Poser 11 was was both faster and more convenient when using the Render Queue Manager. I thought it would be useful to write a quickstart on this feature, as it exists in the latest fully patched and updated Poser 11 Pro. Since the only YouTube video on it is now out-of-date.
Things to know, straight off, as a new Poser user:
* “Render Queue” is a Poser Pro-only feature.
* “Render Queue” was only for Firefly renders in Poser 11. But apply patch SR3 or higher, and Superfly can also use it.
* “Render Queue Manager” is not the same thing as Poser’s internal “Render in Background”. “Render Queue” is for stacking renders, so they automatically render one after the other. As such it can save quite a bit of time on a multi-render project.
* Rendering is done by a separate programme in the background. On many new 64-bit multi-core Windows systems this should make rendering faster, and Poser far more responsive while rendering. Again, this will save you time in your workflow.
* There is also something called “network rendering”, where the rendering task can be shared across many PCs on a network. This was introduced for Firefly in Poser version 11.0.3.
Short version:
1. Load and tweak your Poser scene. Save. Do a small test render, then set your full render size and quality in Render Settings | Firefly or Superfly.
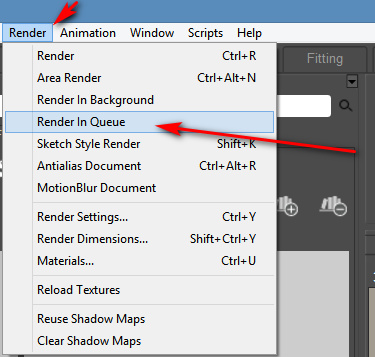
2. Go: Top Menu | Render | Render Queue. The Render Queue Manager launches as a new standalone window, asks for the filename and folder it should save to, then goes off and starts rendering.
3. You then carry on with other work in Poser or Photoshop etc, while the rendering is done by a separate programme in the background.
Long and tedious version:
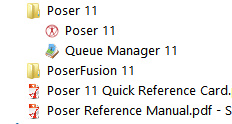
1. OK. First, where is it? Well, if you downloaded Poser 11 and its extras a while ago, look to see if you have a ‘Queue Manager’ sitting in your Start folder alongside Poser 11…
If you don’t see it there, check you have it at: “C:\Program Files\Smith Micro\Poser 11\QueueManager.exe”. If it’s not there, check in your Smith Micro Download Manager to see if you actually downloaded all the various bits needed for Poser 11 Pro.
Let’s assume you find it’s installed. Now go find your set of serial numbers that came with Poser 11 Pro. Copy-paste the serial for the Queue Manager, as you may be needing it in a moment.
2. Launch Poser 11 and load and set up a test scene. Save. On the latest version of Poser the “Render Queue” is then found on the Top Menu | Render | Render Queue…
On revisiting the “Render Queue” I found that this menu item remained curiously ‘greyed out’ and inactive for me, even when I switched to the relevant tab in Render Settings. I found that what I actually had to do first was make a small test render using a Firefly / Superfly render engine. Doing this caused the “Render Queue” menu item to become active and selectable.
3. Now, clicking on the active “Render Queue” item should launch the Render Queue Manager .EXE window. If this is the first time you’ve ever launched it, it will need the serial number to be input. Then you will first be asked to set a filename and destination folder for your render, then asked to give the QueueManager.exe Firewall permissions (which only needs to be done once, at launch).
QueueManager will stay open and waiting after the first render completes, hoping to be sent more renders.
In the Windows Control Panel | All Control Panel Items | Windows Firewall | Advanced, you may then want to make the Firewall settings permanent. Once done, this should mean that you won’t be asked each time it launches…
OK, it’s up and working. “Process jobs locally” if you’re on a single desktop PC…
From now on you just skip merrily through the simple version of my tutorial, as given above.
MOVIES? Rendering multiple movie frames is apparently currently more problematic, for those with the latest patch applied. It can be temporarily accomplished through a MovieRenderToQueue.py Python script. Apparently a vital button on the Movie panel in Render Settings was removed with the latest patch, along with the advanced Auxiliary Render Type switches. There’s a simple workaround for the Auxiliary Switches and the Poser devs reports that the Movie queue button should be back in Poser very soon…
ALTERNATIVE ACCESS: One can also access the “Render to Queue Manager” command via the official partner script for Firefly. This is found under Top Menu | Scripts | Partners | Dimension 3D | Render Firefly. Or it can simply be invoked by pressing Shift + F on the keyboard.
NETWORK RENDERING: You’ll of course get the full benefit of using the Render Queue Manager if you’re using it to render across several PCs. As we’ve seen, the Render Queue Manager is a separate .EXE file and on Windows you’ll be running it on Windows 7 or higher. Render Queue can ‘network render’ across several such machines, only if: i) the Render Queue Manager version on your slave PCs is the same as on your main PC; ii) each .EXE has been activated with the serial (not the same as your main Poser 11 or PoserFusion serials); and iii) you have all the remote and desktop Firewalls set up correctly. Each .EXE will need to be given both inbound and outbound permissions through the Firewall. All this is needed to that the main PC can talk to the network PCs, and the network PCs can talk back.
If you do lots of large renders or animation with Poser then you’ll want to look at advice on building a dedicated render network or base unit. Some advice is to be found here. Looking for the apparently-required 2 x CPU “2x X5650” to “2x X5690” refurbished Xeon workstation on eBay suggests that about £400 should get you something quite powerful (24 render threads) under your studio desk. That’s comparable with the cost of a high-end graphics card, but gets rendering off your PC entirely so you can get on with other work. It also means you don’t have to faff around with upgrading the PC’s PSU, fitting a huge slot-in card, fan-noise, summer overheating etc.
AUTOMATE PREVIEW AND SKETCH RENDERS? For renders other than Firefly, you might want to look at setting up Windows automation software like JitBit Macro Recorder, which records and automates software clicks, and then set wait-times (such as 60 seconds per Preview render, allowing a 3600px Preview render ample time to complete). You could also try to have JitBit use keyboard shortcuts only, to make your automated macro/action independent of User Interface changes and screen size. Obviously this doesn’t take the renders off to another programme or PC, but there is some ‘background’ automation involved.
Lost your Toon ID renders in Poser 11? Here’s how to get them back again.
Update: Poser 11.2 has restored these render switches.
Possibly as a result of the latest Poser Pro update, I seem to have lost the Firefly “auxiliary render” switches. These add additional render types, and their drop-down switches are usually always found on the Firefly Settings panel. These extra renders are then bundled into a saved Photoshop .PSD file as layers.
But there’s a workaround fix for this problem, for me and possibly for others. Because Firefly renders can also be controlled by an official partner script, which ships with Poser. This script still works, and is robust. Go up to the top menu and find: Scripts | Partners | Dimension 3D — and from there launch the ‘Render Firefly’ scripted panel. This can also be invoked instantly with Shift + F on the keyboard. Update: Shift + F seems to have changed now.
Note that this panel may require you to toggle the render type – see the drop-down in the top-right corner. It appears to default to the last-used render type.
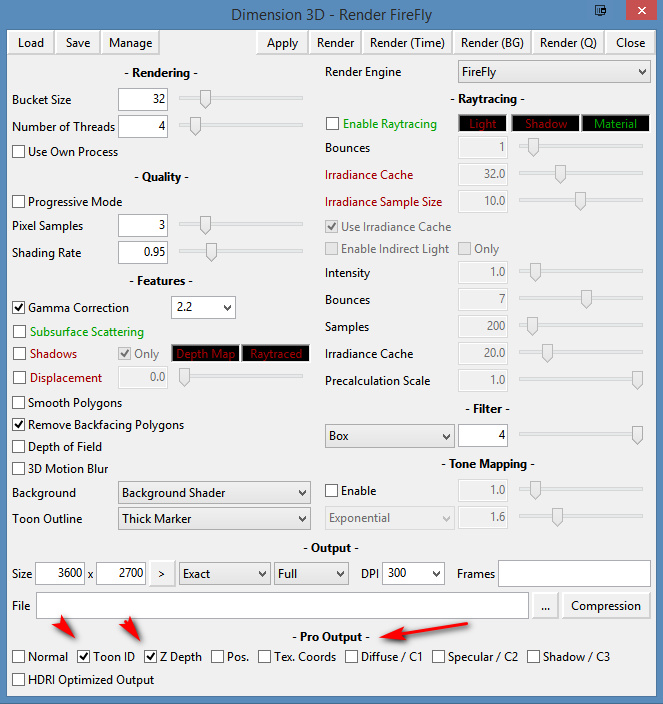
At the foot of this alternative Firefly rendering panel, you’ll see the expected Auxiliary render type switches (the ones which seem to have vanished from the standard Firefly settings panel).
Regrettably this can’t use your regular render presets, but you can recreate them and then save them as presets for the new panel.
Doing a Firefly render this way works fine, as the features are still there even if the switches are not. You then save a Photoshop file and it has the expected extra layers. In this instance, Z Depth and Toon ID.
For future reference, here’s what these Auxiliary renders give the Poser Pro user, even if these days you may not care much for the main Firefly render itself:
* Normal. This produces a psychedelic colour-shaded render. I’ve never had cause to use it, but apparently such renders can be used for adding enhanced bumps and scratches, and were most useful back in the days of low-poly gaming? See the page ‘Normal mapping’ on Wikipedia.
* Toon ID. Also called ‘ToonID’ in the Poser Material Room, and simply ‘ID’ when its render is in a Photoshop layer. Each material on your character gets its own material colour, and this is rendered out to a plain flat RGB colour. This enables easy part-selection in Photoshop. For instance, instantly select all of a helmet, and just the helmet. ToonID is automatically assigned and its number (and thus colour) can be changed per-material in the Material Room.
* Z Depth. A greyscale depth mask for your scene. Not useful for scenes with transparency-mapped elements such as leaves and petals, which become ugly square blocks.
* Position. Aka a Position Pass. Looks similar to the Normal render. I’ve no idea what it does, but the Cinema 4D manual says vaguely… “The Position Pass can be used in 3D-compatible compositing applications that can in turn be used to create all sorts of effects with it.” Sounds like it’s of use to high-end compositing and video editing software, such as After Effects.
* Texture Coordinates. Looks similar to the Position render, and a sort of combination of Position and Toon ID. Again, possibly useful in video compositing, at a guess?
* Custom 1. Renders Diffuse only, unless it has a Material plugged into its node in the Materials Room. In which case this channel will only render that material.
* Custom 2. Renders Specular only, unless it has a Material plugged into its node in the Materials Room. In which case this channel will only render that material.
* Custom 3. Renders a Shadows only layer, with dense shadows hard-merged onto a white background (i.e.: not over transparency). As with Custom 1 & 2, Shadows only render if no materials are plugged into its node. Note that this is not the same as: Render Settings | Options | Shadows only, which appears to produce shadows lighter in tone than Custom 3 (even from exactly the same scene).
One can also fairly easily get an Ambient Occlusion (AO) shadows pass from Poser, though not via the Auxiliary render switches.
3D Map Generator: Atlas
I hadn’t looked at the Photoshop-based 3D map maker ‘panels’ for a while now. Last time I looked they were ‘sort of OK’, and all came from the same maker in a bewildering set of variations and version numbers. But development on these has continued, and the new 3D Map Generator: Atlas looks as though this solo developer has more or less nailed it in terms of easy textured 3D mesh generation from Google Maps. My thanks to Stefan Holzhauer for drawing my attention to this class of ‘Photoshop panel’ software again.
For a mere $21 U.S. the new 3D Map Generator: Atlas works as a panel inside Photoshop 2015.5 or higher. ‘Atlas’ first appeared in summer 2018 (which probably explains why I missed news of it), and is now in a bugfixed version 1.2.
“What can a puny PS panel do”, you might think, but judging by this detailed workflow video… it can load and interface with Google Maps, automatically grab the greyscale heightmap there, and with only minimal manual jiggering of two Photoshop layers, can produce a decent 3D mesh using Photoshop’s own 3D tools. Here’s the video of it in action and tandem with Google Maps. It can even export the resulting mesh as an .OBJ file…
But then the important question is… “can I use Google Maps data commercially?” The answer appears to be “No”. Because even though Google is using public-domain NASA data (Landsat 8) it’s also done lots of private-sector work to clean, rectify and align the tiles. Here’s a quote from Klaas Neinhuis from Jan 2017 on polycount.com, on the matter…
“I’ve spoken to them [Google] and it doesn’t make sense financially to use Google Maps content. I’d need to get a ridiculously expensive license, but the user would also need an expensive license.”
So, while 3D Map Generator: Atlas is going to be of interest for hobbyists, educational users and artist overpainters of 3d scenes, if you create commercial-use map renderings this way — artistic isometric tourist maps for the local tourist board brochures, say — then you’ll still need to go instead to the public-domain for your heightmaps and overlays. Or pay a GIS/mapping nerd $100 to go get the good high-res heightmap and satellite overlay from the public domain for you. Of course, there may be workarounds to get 3D Map Generator: Atlas to use public domain data, but my searches didn’t immediately discover a tutorial on that.
Personally I have a noted workflow and archived public domain datasets for the whole of the UK, with which I know I can produce a viable OBJ mesh for any bit of the UK’s underlying terrain as a result. I used this a few years ago for re-envisioning local Iron Age landscapes using Vue. But it’s still a few hour’s work to get to a good mesh, and involves wrestling with 3DEM and GRASS. So it’s good to know that a $21 Photoshop plugin, such as 3D Map Generator: Atlas, could do the job far more swiftly inside Photoshop. Albeit not for commercial purposes.
Update: I see there’s also what appears to be an easy automated solution over in Adobe After Effects, albeit at a rather high cost. The plugins GEOlayers 2 (mapping) with Trapcode MIR (create 3D meshes in AE) can work together to create maps and terrains, with GEOlayers able to automatically hook into a number of public free mapping tile servers.
Nvidia GP100, geared for 3D rendering
Graphics-card maker Nvidia has announced the Quadro GP100, a slot-in card that is specifically geared for those who want to render 3D to a graphics file, rather than display 3D graphics on screen. It has 16GB of HBM2 memory which helps load 3D model and scene textures “significantly faster”, which should reduce rendering times. It’ll need a PCI-Express 3.0 slot on your PC motherboard. No price yet but industry pros are suggesting it will cost 20-30% more than the current-fastest card the P6000 (“$5,000”), which puts it at perhaps $6,500. Far too high for many, but possible for a small professional studio looking for a purchase they can write off against tax. And for amateurs, there’s the comfort that what is $6,500 today is often $1,200 or less in three years time.
And if you happen to also want to create a new cyber-AI, the GP100 also being touted as the ideal card from which to build your own AI and “explore deep learning”.
Released: SketchUp 2016
Well, it’s been a whopping week for software releases. Today we have SketchUp 2016 released.
Released: KeyShot 6
It’s super-release Tuesday! After DAZ’s Micheal 7 and Poser 11 were released today, now comes KeyShot 6. I’d expected it sometime before Christmas, but Animation World News reported a few hours ago that it’s actually shipping now (note that there’s now a cheap £75 Educational version). My previous post on this blog has details of the new features.
Keyshot 6
The long-awaited Keyshot 6 is on its way soon, very probably before Christmas. It appears that users can expect a host of new goodies users in version 6, including:
* Ambient occlusion, albeit as a material type.
* A new “Product” preset setting — “useful for products with transparent materials illuminated by the environment and local lighting”.
* A new “Interior” preset setting — an easy way to convincingly light an interior scene with natural light.
* Basic editing of 3D geometry.
* File import, or at least linking(?), for Cinema 4D, Maya, 3DS Max.
* Save to a layered Photoshop (PSD) file. Sadly, there’s still no ability to have ground shadows render onto their own layer.
* Material editing and mixing via nodes, for those who like that sort of thing.
* An improved Move Tool for moving objects around the stage.
And much more. Sadly the clunky batch-rendering stack doesn’t get a usability overhaul, via some much-needed drag-and-drop .bip file-adding functionality.
Digital Art LIVE: second issue
Issue 2 of the free Digital Art LIVE magazine is now available. The 84-page issue’s theme is ‘alien flora and fauna’, and there’s also a ‘future humans’ gallery showing possible future human evolution…
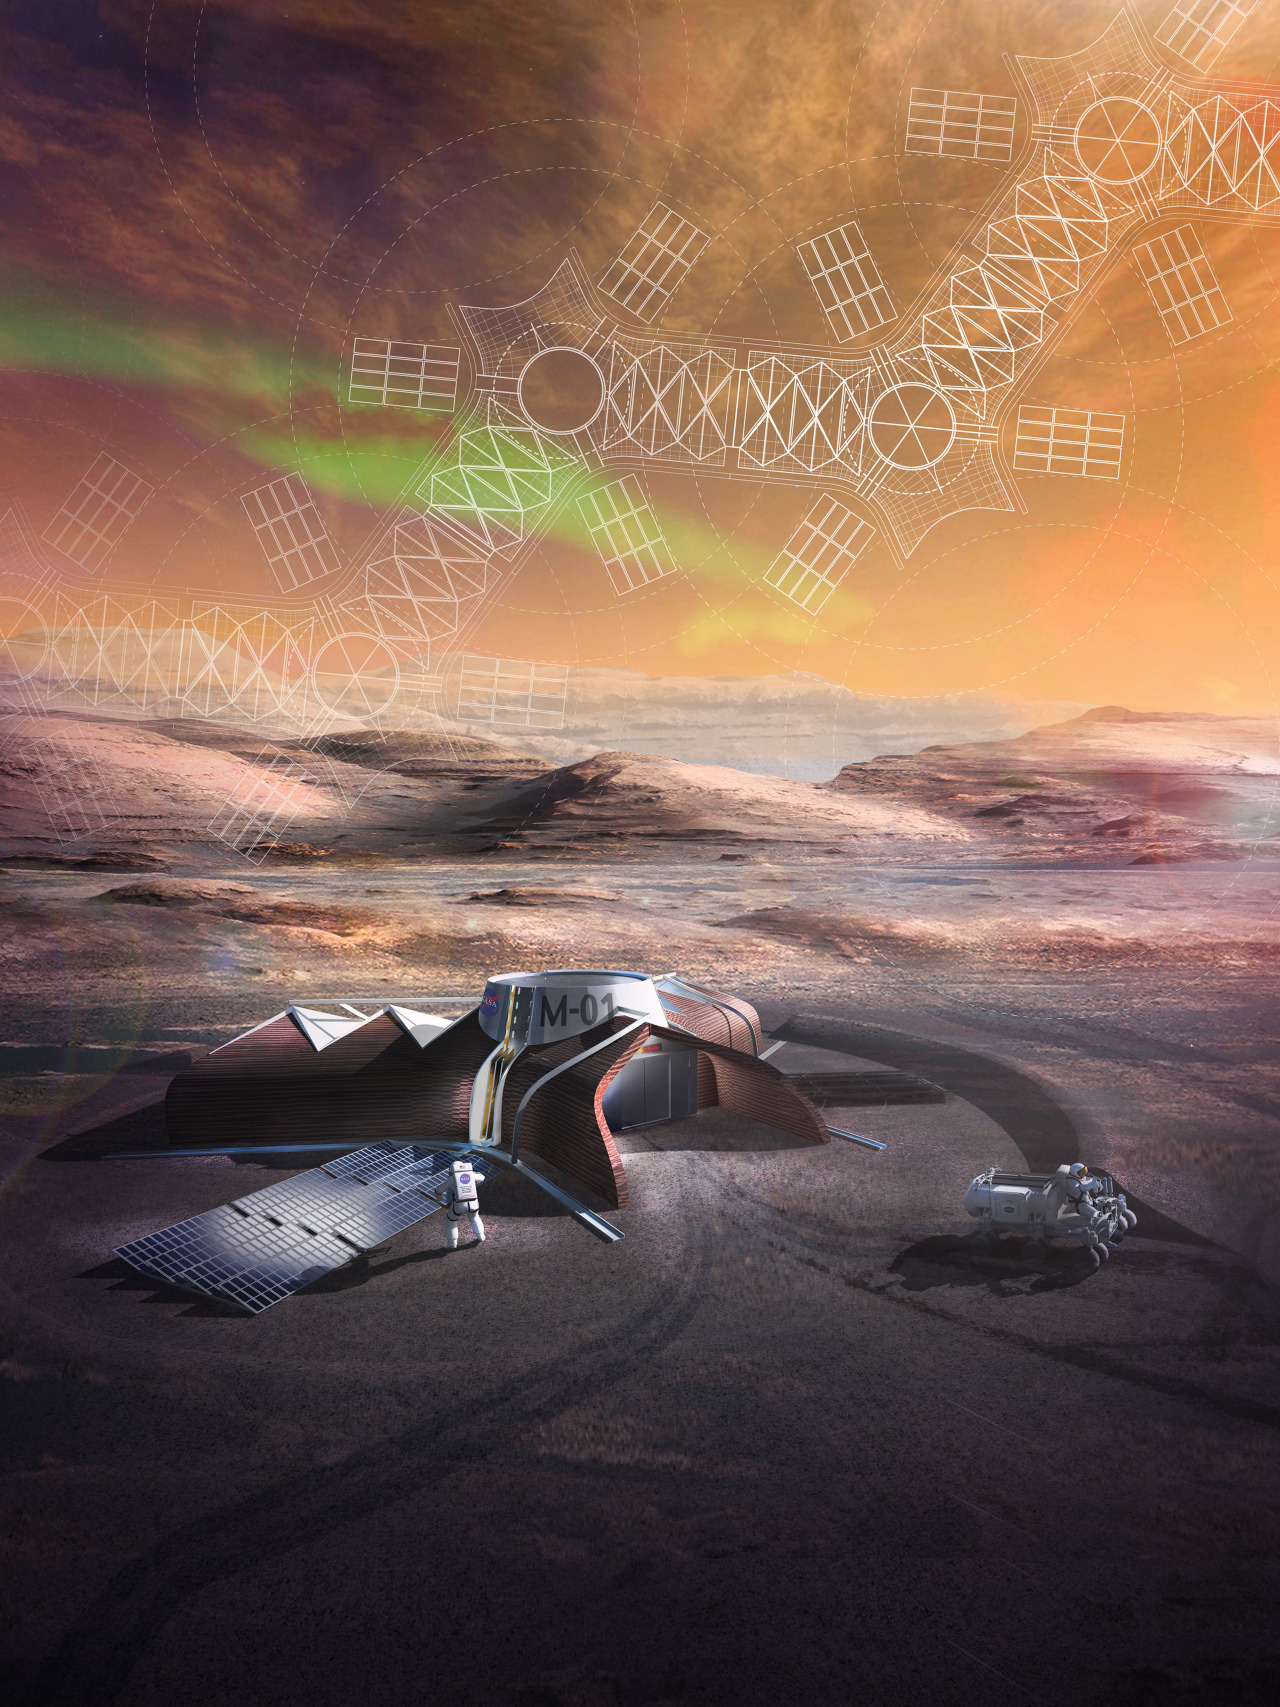
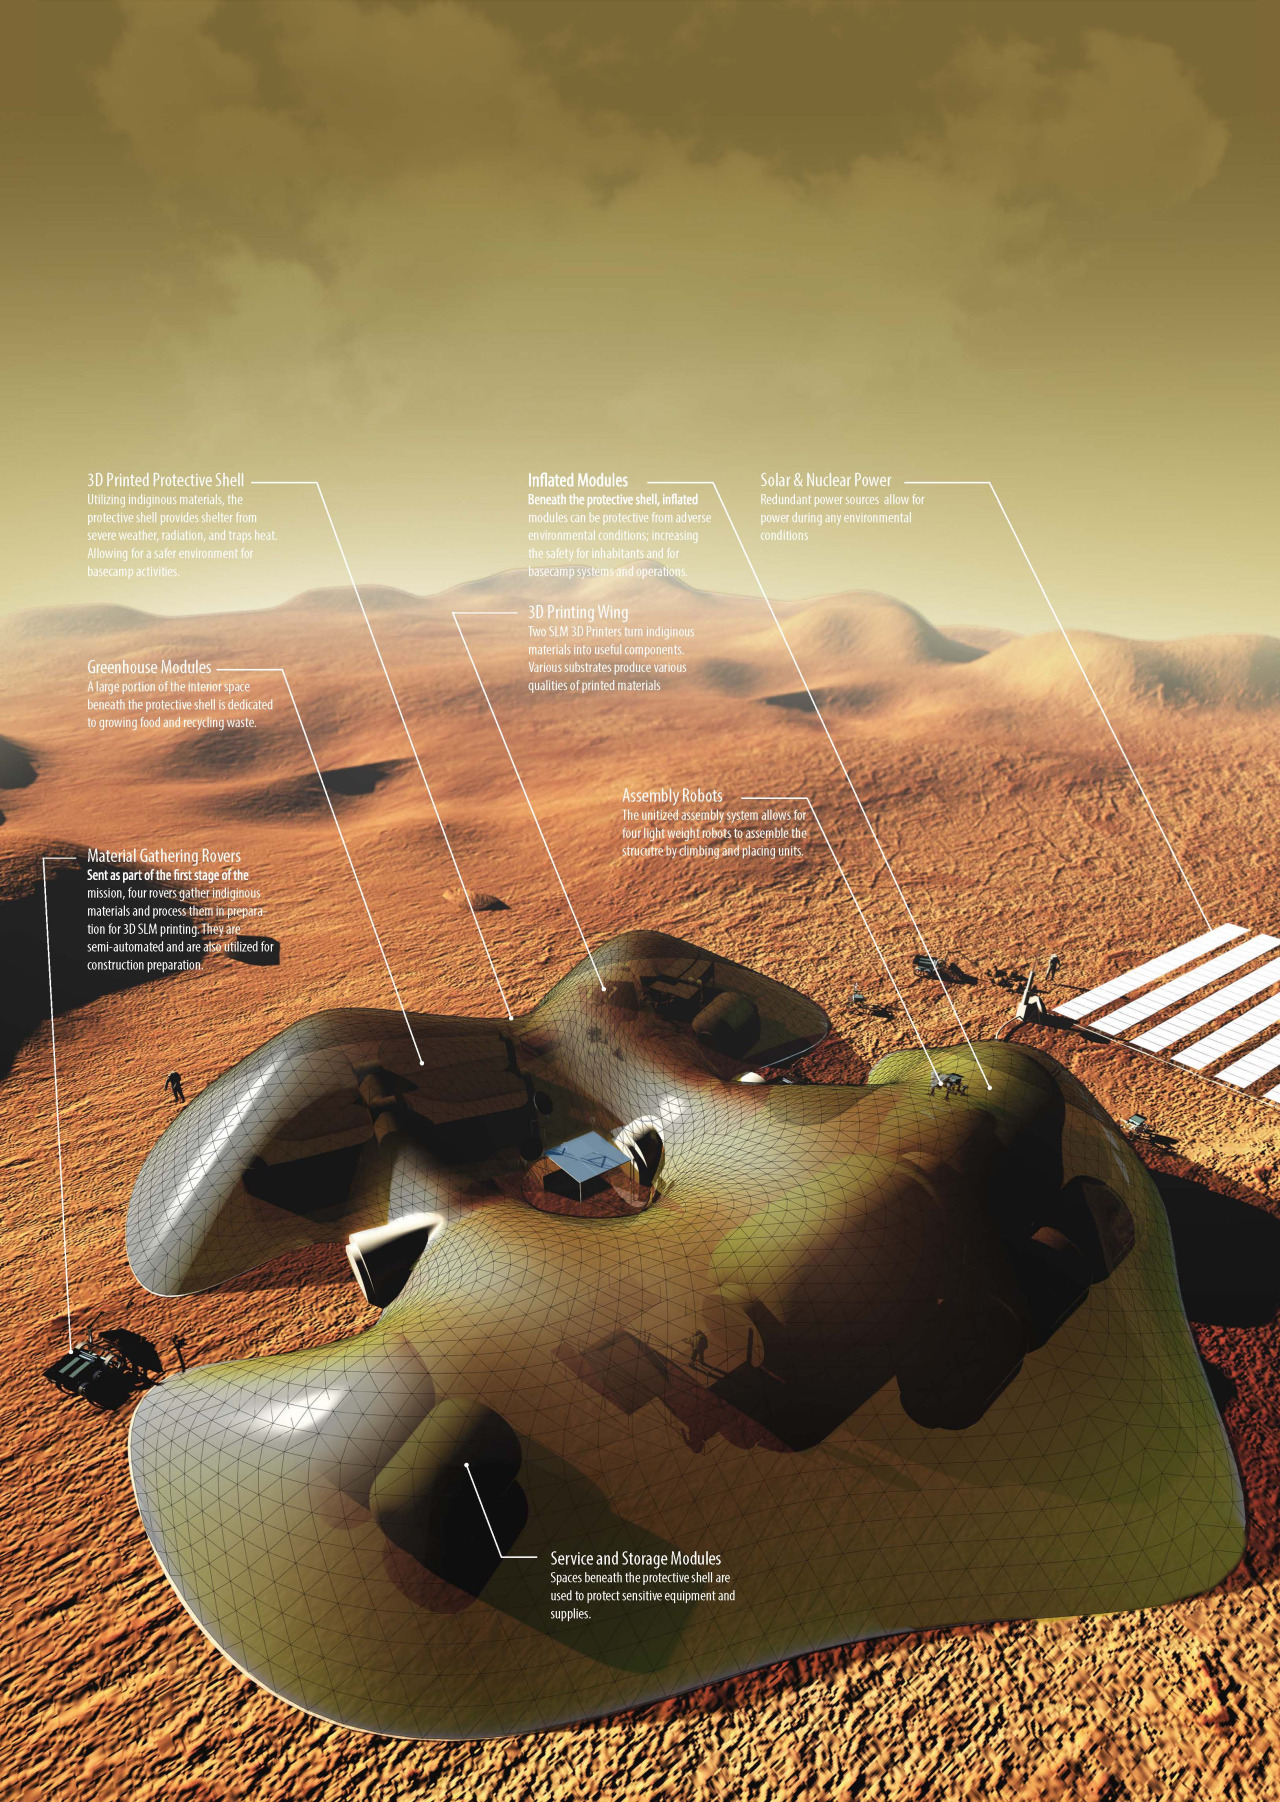
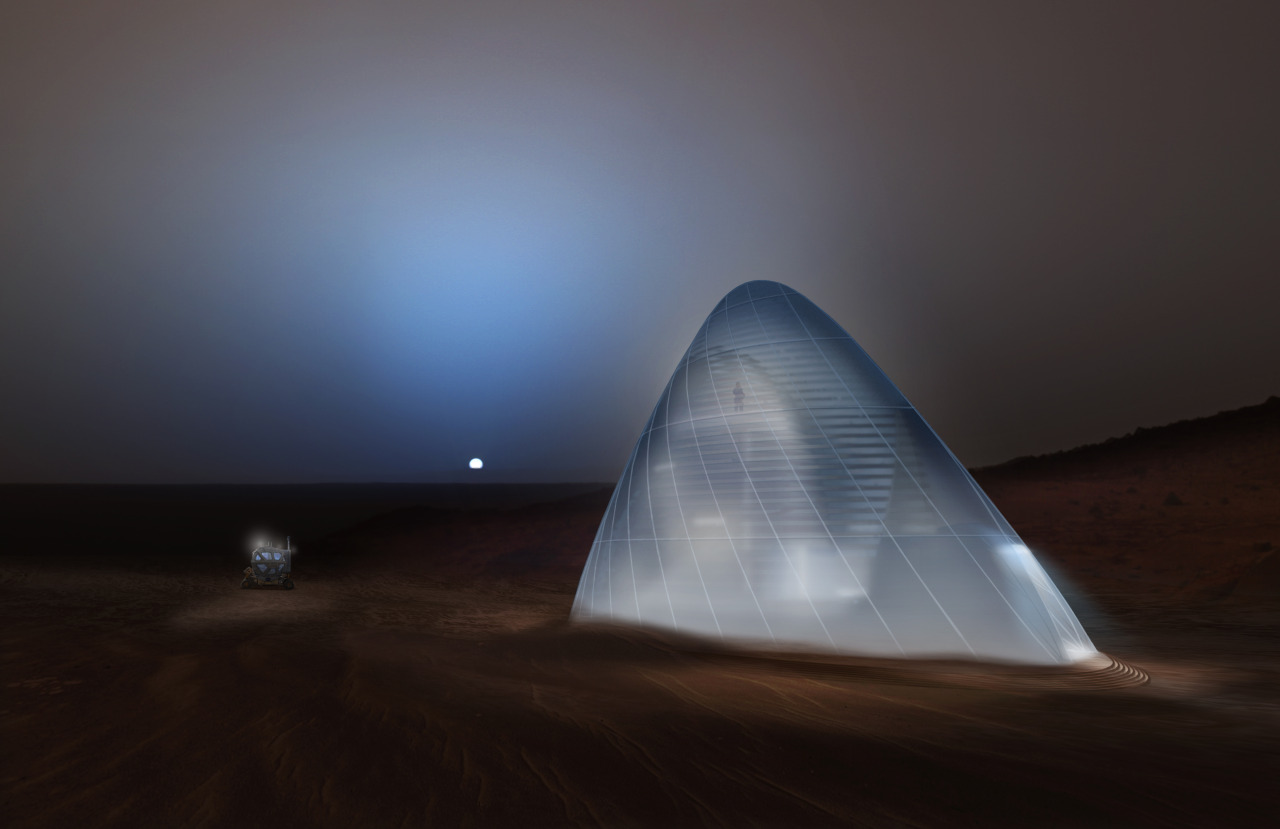
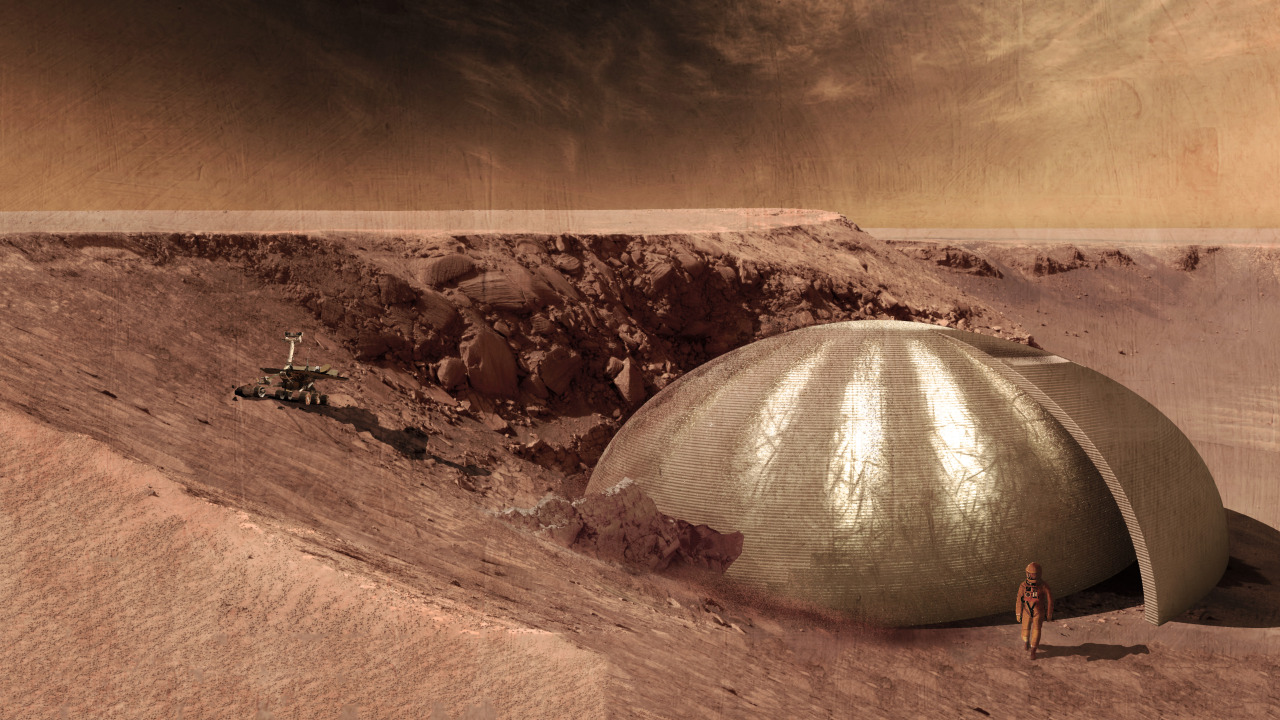
Living on Mars
Batch render for DAZ Studio 4.5 and higher
Going away for the weekend, but leaving your PC running? Then the new Batch Renderer for DAZ Studio may interest you. It will churn out a series of renders, while you have fun. Works with Daz Studio 4.5 and higher, and is compatible with iRay renders.
Outdoor speedlights, free
Currently free, SpeedLights Outdoor Light Set 1, and usually $15. For DAZ Studio. For a limited time only.

