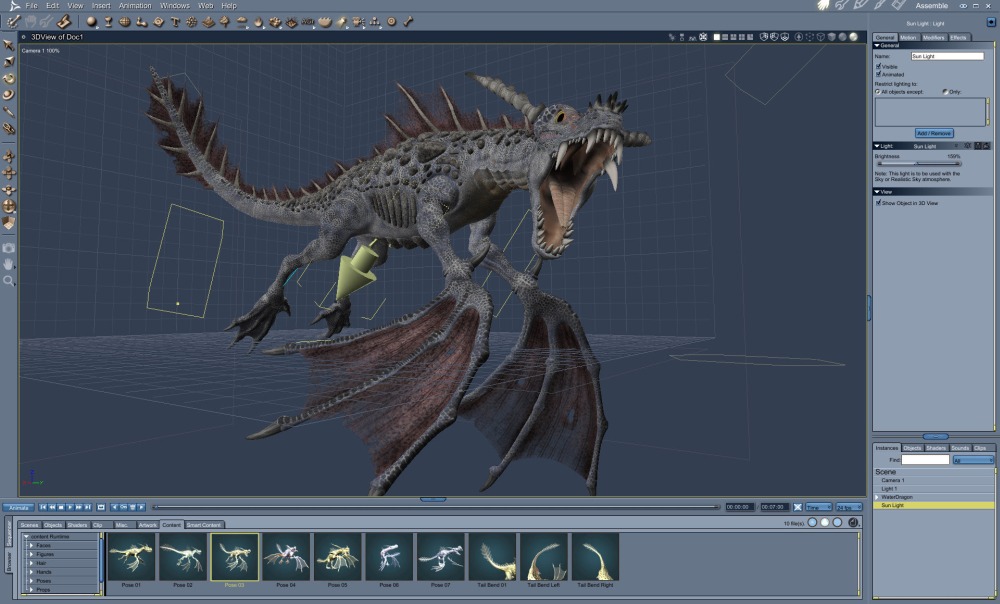
CARRARA CHALLENGE #63: There be Dragons (July-August 2022), with four contest prizes totalling $195 of DAZ Store vouchers. Deadline: 20th August 2022.
Monthly Archives: July 2022
Carrara for line-art
Just a quick look at DAZ Carrara 8.5, so that I know a little more about its line-art features and to be sure I’m not missing anything.
One way of doing it is…
1. New scene | Load figure.
2. Edit | ‘Edit Scene Effects’.
3. Effects Panel, add ‘Filters’ | ‘Toon Part III’ | and edit the settings thus…
It’s now white on black, which you then render and invert in Photoshop.
You can also render normally but with Carrara’s native “Non-Photoreal” engine, after there ticking “Outline” and turning off rendering of Diffuse etc. It seems the better option and the nicer look for line-art. A painterly or charcoal look can be done this way too.
Both are quick. The results of the latter are quite reasonable, in terms of instantly getting a ‘hand inked’ look without needing to then use a Photoshop filter on the lines. It’s quite controllable, though the opacity slider is unbalanced and way too sensitive at the top end. Shadows can be controlled separately from the diffuse. This is a raw NPR render…
What you can’t seem to do is output “Outline” as a multi-pass render layer into Photoshop, along with a ‘Diffuse’ layer beneath it, for further work in Photoshop. You’d need to get them out as .PNGs and then stack them in Photoshop.
It seems you’d probably do better to work up a ‘look’ all done in Carrara itself, and if you spent a day at it you probably could. Sadly there are no NPR render preset freebies floating around the web, offering a quickstart on that.
The ability to work with old Poser assets is good, though Carrara seems to have great difficulty with loading / conforming from a DAZ runtime.
The software’s lack of automation would be a big drawback in production. No recordable/replayable Actions, no ability to write “do this, then that” Python scripts.
Also, as usual, trans-mapped eyelashes are a pain in terms of rendering to line-art. They become black blodges or ‘wings’. No-one else has done so, so I wrote a quick tutorial on How to remove eyelashes for non-photoreal rendering in Carrara.
PoseRay updates
A new 2021 version of PoseRay, a simple freeware Windows utility for converting Bryce .DFX to .OBJ files.
You may want to uncheck “Reorient” for best results, in some cases, before importing your .DFX mesh.
Python code display added
Now that this blog is self-hosted I can display Python and other code rather better. After trying a half dozen possibilities I settled on the free WordPress plugin Urvanov Syntax Highlighter. Works with the Classic editor in txt mode, and has none of that Blocks nonsense.
Embedding in a post is via a form, or more simply via a blog code snippet…
|
1 2 3 |
<pre class="nums:false lang:python decode:true " > add code here <pre> |
It has a very large range of display colouring options. Doesn’t mess with the Python code, so if the plugin fails the code is still valid in plain-text. Doesn’t mess with stuff in existing code tags.
A small Python script to load and render a Sketch Preset in Poser 11
Copy-paste, save as a .py Python script. Make sure the ” ” are not fancy curly quotes. They need to be straight quotes… " "
|
1 2 3 4 5 6 7 8 9 10 11 12 13 14 15 16 17 18 19 20 21 22 23 24 |
# A Python script to load and render a Sketch Preset in Poser 11. # Do the usual setup stuff. import poser scene = poser.Scene() # Tell Poser we are going to want to load a Firefly options preset. option = scene.CurrentFireFlyOptions() # Set Firefly as the render engine. scene.SetCurrentRenderEngine(poser.kRenderEngineCodeFIREFLY) # Load the Sketch render preset, and Firefly will # accept it even though it's not a .prp Firefly preset. # Note that the backslash is required on the file path. option.LoadPreset("C:\sketch_preset.pzs") # Now the important bit, we have the script switch # Poser's render mode to Sketch. scene.SetCurrentRenderEngine(poser.kRenderEngineCodeSKETCH) # Do the render with the current Sketch preset and Sketch # engine, and adopt the other current render settings. scene.Render() |
Yous custom Sketch presets are found at:
C:\Users\YOUR_USERNAME\AppData\Roaming\Poser Pro\11\SketchPresets
or
C:\Users\YOUR_USERNAME\AppData\Roaming\Poser\12\SketchPresets
Cartoon Animator webinar
A new free two-hour webinar for Reallusion’s Cartoon Animator software. “Create Motion Comics Fast using Cartoon Animator”, now online as a YouTube recording along with a public link to a 3Gb(!) project file.
I was mildly excited. But on clicking through the video, the example appears to just a slow anime. A slow pace, and a few Ken Burns style slow-zooms and pans, does not make a motion comic. The title is thus a bit misleading. It’s certainly not the sort of panel-based motion comic you’d make with the dedicated motion comics software MotionArtist.
Release: Easy Toolbox ZBrush Plugin
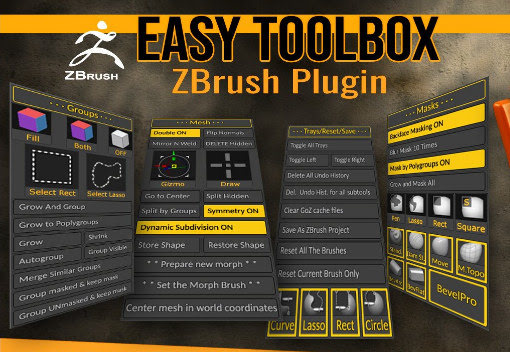
Looking rather useful for $3.50, Easy Toolbox ZBrush Plugin aims to speed your work with the software’s uncongenial and confusing interface, by…
“gathering together, in a single interface, many of the most useful functions of ZBrush that you use all the time.”
Release: Kinetix 1.5
The ‘video to mo-cap’ tool Kinetix 1.5 has been released. It’s a free browser-based service. Formerly you used stock figures to transfer the mo-cap from a video of a moving figure. But it appears that with this update your own figures can now be imported in .FBX format. Which may make the service of more interest to DAZ and Poser users. They’ve also removed the ups-selling micro-payments system.
Technical Search updated
My Technical Search engine has updated. Sources now include 142 sites, forums or pages. Now with some added Japanese and German goodness, plus these new additions…
My own blog is also now back in the Google Search index, and thus in Technical Search, though is not yet fully indexed by Google Search.
Master Material Zones in DAZ
Now on the DAZ Store, How to Master Material Zones in DAZ: Tutorial Guide.
DAZ 3D bridge for Photoshop – it needs Photshop CS6 32-bit for full functioning
After a little wrangling and bashing I was able to get the DAZ 3D Bridge for Photoshop, posted about yesterday, fully running. Including its “Update” and “AutoUpdate” features.
Required:
1. As per my tutorial yesterday, the latest DAZ Studio 4.20.0.17 64-bit, and its latest DS4_3DBridge_1.13.0.17_Win64.exe Bridge. This Bridge then installed to both DAZ 4.20 and to my 64-bit Photoshop 2018. The latter is here superfluous though, as we also need to get another and 32-bit Bridge plugin into Photoshop CS6 to get the Bridge fully functional.
and
2. Photoshop CS6 32-bit, with its 32-bit plugin installed from an old DS4_3DBridge_1.6.2.70_Win32.exe installer I found on an old backup DVD. Note that install of this requires a DAZ Studio 4 32-bit version to be present (I used an old 4.12.x 32-bit), or else the vital Bridge install will be refused. 32-bit parity between the two is important. You may also want your old DAZ 4.12 Pro serial to activate the 32-bit DAZ, though that is probably not needed. No serial was needed for the Photoshop side of the old 32-bit Bridge. No damage was done to my DAZ Studio 4.20.0.17 64-bit by the install of an old 32-bit version over in C:\Program Files (x86)
It’s possible you don’t even need that old 32-bit Bridge installer, as a there’s also a current 32-bit one still available in your DAZ Product Library. The current is DS4_3DBridge_1.13.0.17_Win32.exe
Usage:
Then I just load Photoshop CS6 32-bit, load its 32-bit version of the DAZ Bridge, it will then auto-launch my latest DAZ Studio 4.20.x 64-bit. Then, the 32-bit CS6 plugin can happily talk to the latest Bridge script/camera in the 64-bit latest DAZ Studio. Update and Autoupdate work perfectly. Importing an iRay render into Photoshop also works fine. Use the 3D Bridge camera. I assume it’s all direct script-to-script talk at that point, and thus no .EXE bit-parity is required.
So… the problem appears to have been that everyone had moved on to 64-bit Photoshop, partly breaking the Bridge’s “Update” and “Autoupdate” features. But the current plugin still works fine if you give it a 32-bit Photoshop CS6 with an old 32-bit Bridge plugin located in Photoshop’s plug-ins directory.
I should say that all this happens for me in Windows 7 64-bit, and that later versions of Windows may not be so co-operative.
Also found: the original Bridge PDF User Guide from 2008. Never updated, it seems.
Up and running with 3D in Photoshop, via the free DAZ Bridge
Here’s how to get the free DAZ Bridge running with Photoshop, and streamline a chunk of the workflow with my additional automated script.
1. Download the Bridge.
BRIDGE: Most people will want the 64-bit installer current at DS4_3DBridge_1.13.0.17_Win64.exe and this is working with the latest DAZ Studio 4.20.x. DAZ Studio lacks Poser’s ability to render to a multi-layered Photoshop .PSD, so this is the only official way to get renders over to a layered Photoshop file.
PHOTOSHOP: In this 64-bit case you need a 64-bit Photoshop that also supports 3D. Adobe recently pulled all 3D support from Photoshop, for rather murky reasons. Technically that should not matter, as all we’re doing here is bringing in a 2D render via a Bridge. But you may still want to revert to an older 3D version of Photoshop. The following tutorial assumes Photoshop 2018 on Windows.
2. Install the DAZ bridge. In the installer, you specify the plugins directory for the version of Photoshop you want to target. In this case…
C:\Program Files\Adobe\Adobe Photoshop CC 2018\Plug-ins
3. Once installed, go look in your regular Photoshop’s ..\Plug-ins directory and you should see a new ..\DAZ 3D folder there, and inside that a psdzbridge.8li file. Success.
4. Now load Photoshop. Open the backdrop image (aka ‘background’, aka ‘backplate’) you want as the base layer for your picture, above which your 3D DAZ renders will appear as adjustable layers. Ideally this backdrop is not at some huge size, but rather more like 1800-2400px wide. Then you run the Bridge script thus…
6. The Bridge’s mini UI panel will then appear in Photoshop. DAZ Studio will also be auto-launched at the same time, if it wasn’t already running. Give it time to load. In DAZ you will see you now have a special camera which is being used to get and pass the renders, and you will automatically be looking through that camera.
7. In DAZ, the Backdrop now needs to match the same one you have open in Photoshop. I wrote a script that automatically takes care of all the fiddly steps involved in this: it first invites the user to select and load the same backdrop they’ve already loaded in Photoshop. Ignore other manual switches, as the script will take care of them. This is how you load a backdrop image…
Then, once you’ve done that, the script continues. It auto-sets the Viewport ratio to the new backdrop, then also matches the current render size to it in pixels, and finally it turns off visibility of the backdrop in renders. The script also sets the iRay Max Time (i.e. maximum render time) to 30 seconds.
* Script (save as Photoshop_Bridge_helper_script_for DAZ_Studio.txt and then rename to .dsa).
(I have a tutorial here on how to pin a script to your DAZ UI’s ‘Scripts’ menu).
8. Both DAZ and Photoshop should now have the same auto-magically matched backdrops. Set up your prop or figure in DAZ, via the special Bridge camera, so as to match the backdrop in terms of position and lighting.
For 64-bit users to get a cutout render on transparency, you need to first click “Preview Image”. This doesn’t Preview in 64-bit (see below for details) but does set up “Render to New Layer” to render onto transparency. 32-bit users with CS6 need no such workaround.
In Photoshop and via the Bridge’s mini UI, you then “Render to New Layer”. The resulting render will perfectly match the backdrop in Photoshop, and will also be a cutout on transparency.
And the DAZ render time is now reasonable, taking 30 seconds to get into Photoshop. The seconds can be adjusted at the foot of my script. Adjust the time to as long as you can bear…
// Max Time in seconds
oProperty.setValue(30)
oProperty.getValue()
Yes, sadly 64-bit users have to do a proper full render in DAZ before it’s brought into Photoshop. Because the Bridge’s “Preview” button no longer works in 64-bit. What “Preview” was supposed to do was… “create an image or layer in Photoshop using the current DAZ Studio viewport image.” But for most this no longer works. Bridge now only works fully if you can use this method which involves having CS6 32-bit on a 64-bit system.
Thus for most people the best way to get an iRay render into Photoshop with any speed is to manually cap the render time to just 30 seconds, which my script does for you. At my default of 30 seconds the iRay render’s result is grainy, yes… but that doesn’t matter for me. The aim in Photoshop is “painterly via a filter”. The grain thus gets smushed away by the filter, and the painterly effect is perhaps even helped along a bit by the grain….
Alternatively you could try setting your DAZ engine to use a superfast custom iRay preset you have working with a ninja $1,000 graphics-card, or manually set the near real-time render-engine of OpenGL, after my script has run.
The advantages of rendering to layers over a matched background are various. Layers can be filtered differently or faded out for a ‘depth fog’ effect. Cutout edges can be stroked. Layers can be moved or deleted without having to go back into a big 3D scene. Very large complex pictures can be built, potentially with many elements, without burning out your PC trying to render some DAZ mega-scene all in one go.
That’s it. Enjoy, as the DAZ Photoshop Bridge could have cost you $200 back-in-the-day!


