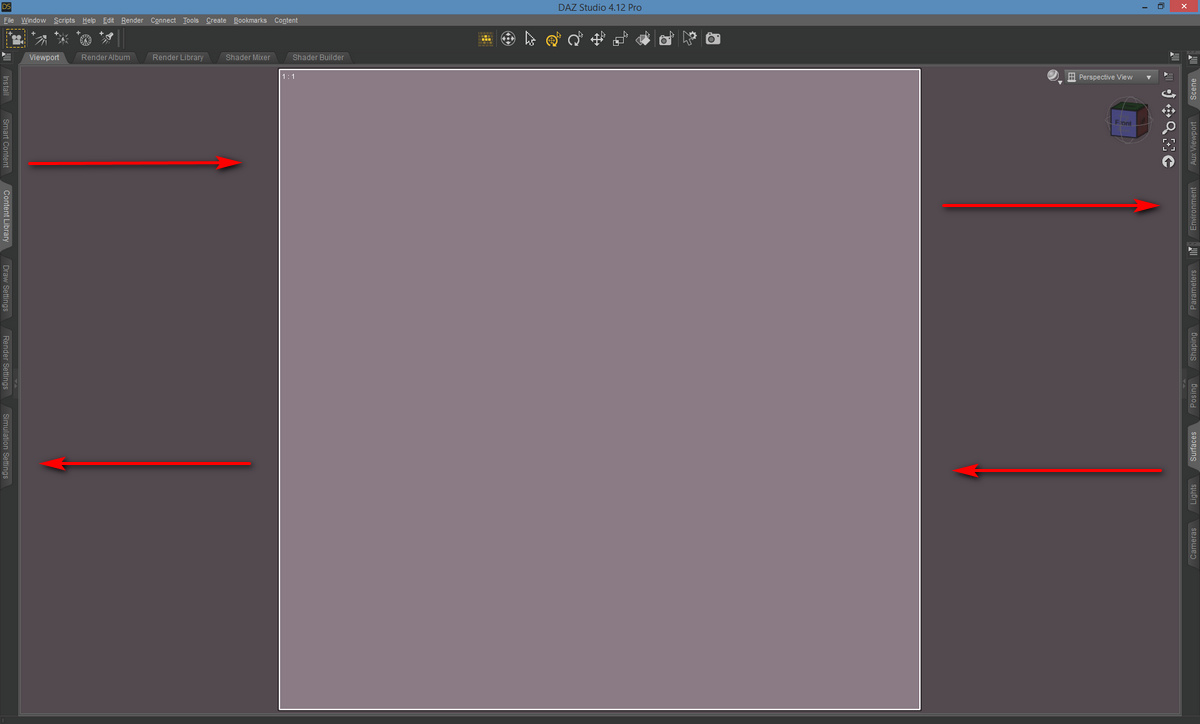
How to quickly show/hide your Dock Area panels in DAZ Studio? Also known as “the sliding side things” that hold tabbed panels such as the Content Library, Materials Surfaces etc, and which can slide in and out from the sides in the “City Limits” UI layout preset.
There appears to be no keyboard hotkey already set up, for having these slide in and out. But this can be done in 12 milliseconds by using the free and official Dock Area Toggle script. Who knew?
Great, so how to install this script and get it working with one keystroke? Or better still, with a single mouse-gesture?
1. First, save the script by clicking on its name on its demo page. It will download.
2. Copy the downloaded script file and paste it to ..\Studio4\content\Scripts — and optionally make a 91 x 91px PNG of the same name, to give it a pretty icon.
3. Open DAZ and your Content Library, and navigate to your Scripts folder. The toggle script should be up above the other script folders. Right-click on the script and choose Create Custom Action…
Accept with the default settings.
4. Up in the top there is a now a new menu-bar item, called Scripts. The dropdown shows the newly added item there.
5. Nice, but it’s still a bit “reachy and clicky” for something you could be doing several hundred times while making a picture. So, next we press F3 to bring up the Customize panel. This used to be accessed via: Top Menu | Window | Workspace | Customize, but now seems to have been removed from there. Pressing the F3 key on the keyboard still does the same thing, though.
So F3 has opened your Customize panel. On the left we see up top a section called “Custom”. Expanding this we see the newly added script located down at the bottom of the list. If you want to start over, you can right-click it now and delete it, then click Apply then Accept.
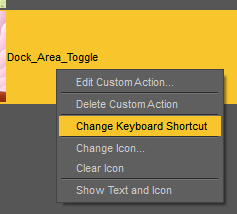
However, also available via a right-click here is a very handy “Change keyboard shortcut”.
Try setting this to something like SHIFT + P which is a Weightmapping Brush shortcut that 99.9% of DAZ users don’t use. Don’t forget to then again click Apply then Accept.
Now, you might think, “SHIFT + P, that’s going to be an awkward of finger-yoga on the keyboard”. Ah, but we’re not going to use the keyboard, we’re going to be clever and use a mouse-gesture to call the keyboard shortcut, and thus trigger the toggle script.
6. Install the free StrokesPlus utility. I much prefer this older version of the freeware. Set it up as seen, to use the right mouse button. Go to its Actions | Global Actions section. Choose an easy-to-remember mouse-gesture like “P”…
And attach to this gesture the code command…
acSendKeys(“+p”)
Note that capitalisation is important. acSendKeys works here, acSendkeys doesn’t. Using normal quote marks rather than fancy “.” curly quote marks may also matter. This command triggers SHIFT + P on the keyboard when you do the gesture.
Ok, all the set-up is finished. You now right-click on the mouse, draw the “P” shape on the screen, and the DAZ script is called and toggles the Dock Areas open. Do it again and they close.
The DAZ setup will need to be repeated for each version install, as the new version of Studio wipes the Script menu item and and keyboard shortcut setup.
7. Optionally set StokesPlus to start with Windows, by placing its shortcut in your Start-up folder. Its mouse gestures are also very useful in simply going quickly back / forward in your Web browser for which you want…
acSendKeys(“{BROWSERFORWARD}”)
acSendKeys(“{BROWSERBACK}”)
… and you can set it to teach your mouse all sorts of other tricks.
8. Back up the downloaded DAZ script somewhere safe.
9. Now that you know how to do it, other scripts can be placed up top on the top menu bar. And potentially be given mouse-gestures.
10. You can also explore the F3 “Customise” menus and delete from the UI a lot of buttons you never use, and add in more useful items on your ToolBars. Never going to Convert TriAx Weight to Node Weight? Or Edit Dform Joints? Nope, me neither. Delete their buttons and add in some useful stuff.


Pingback: Testing DAZ 4.20.0.17 – MyClone Poser and Daz Studio blog
Pingback: Up and running with 3D in Photoshop, via the free DAZ Bridge – MyClone Poser and Daz Studio blog