
It’s great to see that Dreamlight has released his new outdoors lighting and compositing system Light Dome Pro -R for DAZ Studio 4. This updates his old Light Dome Pro 2 and appears to combine it with parts of his old Mood Master 2 (both of which only worked in DAZ Studio 3.x until now). There’s also a welcome speed boost.
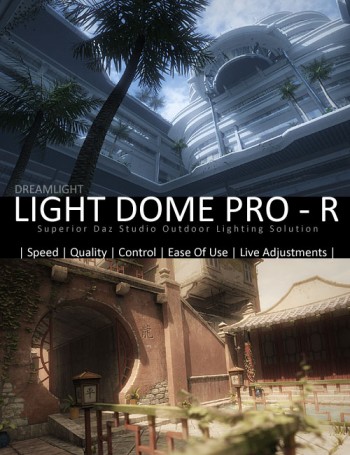
The new Light Dome Pro -R looks like a “must-have” for those who use DAZ Studio to create large outdoor scenes and then tweak them with Photoshop. I know from past experience that Light Dome is fairly simple to use once you learn a few easy steps, and that it gives great results. Light Dome Pro -R comes with a handy Photoshop Action which automatically loads all your seven render passes into Photoshop layers, where they can be automatically blended and adjusted with filters in real-time — thus cutting DAZ’s render-time dramatically. Since it’s only an Action, I’m guessing it’ll work with any version of Photoshop above about CS3?
Here’s the new video showing how it’s done (the intro sequence ends at 1:00 minute in, when the step-by-step tutorial begins)…
There’s also a longer 23-minute version of the video.
Of course, there’s nothing to stop you adding a render from the same camera with more dramatic lighting applied, to throw another flavour into the Photoshop mix of layers.
Also worth mentioning is the “glow effects” in the features list for Light Dome Pro -R. Be aware that this is just a whole-scene videogame-like high-contrast ‘bloom’ (yuk), rather than the ability to add per-object glow spillover of light into the air.
Included in Light Dome Pro -R is the old Mood Master 2’s simple Depth Fog / Haze, for easily adding a nice Vue-like z-depth fog to your landscape or cityscape. The fog effect alone is a good reason for getting Light Dome Pro -R, even if you’re not impressed by the other features. But we do appear to have lost Mood Master 2’s weather effects layers, such as rain etc. Possibly a new weather-tastic Mood Master 3 for DS 4.x will be coming along next from Dreamlight, along with time-of-day and night presets? Just my guess.
This works with 3D Delight as a renderer. There was also a later iRay version, but it was nowhere near as automatic or seamless.
Update:
Note that “- R” version 1.0.5 changes where you find it in your runtime. Instead of having to burrow around to find it down in My Library, it’s now up on Dreamlight | LDP-R, and is thus more easily found…
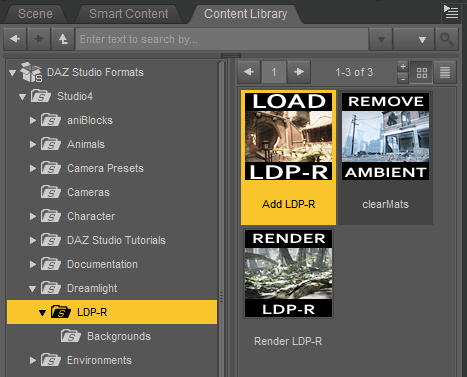
The basic workflow for “- R” is now…
1. Dreamlight | LDP-R | right-click on Load icon, “Open as New”.
2. Select the Skydome in the Scene tab. Then in the Content Library, drop down a level to find Background images, and apply a suitable sky to the Skydome.
3. Save the basic scene file. Load in your objects and arrange the scene artistically using the special LDP-R camera to view and frame it.
4. Ensure the scene’s render settings are as in PDF. This version of Light Dome Pro only works with 3Delight, not iRay.
5. Approximately set sun position by looking through Sun camera.
6. In the Scene tab, look through the Parameters LDP-R, set fog-depth – default is likely to be too far away. Try 2000 instead of 20000.
7. In Parameters, ensure set Ray-tracing is set. This is independent of the main Render setting.
8. Render, pick folder to save the output. ( C:\Users\YOUR_USER_NAME\Documents\DAZ 3D\Studio\Render Library\.. ) Close render windows when FOG finishes rendering, as it’ll be the last of the set. Save scene file and close DAZ. Load Photoshop, load renders into a single file by using the LDP-R Action.