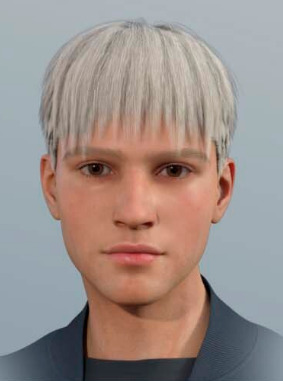
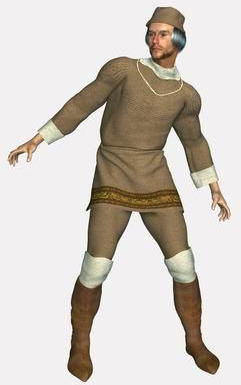
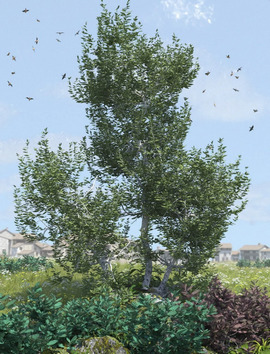
SIGGRAPH 2020 now has a handy Open Access page for public content. Spotted in the 2020 sections: using physics to make 3D fonts dance; deeply emotional talking heads; AI for lineart colorisation; stylization in realtime; and anime-style colorization. They’ve also usefully added collected links to public/open material from conferences back to 2015.
Monthly Archives: August 2020
‘Look At My Hair’
The DAZ Studio fur-and-hair plugin Look At My Hair 1.6 is currently on a 50% off deal at the DAZ Store. Its companion LAMH 2 iRay Catalyzer plugin is also 50% off at around $7. Note that the latter iRay addon only works with a few “LAMH models [creatures] compatible with the Catalyzer”, so it you want LAMH for some other use than DAZ LAMH-enabled creatures then the extra iRay addon may not be needed.
Just be warned that it’s well known that LAMH is extremely crash-prone, and it needs to be learned fully and worked in the correct way if you’re to try to avoid some of the crash points. I can confirm that it’s crash-prone, and that it will usually take down DAZ with it. Check the forums for advice and some possible workarounds for such common problems. One of the worst problems is when it crashes DAZ on trying to load a finished scene that was saved with LAMH hair in it — users might save two versions of such a file just in case, one with the preset applied and one with it removed from the scene.
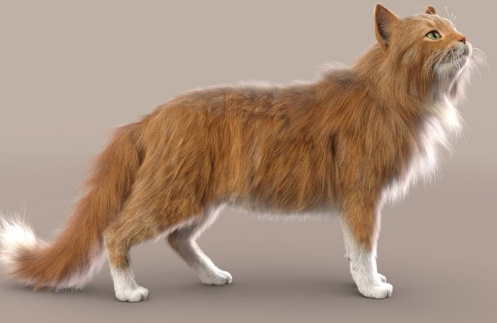
That said, when LAMH can be made to load/render, a preset is simple to operate in terms of fur colour and density and it renders reasonably quickly in 3Delight. Very quickly in default lighting, less quickly in complex lighting. For instance here I have dear old DAZ Millennium Cat with a black cat texture MAT (Classic Cats pack?), a fairly tough ‘Caressed by Light’ light preset #05, and the LAMH short preset for the MilCat ramped up to 260,000 hairs. Even with the tough lighting and many hairs, this render is done in five or six minutes for me. And that’s with me not using the Xeon workstation, just the normal desktop PC.
3Delight. Raw render, no postwork.
Since version 1.5 LAMH has also offered easy export for Poser and Vue and even .OBJ…
New in 1.5: LAMH will now create optimized FiberHair for rendering in Poser and Vue … applies compression to the fibers to control the size of the exported hairs. … LAMH will include the UV’s and custom textures with the FiberHairs, providing a complete asset” for export. Also… “provides the option to write the FiberHairs to .OBJ format.
… and export is relatively straightforward (provided you can actually load the LAMH preset and pose, without DAZ crashing-to-desktop). Such exports alone may thus be worth the $25, when LAMH is on a 50% discount. Indeed, it may even enable iRay (I’ve yet to test that myself) as Kendall in the forums gives some possibly good advice re: taking LAMH FibreHair exports to iRay…
“Do not generate the FiberHair until right before render. [Because FibreHair doesn’t auto-follow the pose]. The FULL version’s FiberHair export will put the generated hairs DIRECTLY on the model in the DAZ Studio viewport.” I also read a little later that “It is no longer necessary to export out FiberHair specifically for iRay … LAMH takes care of determining the rendering engine and adjusting accordingly.
Nice, if that’s the case. And apparently FiberHair exports can also inherit the colouring of the base diffuse texture (.OBJ export of strands don’t).
And I guess that if one then intends to do a lot of iRay rendering with FiberHair, DAZ 4.12.1.83 is current minimum — as that was updated to include “NVIDIA iRay RTX 2020.0.0 (327300.2022)”. That’s important because the iRay devs reported in the early Spring that their new iRay… “2020.0 final has just been released” and strand fibers do “especially well” with the new iRay 2020 + an RTX graphics card. Even fibres with dense intersections do very well, they said. Thus I presume that DAZ running iRay 2020 should help with the speeds on LAMH strand hair, if you have the required graphics card type. Possibly even if you only do CPU rendering, though that’s another guess. According to the forums this ‘Speed’ setting, in particular, might also help…
The current public beta of DAZ Studio is at 4.12.1.117 for the very latest, which is what I’m now running on. As well as the addition of iRay 2020, in recent 4.12.1.x releases the technical Changelog notes several dForce version updates and .OBJ import/export improvements.
For people looking at fur options I should note that Poser 11 Pro has a Hair Room built in, in which basic fur is relatively easy to make and quick to render. I seem to recall that Hair Room fur colouration can automatically take up from the diffuse material’s pattern, if needed. But I hear that LAMH can also do that, though not for .OBJ exports.
There’s also the new DAZ Studio Strand-Based Hair Editor, which is similar but more stable than LAMH. But the problem there is… it has no cat presets! In the meanwhile, LAMH has excellent cat hair, both the old MilCat and the new Hivewire HouseCat. And actually, thinking about it… I have yet to see a single animal preset produced for the native DAZ strand hair. You’d have thought that, a year after release, we’d have fifty or more animals furred by now. Is the absence because such hair can only be saved if there’s a base mesh to ‘grow on’? And that mesh can’t be redistributed, as it’s part of the commercial model?
Paper: “Effects of piracy on the American comic book market”
“Effects of piracy on the American comic book market and the role of digital formats”, Institute for Structural Research, Poland, March 2020.
This is the first really in-depth paper I’ve seen on digital piracy of comics in the Anglosphere. Specifically the reading of per-issue comics in the USA, as they are freshly released. It’s not about the collected series/graphic novels, so the research is only talking about the type of readers who are not averse to reading episodes that are dribbled out over as much as a year or more. I can’t imagine wanting to read a comic in that painfully strung-out way, but I guess there are people who do.
The paper’s headline conclusion is that, for the per-issue readers…
“11-14% more print comics issues could have been bought if not for illegal availability [of digital per-issue scans]”.
My suspicion then would be that some of the “11-14%” is readers who read the initial issues of a run and got bored, decided to sell the paper issues quick to newbs on eBay. Because the series had obviously become mediocre in their eyes. But they still kind of wanted to know how the story ended — so they read the pirated digital versions of issues #5-7, just to know if they should get the trade paperback or not. Probably not, 90% of the time, as they’re savvy readers who can tell when a comic isn’t going to work out. That would be one possibility.
As the new research paper points out, part of the problem here is that legal digital-issue copies are too high in price, often being nearly as expensive as the print version when first released…
“most of the readers who acquired a comic book without payment had a positive willingness to pay for the digital copy of the title … a reduction in [per-issue] digital prices could have incentivised some of the readers to purchase digital formats instead”
The author of the paper points out also a mis-match between audiences…
“the official app-powered digital comics [buffet-style services] target an audience whose specific intent is not to own a print version”
These U.S. digital ‘walled gardens’ give every appearance to an outsider of being mostly for manga-loving youngsters and their manga-nervous parents, and as such I assume they don’t lure away too many ‘$100+ a month guys’ from the comic-book stores. It’s likely been a profitable balance for the big publishers. Until now… as comic stores struggle to re-open and many a ‘$100+ a month on comics’ guy is now finding himself unemployed.
Another factor, as some Japanese research has recently suggested, is that the 11-14% per-issue piracy loss may effectively act as a string of ‘free samples’ that boost profits in the long term. Because they spur a significant boost in the eventual purchase of the collected trade edition in paper. Thus, per-issue piracy could actually benefit publishers, over a typical 18 month release cycle. Though that will likely only apply if the comic is a quality one. If your ‘free sample’ is boring after four issues, you’re not going to be buying the trade to cherish and keep on your shelves.
A further conclusion of the new paper is that, with a couple of key pirate sites seeing at least 10x more traffic than Amazon’s ComiXology walled-garden…
the high volume of pirate consumption suggests a large audience with no intention to pay for any of the formats available at the official market.
Interesting, but you’d want to break that down. How much of that traffic is from the USA, and how much from nations like China where piracy is just casually taken for granted? And how much is scraping bots?
The difference is going to come in curation, I think, in terms of getting highly subscription-averse people like me to get a monthly subscription. Which will potentially open up new adult markets. Give me guaranteed “download in digital and keep” access, from a store that only has truly completed story comics for grown-ups (i.e. no manga other than a handful of Hayao Miyazaki-level quality titles, very very few superheroes, clear out all the ‘young adult’ teen-angst stuff, and the gloomy art-school depressives, and make no sales that leave the buyer with ‘cliffhanger’ volumes). Stories that can entertain like a movie for between an hour and four hours, and which are complete. Then give me a digital comics ereader that can do frame-by-frame guided view, with no hassle every time and the ability to switch to b&w or mute garish colouring. Then curate your store catalogue by hand, and do it properly and with fine-grained facets. Oh and this is about entertainment, not political lectures — so let me hide all comics that have huge political axes to grind, with just one click on my Settings panel. “But there won’t be anything left!” you cry… Yes there will, you’ve just got to go out and search and curate the heck out of the online store. And if a suitable comic is not available in digital via your store, still give me a link/profile page for it and tell be exactly how to get it from elsewhere. Thus, your store should be the completist catalogue for this particular type of completed comic story. I’d pay $15 a month for that, and happily. Maybe even $20, if you throw in two free comics per month.
BEER fizzes
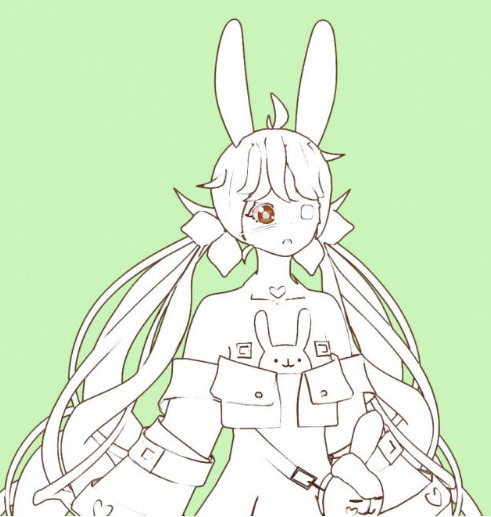
And… it’s a wrap. Or rather, it’s a BEER. As reported here in early August, there’s been a long period of fund-raising to get some serious NPR tooning capabilities into Blender. This goes under the name of BEER, and the fundraiser recently went kerr-ching! and raised enough for 10 weeks of hard development work this summer. Week 10 has just reported. After intensive line-weight research and refinements they have produced the first really ‘worth-having’ Poser-comparable automatic lineart I’ve seen from Blender…
The eye is mean to to be missing, as the model wears an eye-patch.
Good work, chaps, those lines look very usable. The eventual BEER plugin will also aim to be seriously artist-friendly too. If you’d like to contribute to their fund and help raise the cash for the final 10 weeks (of 20 weeks) needed to actually make the finished plugin, you can donate $5 on Gumroad and get fab toon .blend files featuring bunny-girls and kitties under CC-BY. Those with ninja coding skillz can also offer their services to the project.
Free ecosystem spawner for Unity
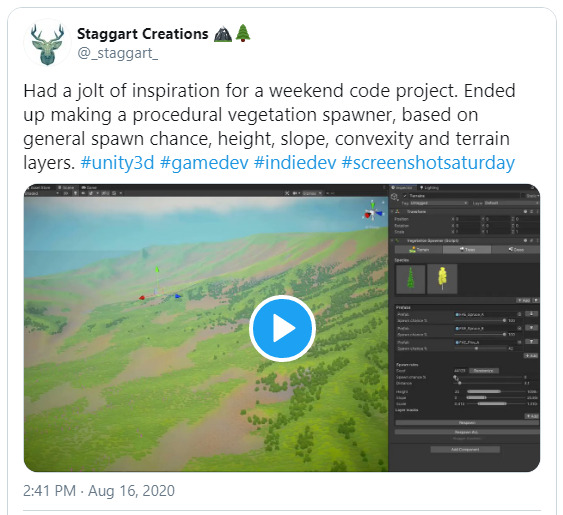
Take a big square landscape terrain into the free Unity game engine, automatically cover the ground with vegetation based on slope height etc. It’s not Vue’s ecosystems. But it is as free as Unity is, and on the Unity Store now.
If Poser 12 does indeed support ‘export to Unity’ with decimation, this could be a quick “background generator” for an imported Poser scene with posed characters.
Solution: fix the DAZ Studio “Error during rendering” problem
There has long been a persistent and out-of-the-blue problem periodically had by a few users of DAZ Studio, that appears to stump forum helpers every time. It’s often wrongly assumed to be a graphics drivers problem. That can be true if the user recently upgraded to a new version of DAZ Studio that requires new card drivers for CPU rendering, but does not apply if no such change was made.
Symptoms: The user has not recently upgraded DAZ Studio to the latest version. An unspecified “Error during rendering” has caused iRay to fail, with that rather unhelpful message. If the user tries to close rendering and render again, they are told that iRay is already in use (even though it has definitely closed). Other render modes are still possible.
Solution: A little digging with my handy new Technical Search Engine suggests that the only one who got it right was one ‘JaeAlexisLee’ in 2015, who painstakingly went through every damn thing that could be wrong with the wayward scene. At last it was found…
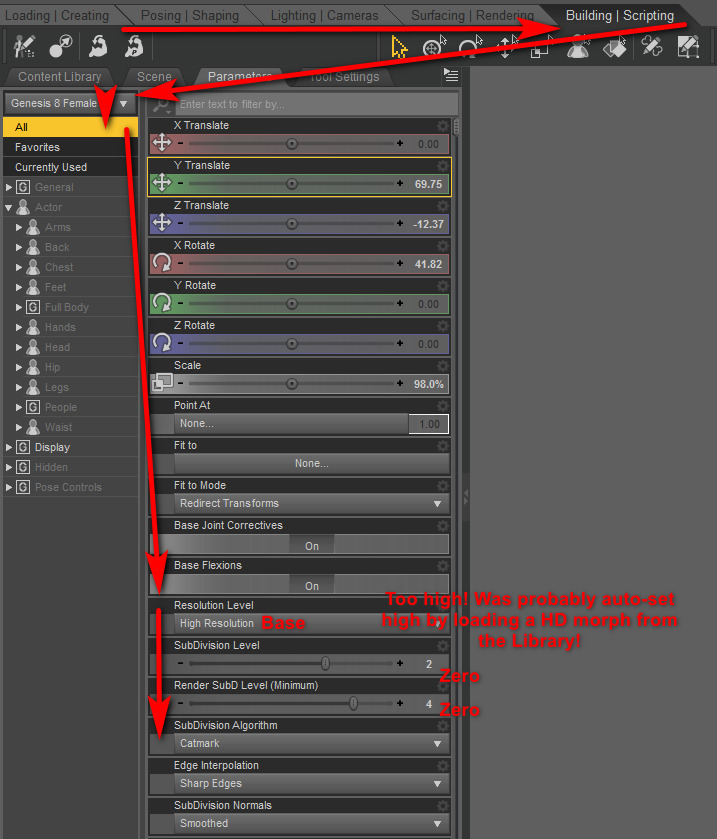
“Found it! Occurs if the Render SubD level is higher than 1!”
Where to find these settings: I’ve tested this solution, and it does indeed cure the problem instantly and perfectly. So, here are where you find the settings you need to change in DAZ Studio 4.12…
Manually putting the above settings back to Base | 0 | 0 and saving the scene then enabled an iRay render to run again fine. I then switched them up to High Resolution | 1 | 1 for better resolution, saved the scene again, and once again DAZ Studio rendered fine in iRay. The “Catmark” setting appears to be harmless.
Fixed.
HD morphs presets as probable cause: I suspect these settings were silently changed on loading one or more HD Morph presets from the Library, and that such things need high settings in order to accommodate the morph dial’s need for lots of polygons in the Genesis figure mesh. Possibly those with amazingly powerful graphics cards can handle such HD things, so it may indeed be a RAM problem ‘of a kind’. But many DAZ Studio user will not be able to run their figure at that high level. Ongoing nuke-from-orbit solution: just shun all HD figures on the DAZ Store, at least until you get an $800 graphics card.
What’s new for Poser and DAZ: August 2020
It’s getting near the end of the month, and so here’s my pick of the new Poser / DAZ Studio items that have appeared since my last round-up.
Steampunk:
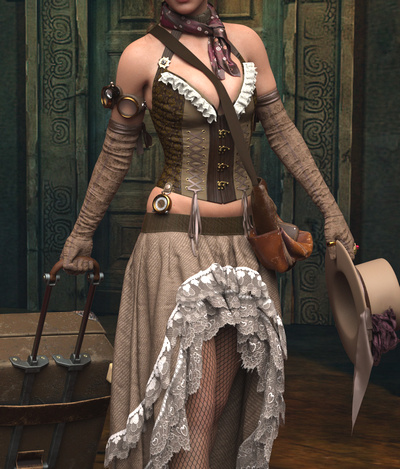
Vampire Hunter for M4, for Poser and DAZ Studio.
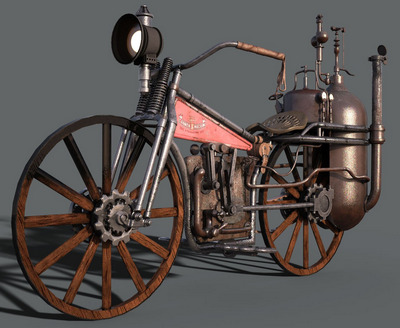
Your hunter probably rides the new Steam Motorcycle.
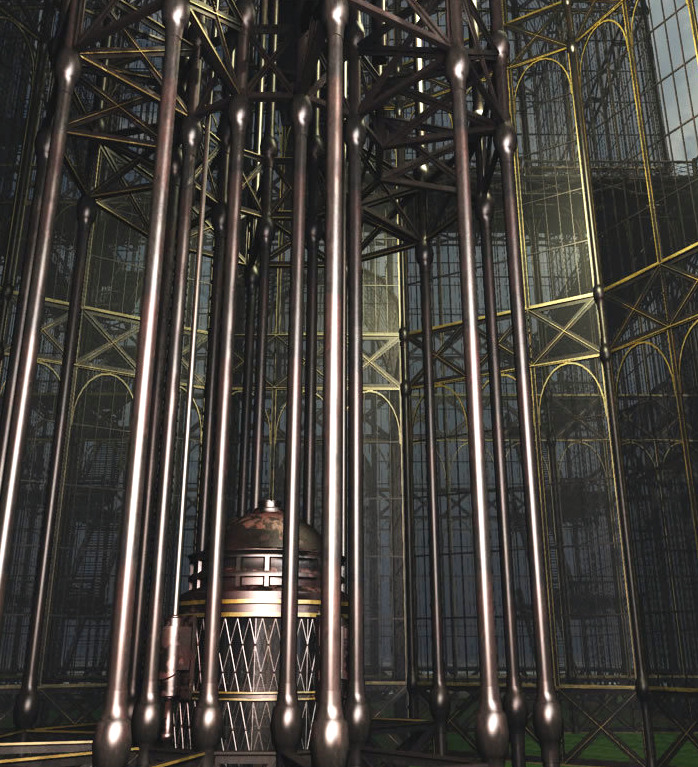
Where’s he going to chase a vampire? Could be the Steampunk Arboretum for Poser, now at Renderosity. Formerly known as the Great or Grand Arboretum and part of the Steampunk City Volume 1 set from Meshbox. Be aware that their models are older, but well made. Check your Vue content to see if you already have it there under the name “Grand Arboretum”. If not, there’s a Vue version at Mirye.
All that glass may need a defence force, so you may also want the Zeppelin Station for Poser.
For lights for the Steampunk Arboretum, see the hanging lamps and low-poly Antique Street Lights which both match the Arboretum.
Science-fiction:
The free MC saucer add ons for Alien Invasion Saucer.
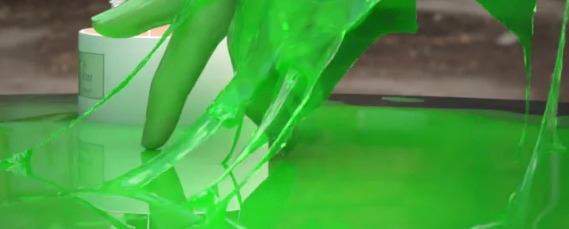
Got aliens landing their UFOs on your lawn? You may need the new dForce Slime and Goo.
City Container Houses Set from 1971s, for Poser and DAZ Studio.
The Saturn System for DAZ Carrara and DAZ Studio. Saturn and its system of moons, useful for scientific illustrations as well as pictures of of robo-kitties surfing the rings.
Storybook:
Hr-237 hair by Ali, with a suitably storybook look to it.
Exnem Ice Cream Props and cones for DAZ Studio, as “fit to hand” smart props and poses.
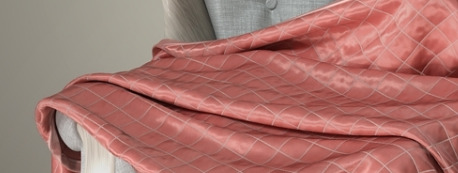
Realistic dForce Blankets for DAZ Studio. Could also serve as ‘magic carpets’, perhaps.
dForce Fur and Feather Boas for G8F.
dForce SY Capes II for Genesis 8. This second set has a more superhero look, but could also be used for storybook characters such as a wicked queen.
Historical:
A free Temple of Venus in .OBJ and for DAZ Studio.
Deepsea Adam HD for all Genesis types. Appears to be very suitable for renders that recreate classic ‘old master’ paintings and Biblical scenes.
God Of The Sea Tentacles Props and Poses for Genesis 8. Again, very suitable for renders that recreate old mythic scenes. Not that I recall seeing octopuii men in old paintings, but you never know…
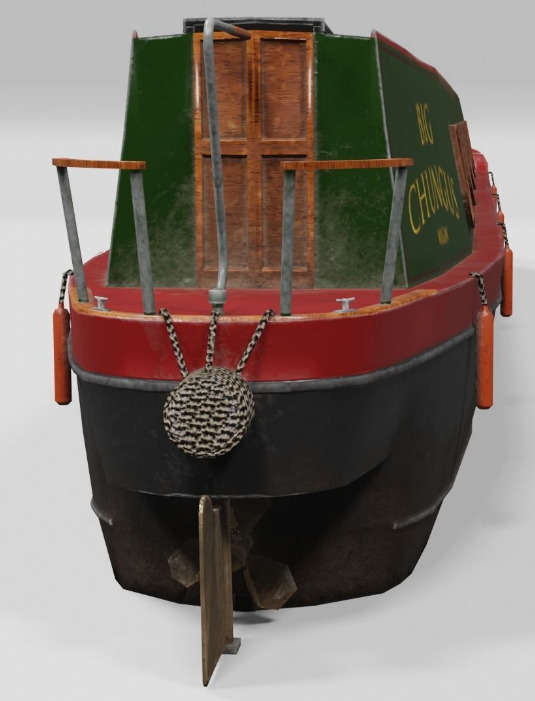
A British canal 3D canal narrowboat. In low-poly, so you could have an armada of them converging on Dunkirk.
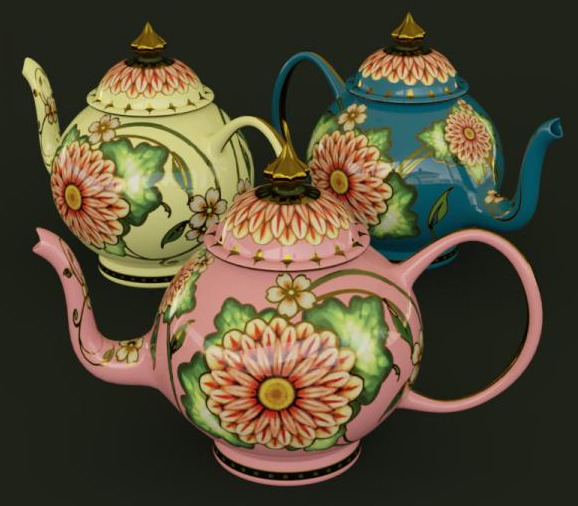
A free Painted Teapot, circa 1895, for DAZ Studio. Not canal-ware matching the narrowboat, but close.
15th Century for M3 is available again.
A vintage Letterpress Case for Poser. Metal letters were sorted into this, ready to be picked out and assembled to make a page for a printing-press.
Animals and nature:
The HiveWire Tiger for Poser and DAZ. This requires the HiveWire Big Cat as the base. There are also Tiger LAMH Preset and Animations for the HiveWire Big Cat.
There’s a new Cat Rig for Cinema 4D.
A new Peregrine Falcon for Deepsea’s Eagle.
Ken Gilliland’s new Nature’s Wonders Bee Swarms & Nests.
A free pack of Bubbles and Rays for underwater Poser scenes.
Landscapes:
Pebbly beach for Vue 11 or higher, from RaffyRaffy who makes a welcome return to Vue after a run of Blender scenes. Very nice. I’ll be picking this up on Black Friday, along with a few of his others for Vue.
ShaaraMuse3D’s HD Shrublands, a dry setting suitable for smaller desert cats and the like. Though possibly the uplands of India has areas that look like this, where tigers roam.
Olive Grove with Ancient Olive Trees and Mediterranean Shrubs Vol 1 for DAZ Studio.
The free Easy Terrain in .OBJ, suitable for Halloween or First World War winter battlefield scenes.
For figures:
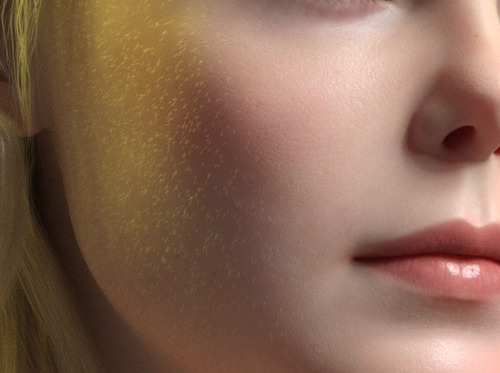
Free Vellus Hair for Genesis 8 Female, this type of hair being faint downy cheek hair.
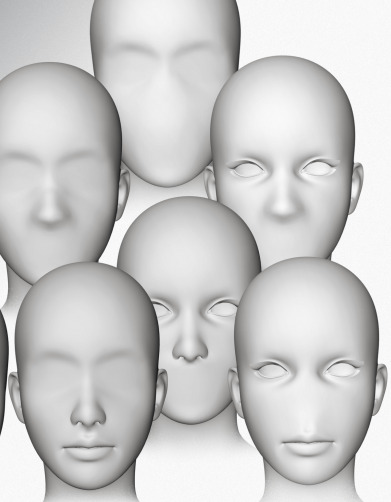
A free morph set, Gone LF for La Femme. Removing eyes, or nose or mouth. Possibly useful for those who manually intend to ink or paint in these features on the render. Possibly also interesting starting-points for a science-fiction or horror makeover.
A free supermodel body type for La Femme and a younger body type for La Femme for Poser.
A free pack of chest morphs, EMB for La Femme for Poser.
A free Ball Joint Doll for G8F in DAZ Studio.
Shutterbug Pose Collection for Genesis 8 Female. Being an unusual set of “making pictures” poses for a SLR photographer.
Obvious fan-art:
For non-commercial fan-art use, obviously.
The Man Without Fear for G8M, a Daredevil-alike for DAZ Studio.
Free Star Trek Uniforms for G8F.
Fur, shaders, materials, geo-shells:
Hair settings transfer for Poser. Fairly easily build a preset library for fur, and apply these in the Hair Room.
Me195’s free but WIP mt5 and node screenshots for cat hair in Poser. Don’t just grab the first link, you need to read the whole thread and notice that there are later updates to the freebie based on tester feedback. It’s still not complete.
Basic Shader Pack for Poser, possibly useful for comics work with the real-time Comic Book Preview mode. “30 open source shaders for you to use. Develop yours for sale or as freebies, using this set.”
RAMWorks ShinyShaders for Poser. Mottled and shiny, perhaps especially useful for natural things like shells.
Geoshell Skinz for G8F. “This pack is sure to be a major resource for your artistic renders. Utilizing DAZ’s Geometry Shell feature, this product is a simple, one-click solution … problems with extreme poses and clothing layers becomes a thing of the past.” Even if you don’t care for the presets, it’s presumably fairly easy to build your own on top of this by replacing textures etc?
Tutorials:
A useful Vital Tips in Getting Started with DAZ Studio webinar recording.
Edgy to Smooth with Subdivision Surfaces for Primitive Objects in DAZ Studio. Smooth the edges off cubes and the like.
How to make custom Poser thumbnails, with Windows freeware and a free Python script.
Change Shadow Intensity of Selected Lights in Poser.
Making billboards in Poser, with auto-masking.
Offers:
I see there’s a “50% off” moving sale at Teknology3d.
That’s it, more picks next month!
Actions for Blender
Blender has record-able Actions, like Photoshop. Who knew? It’s a free third-party add-on, now in v.3.3.1 (August 2020).
RDNA forums saved
I can now report on my experiment with a gig on Fiverr that offered to “Download an entire website from the Internet Archive Wayback Machine”. You can only choose one date to grab, and hope for the best. I had picked a date in late 2015.
Joseph came through and provided a 310mb .ZIP containing 1.1Gb of archive that Archive.org had backed up from the RDNA forums. 3,000+ forum threads, plus individual posts, back to 2005. It’s something I’d have never have obtained otherwise, since it involves typing in command lines and other ikky stuff. He knows how to do it, and is happy to do so for just £6. I’ll use him again for this sort of thing.
I didn’t expect Joseph to re-link everything, and make the RDNA forums ‘as if on a working site again’ — because it was a .PHP driven site. For that reason, it’s highly unlikely to ever go online again as a working site.
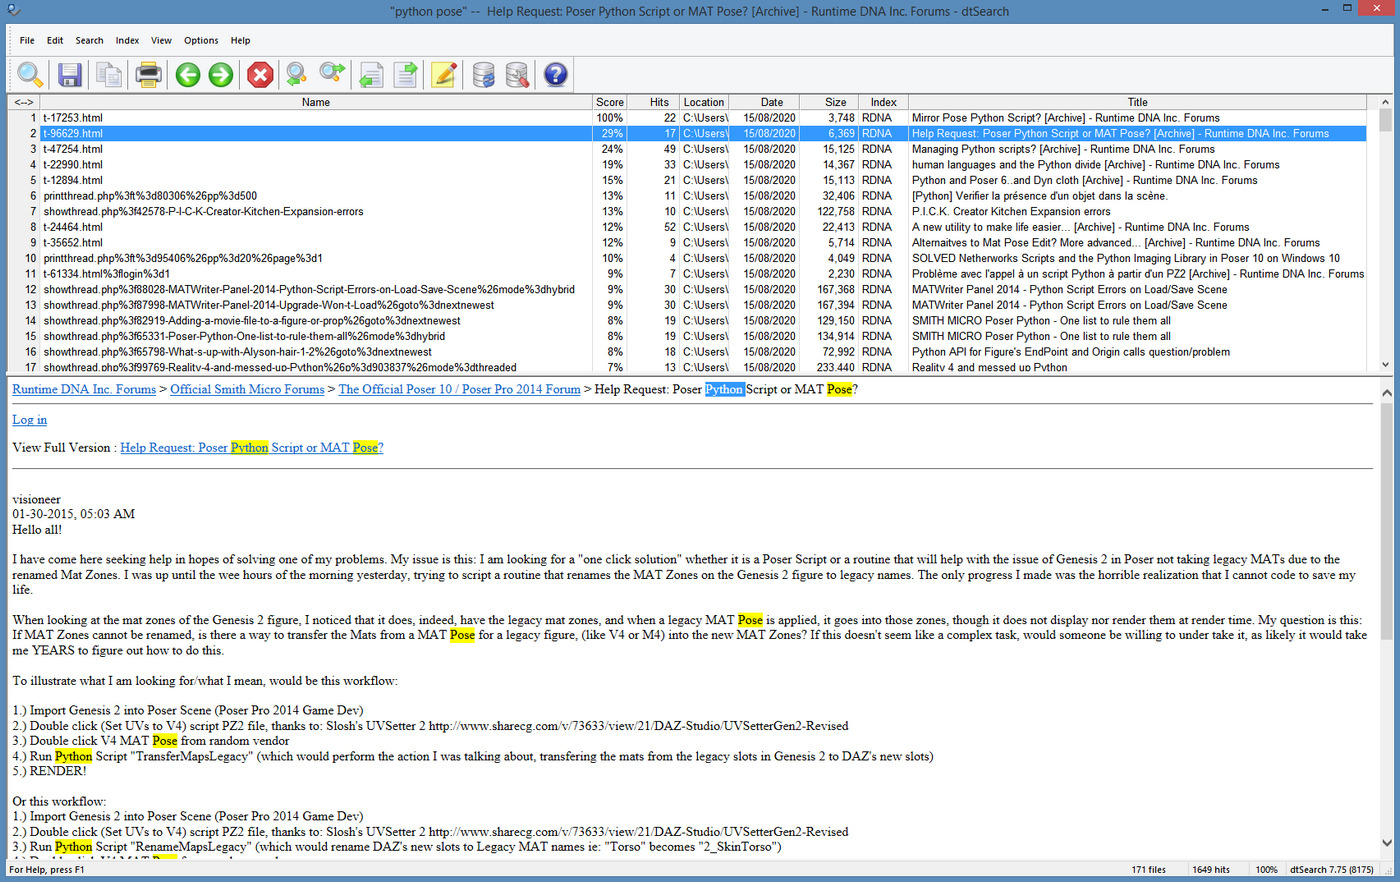
Once the delivered .ZIP was extracted I then had dtSearch index all text in the files, thus providing desktop keyword-search across the archive. If you’re following in my footsteps, and need a free desktop search tool, then DocFetcher is a good freeware equivalent to the paid dtSearch.
Here’s what I get on a test search across the archive. Definitely worth $6 to save this sort of knowledge, I’d say…
Possibly some of the Poser official forum was later ported to Smith Micro, but I also see Okham stuff back in 2005, on this search. It’s likely only a partial capture, but it’s pretty large.
Update: Community archive of the old Runtime DNA forums at the Internet Archive.
Heavy Vue users may also be interested in grabbing the old and vanished Cornucopia forums. Does anyone have the URL which those used be located at? Update: found it at cornucopia3d .com / forum / index.php — but Archive.org does not appear, at any point in time, to have archived any of the actual posts. Just the names of the forum threads.
How to make custom Poser thumbnails, with Windows freeware and a free Python script
I found gnuThumbnailer 1.2. It’s a free thumbnail generator and batch image-processing tool from 2015, in English and German.
What can it automatically apply to a batch of thumbnail renders?
Images can be stained (sepia effect, grayscale, user-defined color).
The colors of images can be overlaid.
Can make images lighter or darker.
You can add a colored or a transparent border to your images.
You can add a watermark to your pictures.
Very nice, especially since I can’t get the Netherworks Thumbnail Designer to work, which I bought a couple of years ago. gnuThumbnailer appears to do more or less the same thing as Designer, albeit working outside of Poser.
gnuThumbnailer is free for non-commercial use, and is pay-what-you-want if you use it for commercial work. It’s for Windows and Linux and requires Java, but it has a portable version (which means, if a future Java upgrade breaks the software, as can happen, the Portable should still keep running because it bundled the required Java runtimes).
So, Poser content makers reading the above description will see the options here, for helping to automate the making of standard 91 x 91 pixel Poser thumbnails in 16-bit .PNG, but… with your own border and brand overlay easily added via an automated batch process.
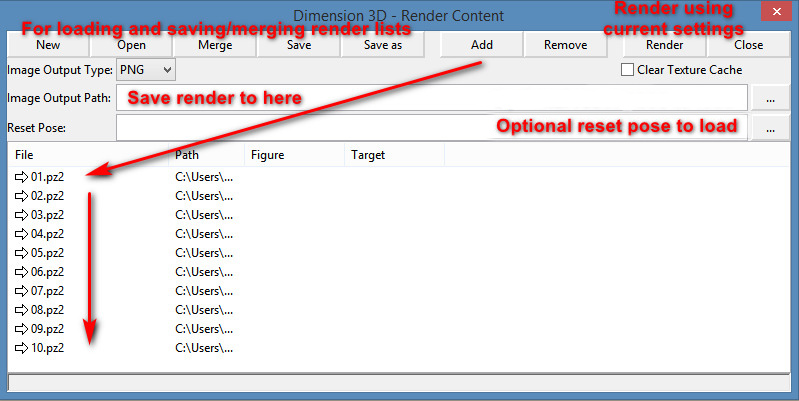
Ah, but how to get a nice set of uniform thumbnails for gnuThumbnailer to work on? What you want there is D3D’s batch “Render Content” script that ships for free with Poser 11, as an ‘official partner’ script. This is found at… Top Menu | Script | Partners | Dimension3D.
This script appears to be a expansion of what used to be his “Batch render poses” script (which no longer loads for me in Poser 11, even with AVfix). The new “Render Content” can make batch renders from a set of Poser poses, and there’s also a slot to load a reset pose in…
There’s no Help or entry in the Poser PDF manual for this, but it’s fairly easy once you’ve spend 20 minutes figuring out what the buttons do and testing it. Your Poser pose sets should be found down on the folder path…
..\content\Runtime\Libraries\Pose
… though a few freebie makers may have used ..\Poses But I guess if you’re a maker you have have saved out the finished poses saved out elsewhere, in a production folder.
The script does not also move the camera to frame the applied pose, which means some poses may fling the figure out of view of the camera. You might want to hack it, so that the figure is placed back at the scene origin before rendering.
The batch “Render Content” script then uses your current render settings, so be sure you don’t set it running on 100 SuperFly renders at 4000px, or your PC will be running through that for days. The script has no QUIT! option, once the renders are underway.
Fixing line-breaks in Poser lineart – the solution
Right, so after more research I find that there are in fact two ways to have Photoshop play “spot the differences” across an image stack, and to extract those differences. This solution relates to my previous post on Poser 11’s Comic Book Preview lineart, and the desire to fix small breaks and missing ‘chips’ of inked line.
I had discovered that a click of the current Display Mode’s ball-icon subtly randomises the coverage and break-patterns of the line-art available from Comic Book Preview in Poser 11. I was thus looking for a Photoshop plugin to combine multiple PREVIEW renders made in this way, but I now find… the feature is already native in Photoshop and can be done via two different methods!
First you’d assemble your slightly variant lineart renders, made as described here. 1.png through 6.png should do it, though you could go to twelve renders if you wanted to be really thorough.
METHOD ONE:
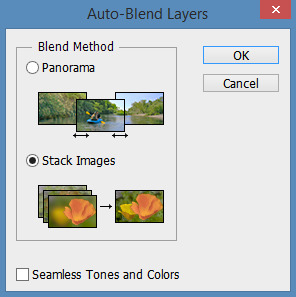
Top Menu | File | Scripts | “Load files to Stack” (Stack is 64-bit only, do not tick “Automatically Align”). Shift-select all layers in the Layers Palette. Top menu: Edit | Auto-blend Layers | Stack Images. That’s it. Photoshop will then whizz through the stack as fast as a whizzly weasel, spot the differences, and produce a single unified image containing all those small differences.
The result is not as adjustable later, since Photoshop does it a weird way and you don’t get discreet cutouts on new layers, each containing ‘just the bit that was different’.
I never knew this feature existed. Never heard it mentioned in umpteen years, or had cause to use it. It’s generally though of as a focus-stacker for macro photographers.
METHOD TWO:
1. Top Menu | File | Scripts | “Load files to Stack” (Stack is 64-bit only, do not tick “Automatically Align”).
2. Select top layer in the Layers Palette. Set its layer blending mode to Difference. Invert. ‘Select Colour Range’ – white. White highlights the bit(s) different from the layer beneath it.
3. ‘Copy merged’ and ‘paste in place’ your selection to a new layer at the top of the stack, invert it to return it to black. Ensure the new layer’s blending mode is set to Normal.
4. Delete the source layer and have the Action move down to the next layer in the initial stack. Repeat.
Eventually you have a base layer and all the differences are isolated, extracted and stacked on top. This stack of differences is more adjustable than the results for method one, for instance allowing you to delete a layer with a manky eye if needed. However, it’s probably not as computationally precise compared to Method One, because the process can only ever compare with the layer beneath it. Fragments may also have slight unwanted fringing around them.
In terms of speed, once you have Method Two as an Action they’re both about the same speed.
Either method is still not going to automatically fix tiny hairlines running across eyeballs, or noses that have double lines or broken ridges when seen at certain angles.
Script: Hair settings transfer for Poser
A free Python script Copy Dynamic Hair Room Settings…
Prompts the user to select a dynamic strand-hair prop as a template, and copies its parameters to the currently selected dynamic strand-hair prop. If no HairProp is chosen from the list, but OK is clicked, the script defaults will be applied.
Great. So to try it out I recalled that Rosemary kindly has free Fur Caps for M4 and a Dynamic Fur Capelet for M4. These can, effectively, work with the script as a mini library of hair presets.
1. Install the fur items from Rosemary. I had decided to amalgamate the M4 props under the fur cape location. Thus they were all found at…
..\props\Dynamic Clothing
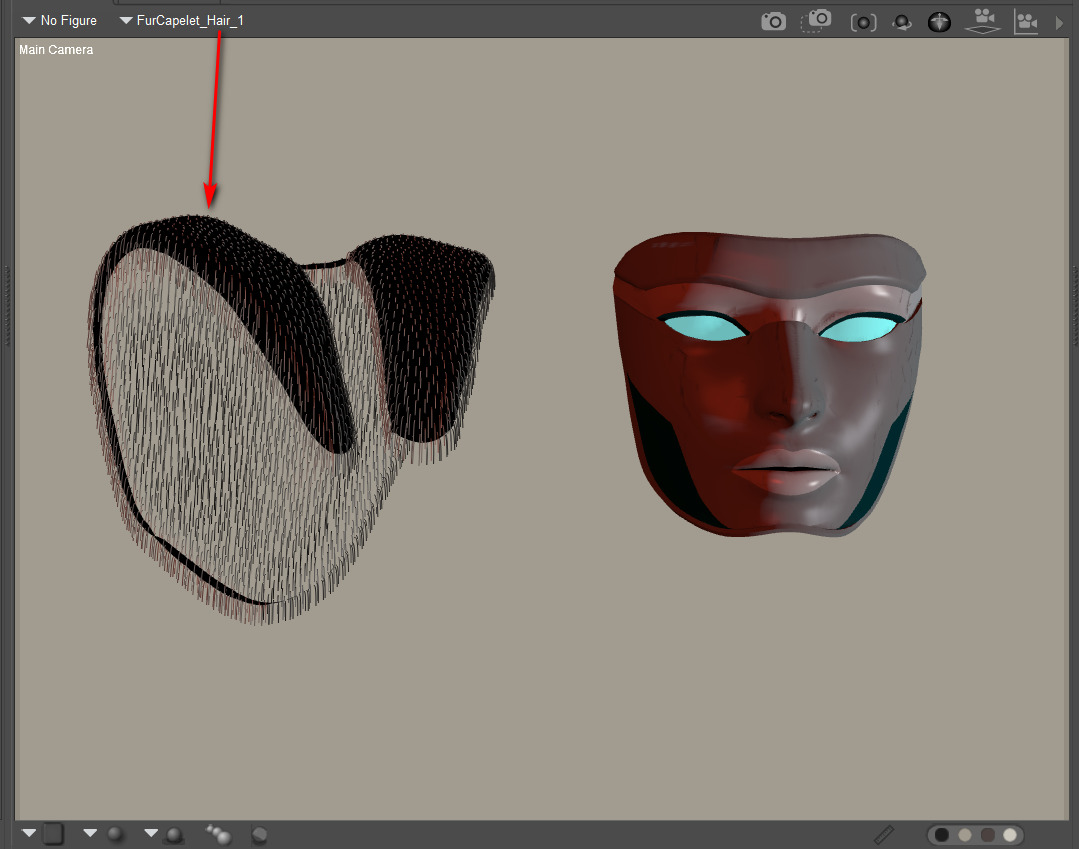
2. Load one of her furred items, and place it alongside a target prop. In this case my target was a mask.
3. The hair to hair settings-transfer script of course requires… hair. Any old hair, so to add it to the mask: Select Prop Hair Room | ‘New Growth Group’ | ‘Edit Growth Group’ | Select All | exit panel | Click ‘Grow Guide Hairs’ with default settings. Your mask prop should instantly be super-sprouting with default guide hairs!
I don’t know of any PoserPython script to do all of the above basic hair setup automatically, though it should be possible. Thus a visit to the Hair Room is still needed with this script.
4. OK, now I selected the group of default guide hairs on the mask. The script was run. The other hair groups in the scene became available for selection for transfer, via a simple drop-down list.
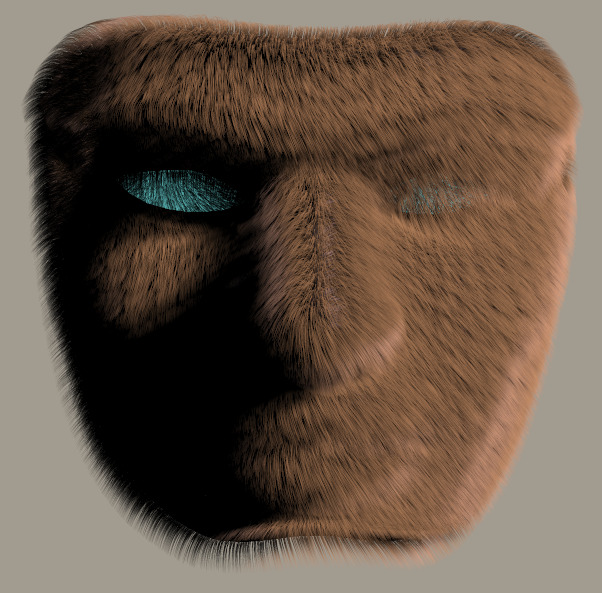
5. In an instant, the script then copies over the selected hair’s settings to the mask. Here we see the rendered result of a transfer from one of the hair groups used to make Rosemary’s hats. Only one was copied but several were used to make the hats, meaning that the results were a little sparse. That was solved by simply cranking the Hair Density Setting to 300,000 and giving the hair a slight ‘Pull Down’ of 0.00008.
Hurrah, a hairy mask…
Now what’s needed is an auto-setup script to run step 3 on any selected prop, even if you’re not in the Hair Room. And a handy library of 50 hair setting presets, each growing on a simple ball prop, to transfer from.
Fixing line breaks and ‘chips’ in Poser Comic Book lineart
This post is about how to partly fix line-breaks and missing ‘chips’ in Poser 11’s Comic Book Preview lineart renders. Solutions are not being sought here for the purposes of ‘closing gaps’ to enable easy flood-fill colouring in paint software. Since, if you’re doing it right, Poser already gives a ‘colour flats’ render. I’m thus assuming that your basic output layers are colour flats, lineart, and shadows/highlights, each as a separate render from the same scene and ready for a Photoshop Action to composite and tweak. Thus your lineart is on its own layer, making it vastly easier to filter and correct later on.
Here the solutions are being sought simply to have nicer lineart with fewer or no breaks.
Update: the solution. It’s No.1 + a couple of little-known Photoshop features.
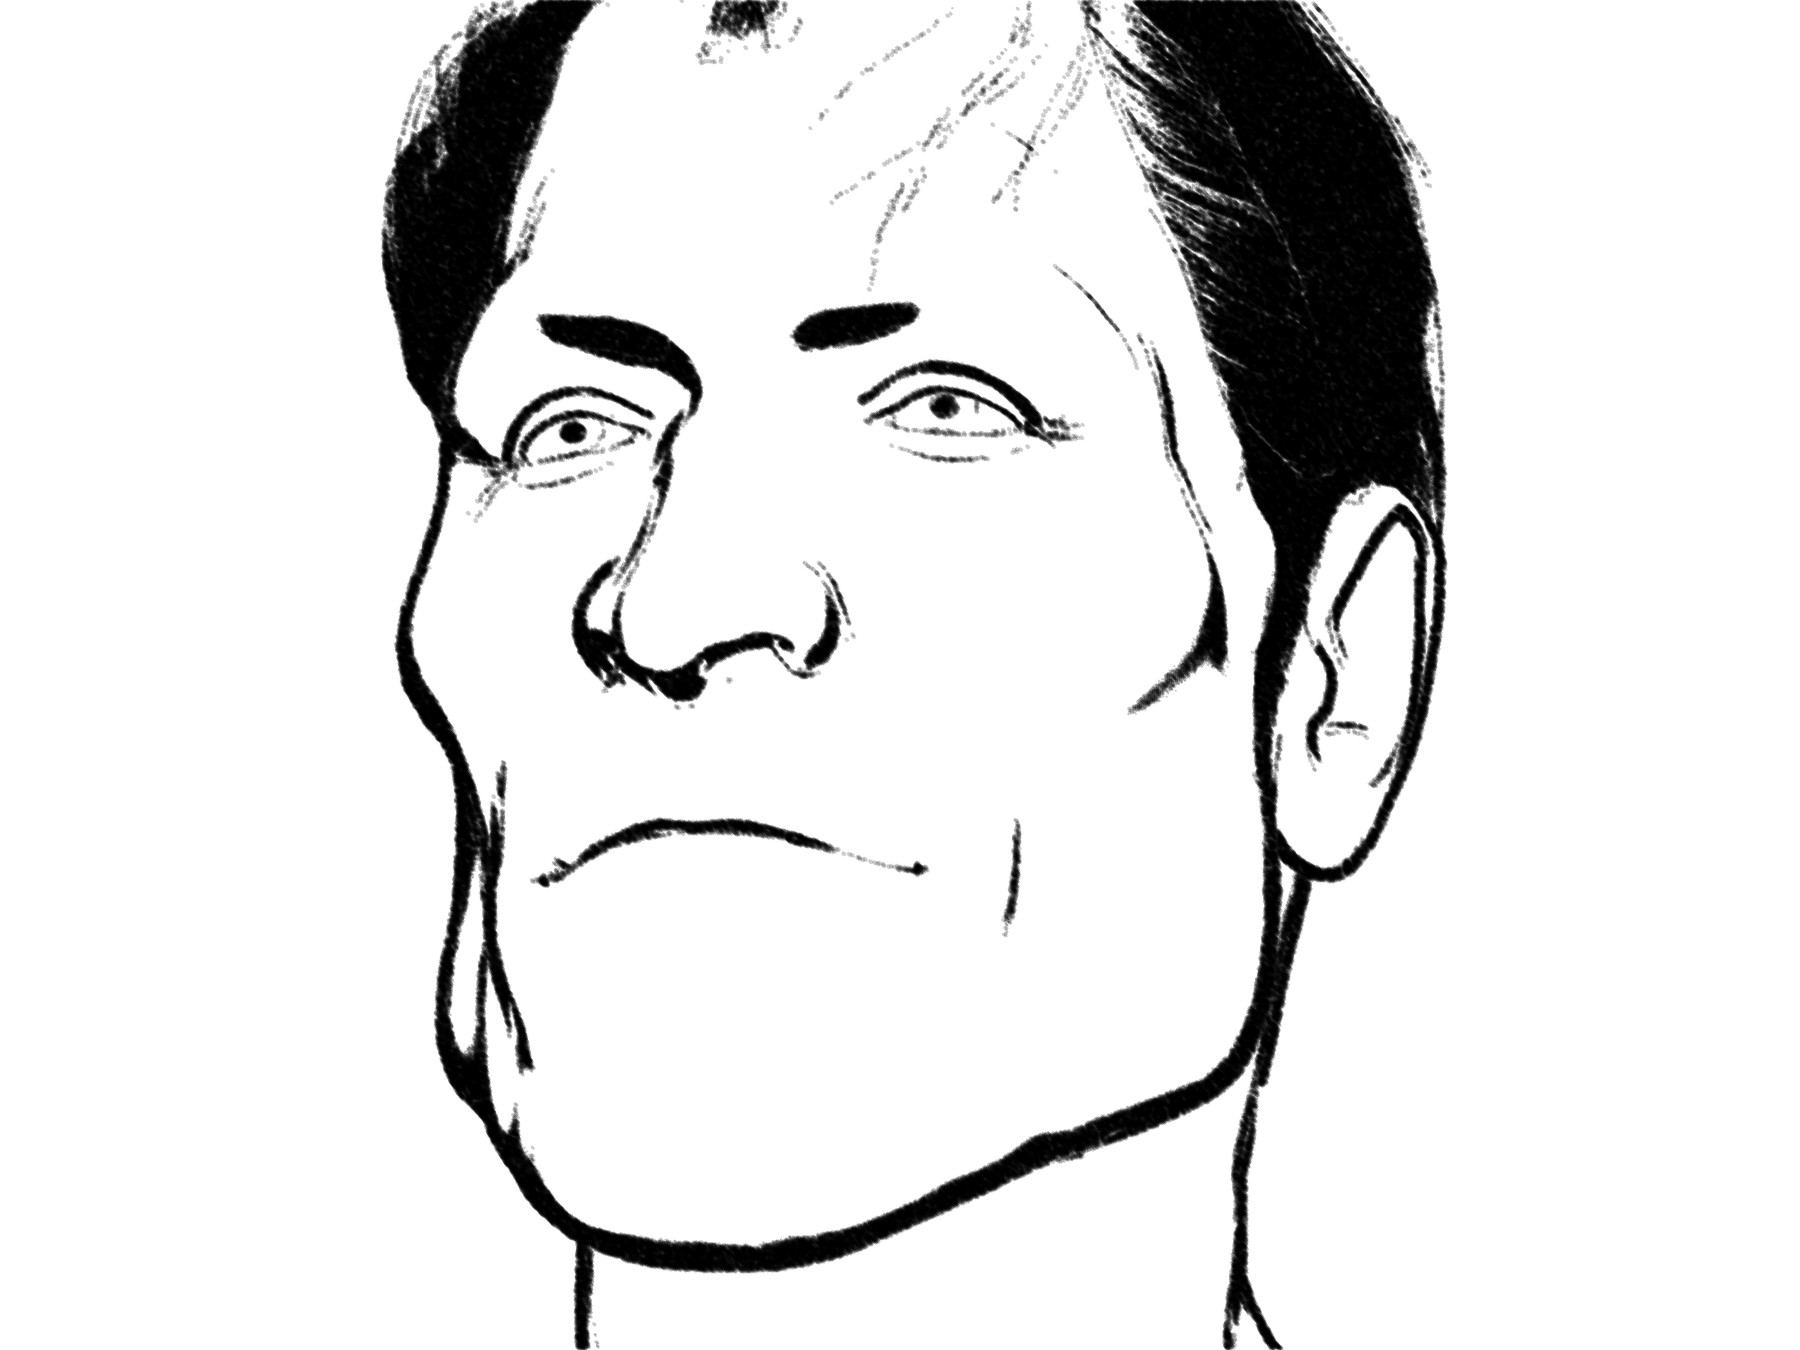
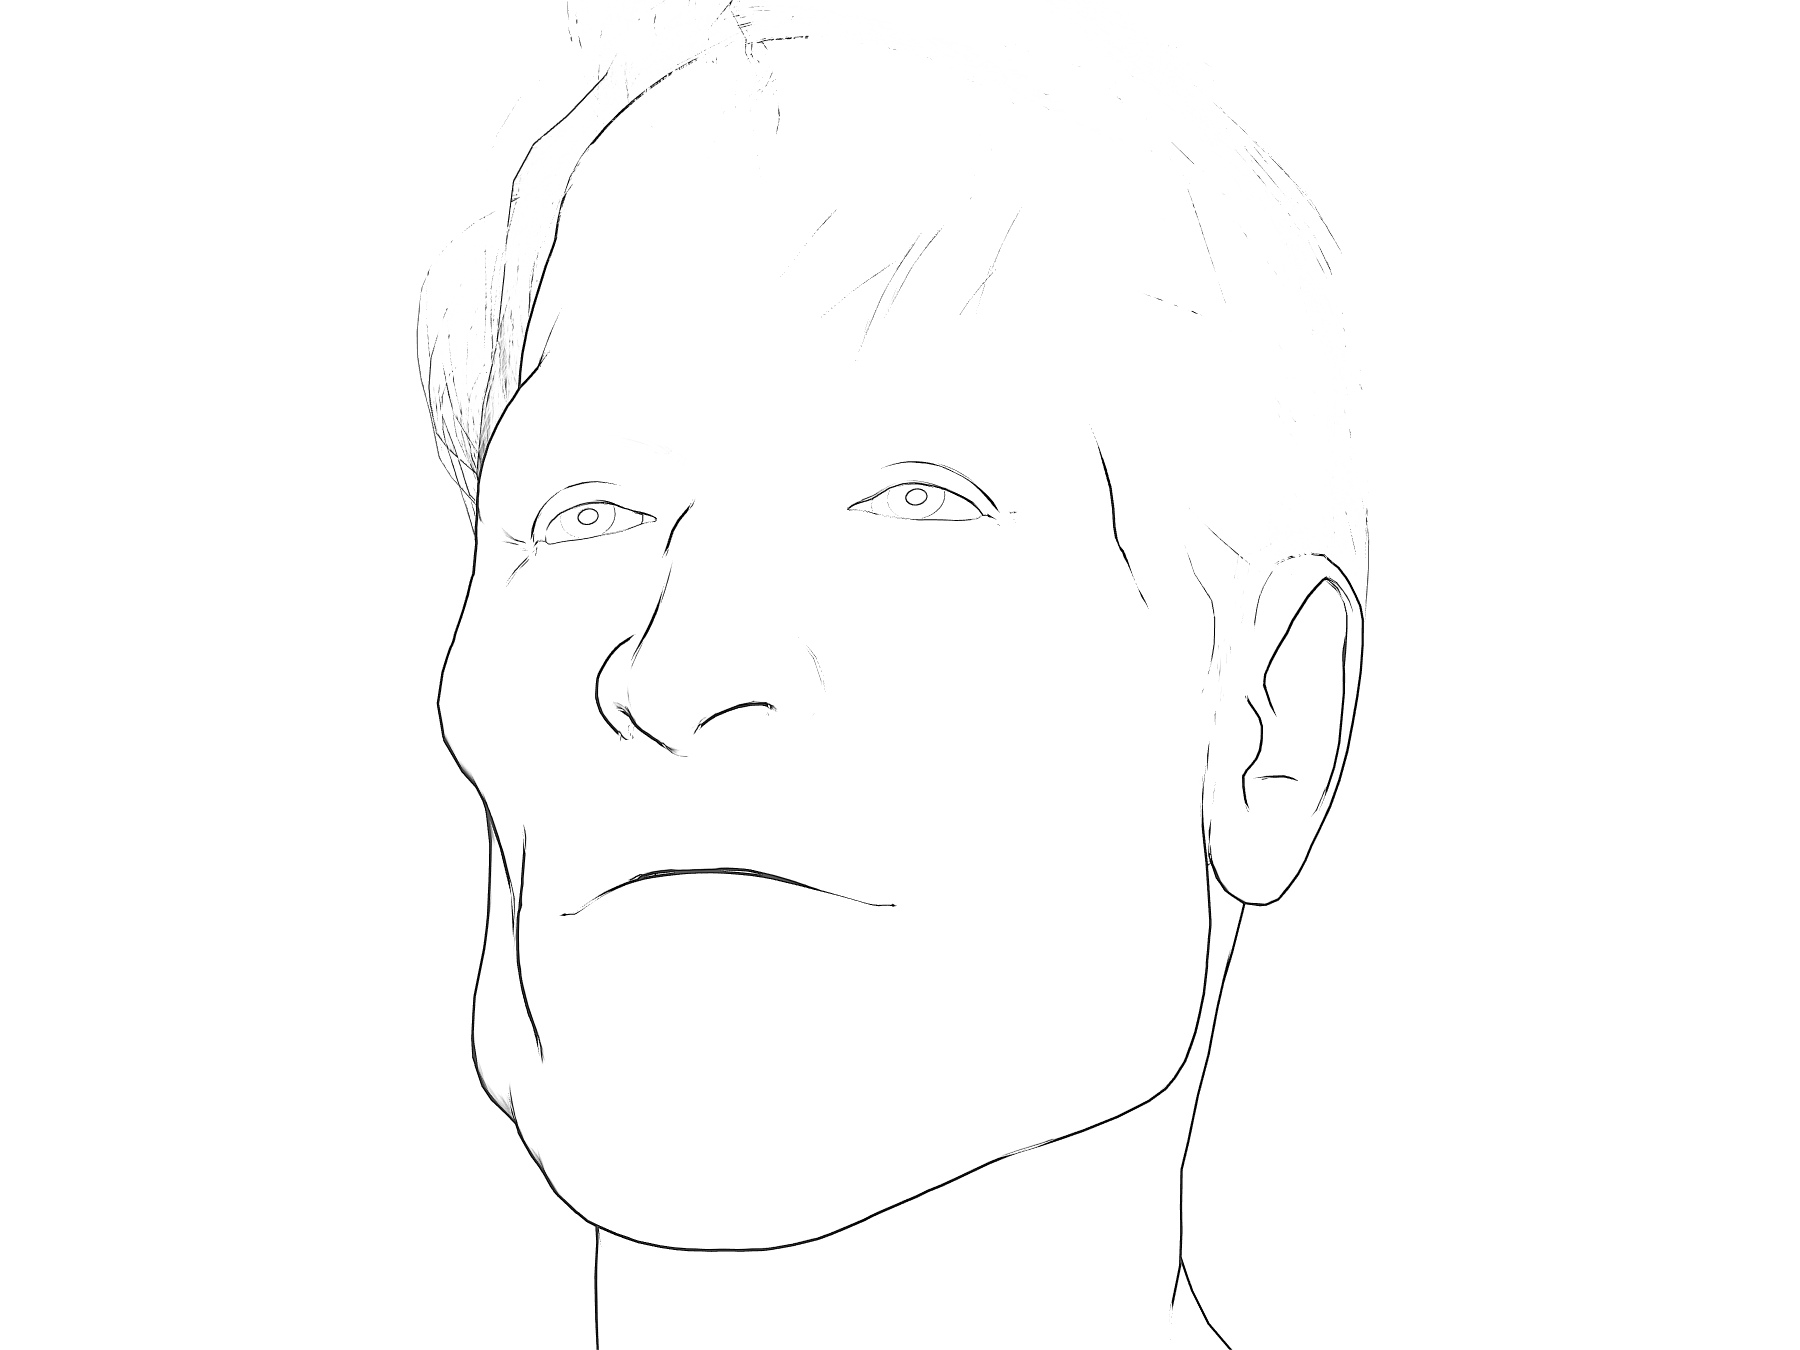
Here we see a deliberately extreme example showing the breaks and gaps that can happen in a raw lineart pass from Poser. We’re in Poser’s Smooth Shaded Display mode here, and on B&W in Comic Book Preview, and thus some of the Neal Adams-style inking is coming from shadows cast by one of the two lights. Poser is running in real-time with OpenGL, and it’s all WYSIWYG. Brom’s hair (‘Mature Mark’) is of course completely un-optimised for tooning as yet.
As you can see his nose and eyes may still need some manual clean-up, even when using some of the tricks given below. Manual clean-up of such source linart is not ideal. If cleanup takes just under an hour per page, and you have a 28 page comic, that’s perhaps four days of extra work. Per month, perhaps! Across a six-issue series intended to become a graphic novel that’s… way too much fiddly and non-creative work.
Here are a few of the options I explored…
1. PARTLY WORKS. In Poser, before you render to PREVIEW you click the Document Display Style ‘ball’ again. Then do it again. You’ll notice that each time you click, Poser slightly randomises the lines-joins on the inking, and may also make other lines look better. Nice.
Sadly, it’s not viable to then do six clicks, save a PREVIEW render from each, and then combine them all to ‘fill the gaps’ in Photoshop. I’ve tried it and the accumulated result is just dark and grungy blurgh. We would need a Photoshop plugin able to computationally ‘spot the differences’ between a near identical set of lineart. (Update: the solution is that Photoshop has this natively).
So, ‘click the ball again’ is simple and a neat trick, but there’s also not much this trick can do about the nose when the faces is seen at certain angles (see example above).
However, it does has two advantages:
i) it quickly enables you to at least find a state that offers a balance between ‘good eyes’ and ‘reasonable lack of line-breaks’. Such a balance may be good enough, when mixed into a final complex blend of colour flats, lineart, and shadows. You have to remember that your ‘artist eyes’ see things in the art that the general reading public never even notices, and especially so if the intended audience is under age 12.
ii) it also offers the possibility of making just two near-identical lineart renders, one where the eyes are at their best, and another for the rest of the linework. Then you’d make a loose Lasso selection around the eyes and have a Photoshop action feather, switch layers, ‘paste in place’ and merge, and then drop back down the layer stack to delete the source layer.
Bad eyes
Good eyes
iii) there are also more complex ways of using Photoshop in which you effectively just ‘paint in red’ on nice lines you want to keep. But here we’re trying to avoid the whole ‘spend an hour carefully fixing the lineart across six panels per page’ thing.
2. SOMETIMES SUCCESSFUL. Make a suitable fast custom-preset for Poser’s SKETCH renderer, one that gives you lineart with a fat charcoal line when run on b&w lineart. A preset that smurshes away most of the gaps and broken chips. Here’s my “2000AD” custom SKETCH preset at work…
We’d still need to dab some white on the nose and draw in some Dan Dare eyebrows, but it’s nearly there. Like I said above, the hair is completely un-optimised for tooning and we’ve smurshed it to black here. Although the black does then lend itself to raking with a wide white ‘rake’ brush.
Alternatively idea 2 could be emulated by running the lineart through a Photoshop filter, G’Mic filter etc, of a type that also smurshes out most of the breaks and gaps. Partly the success of this will be dependent on your comic’s style.
A sub-option for idea 2 it to simply scale down the inking, via the dial on the Comic Book Preview control panel. With thinner lines you have more leeway when bloating them, either by SKETCH rendering into PREVIEW lineart or via a third-party filter.
3. FAILS. You might think there would be some computational solution by now. CorelDraw does have a tool called “Join Curves” for lineart. Apparently Illustrator can also do that. For those who need free software, Inkscape also has a free inkscape-chain-paths plugin which does much the same thing. However, judging by the Inkscape experience it doesn’t work as hoped, in terms of nicely closing small gaps in vectorised lineart.
4. FAILS. Clip Studio has a feature found at Correction Line > Correct line height. This fattens all lines on lineart from which you’ve ‘knocked out’ white. (That latter option has the deeply un-memorable name of Edit -> Convert brightness to opacity, where it should have a dinky little icon showing a white Mickey Mouse glove throwing a knockout punch). Sadly Correction Line just fattens everything. I’m very much a newbie at Clip Studio, but it appears to me that there’s no way to have Clip Studio do a more refined fattening of the lines. For those who need free software, line fattening is also easily done in Paint.NET via the free Overliner plugin.
5. SUCCESS. I’ve yet to get to this point in my experiments, but from what Sixus1 has said I suspect that one takes a Texture Atlas from a figure + clothes, up-scales it to 8k and starts hand-inking ‘along the edges/seams’. The intention being to give the figure a total ‘hand drawn toon’ makeover, which you can then load back onto the figure at 4096. Possibly body and head are each done separately. That’s my guess, based on what I’ve picked up. You can see this partly happening in this Brian Haberlin screenshot from a while ago now. This is one of his hand-inked faceplates seen in Smith Micro webinar, presumably partly designed to work with and mask Poser’s small lineart breaks and chips.
Like I said, I’ve yet to get to experimenting with this ‘intensive makeover’ approach, but from what I’ve heard on webinars and podcasts that seems to be the gist of the approach. And judging by Brian’s marvellous Poser-made comics, the approach can succeed very well. It looks quite labour intensive at the start, and before you start you’d have to be absolutely sure your ‘runtime bashing’ was finished and you’d devised exactly the character you want for your story. Because changing things later could be difficult.
One other trick learned from Brian Haberlin’s webinars is that it’s possible to emulate inking in Poser by zooming right in and selecting a line of polygons, and giving these a black colour. For those who find they have a persistent ‘break’ on a character’s lineart, even from different angles, this may be worth considering.
You have to do this ‘Haberlin approach’ by hand because there’s as yet no market in figures designed like this, or in off-the-shelf makeovers designed to do this for existing figures. Although if you go look at the Gage fan-art Poser figure on the Forender store, then you’ll get an idea of how attractive this approach might be be made for buyers, and how it would play very nicely with Poser’s Comic Book Preview.
X. A future possibility. Software such as Krita, Clip Studio etc can already successfully flood-fill gapped lineart with colour. Presumably it does this by detecting and forming an invisible shape in order to “hold” the paint. This shape could theoretically be repurposed by future plugin makers to run a dark line along the ‘invisible shape’ outline, which would then be imposed to fill gaps in the original lineart. If the result would be pretty or not is anyone’s guess. I suspect it would be a blobby mess, which itself would then need manual cleanup.
Release: EBSynth moves to beta
EBSynth has moved into beta. 10x faster, and batch auto re-naming of files when you drag-and-drop. Still free.
It’s style transfer for video frames. You first extract a still keyframe from a video, and give it a nice manual artistic paintover. Then you use the resulting painting as a style-source in EBSynth for processing all the other frames. Once done, the whole video clip should have taken on the same painterly style.
Obviously you have to work ‘per sequence’ of the video. For instance, you can’t just take a frame out of an exploding tropical volcano scene, overpaint it, and then also expect the same painted frame to work on the next scene… which may show James Bond in a speedboat racing over the sea.
Thus the way EBSynth works is a bit different than just running an entire video through an automated paint-emulation filter. One of the advantages may be, judging from the test footage, that the resulting ‘art emulated’ video is less flickery, depending on how wild your paintover was.
With a bit of careful work it seems it can also be used to remove or add wrinkles, and thus change age. It’s still at the “interesting tech-demos” and “light-show hippies getting freaky with footage of Terence McKenna” stage, but it’s one of several free and relatively easy style-transfer options worth keeping an eye on. Though it looks like we’re still a long way from “grab a Jack Kirby comics frame, apply the style to my basic lineart”.
There’s an official tutorial here (starts at 4:54, once the introductory guff is out the way).
Poser script: Change Shadow Intensity of Selected Lights
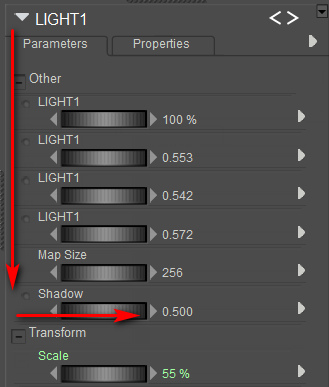
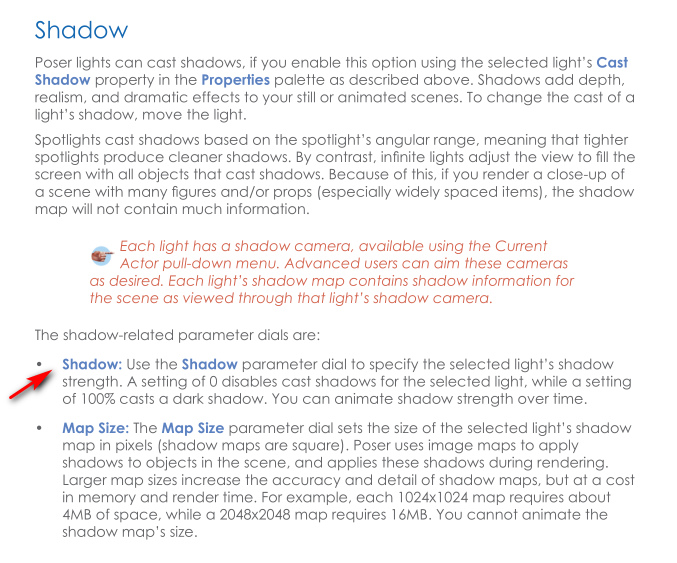
There’s a useful new Poser script, “Change Shadow Intensity of Selected Lights”. It doesn’t change the brightness intensity of the lights, only their shadow intensity when rendering…
In plain English, it adjusts “how dark or faint the cast shadow is” in the final render. It doesn’t affect the Preview shadows.
To use, copy out the script from the forum and save it as a text file, re-name that from .TXT to .PY and then install as you usually would for a Python script.
Theoretically it should also be possible to hack the script so the user can also input a number that controls the dial located above Shadow, “Map Size”…
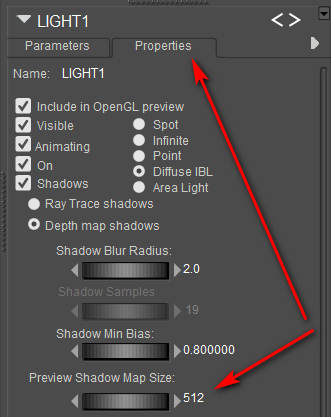
Over on the Preview tab of each Light there’s also a “Preview Shadow Maps Size” dial, and this is independent of the rendering “Shadow Map” dial. “Preview Shadow Maps Size” only affects shadows as seen in Preview.
The larger the “Preview Shadow Maps Size”, the better the quality, and lowering light intensity can also help to soften shadow-edges. However, this dial defaults to the lowest value of 512, while Comic Book Preview users would like to have this up at 1024 — so as to get better shadows on Preview renders. You can have it even higher, and if you’ve heard the Brian Haberlin webinars on Poser comics then you’ll know the ideal for Preview shadows is actually 2048 or 4096 and he wishes it could go ever higher than that. Possibly it can, if you have a ninja graphics card but for me it tops out at 4096. But… you should know that Poser will reliably have a fatal crash if it’s over 1024, and you then try a Firefly render from the same scene.
Unfortunately there’s no possible way in Poser 11 to control this particular “Preview Shadow Maps Size” with a Python script. There’s just no parameter ‘hook’ or ‘command’ for doing that. But you can save light presets to the Library which remember their “Preview Shadow Maps Size”, and Comic Book Preview users are probably only using two or three lights anyway, so it’s no great hardship.


