How to change Poser’s Comic Book ink lines from hard black to… any colour you like. You can’t yet do it natively in Poser 11, although perhaps the forthcoming Poser 12 will add a feature to make that happen.
I’m assuming here that you make several quick real-time render passes from Poser. These being, for this tutorial:
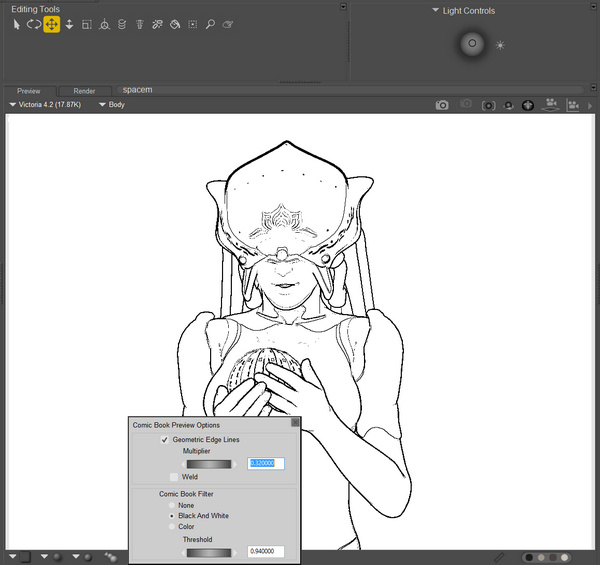
i) The Comic Book ink lines from a flat IBL light-lit scene.
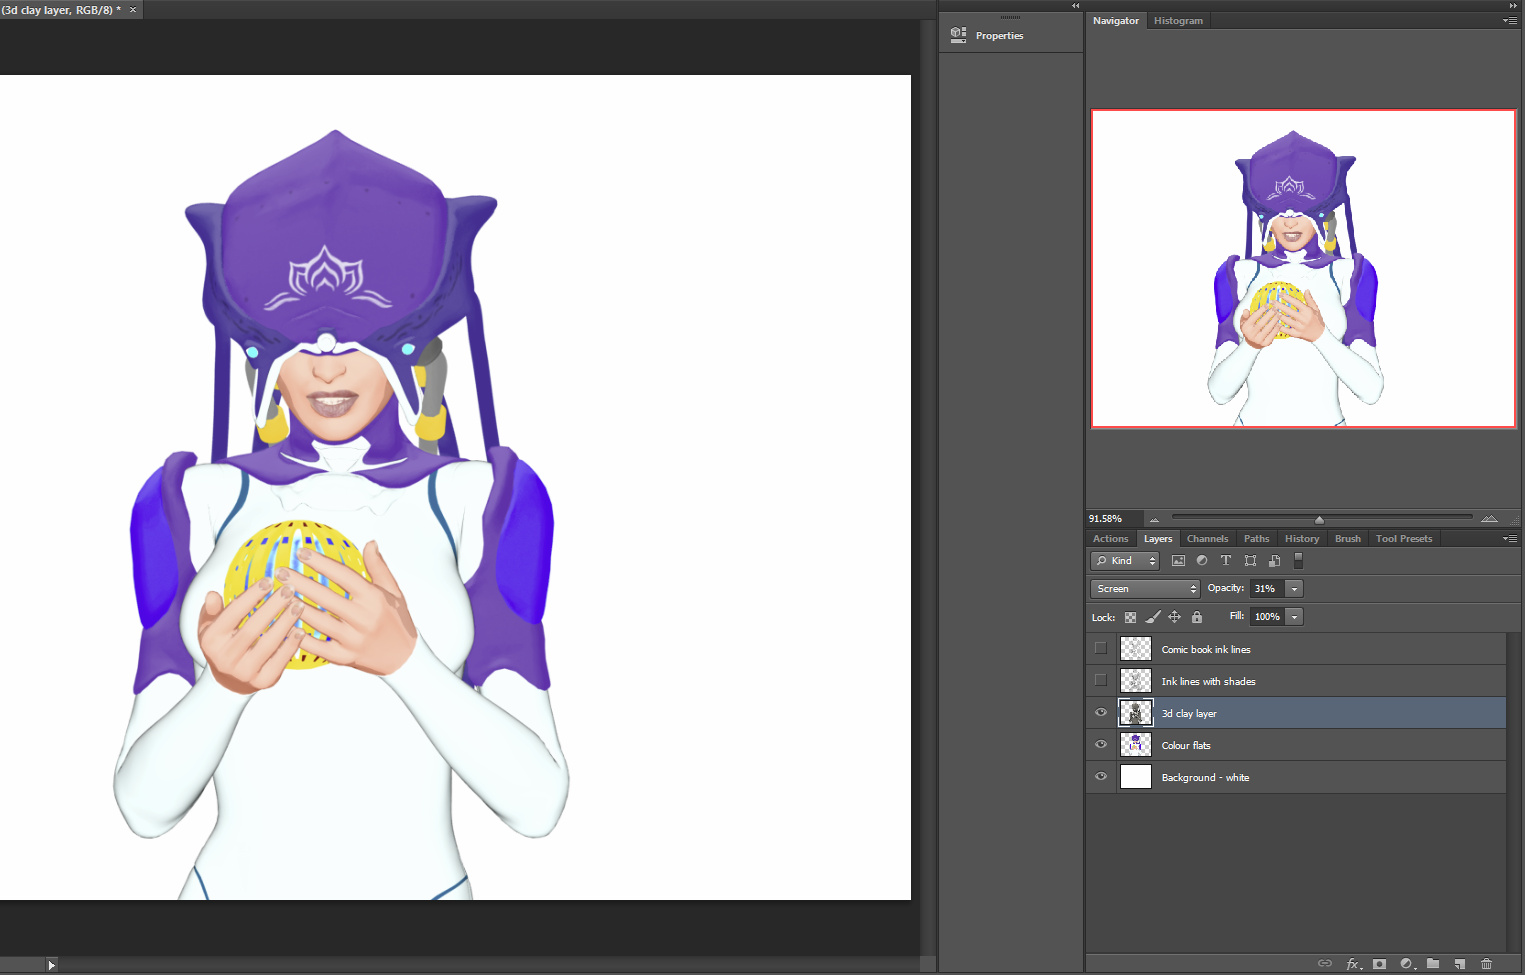
ii) The colour flats, with the same light, made by just turning off the same Comic Book mode’s ink lines.
iii) A 3D grey/shadows layer. In this instance, from a simple switch to the old default Poser light preset + set Display as Cartoon w/Lines. (If you’ve swung the camera before starting, make sure there’s a fairly even illumination by having your main light ‘dead-centre’, as you can see happening on my light preset icon). This layer is just used later to subtly add detail to the colour flats. Any good lots-of-shadows layer, suitable to become a greyscale, should work. It doesn’t need to be pretty, so don’t waste time tweaking it.
iv) Then you make an alternative linework render. This is made very simply by switching scene iii) from Colour to B&W in the Comic Book controls, and tweak the B&W dial slightly to get a layer with different lines and more of a 2D manga-like subtle shading to it. The horrible posterision of the shading edges doesn’t matter, as that’s easily fixed in Photoshop. (Though if you want better shadows in Poser, try taking Preview-light “Shadows” up from 512 to 2048). (If you save ‘2048 shadow’ lights, label them ‘do not use with Firefly’ – as lights with that setting will reliably crash Poser when making a Firefly render with them).
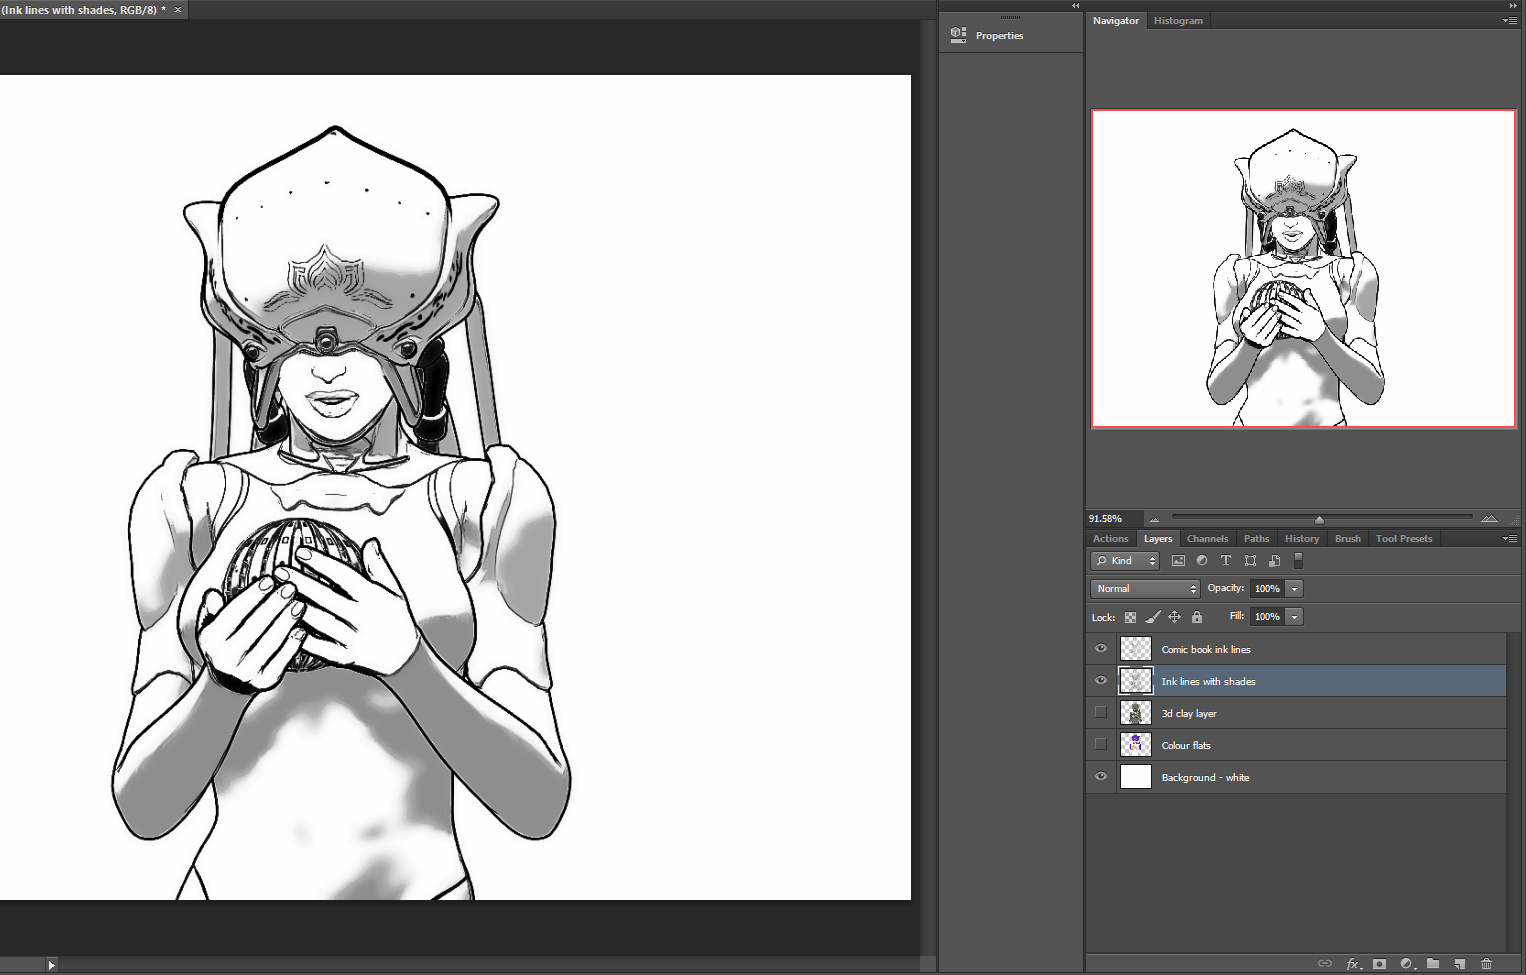
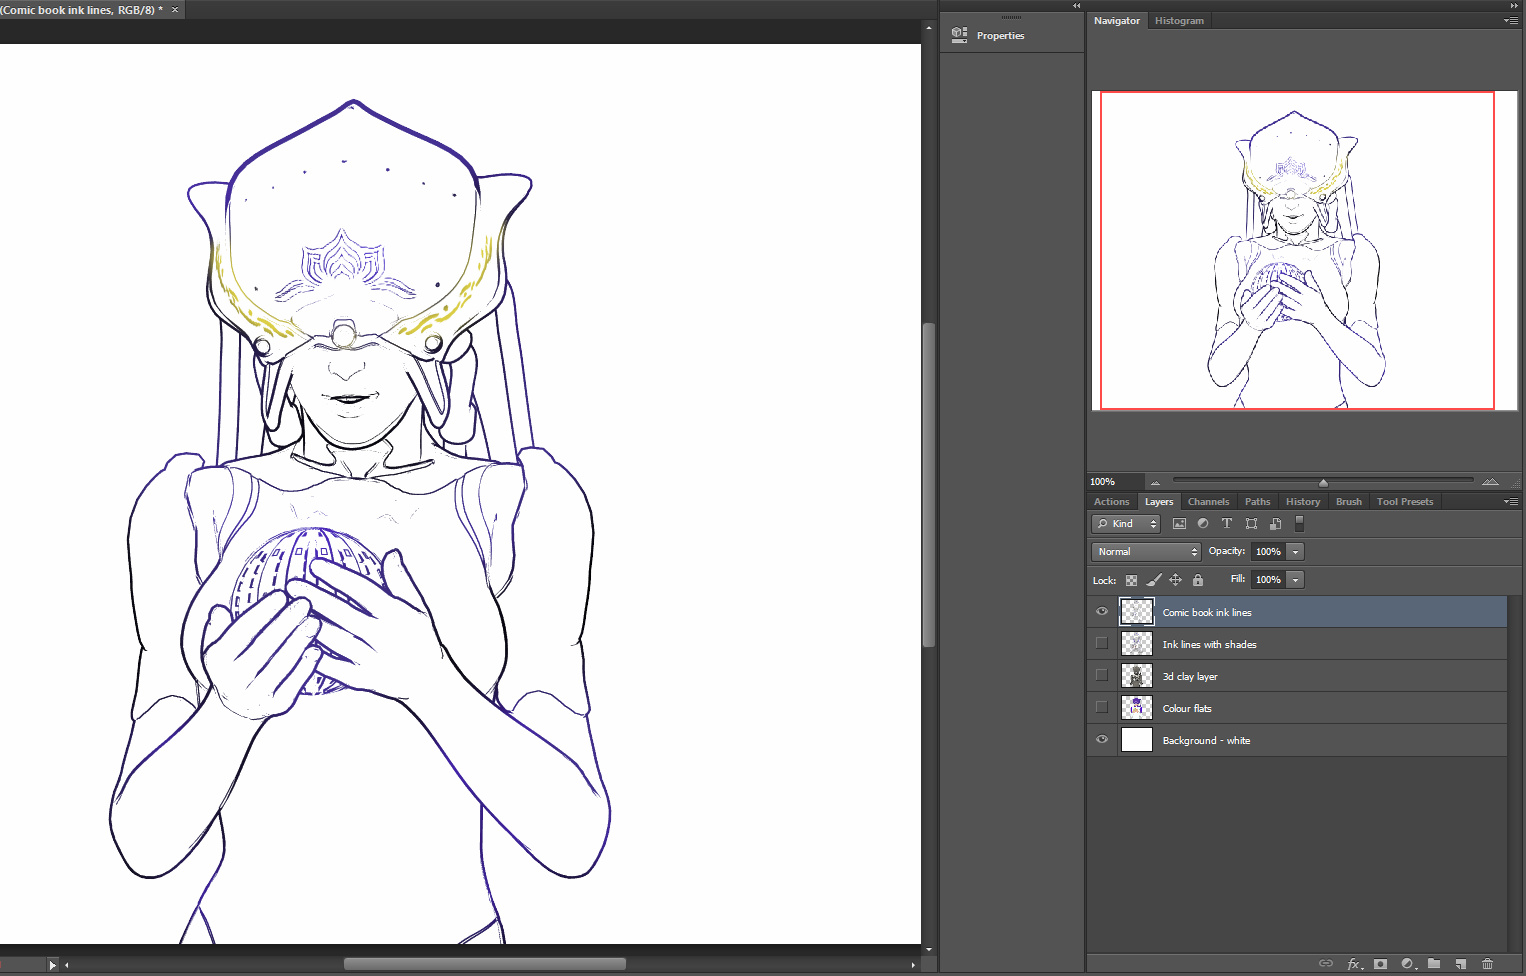
Once the two ink line layers are loaded into Photoshop with “Paste in Place”, you can knock out white, blend the two line layers and clean any stray lines and ink in missing lines. Here I’ve knocked out the white from both layers (there’s an automated Photoshop action for that), then used the eraser to clean the mouth ink lines and a couple of unwanted weird lines that were lurking below the helmet edge. I could have done much more to tidy up the linework, but this is just a demo. I then softened the posterised edges on the subtle shadowing ink-lines layer, by applying Surface Blur to the whole layer at 7 | 42.
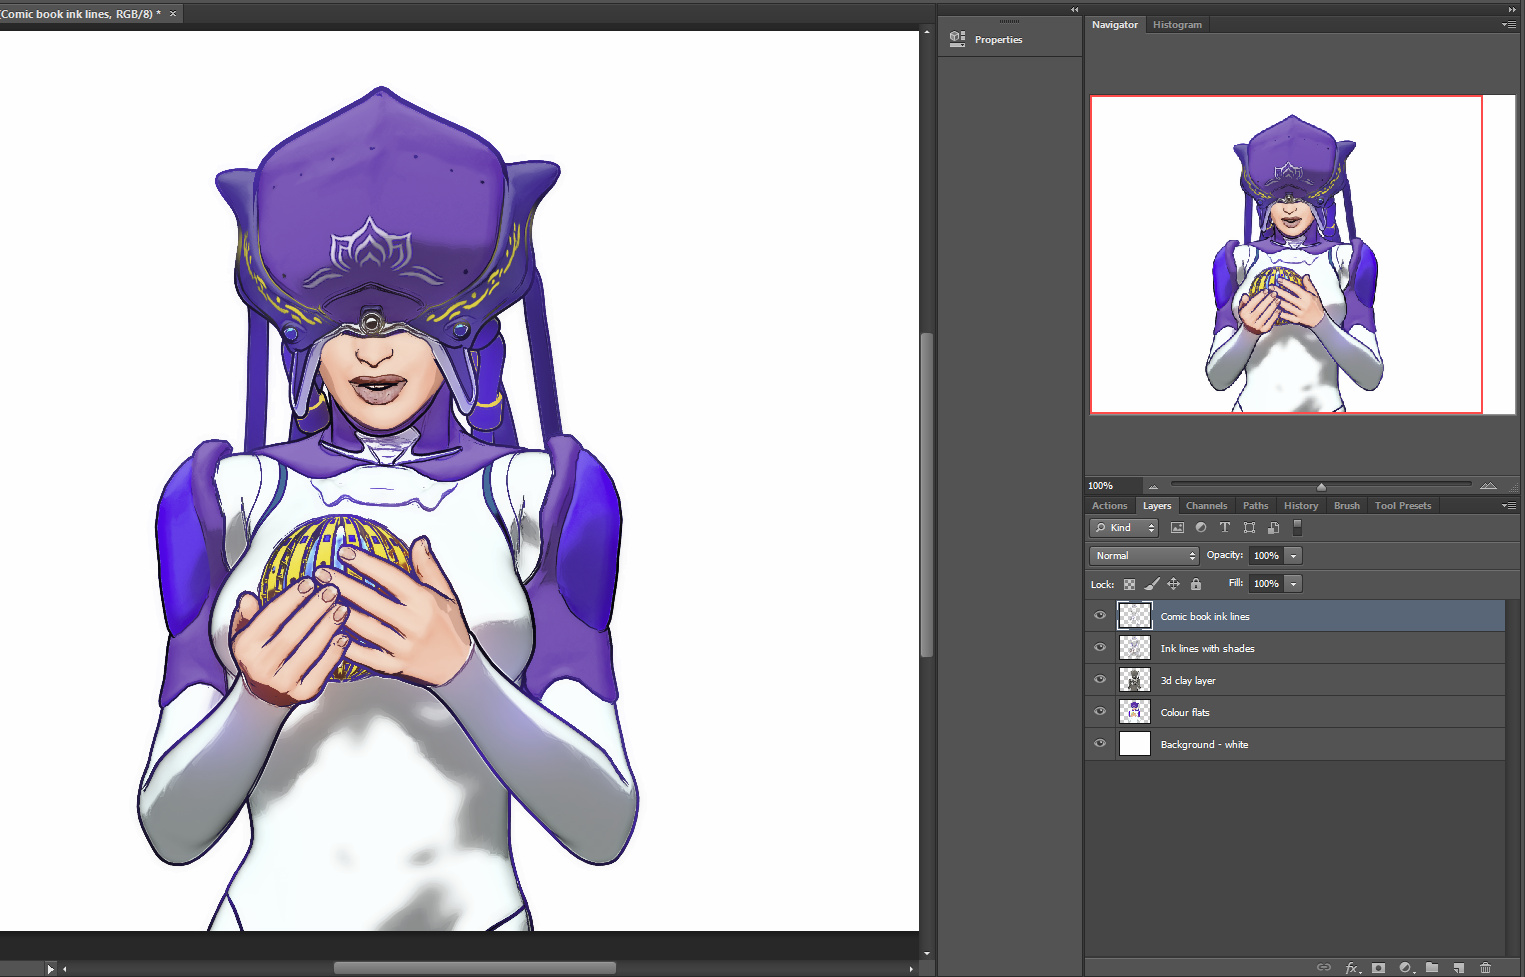
Under the ink lines is the 3D grey/shadows layer, but converted to greyscale (with a simple Desaturate), and then set to Screen blend at 30%. That makes it blend into the Colour Flats layer below it, softening down the colour layer while also adding a bit of subtle shaping to the colours, but not so much as to provoke an “Ugh, that’s so 3D!” reaction. No watercolour shaders required.
The problem then is that when you turn the two ink line layers back on, over the colour, then the inking looks way too heavy and crudely black. To beautify we need to make the black ink lines change colour. Here’s how…
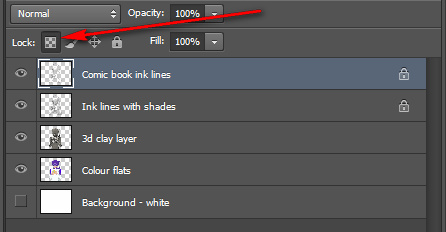
Firstly, in the Layers Pallette, turn off all but the topmost of your ink lines layers. Then click on that layer’s tweeny-weeny little checkerboard icon…
Then select a big soft brush at 100% opacity in Normal blend mode, pick a colour and simply paint over your chosen layer’s black line work. Only the ink lines should be colorised, because we turned on the little checkerboard icon.
Repeat for the next ink line layer.
Here’s the result, with the ink lines coloured up a bit so as to better match the colour flats layers below, and all layers turned on.
In the comic book colouring trade, this is known as a “colour hold” on the line.
The ink line edges are a bit jaggy here because I’m only doing a demo here so have been working with 800px 72dpi renders. Ideally you’d be working with 5000px and above. Even at that size they render quickly, because all the renders come from the real-time Preview render setting.
The flattened final frame can also be art-ified by being run through a Photoshop filter. Note how what was a clunkily-inked nose and mouth now look very nice indeed.
Here’s another and less garish version, with the same filter just run on the base layers and then with the colour layer blended. Still not ideal, as again we’ve lost some of the ‘sci-fi look’ on what was a white jumpsuit, and our carefully coloured ink lines are now shades of dark grey and white. But at least they’re not a jarringly hard black, and you get the general idea.
If you have an additional Poser Sketch Designer sketch-lines render layer, you could blend that back onto filtered versions, for a charcoal line look. That charcoal linework could also be coloured using the technique above. You can also colourise in Photoshop using the Replace Colour option (though not from a hard black) and can use the Sponge to desaturate small areas when a filter causes them to “pop” too much.






Cool tutorial. I think this will be very useful for people who want to do this in Photoshop. However, Poser 11 already has the ability to change line colors to… well, any color you want. This feature is accessed through the Materials Room. I wrote a tutorial on my workflow (which I use to create noir-style comics), and I cover this feature in this particular blog post: https://mikemitchellonline.blogspot.com/2017/07/noir-style-tutorial-pt-8-step-3-edit.html
BTW: Your site is AWESOME. I’ve been looking for stuff on converting poses from Daz to Poser, and other info. I’m definitely going to poke around here and learn some new stuff!
Many thanks, Mike. A very useful prompt. Here’s the reply and a workaround to get the B&W line into Photoshop in colour… https://www.jurn.link/dazposer/?p=8761