
Now that all Poser 11 users have the Poser Pro features, and now that the auxiliary render-switches have returned in the latest Poser Pro 11.2… we can all do depth-pass renders in Poser!
(Background: The mini-drop-down for the z-buffers had gone missing from the UI in 11.1.1.35540 and the public release before that, though these render-passes were still there and could still be fully accessed by D3D’s Firefly script and any other Python script that called them. The ability to send multiple animation frames to the Queue Manager also returned with version .35540, which had had to be done via temporary script in the meantime.)
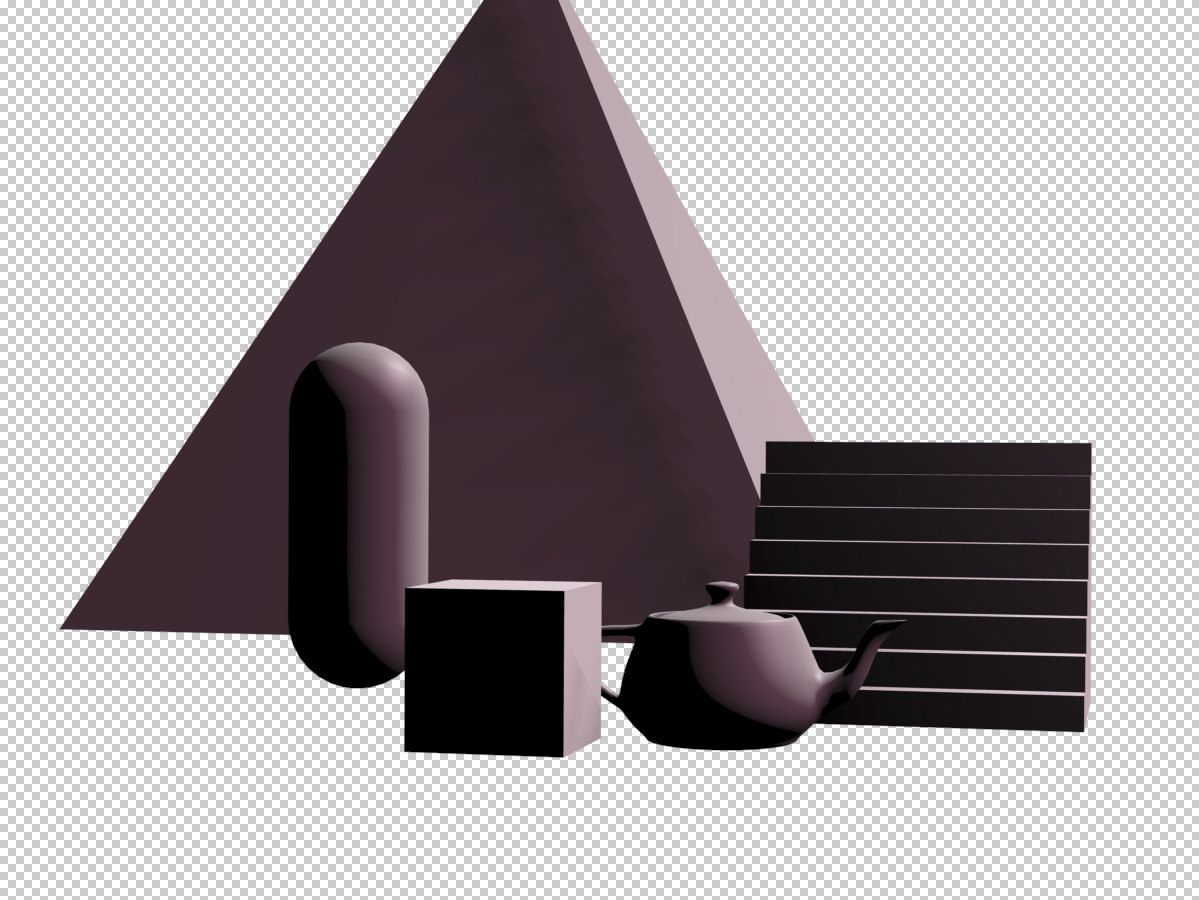
1. To prepare to do a depth-pass, first set up your scene and use a suitable light. Take a look through the “Top” camera, to make sure your props and characters really are correctly-placed in terms of distance from each other.
2. Apparently, in order to get a z-depth pass, you don’t need go to Materials Room | select “Atmosphere” | click “Create Atmosphere” | Select “Depth Cued” and adjust distances and fog colour. But I could be wrong on that. If you can’t get a z-depth that looks good by following the steps below, try adding this to the workflow.
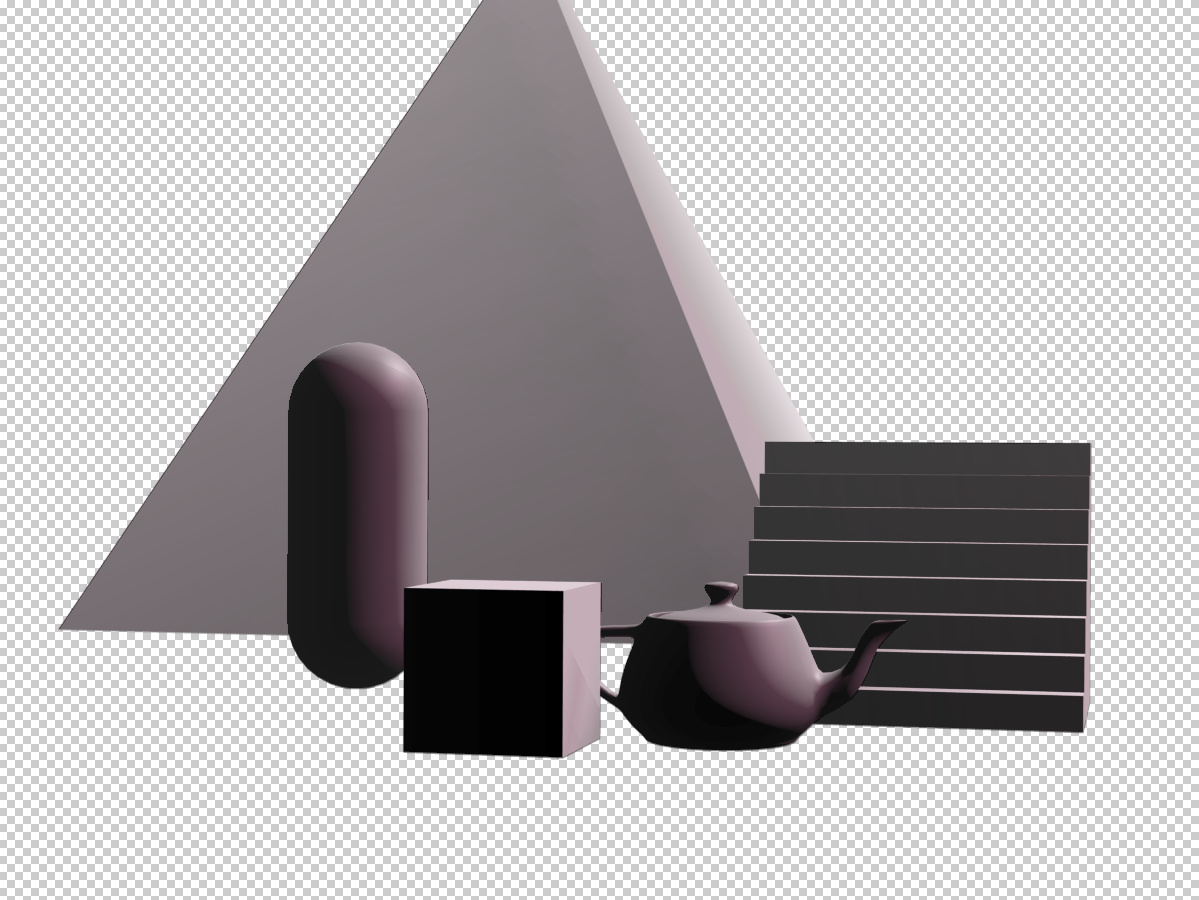
3. At this point I changed the lighting to a darker type, so that the depth fog will show up better later on in the tutorial.
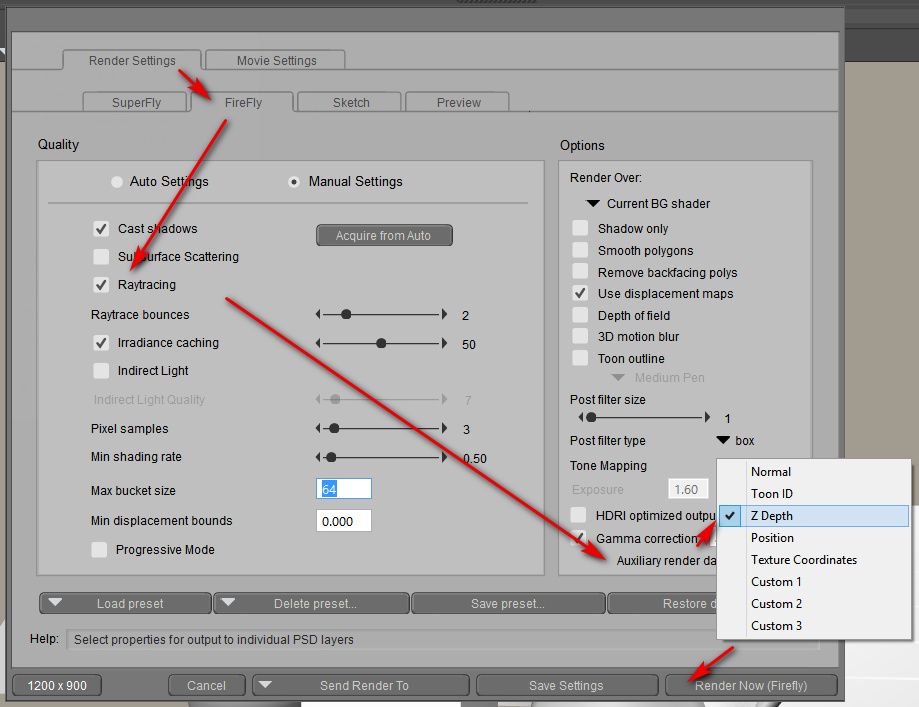
Render settings | Firefly render. I suspect it’s important that you have “Raytracing” ticked to get a z-depth pass, but I could be wrong. Along with your main render, switch on the “Z depth” auxiliary render switch. This tells Poser to render out a depth-pass along with your other renders.
4. Save your render via the little arrow icon, found up in the top-right of the render window.

Save as a .PSD file. A .PSD is a layered Photoshop file. One of the layers it contains is the “Z depth” render pass.
5. Load the .PSD in Photoshop and look in the Layers tab. You should see a layer marked “Z”, which will be turned off by default.

Turn that layer on and then Invert it [ Top menu | Image | Adjustments | Invert ] then set its Layer blending-mode to “Lighten”. With the main render sitting below it in the layer-stack, adjust the Z layer’s blending to taste. Here I have 60% blending opacity to turn a dark render into one where there’s some noticeable depth haze happening…
For deeper fog, duplicate the layer with some opacity to it, and also try adding other blend modes to the mix.
If you don’t have Photoshop you can also use open source graphics software, to open a .PSD file and do the invert and blend trick.
If you have a good version of Vue that can import a Poser scene, you can also do atmospheric fogging that way and quite quickly. Vue does it the brute-force way, but the effects can be very pretty and quite quick provided you have no clouds. The above Poser method, however, is a ‘cheat’ to save render time. You can probably also greatly enhance the effect by turning on “Atmosphere” correctly in Poser.
That’s it. You can of course use it on far more creative scenes, such as an army of mammoths and war-towers emerging from a dust-storm, etc. I’ll be looking more closely at the Atmosphere in Poser in a future post.
Pingback: How to set up a depth cued Atmosphere in Poser 11 – MyClone Poser and Daz Studio blog