This is a tutorial for complete and utter beginners with ZBrush, who just want to test the exciting new NPR features in ZBrush 2019.
This tutorial uses the only method I found that worked in ZBrush 2019 that gives proper anti-aliasing on a large canvas — without which NPR filters are useless. Thus much of this first tutorial shows how to wrestle ZBrush into a setup suited to NPR destined for the pages of a comic or magazine. I’m not an expert, just a fellow total newbie who carefully worked out what the workflow is supposed to be.
1. Firstly, don’t even try to understand ZBrush’s baffling and non-standard user interface, unless you’re willing to spend at least a day just watching tutorials on it.
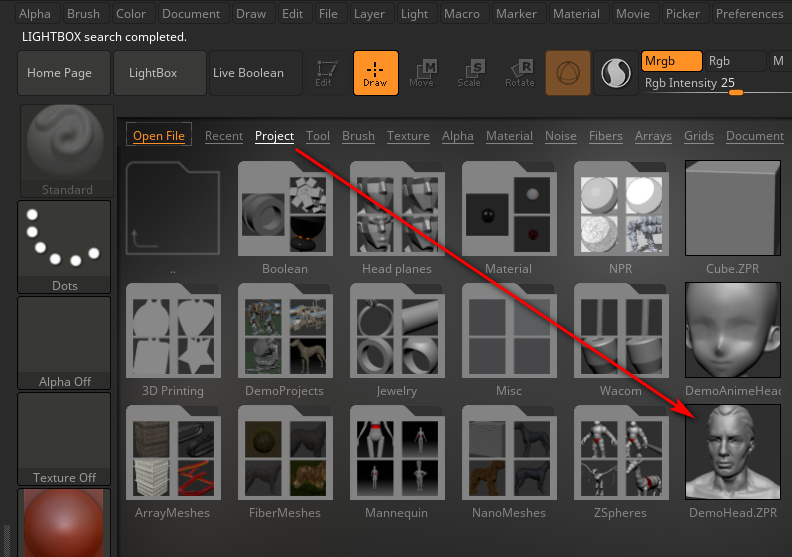
Instead, just load ZBrush. You will then be asked to pick a preset project from the Library. Pick a good choice for a NPR test, such as the obvious default “Demo Head”. Double-click on the head’s preview icon, to load it. We see a flickering old floppy-disk icon appear. Then after a few moments a little text message will appear in the upper left, saying that the project is loading. Wait for this to finish loading before continuing.
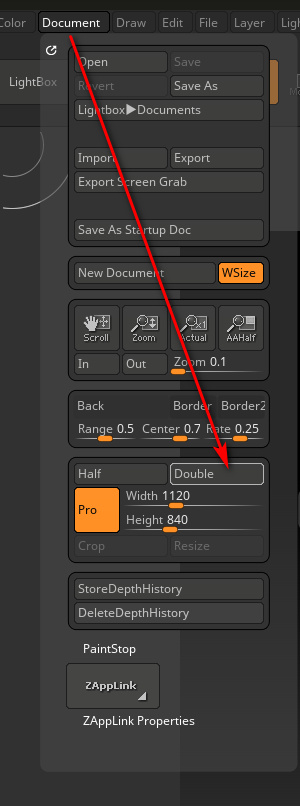
2. Now we need to force ZBrush to use full maximum-strength anti-aliasing on a big canvas. NPR filter effects, such as hatching and line-art, are no use if there’s no powerful anti-aliasing going on, and also if the final render size we get is puny. Thus there is a vital need to first set up a large Canvas. To do this go to: Top Menu | Document | Double.
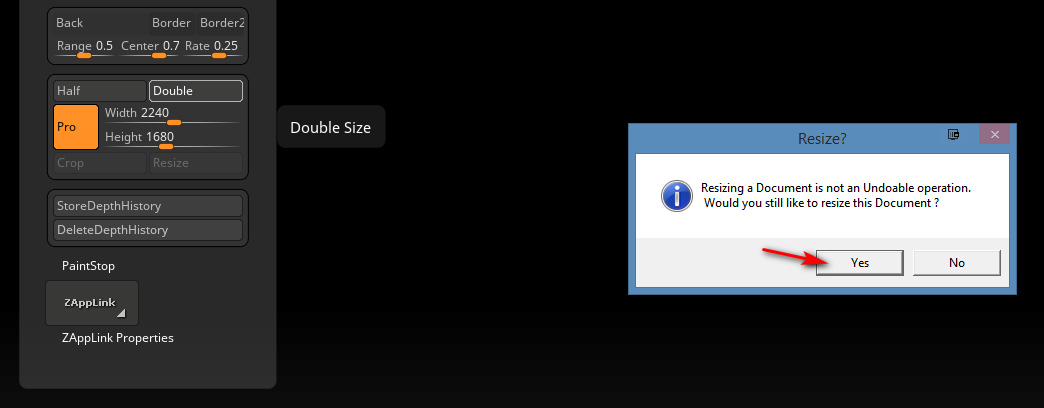
3. Press the “Double” button twice. The second time will trigger a Windows alert. Click “Yes”.
You can go up to 8k on the Canvas, but if you do ZBrush becomes very sluggish and unresponsive. It seems that 2 x Double is the ideal.
(Incidentally if you were wondering what the orange “Pro” button here is, it doesn’t mean you’re on “Professional” settings. It means the “Pro-portions” of the Canvas are locked together).
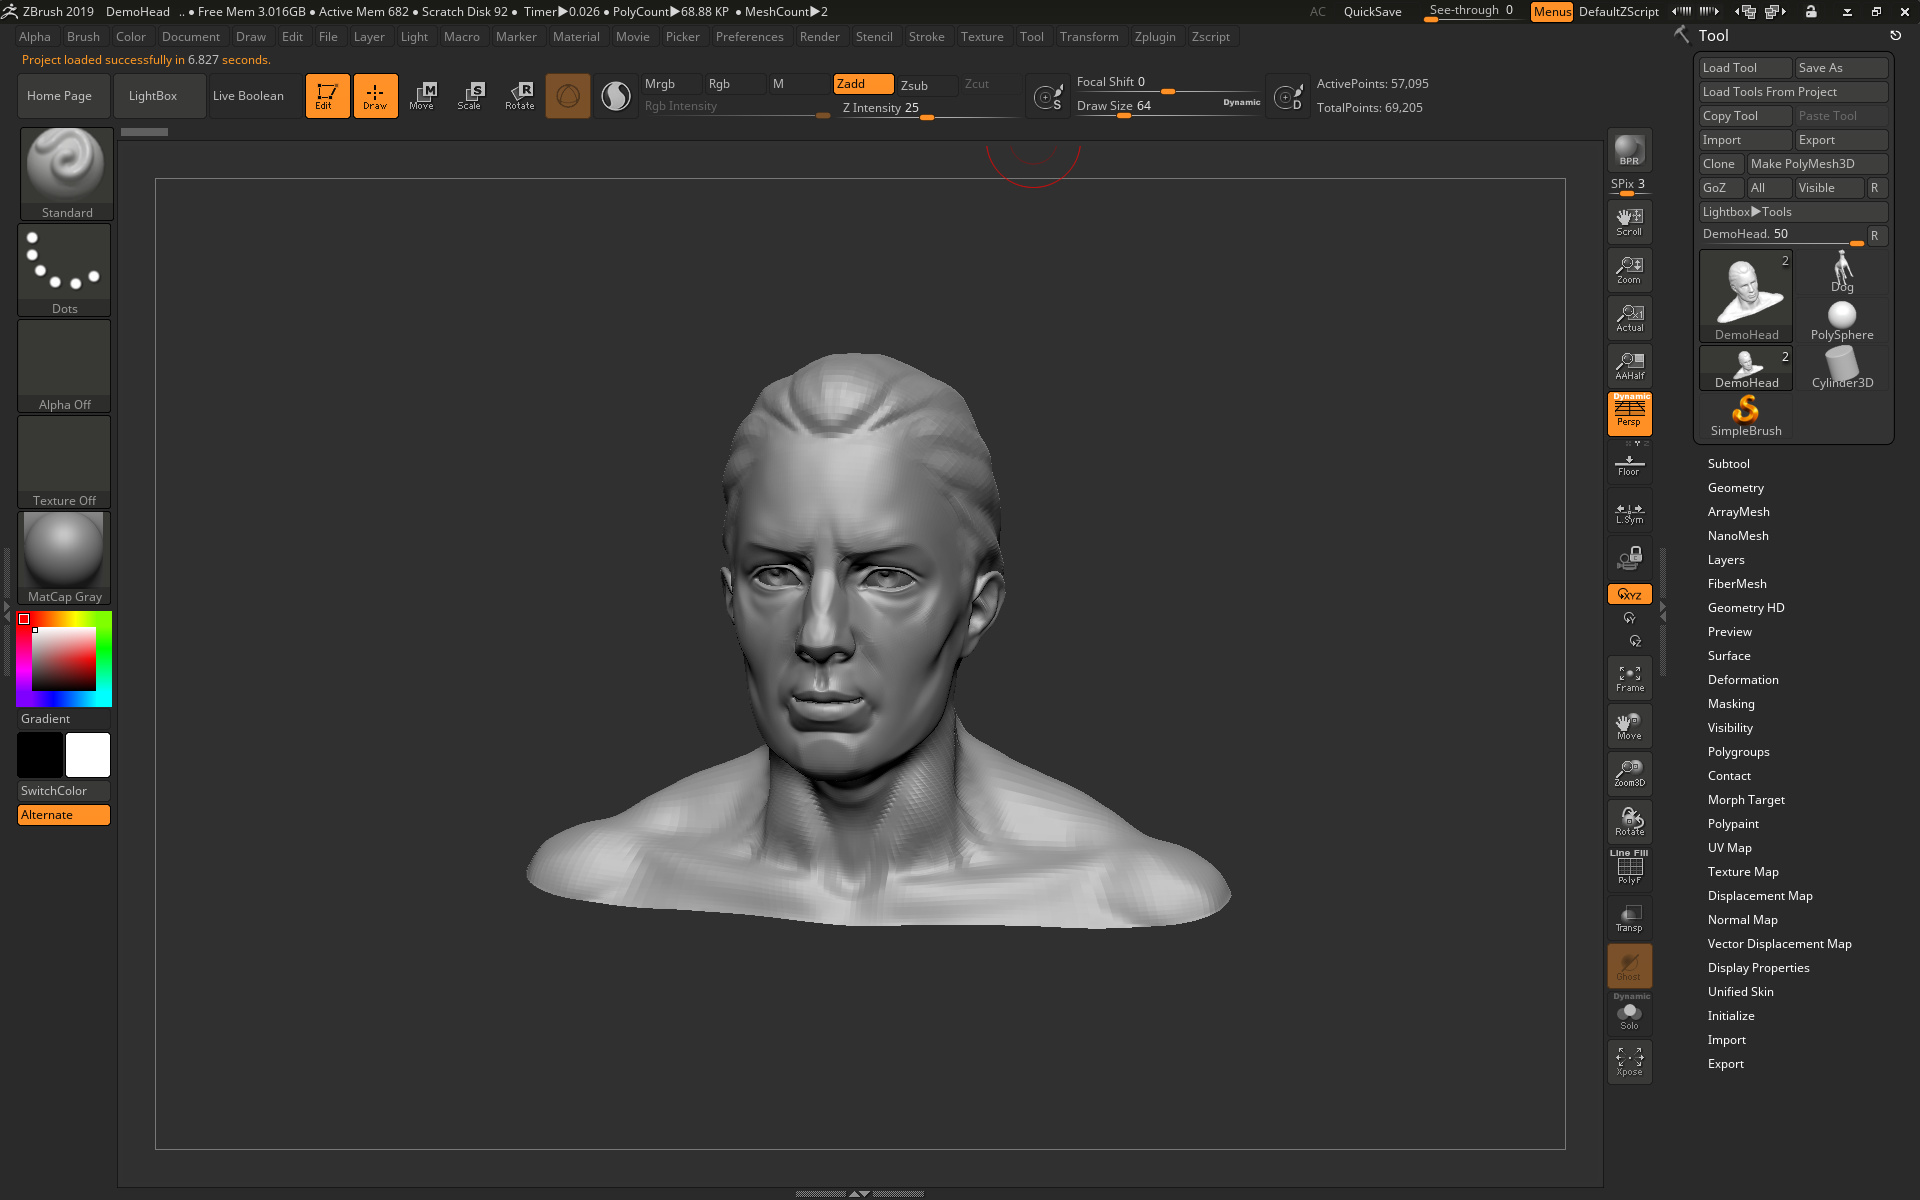
The head will now look terribly jaggy, as we can see here…
But don’t worry, as we’re going to delete this horrid head. We’ll replace it with a fresh identical one. The new head will match the new big Canvas size we just set in the Document menu, and it will be much smoother.
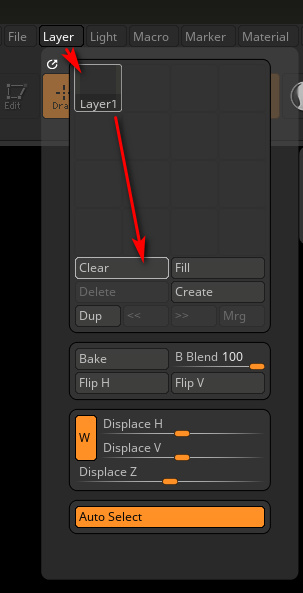
4. But first we must now go: Top Menu | Layer | and then with Layer 1 selected we press “Clear”. This deletes the first head. OK, we now have a large cleared Canvas at a size that’s theoretically feasible for production use for comics.
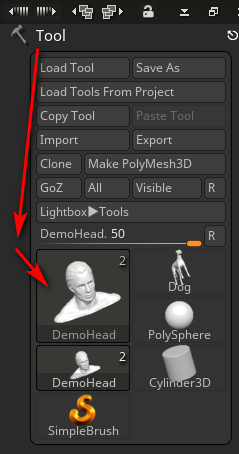
5. Now we load the same head model onto the Canvas again. To do this, first glance over on the upper-right hand side of the UI — where the “Tool” panel should be visible. This glance is just to ensure the brush is set to “DemoHead” as it should be.
Then we left-click with the mouse near the upper left edge of the Canvas, and drag-hold to “draw out” (i.e.: place and then enlarge) the DemoHead onto the Canvas.
(At this point there’s also an alternative route, of bringing in your own .OBJ model. ZBrush can’t handle .FBX files, or if it can it’s not in my version. Import is also done over on the Tools panel on the upper-right, via the “Import” button. But let’s assume we’re continuing with the default head, for our NPR test Update: FBX import is now possible for ZBrush).
6. Then once the object is roughly placed on the Canvas we immediately press “T” on the keyboard to escape from the the “DragRect” placing tool. We have to press this button now, or we’ll never be able to escape the “DragRect” mode and will be trapped in it. ** It’s absolutely vital not to skip past this step and omit it! **
7. Then we go on to adjust the head with the side-toolbar buttons (“Move”, “Zoom 3D”, “Rotate”) so that it has the angle and position we want. Then over on the right hand toolbar we click “AAHalf” and then “Frame” (not the other way around!). This sets up a basic anti-aliasing trick and frames the head on the Canvas. Only when the zoom factor is exactly 50% are the contents anti-aliased by ZBrush, or so I’m told.
8. Then the head’s mesh needs to be smoothed a bit, to make it a better test subject for NPR. Press Ctrl + D twice on the keyboard, to smooth the head’s mesh by subdividing it. It appears that ZBrush will only let the user subdivide a mesh three times. OK, so after doing that we have a nice smoothed head, centred on a large Canvas, and with a basic anti-aliasing trick applied.
The basic setup is now done. Sadly we can’t now save this changed project file and have it carry the large canvas settings within it. Save it and load it again, and it just loads into the puny default canvas size. So far as I can see there’s no way to force ZBrush to always use a higher default Canvas size. It always loads to a useless 1479 width, which then needs to be manually doubled and doubled again.
All this fiddly setup rigmarole should really be made far easier by ZBrush, like ONE BUTTON with ONE CLICK, and the button labelled “Automated Setup for Print”. But for now, at least, we have the basics all set up.
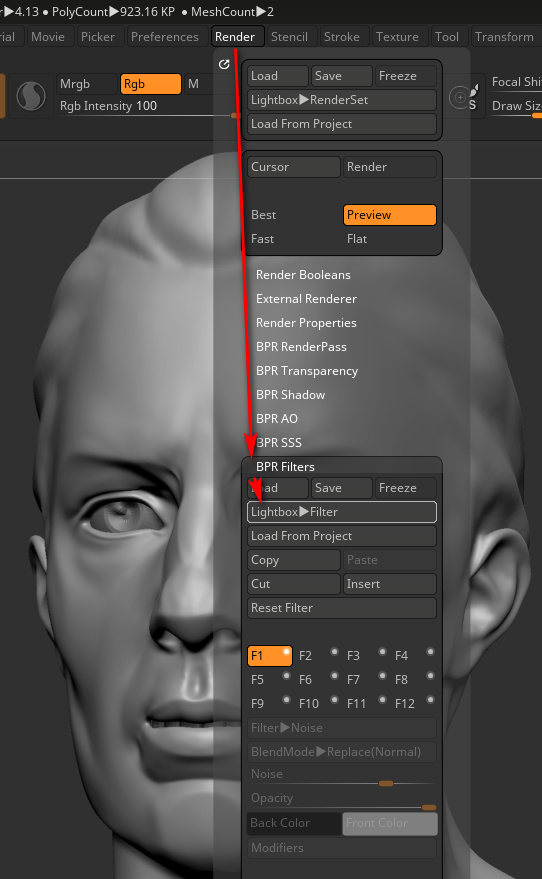
9. OK, now we can finally open the NPR Presets Library, by going: Top Menu | Render | BPR Filter | Lightbox > Filter.
Confusingly, in ZBrush “BPR” = “Best Preview Render”, and the acronym has nothing to do with “NPR” (Non-Photoreal Rendering). Yet the “BPR Filter” menu item is how we drill down to preview and load the NPR presets.
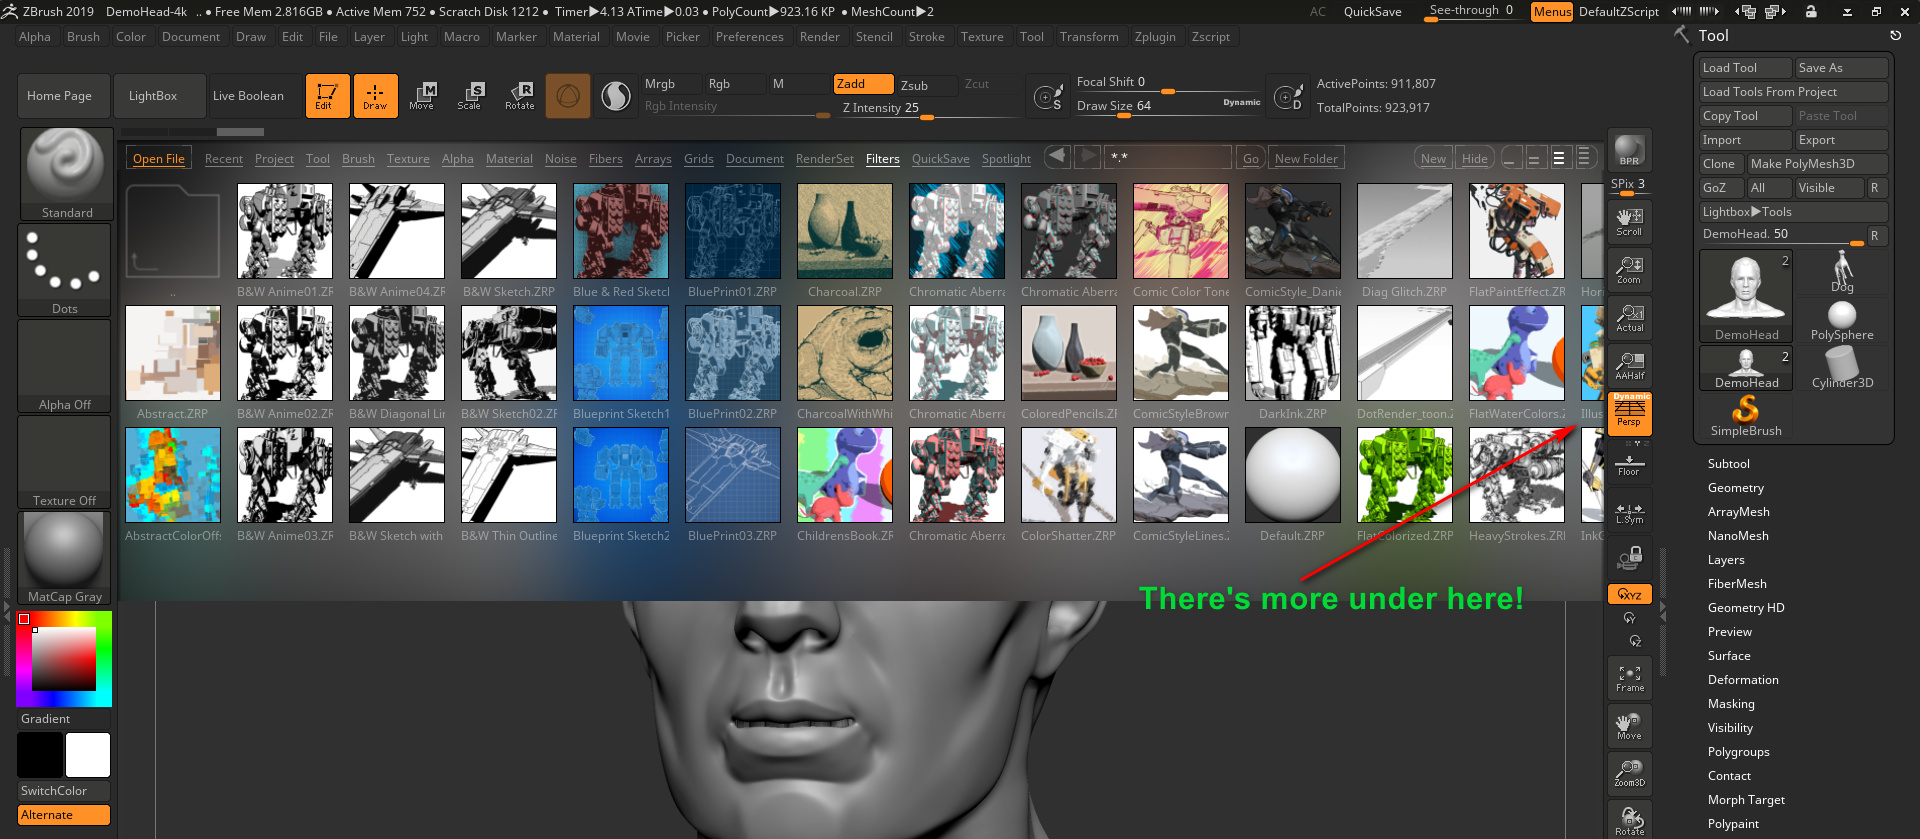
Don’t they look lovely? But, as seen here, some are hidden from the user. Why the Library display can’t just show everything in one single view, I don’t know. These hidden presets can be revealed by left-clicking anywhere on the preset library display, but only if the user knows to hold-and-drag the left mouse button over toward the right. Doing this will slide the Library presets view over to the right, thus revealing the hidden presets. So far as I can tell there’s no way to see them all together, all at once, in ZBrush.
But here I’ve Photoshopped them together…
10. Choose and load an NPR preset, by double-clicking on its visual preview. We should see a text message briefly appear, up in the top left of the user interface. This will say something like: “Opening a ZBrush Filters file…”. It might take about ten to fifteen seconds.
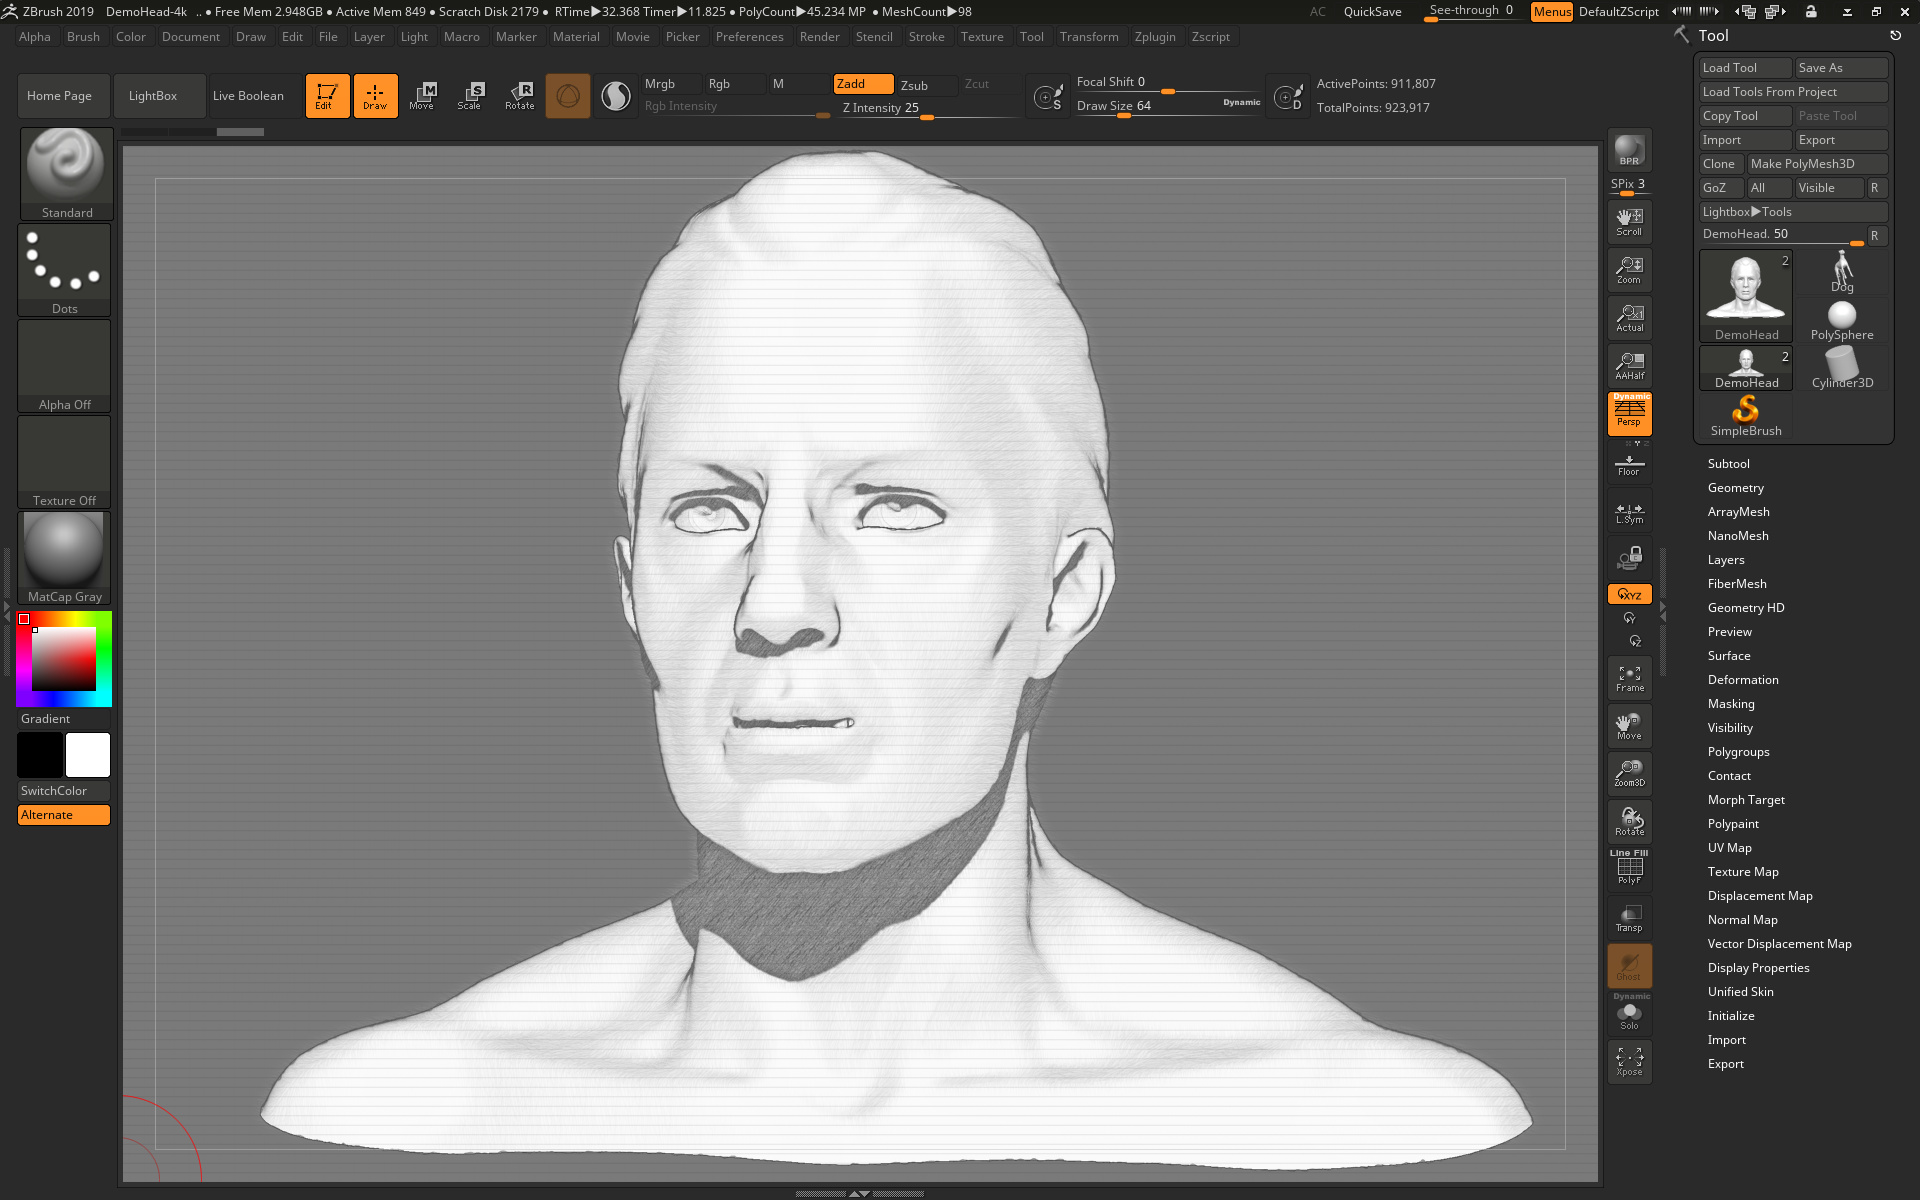
It’s quite possible that nothing will then happen to the sculpted head on your Canvas. The user may be puzzled by this — didn’t the slick demo videos for ZBrush 2019 show the NPR filters being instantly applied in real-time? Yes. But that only seems to happen for some of these NPR filters. For the rest, it seems we need to then manually press the “BPR button” that’s located at the top of the right-hand bar…
“BPR” = “Best Preview Render”, which seems to translate as… “OK, ZBrush… make a Preview render at the best quality you can”. On a large canvas this may take a while. First the basic render is done, then ZBrush will appear to pause while it also adds the NPR effect we just selected. Then it will lay the NPR effect on top…
See how nice and smooth it is. No jaggies. That’s because of the tedious ‘big Canvas’ setup we did at the start.
Note that this NPR effect only seems to work on the BPR Preview render mode, not on “Best” render mode.
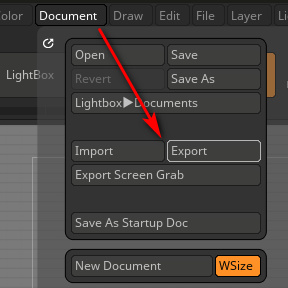
11. Now we want to save this final render to a file. Go: Top Menu | Document | Export, set a file name and folder destination.
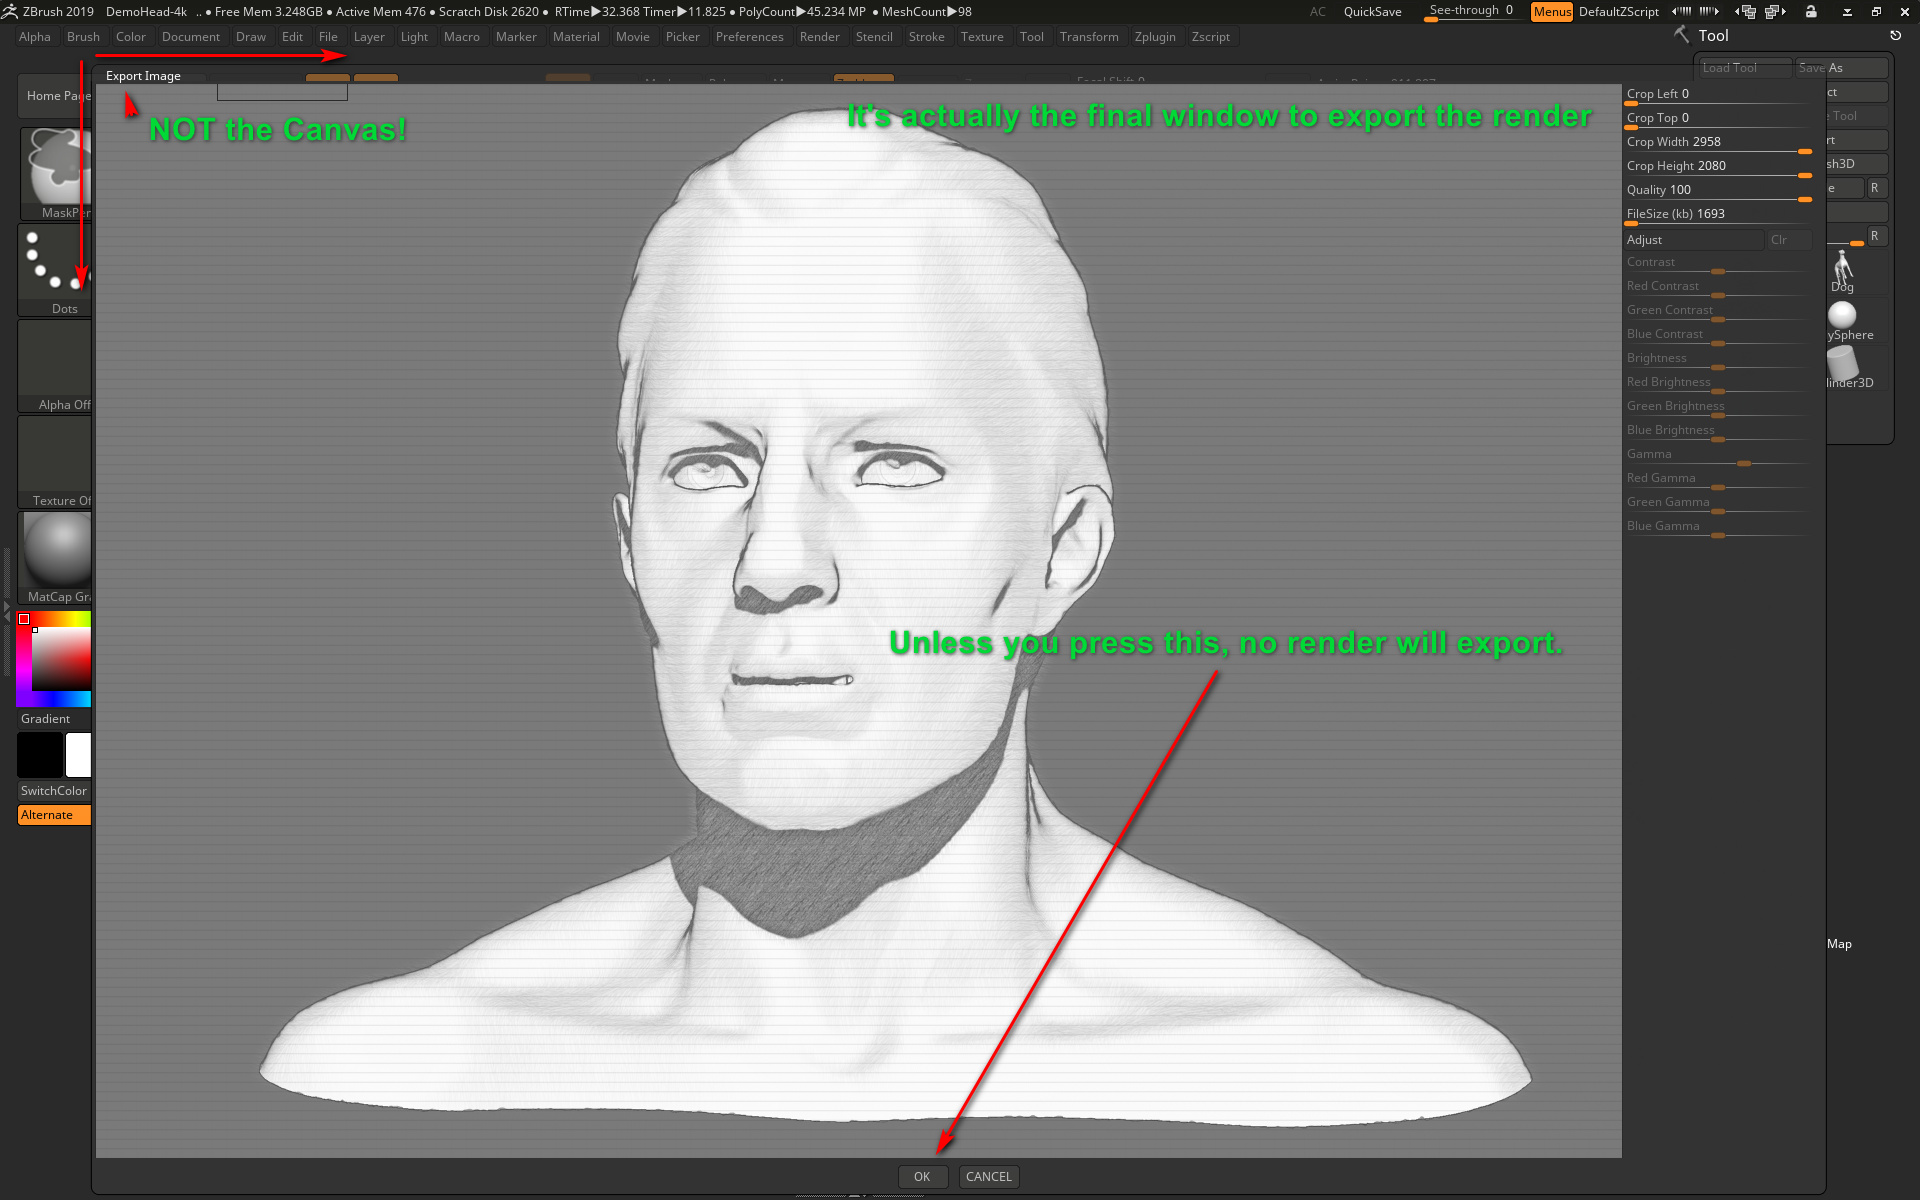
The newbie user might think that’s it, and go off looking for the render they think they just saved. But that’s not it. What ZBrush is now showing on the screen only looks like the Canvas. It isn’t the Canvas, it’s actually an Export window that only looks like the Canvas…
Only once the final vital “OK” button has been clicked, do we at last get the render saved.
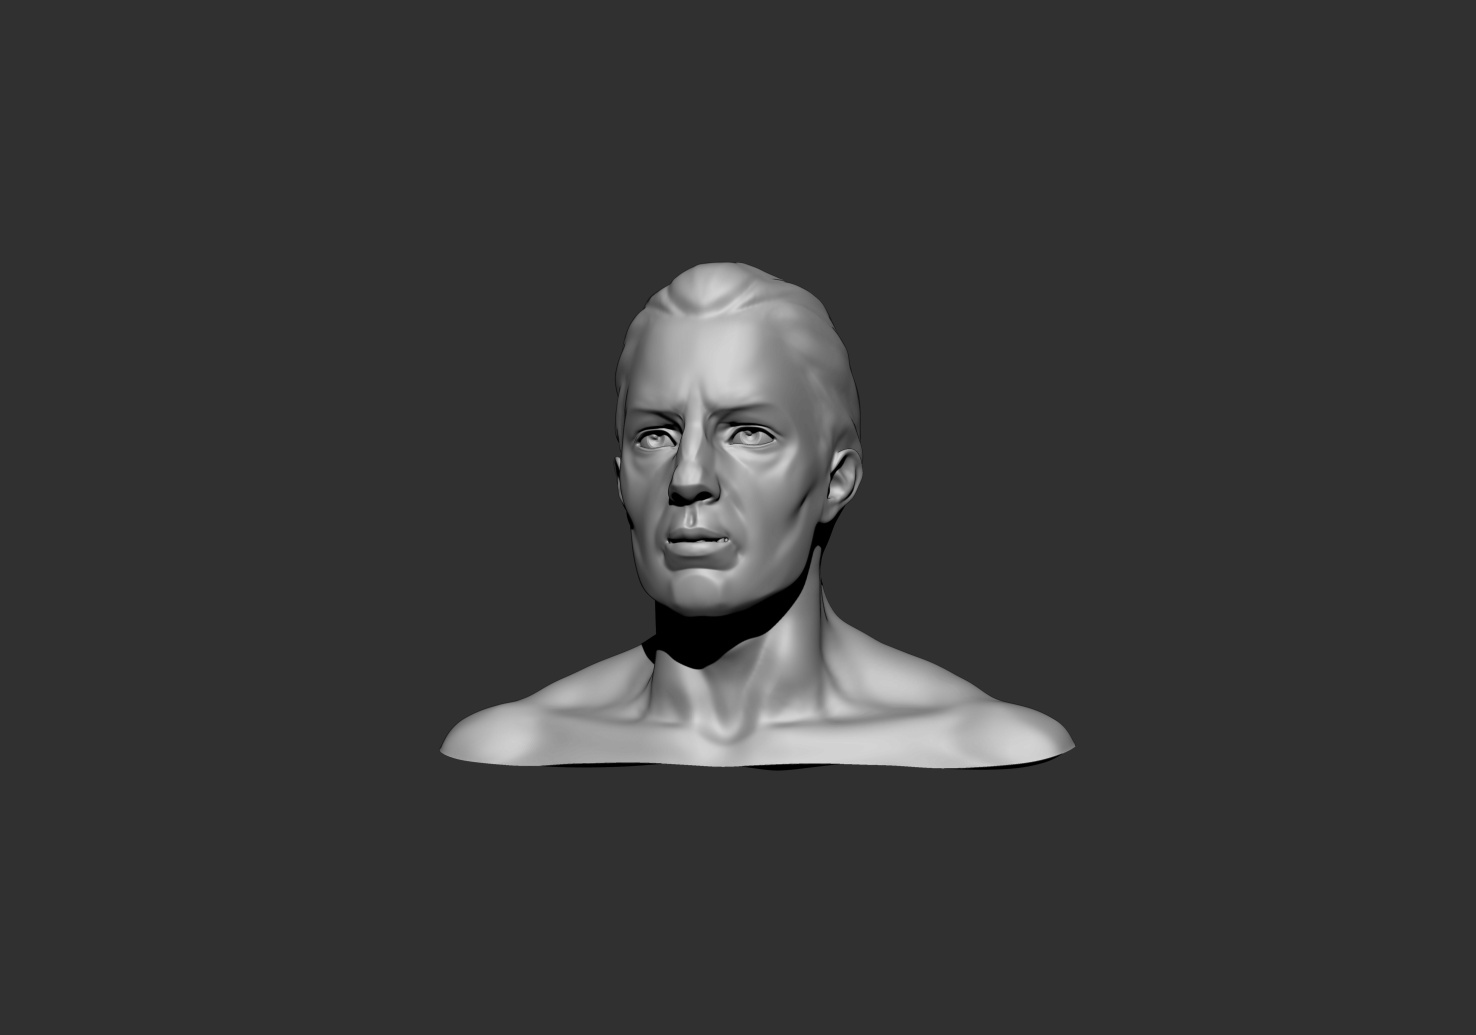
It may be disappointing to find that the model is stuck in the middle of the big Canvas, and is barely 1k once cropped out. But it seems that that’s the way ZBrush rolls, in order to get anti-aliasing. It’s only 72dpi (ZBrush can go no higher) but is just about an adequate size for a comic-book panel on a six-panel page. Though it is going to cause severe frowns from a magazine editor who wants a cleanly anti-aliased full-page cartoon illustration or front-cover at 6000 pixels and 600 dpi. The same is going to be true of publishers of children’s books, posters, t-shirts etc. A 1200px 72dpi render is just rubbish, to them.
(Apparently one can zoom to see the whole Canvas, then “Zoom 3D” to resize the model to fill the Canvas, then render and get a really big render with the object filling the render. That might get you a 4000px object, but the problem there is that it’s not anti-aliased. So far as I can tell, full useful AA is only applied when you click the “AAHalf” button, and doing that unavoidably shrinks the object back down into the centre of the Canvas.)
In some ways it might actually be quicker to just take a screenshot of the final render-export window, and forget the save from ZBrush. Both the screenshot and the export will be 72dpi. Then you could just paste the clipboard straight into the likes of a Comic Life frame. It won’t be masked, but then (unlike Poser 11) neither is the PNG exported from ZBrush.
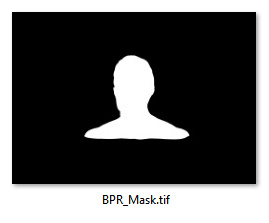
You can however also very easily and quickly save additional render types from ZBrush, such as a simple mask as a .TIF render…
Over in the “Zplugin” folder, there should be a “ZBrush to Photoshop CC” plugin, which can apparently also export and bundle all the rendered BPR layers into an aligned Photoshop .PSD file.
OK, that’s it for Part One. Now that we’ve wrestled ZBrush into an approximately NPR production-ready form, in Part Two I’ll look at the NPR effects themselves and if they’re worth having.






This is incredibly helpful and entertaining!
Pingback: The new NPR render presets in ZBrush 2019: Part Two – MyClone Poser and Daz Studio blog
Pingback: Black Friday: Renderosity Store / AKVIS / Tranmutr / CG Trader Store / ArtStation Store – MyClone Poser and Daz Studio blog