I think I’ve finally learned how to do proper depth-fogging in Poser, via setting up the “Atmosphere” settings in Poser.
Most Poser users will known about the simple way of Depth Cueing…
But there’s not a single YouTube tutorial, using a search for ‘Poser’ ‘Atmosphere’, that shows the more advanced and adjustable way to do it. Forum searches yield little, in terms of a simple step-by-step on exactly what you do to set it up. Here’s my try at such.
To make a “proper” Atmosphere with depth-haze in Poser 11.2:
1. Set up your scene in Poser as usual. Here I’m using AM’s Lost World, a huge tropical lagoon, with no plants loaded. Its preloaders are in Scenes | AM | Lost World, but note that the “with plants” preload is impossible in Poser — Poser doesn’t yet have DAZ’s ‘instancing’ feature.
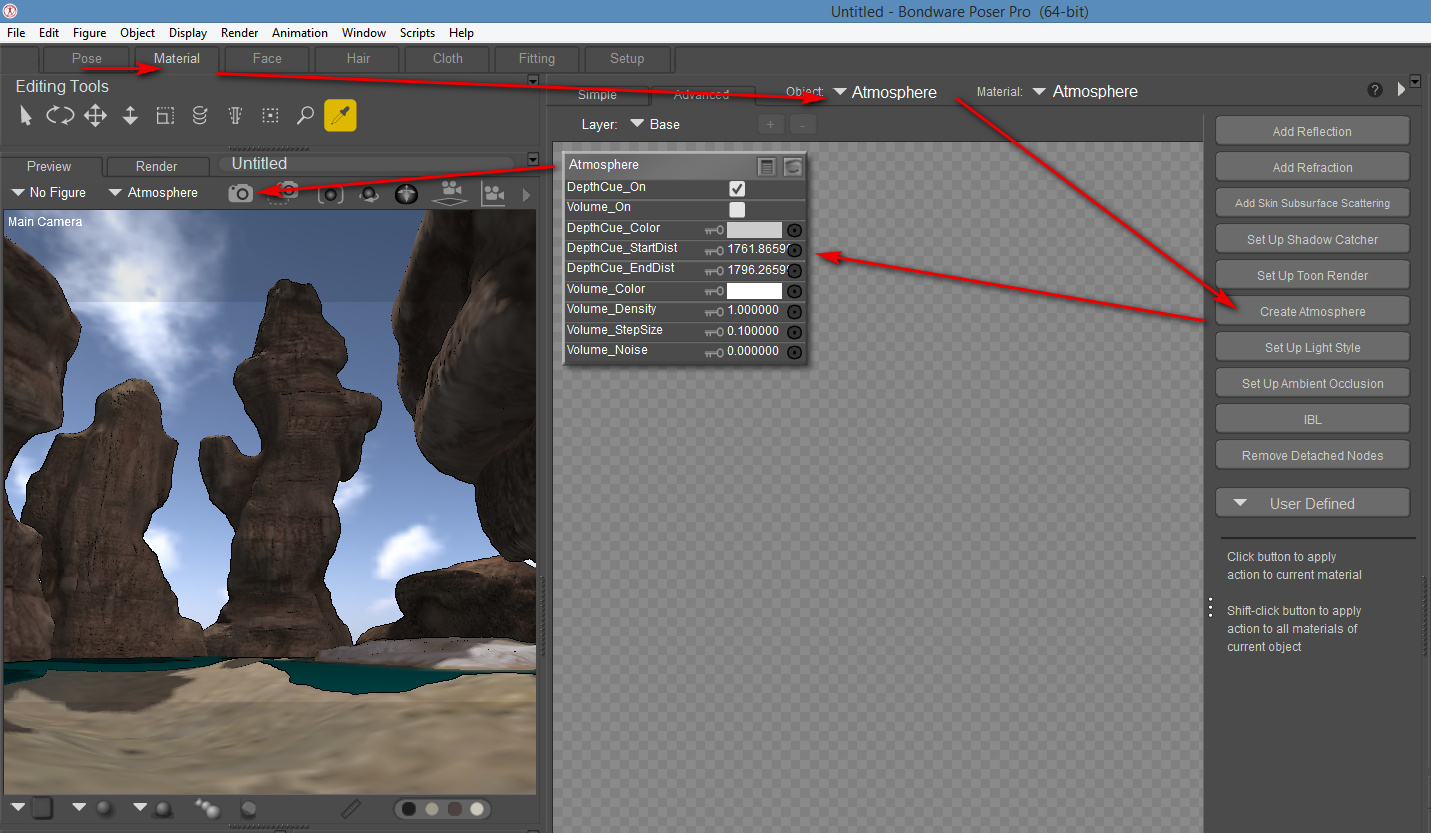
2. Switch to the Materials Room | Select “Atmosphere”.
3. Notice the panel of buttons, located at the side of the nodes window, and there select the “Create Atmosphere” button.
This was the first bit where I was going wrong, in previous half-hearted attempts to figure this out. It appears that “Create Atmosphere” only works if you have first manually selected “Atmosphere”, from the drop-down at the top of the material nodes window. It is not intelligent enough to automatically do this for you, if you have something else selected instead, as you almost certainly do.
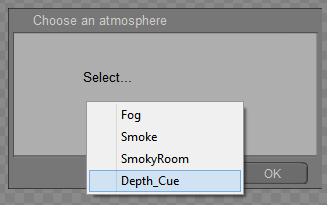
4. The “Create Atmosphere” button (technically called a “Wacro”) spawns a pop-up option selection, on which there are four options for you. Select “Depth Cue” from…
Fog
Smoke
SmokeyRoom
Depth_Cue
5. An Atmosphere node is then automatically created in the Materials node display, with the scene’s Depth Cued distances set up. The PDF Manual calls this the “Root Atmosphere Node”. Ticking “Volume on” (aka ‘enabling volumetrics’) here sent my render times into orbit, so you may only want that ‘on’ if you have a very powerful PC.
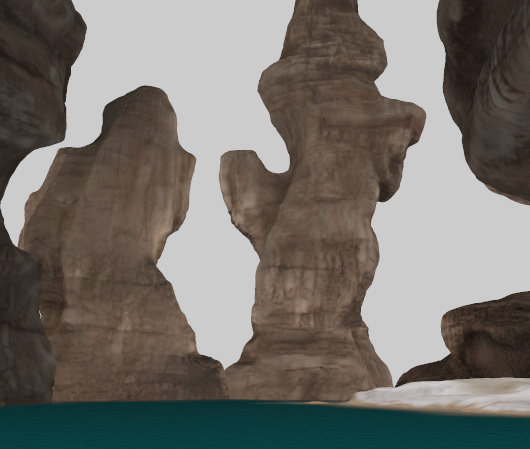
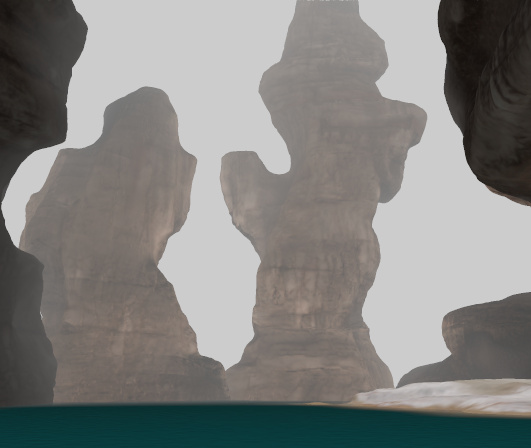
6. As you can see above, ‘DepthCue_StartDist’ is the distance from the current camera at which the depth haze starts. This was the second bit where I was going wrong, in my earlier attempts. I wasn’t then manually altering the starting distance of the depth fogging. And thus I was seeing little or no effect. For a big scene such as this, what needs to be done to get the effect working is to lop a whole 1,000 off this setting. When that’s done, the Firefly rendered scene goes from not fogged to fogged as you can see here…
Note the “Atmosphere” depth haze only shows up when you render, not in Preview.
7. Does one then manually turn on “Depth cued” in Poser’s display mode? The PDF Manual implies that they are similar…
“This [Atmosphere] gives an effect similar to enabling the Depth Cueing option in the Document window”
… but that’s all it says. It appears to me that you can use both together at the same time.
Anyway, now the proper full-on Atmosphere is working and the depth-fogging is looking nice when rendered.
But not nice enough. Now it can be seen that the fog does not increase or decrease with elevation. One would expect it to be a little denser near the ground, and at the top the grey should fade up into the bright sky above. Aka ‘height/depth falloff’. Instead it’s an even grey, all the way up and down.
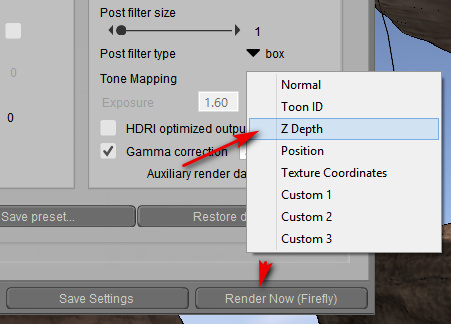
There’s a way to fix this, at least on a scene this big and distant. One can use the z-depth mask [Render | Firefly | Auxiliary Render Data | Z-depth] to mimic this elevation, and without the huge render-time overhead of using “Volume” atmospherics.
Just be aware here that if you added an additional fog-prop to the scene, perhaps from some fog set purchased from a store, then it will show up on the z-depth mask as a solid object. Thus you won’t get the z-depth mask you need, since the camera has no clear view of the scene.
In Photoshop:
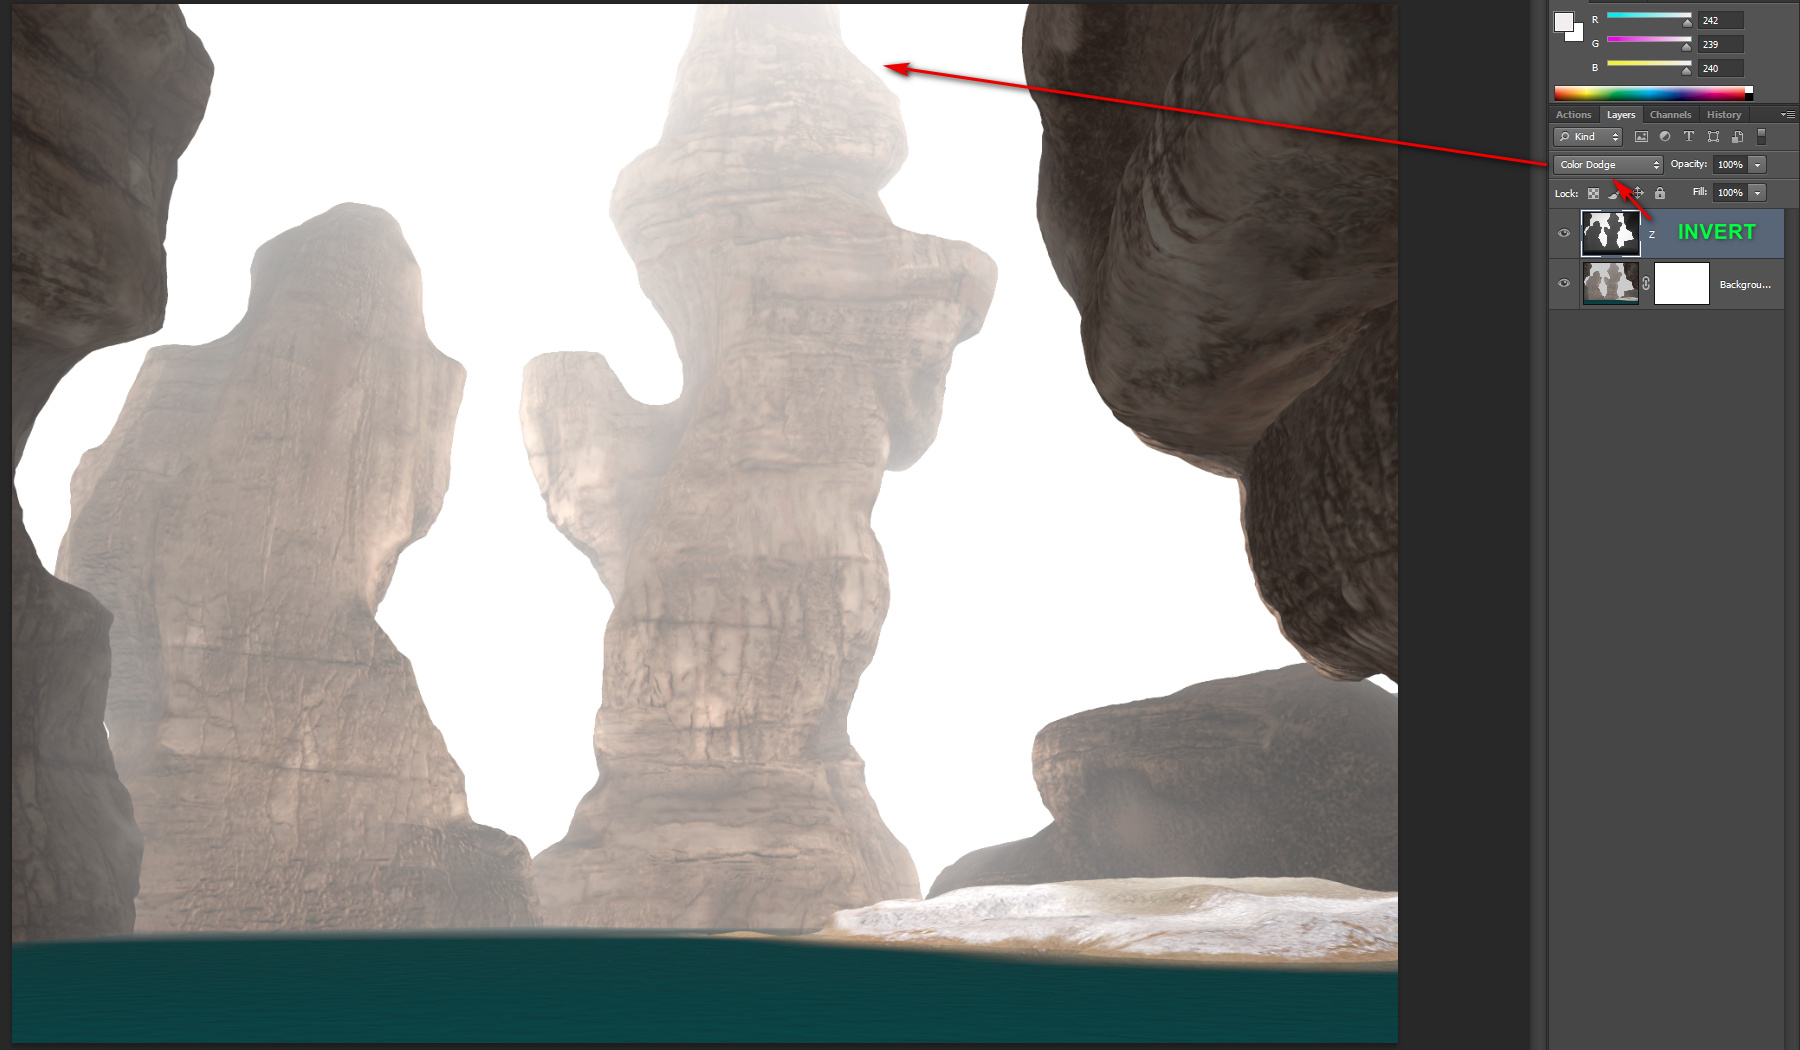
On loading the saved .PSD into Photoshop, a Firefly depth-cued render simply needs its z-depth layer (the layer labelled simply “Z”) inverted, and correctly blended, to simulate height falloff of the fog. As you can see here…
A simple 100% Colour Dodge blending mode adds what’s needed.
What about similarly adding some bottom fog over the lake? Can that also be simulated in a similar way? The best I could get in Photoshop blending modes was to duplicate the “Z” layer, blend the duplicate with Linear Dodge (Add), and then erase away all except the bottom bit…
The really crappy non-reflective water isn’t helping at all in this demo. I was doing a fast render, and had that turned off. But in a full scene one could replace it with some scene-reflective water from the Flood 2 plugin for Photoshop.
Actually, it may just be easier to apply a gradient to the depth mask in Photoshop. To get the height variation. But I haven’t tried that yet.
Ok, that’s it. Please comment with corrections to my Atmosphere workflow if you have any. But I think I have everything correct, and it works for me on this large tropical lagoon scene. It should work on other similar large-scale scenes.
Vue or Bryce? Of course, for those with Vue, it may be easier to just save the scene, import it to Vue, and load one of their lush atmosphere presets. Bryce may also get you there, as that software can also import from Poser.
SuperFly? Note that Poser’s Lights can contain an Atmosphere Strength control-dial, which you may want to play with. But the PDF Manual states such dials are is not supported (presumably ignored) in SuperFly renders. Nor is the plain-old simple Depth Cue display mode supported in SuperFly. However, basic SuperFly “volumetric effects when GPU enabled” were added in a late Smith Micro build of Poser 11, so the Manual may be behind the times. Try it and see.
Also, I should note that I’ve updated my previous z-depth tutorial of last week, to make it clearer on the need (or not) to have Atmosphere enabled to get a z-depth render pass.


