
This is for users of the old WordPress Dashboard, who are puzzled about how to make a wordpress.com blog “private” in 2019.
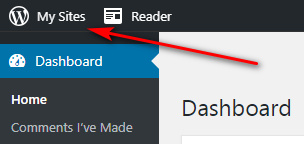
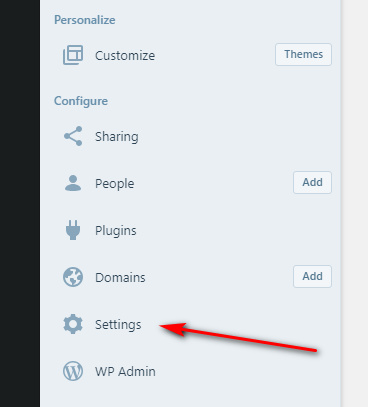
1) Click on the “My Sites” wording in the top left of the old Dashboard. This is actually a clickable link button, rather than just a decorative UI header. This will cause a sidebar overlay to pop out over the left part of your old Dashboard. The sidebar is different from the usual one you use, which is seen in the picture below. At the foot of this new pop-out sidebar is “Settings”, another text label which is also clickable.
2) Here’s a screenshot of the new unfamiliar pop-out sidebar. Clicking “Settings” on this will take you over to the new style Dashboard at your WordPress.com blog…
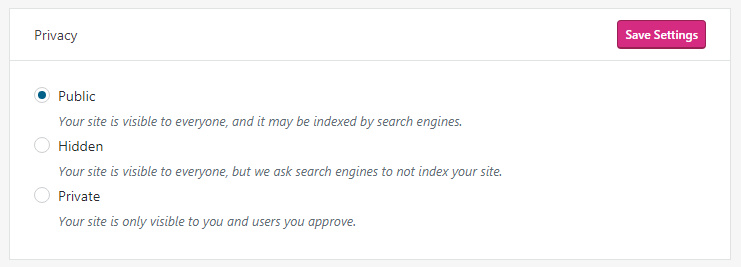
3) Your view will be focussed onto the new-style “Settings” page. Scroll down this unfamiliar page and find a section called “Privacy”, where you can save and set the required settings.
So far as I can tell, there is no longer any way to access these particular settings from the old Dashboard.
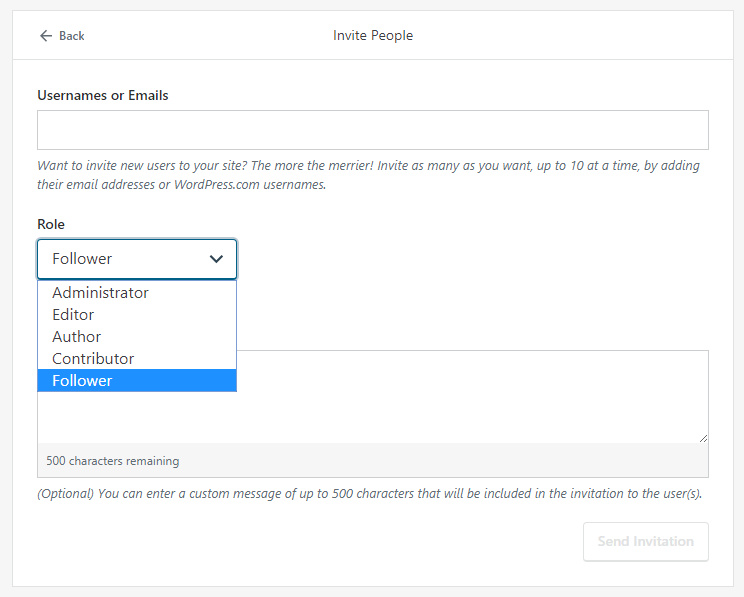
4) Back on the sidebar of the new style Dashboard, the “People” tab then gives you access to invite people to your newly Private blog.
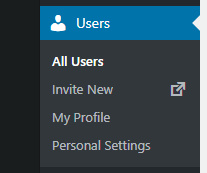
This “People” tab is also present on the old Dashboard, although there it goes by the name of “Users”. You may also see them called “Readers”. This means that once you have set Privacy settings, your blog can continue to be managed as usual through the old familiar Dashboard.
When setting your blog to Private, WordPress will inserting “href.li” at the beginning of Web links. This is a form of link anonymiser, and tries to keep even the existence of your blog unknown. Turn off this feature via: Settings | Reading | “I would like my links to be public” | Save.
While you are at Settings | Reading, you can also see the names (or WordPress usernames) of those you have already invited to read your blog and who have accepted the invitation.
Update: you can also make certain posts “password protected”. This is a useful halfway house between your blog being totally closed or totally public. Your blog’s subscribed Followers/Viewers get to see there’s been a password-protected post, but the general public and search-engines don’t see it at all. Only those you give the password to (e.g. your Patreon patrons) can access the full protected post. A drawback to this is that you can’t mass-change the password on all protected posts, e.g. if you were to get a password leak. What you would do in that situation is to change the password on all such posts going forward, rather than tediously go back and manually update all such posts.