
How to capture zoomified image tiles and semi-automatically re-assemble them into a single image, with Photoshop. Even when there is no overlap between the tiles (which means you can’t use Photoshop’s Photomerge feature).
First, make sure your target picture is of an age and a state to be in the public domain and can legally be liberated. Also, note that the WikiMedia Commons has a de-zoomify advice page which offers various dezoomifying services and tips. These options may be quicker and more accurate than my method. But if the WikiMedia options don’t work, try this…
1. Install the Save All Images extension for Opera (or an addon with similar fuctionality that works in your Web browser).
2. Visit your target page. Zoomify the image and pan around until all tiles have loaded. Then capture all the loaded images on the page with ‘Save All Images’. As you can see, it’s quite sophisticated in its filters, though unfortunately you can’t save your settings as a repeatable preset for a particular website…
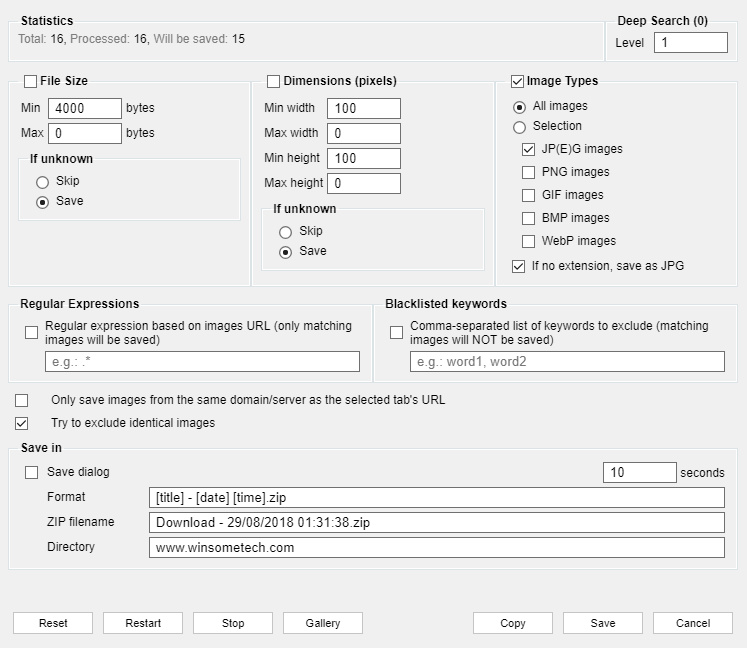
Ok, ‘Save All Images’ will pack all the loaded tiles up in a zip file.
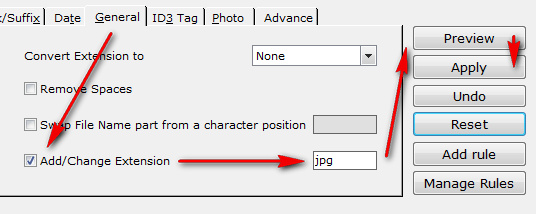
3. Extract your saved .zip of images. View the resulting folder as thumbnail images. Delete all images that are not part of the tile set. Rename .jpeg files to .jpg if needed, with Winsome File Renamer or similar. Also rename to alphanumeric order if needed — tiles are downloaded in their tiling sequence, so a sort-by-date should mean that a 1… 2… 3… re-naming should be possible even if the filenames are obfuscated. You want to end up with a folder of image tiles in .jpg and with a logical alphanumeric loading order. Make a note of how many rows and columns make up the complete image (e.g. three tiles across, and four tiles down).
4. Get Paul Rigott’s Photoshop stitcher script File Stitcher.zip (mirror) and unzip it. This script can handle non-overlapped tiles by using an ‘alphanumeric load-order’ option.
5. Load Photoshop. Do not open a new image. Just go: File | Scripts | Browse and then find and load Paul’s script.
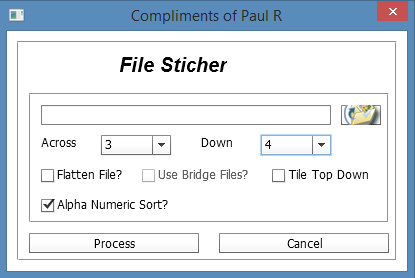
Set your numbers for the tiles across / down, and then point the script at your target folder. The images load and are automatically distributed across a newly opened image, with the script doing canvas expansion as needed. As you can see here, the result is not perfect, but 85% of the work has been done automatically. Most tiles have been accurately snapped together into the main image, but a few tiles have been assembled into strips and these remain as outliers.
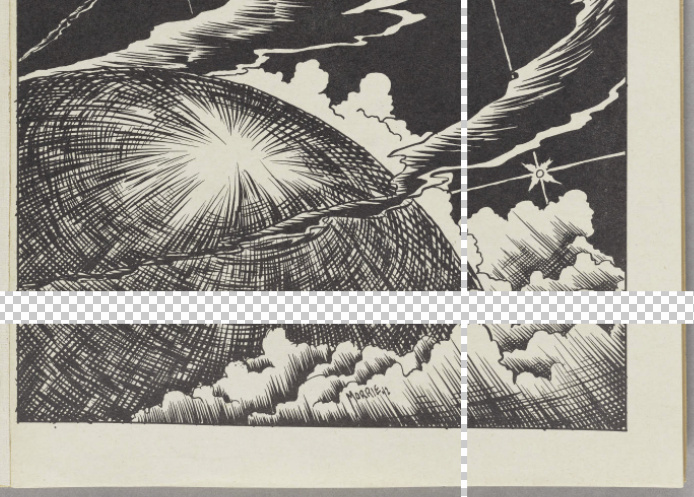
Just multi-select a few relevant layers (Shift, select with right mouse-click, repeat to add the next layer to the group). Then snap the image together. More recent editions of Photoshop should help with that, if Snap is turned on.

Additional note: to assemble a set of six QTVR tiles (the old Quicktime way of present a 360-degree panorama online), use Pano2VR 6.0 or higher to save the tiles out to a single-image 360 VR panorama format that Facebook and WordPress understand.
Update: March 2020. Also try the free Microsoft Image Composite Editor 2.0. It may be able to do much the same thing, and may also work with only a quick set of screenshots.